Why?
It's an insert. Don't wanna be lifting the liner and dragging the insert out every few years to swap it out. Trust me on that one.
Why?
 But I am here to tell ya that the black pipe elbow I had to use to hook to the liner for that 30 in the fireplace was a year away from trash when I replaced it the next year with stainless.
Dang it. Now I have to wait until next season to see how that steel beauty does for you. I have always been curious about them and the High Valley 2500 also. LIkes me them big steel stoves.
Why?


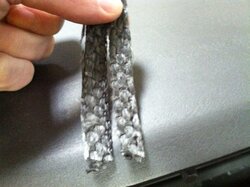
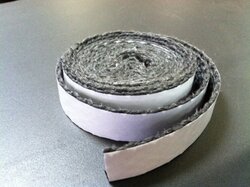
\This is interesting, A1stoves sells a different 6to8 connector than Appalachian makes, I question if it meets code. From my understanding an appliance connector MUST have the band around it to attach to flexible SS liners for a secure fit like the example appliance connecter pictured.


Great looking heater. Come up with a system for that start-up air. My little Jotul had that and it is real easy to forget to close the thing.
By the way how big is the fire box?


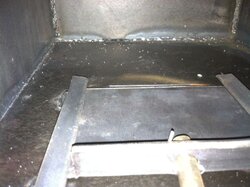
i think you'll end up re-gasketing the door... dry fit it before glueing to be sure of a good fit this timeYea I did the dollar bill test and only the latch side is not sealing, before I do anything I wanted to test Appalachians customer service and see how long it takes to get an answer.
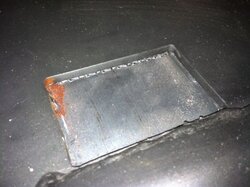
As for the ash pan the lever that actuates the ash dump door is the culprit for the air leak, the ash dumps drawer is sealing like it should but for some reason they did not put a gasket on the pull out lever.