My Angry Beaver : Front End loader Build

  • Active since 1995, Hearth.com is THE place on the internet for free information and advice about wood stoves, pellet stoves and other energy saving equipment.

    We strive to provide opinions, articles, discussions and history related to Hearth Products and in a more general sense, energy issues.

    We promote the EFFICIENT, RESPONSIBLE, CLEAN and SAFE use of all fuels, whether renewable or fossil.
Status
Not open for further replies.

Freakingstang

Feeling the Heat
Dec 30, 2012
262
Berlin Center, Ohio
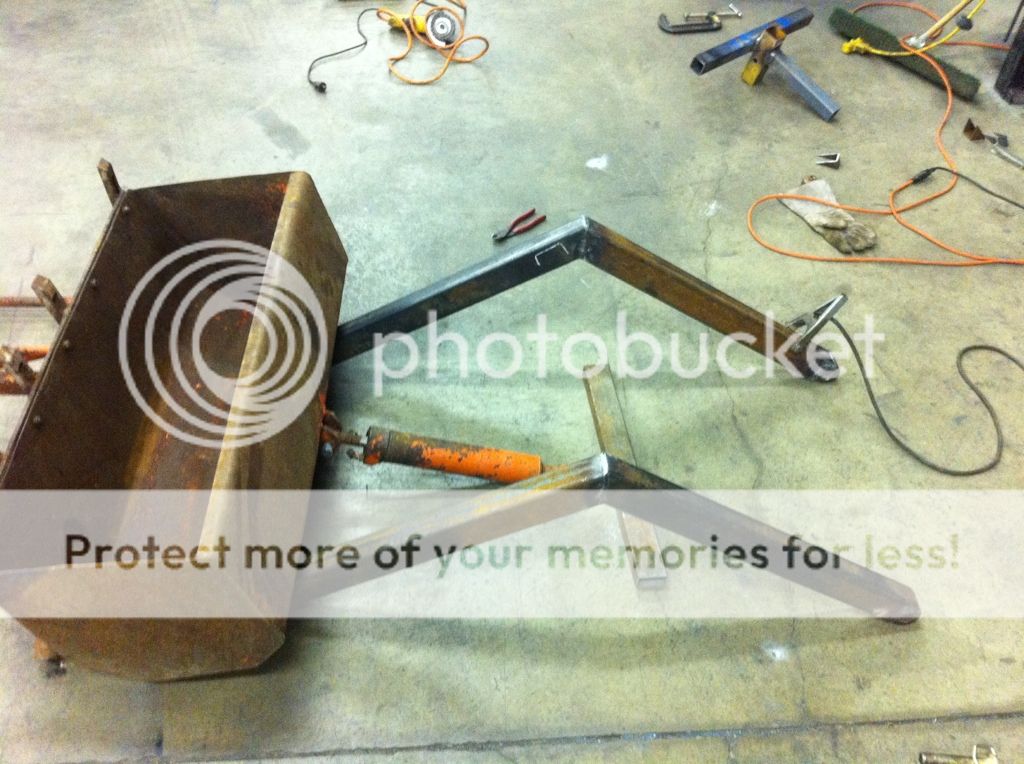
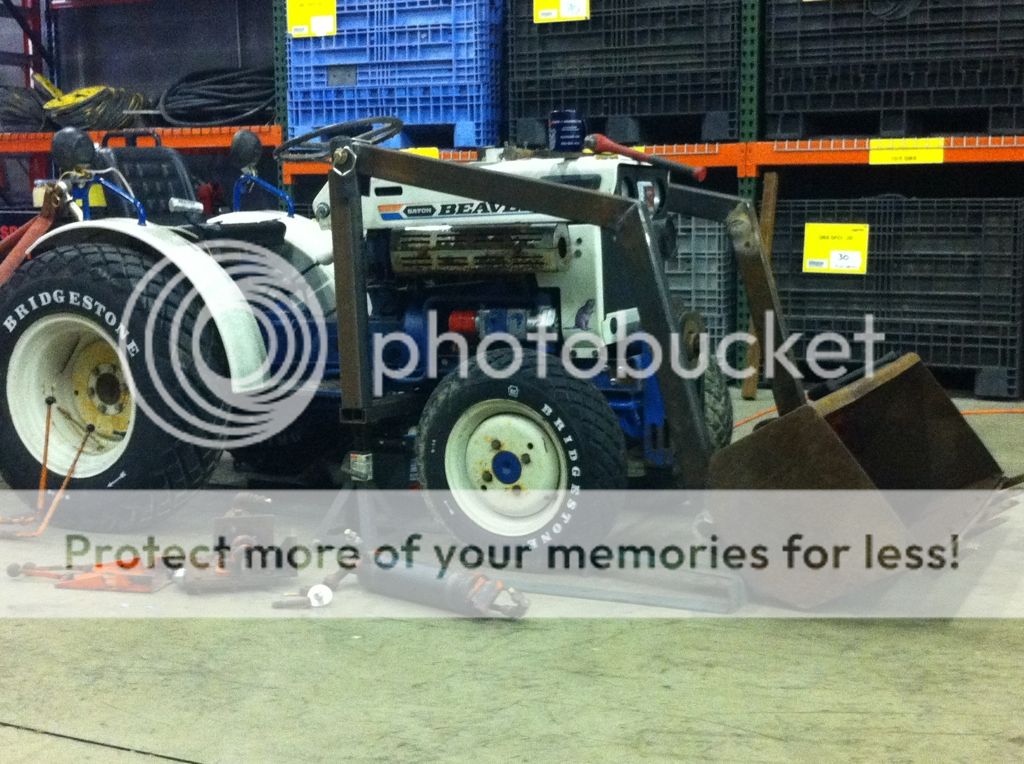
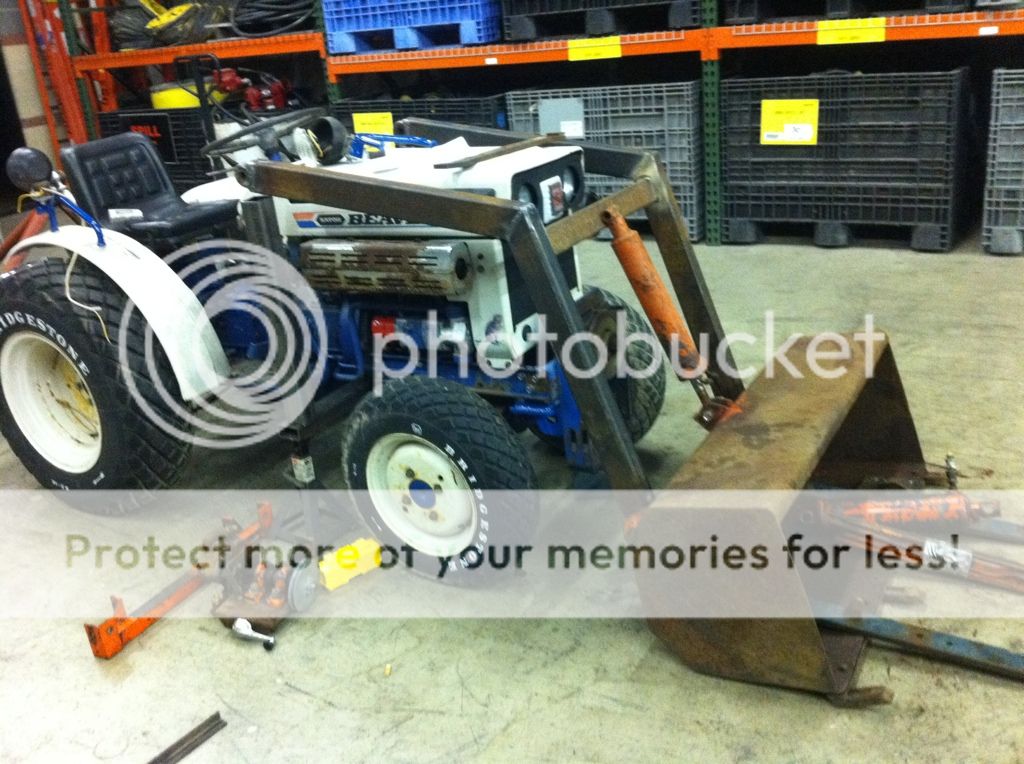
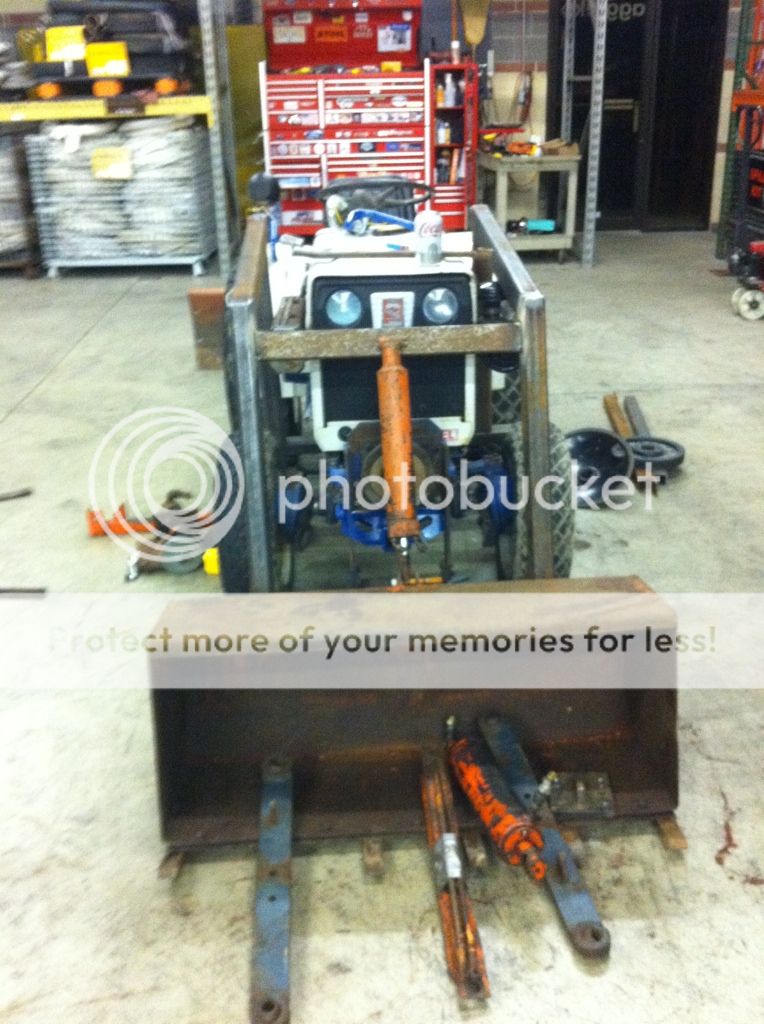
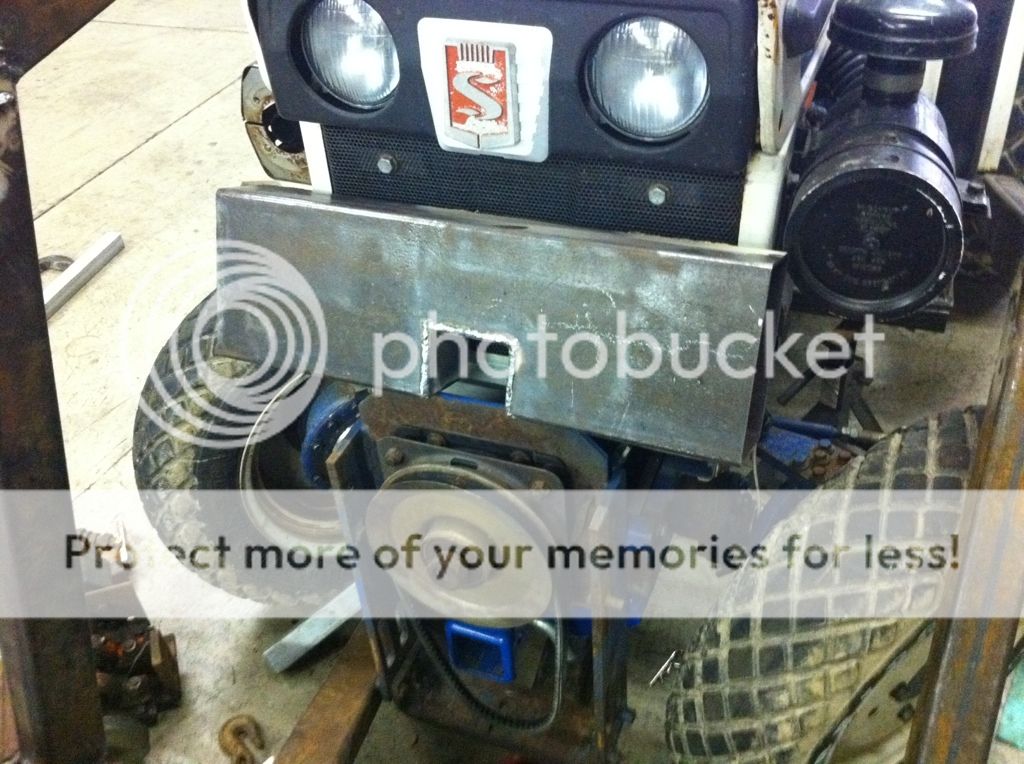
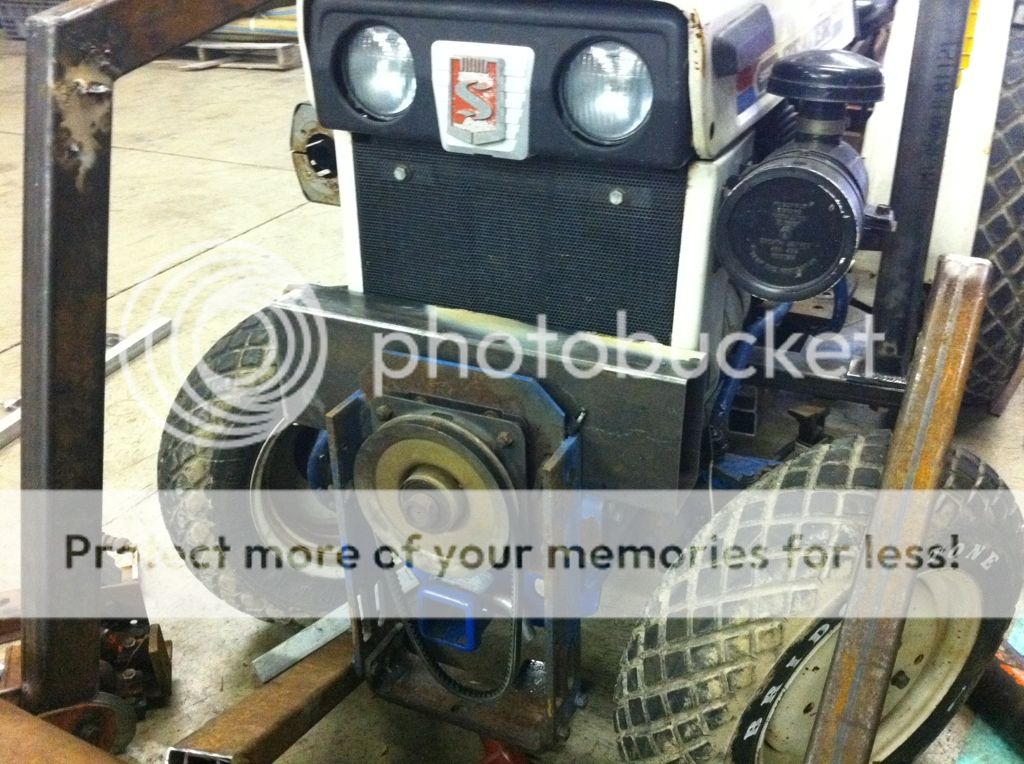
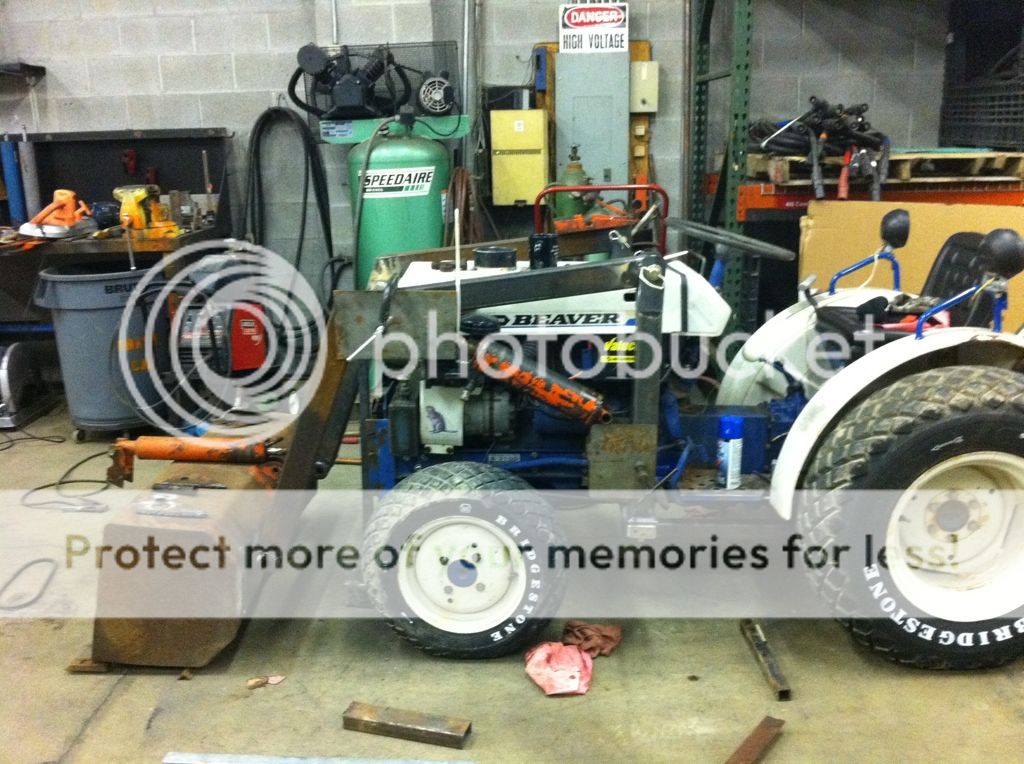
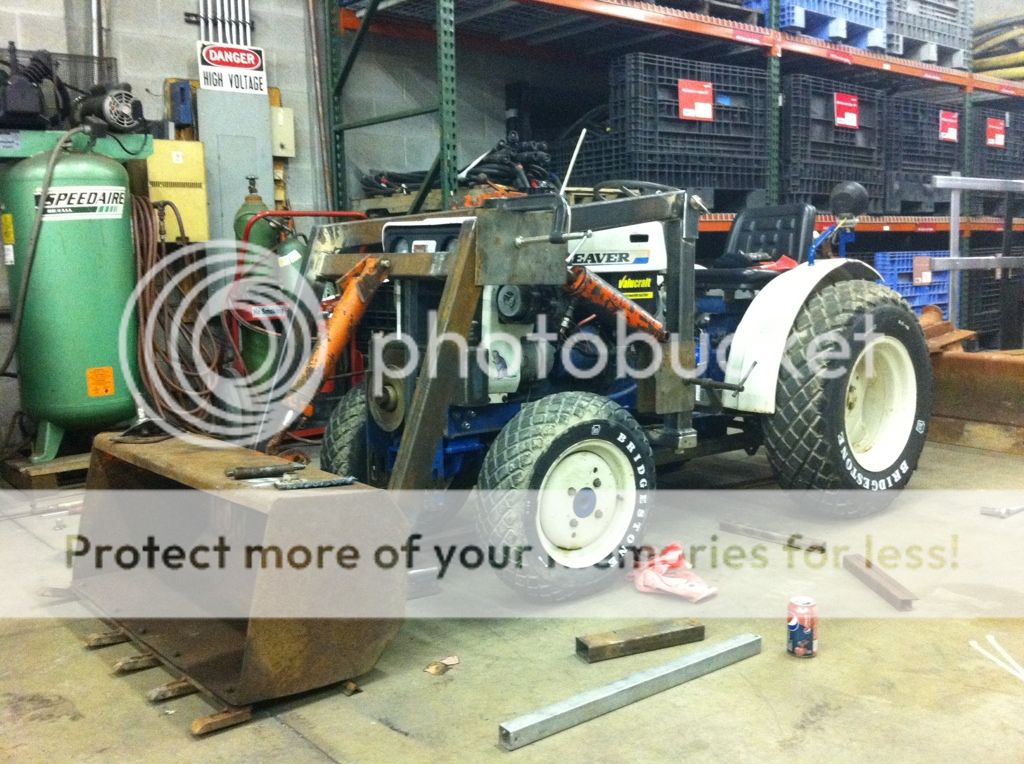
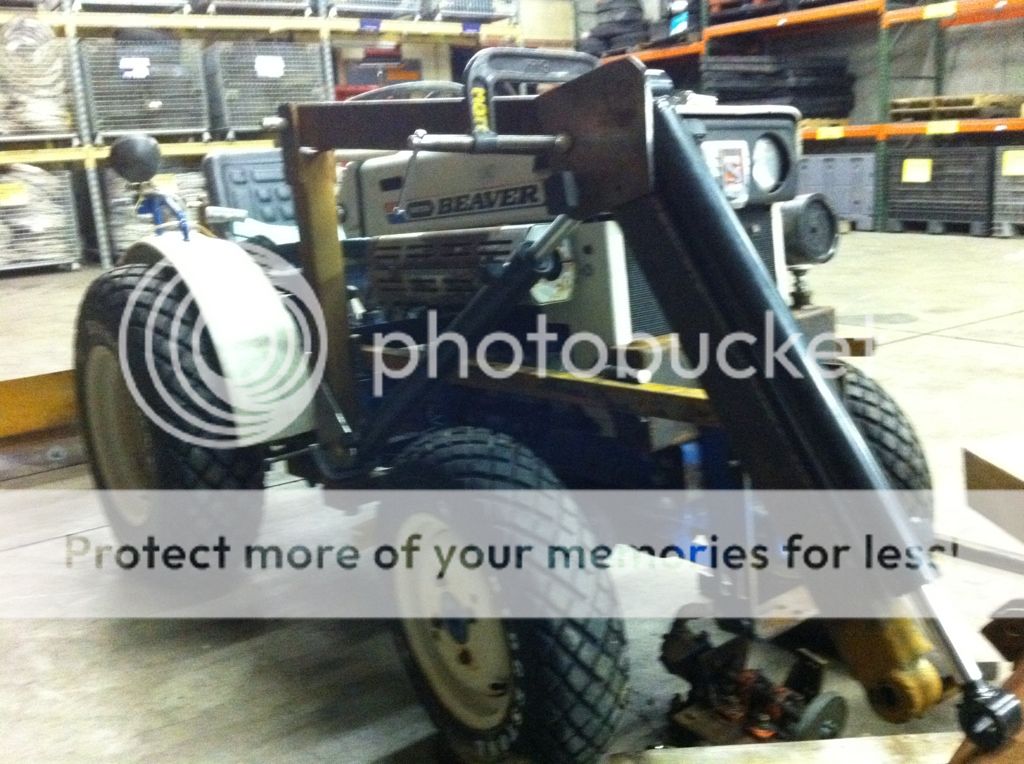
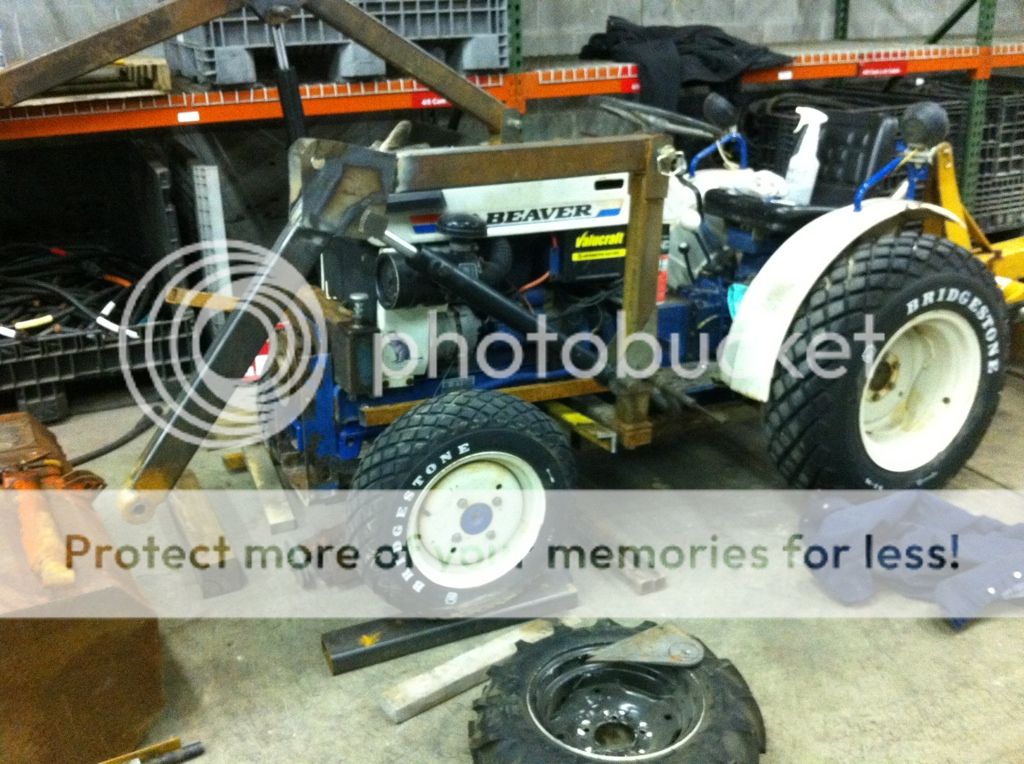
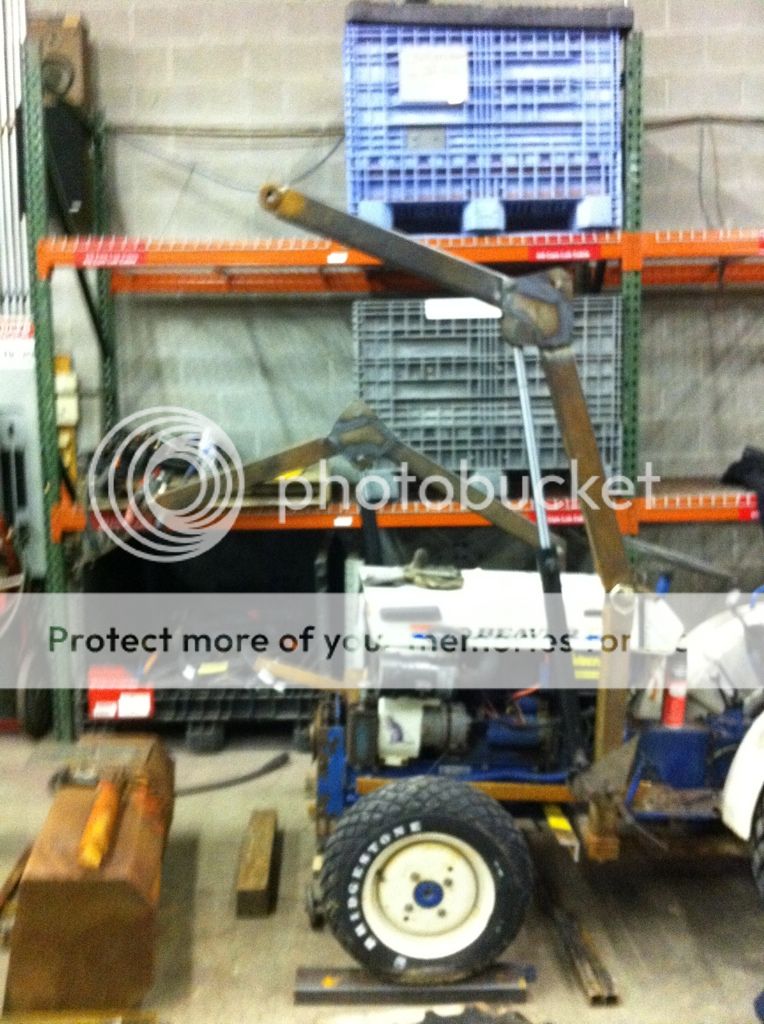
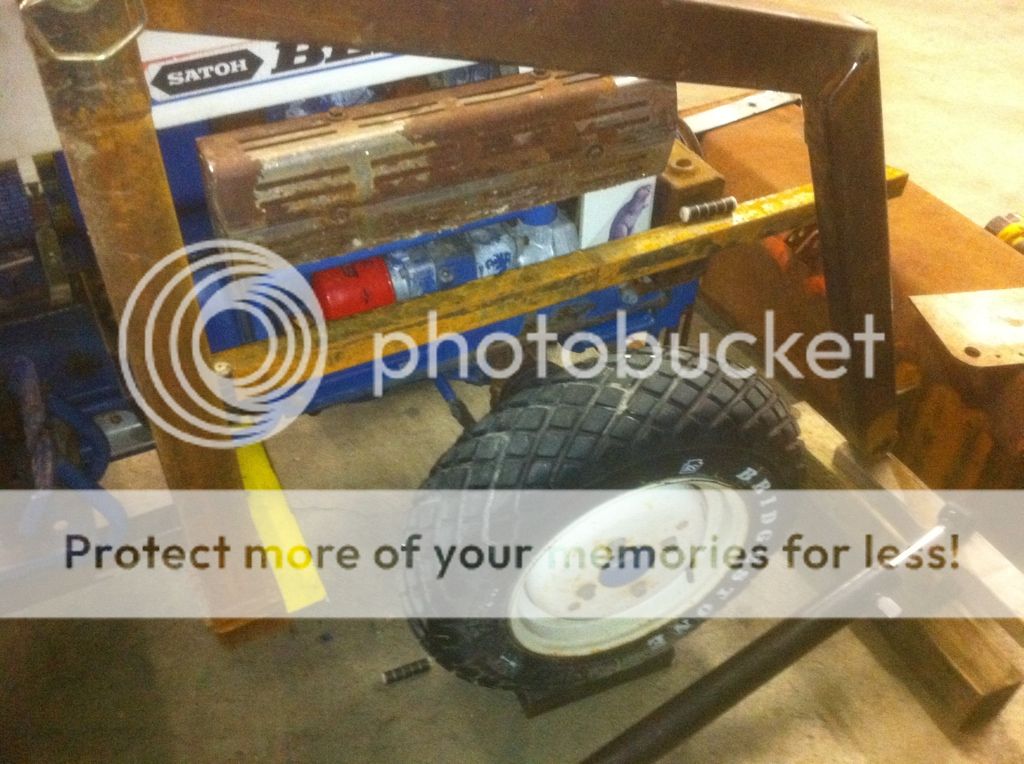
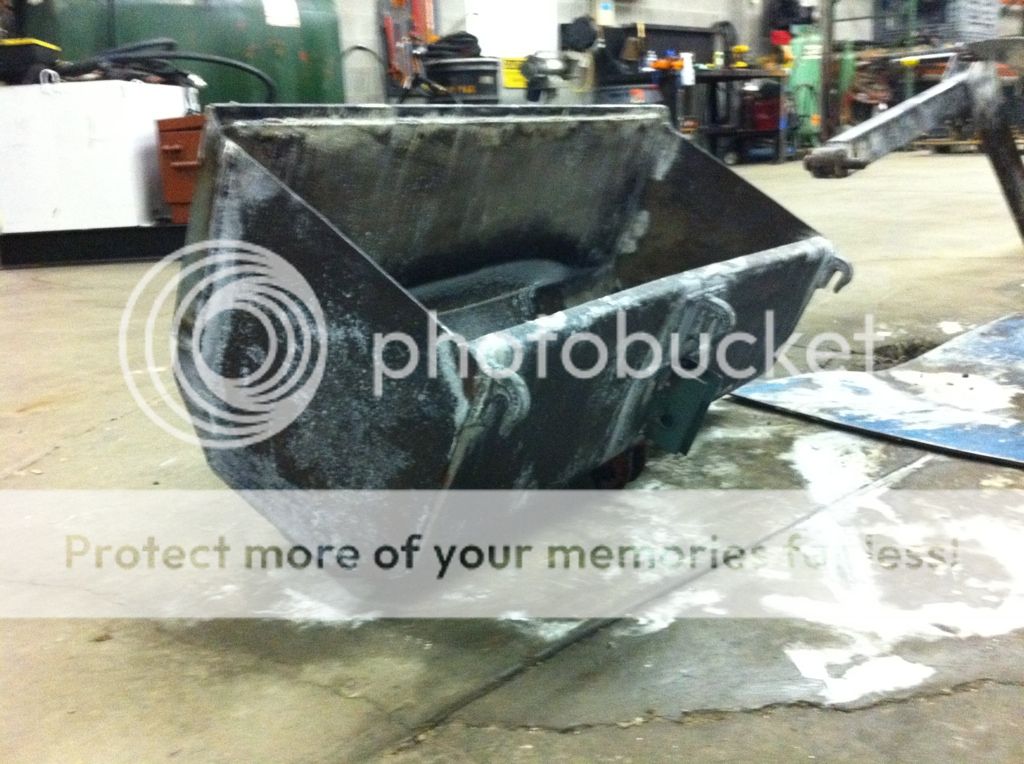
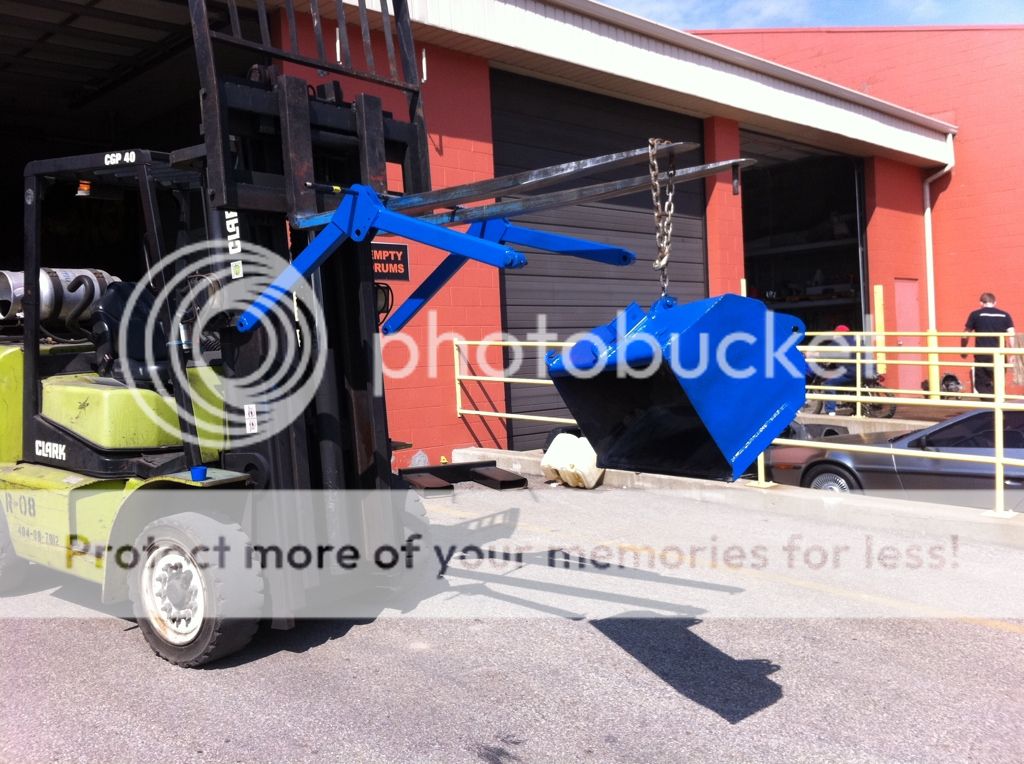
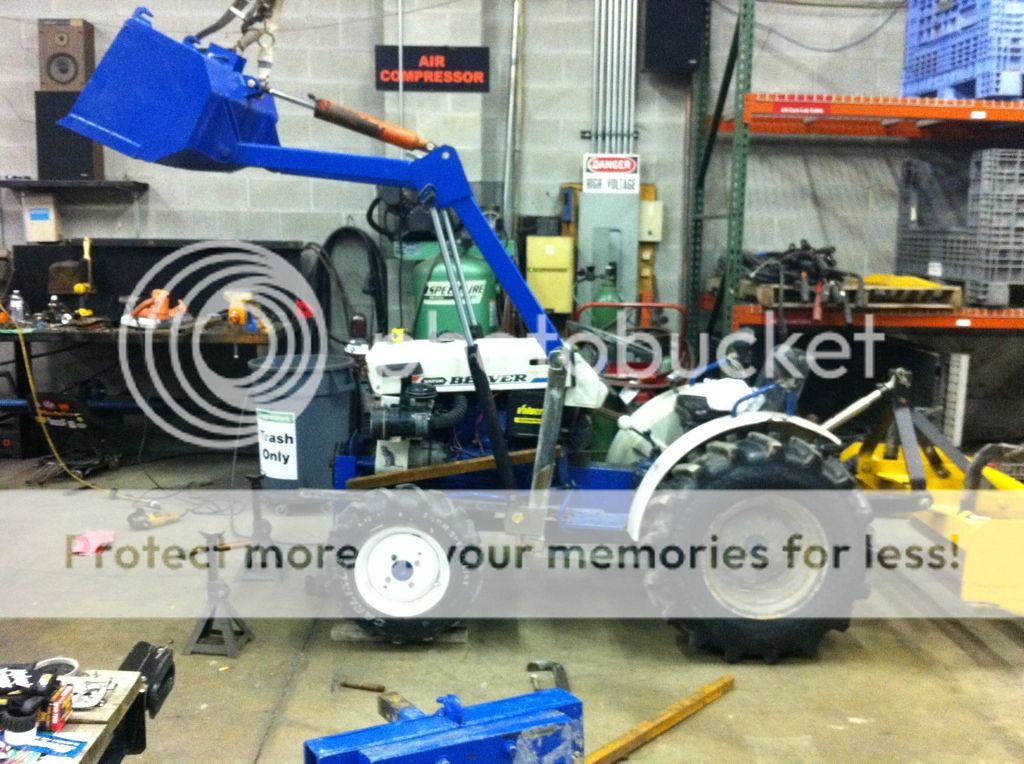
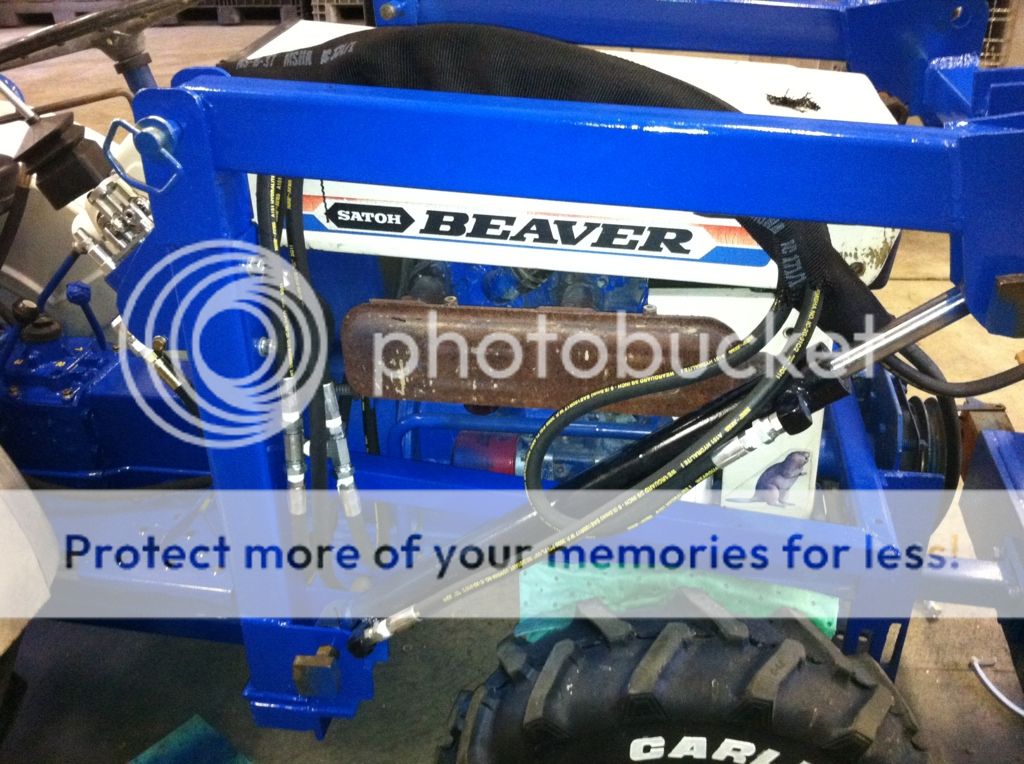
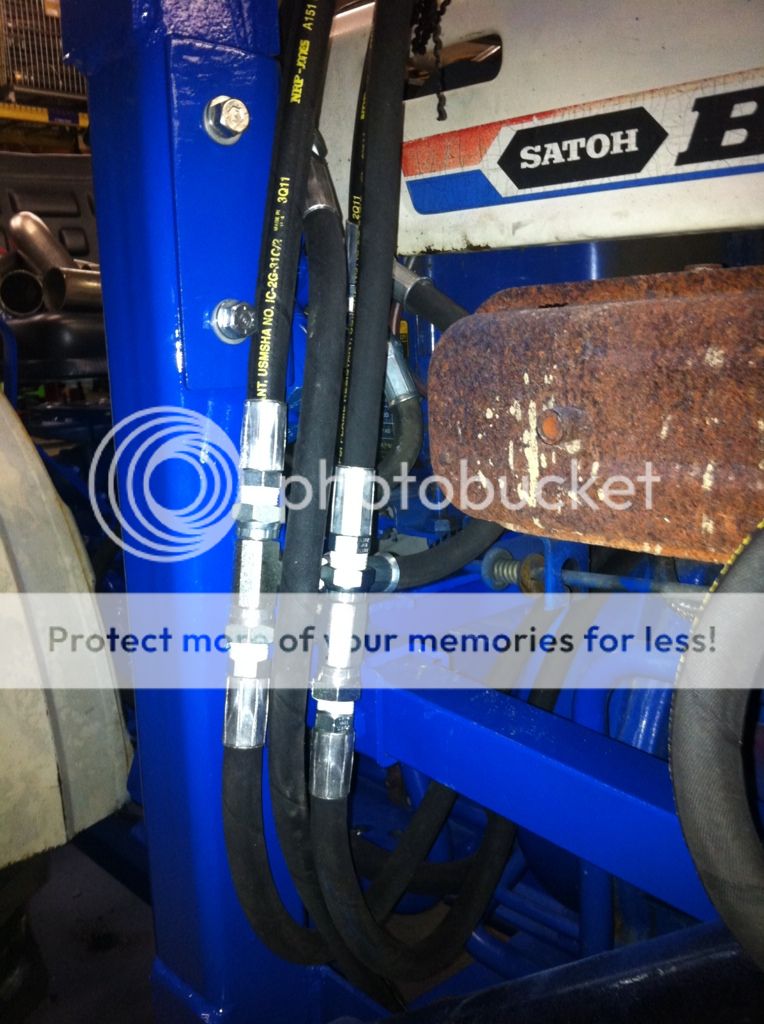
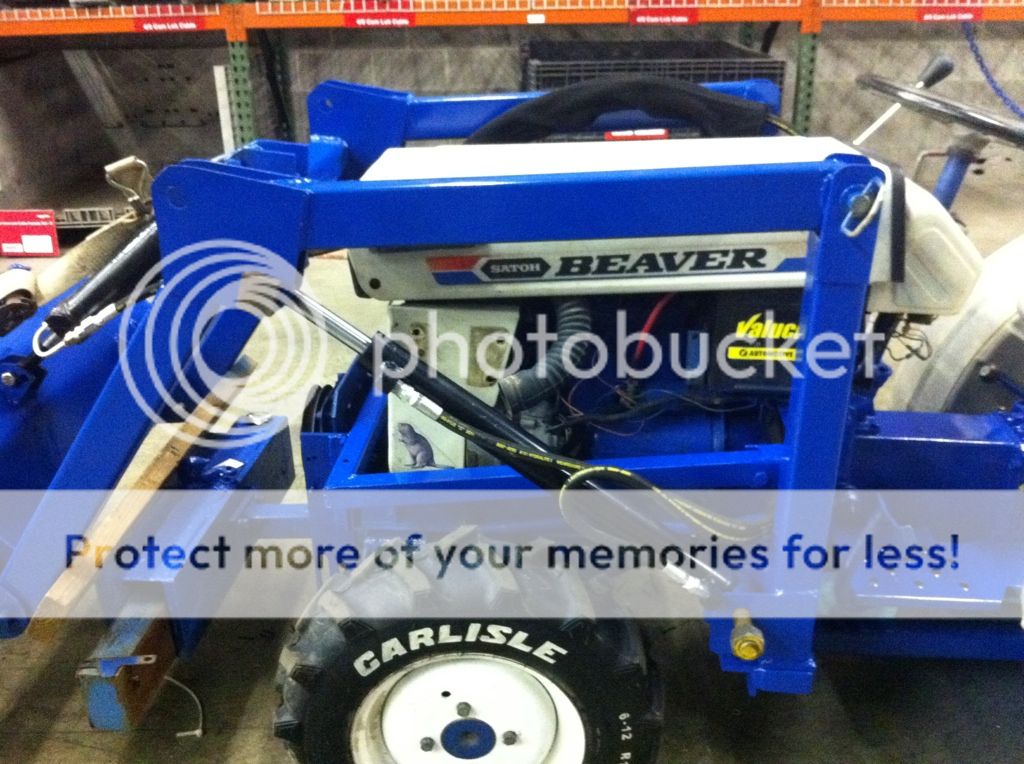
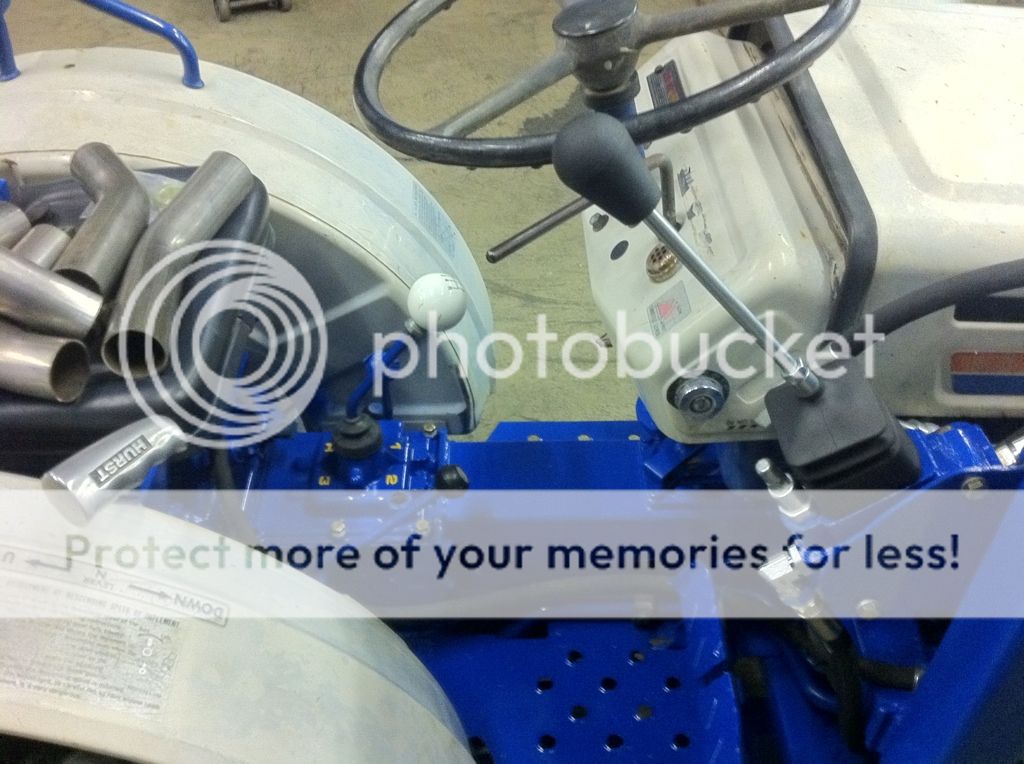
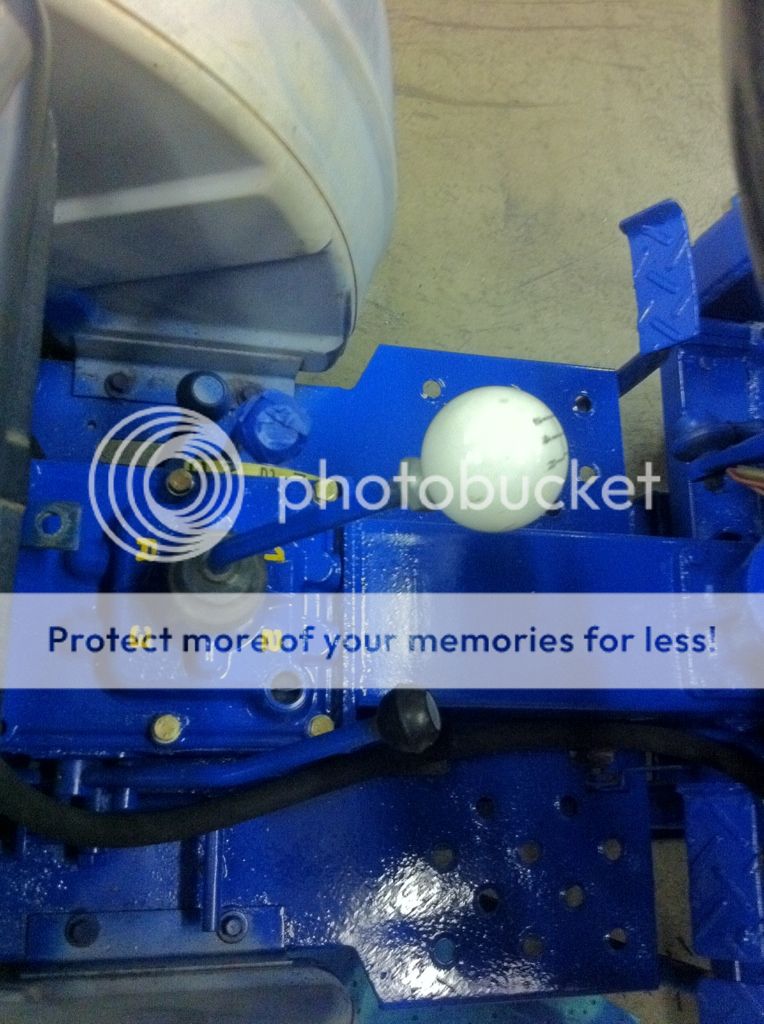
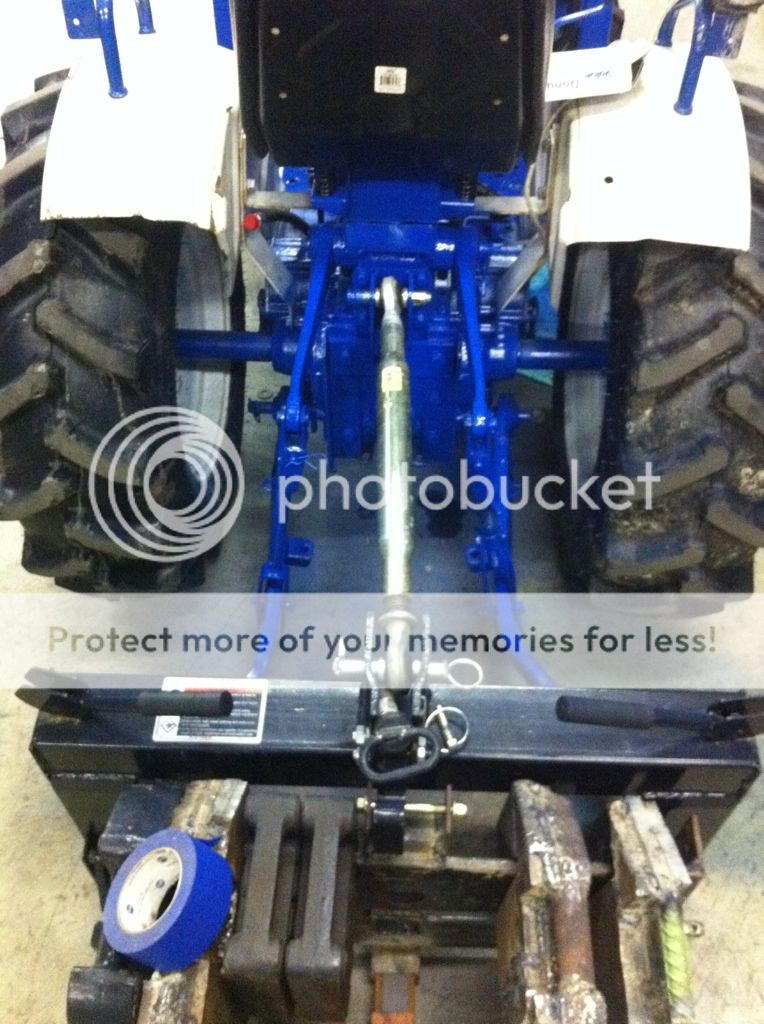
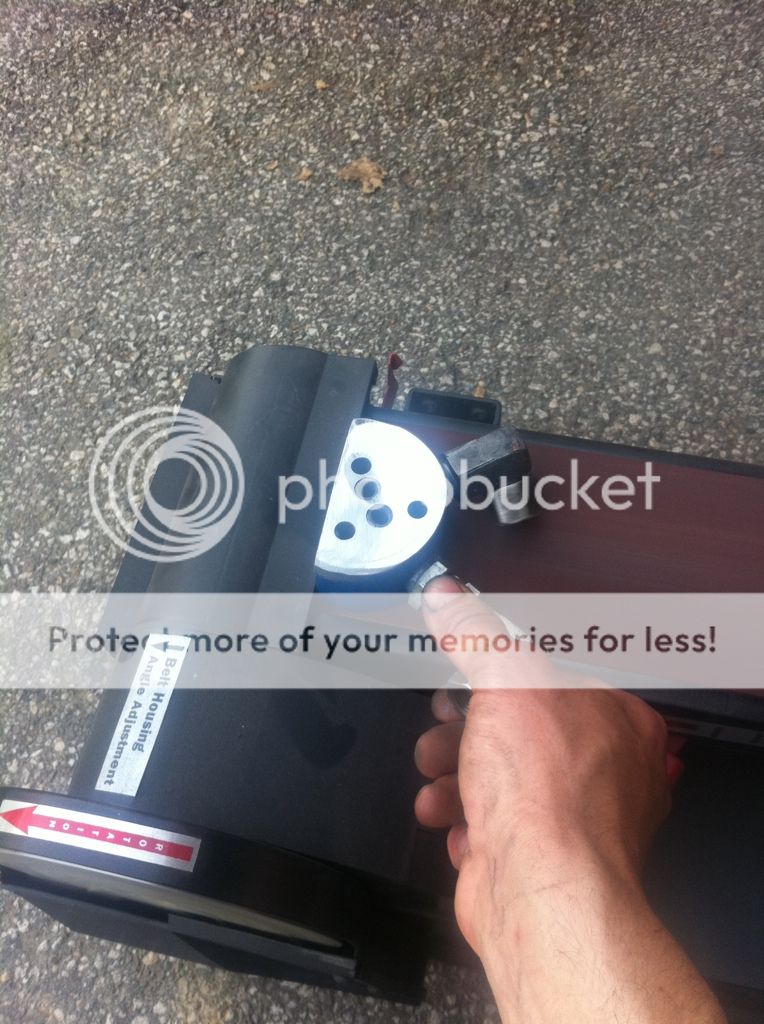
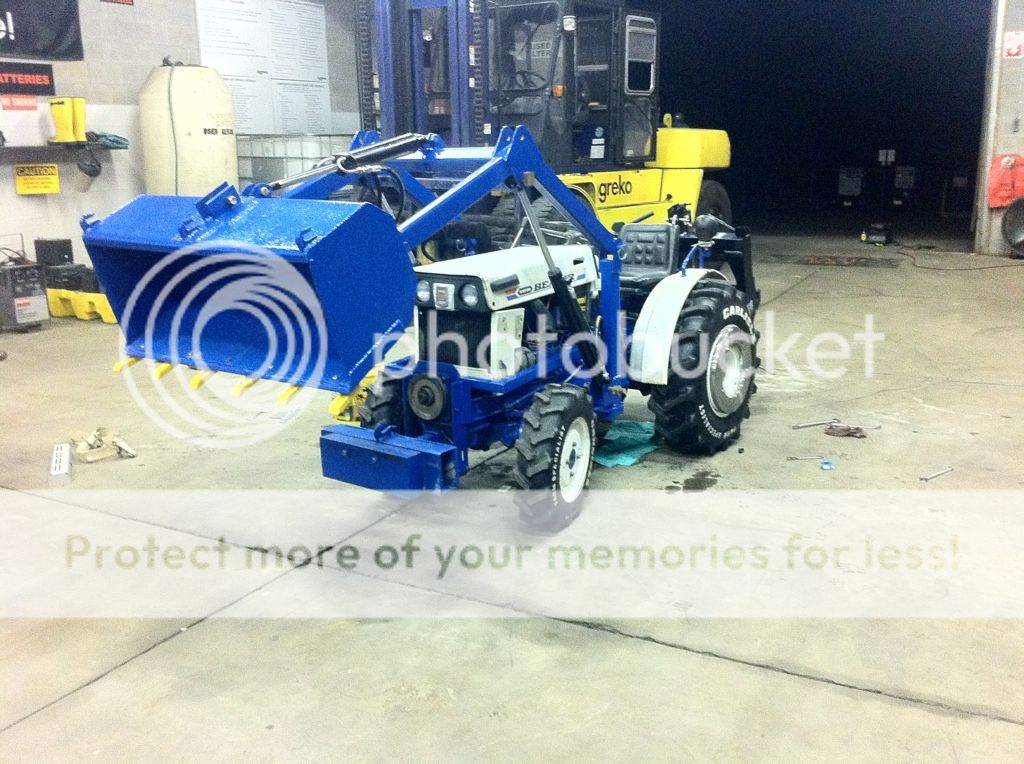
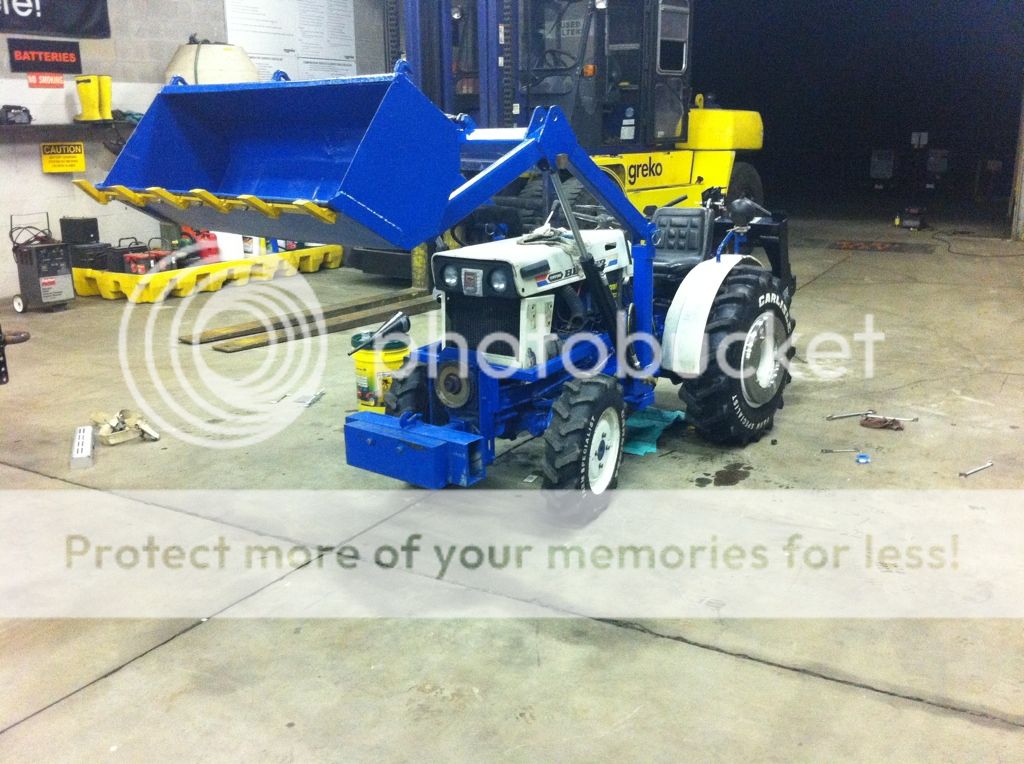
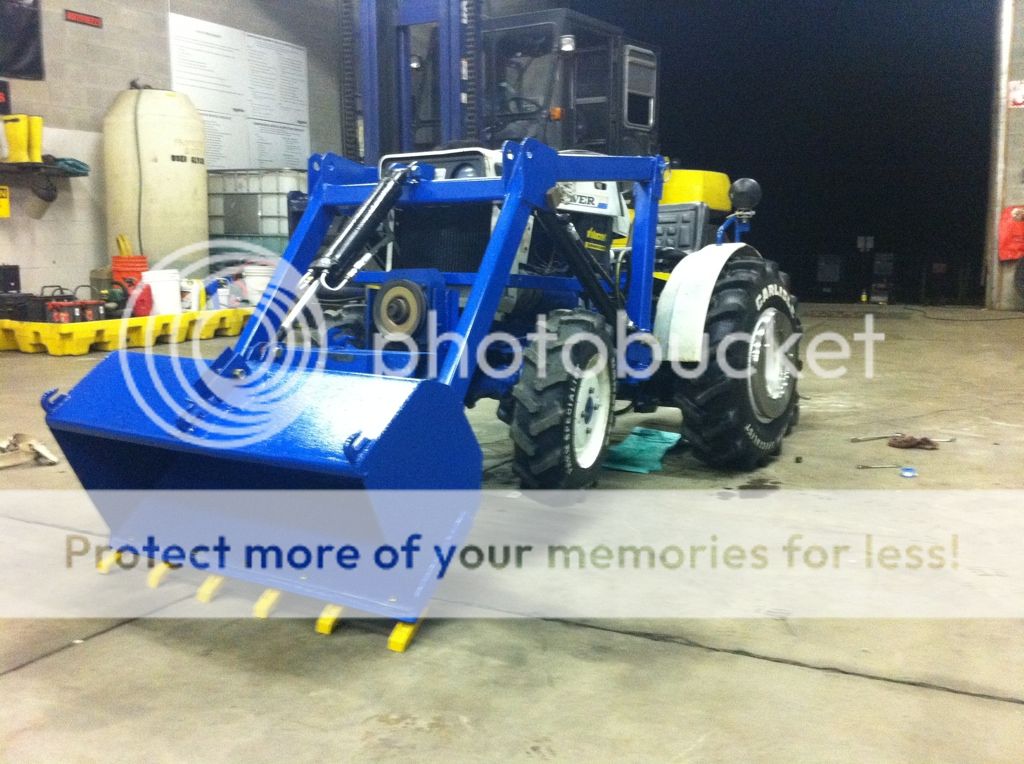
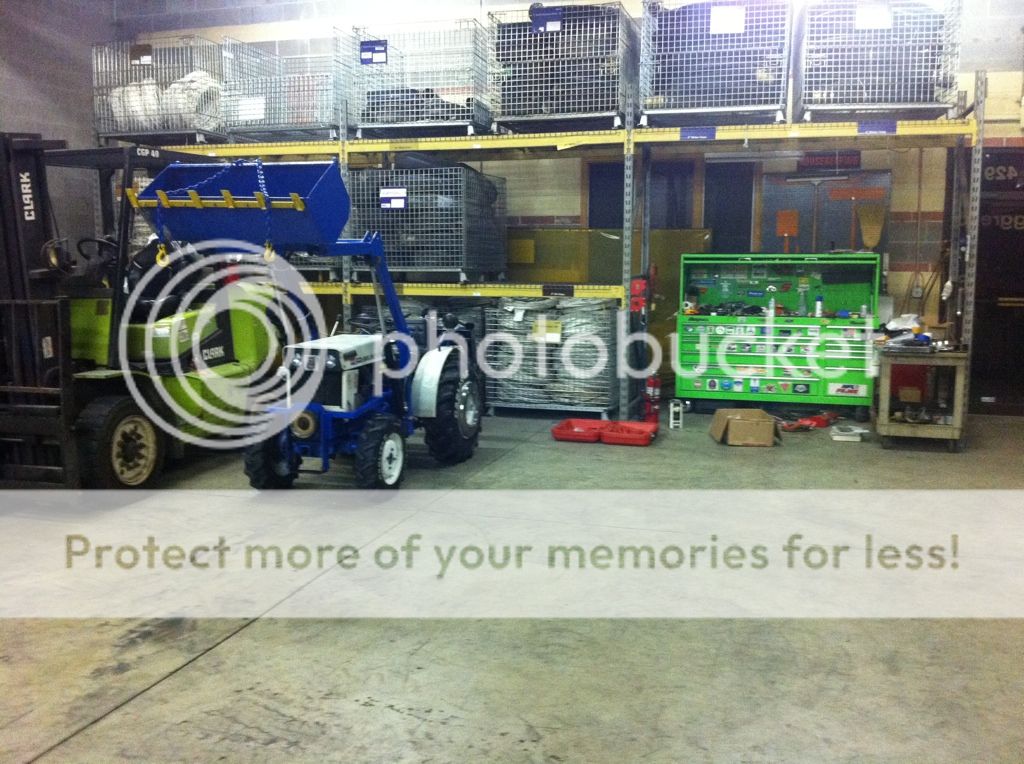
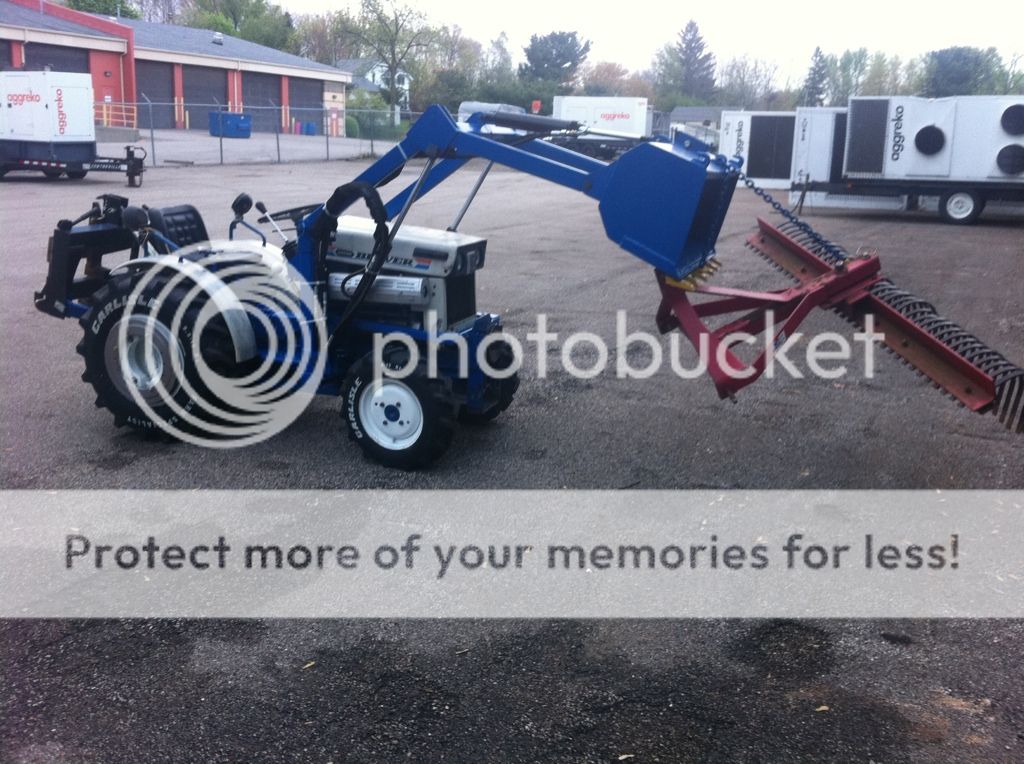
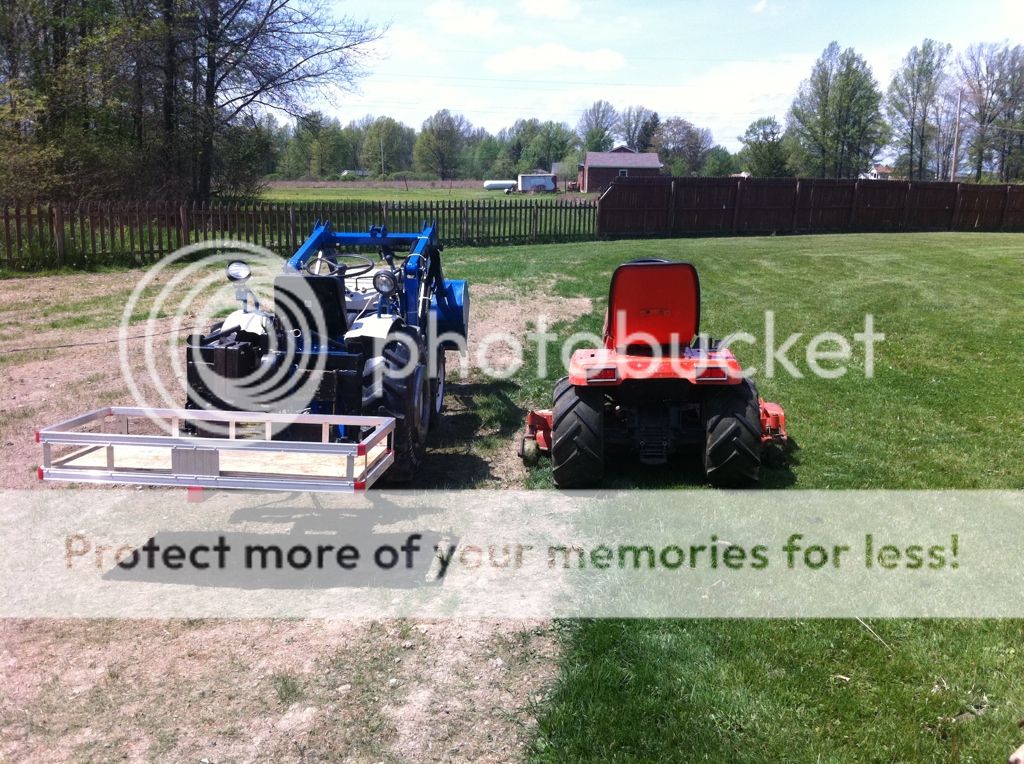
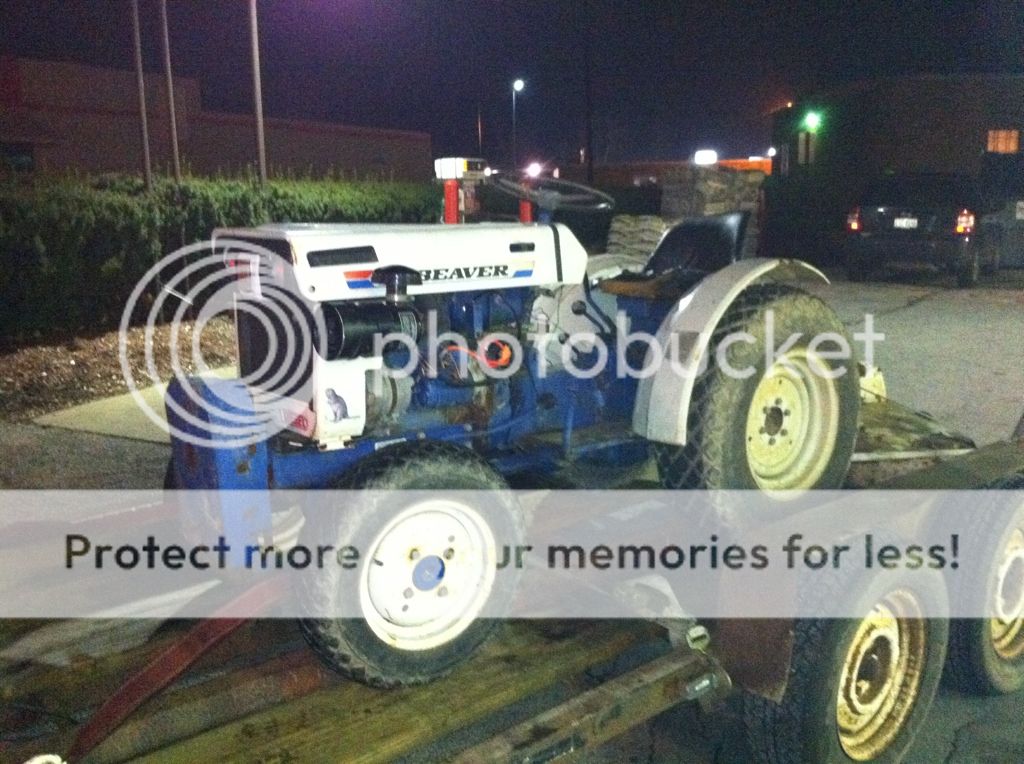
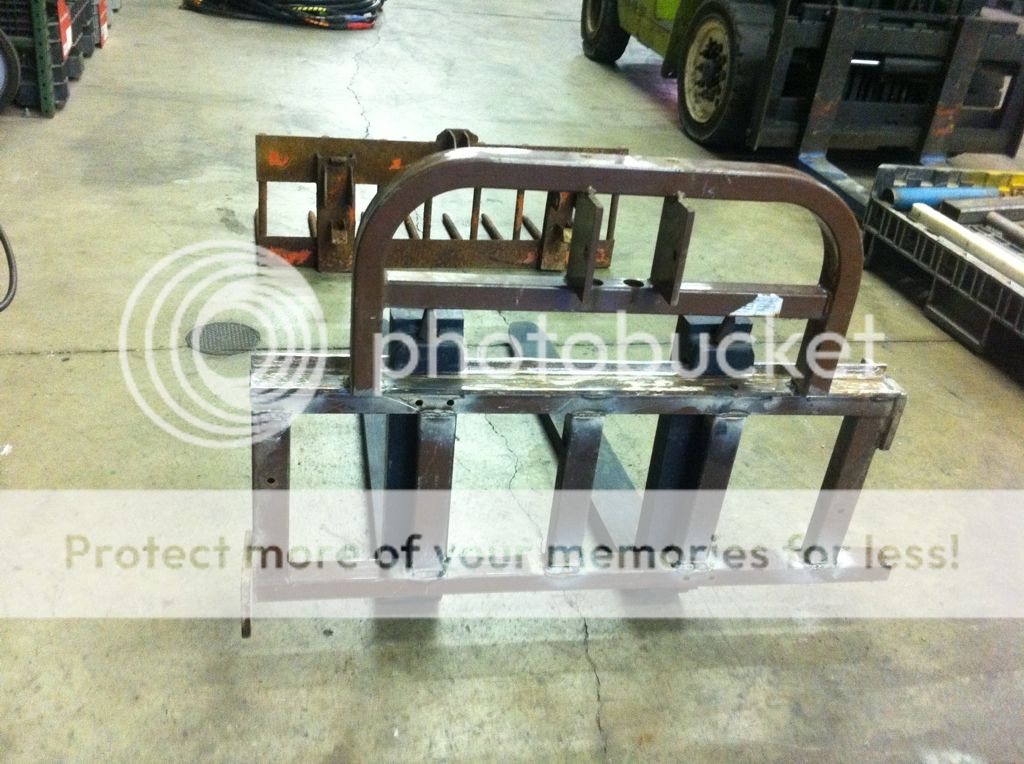
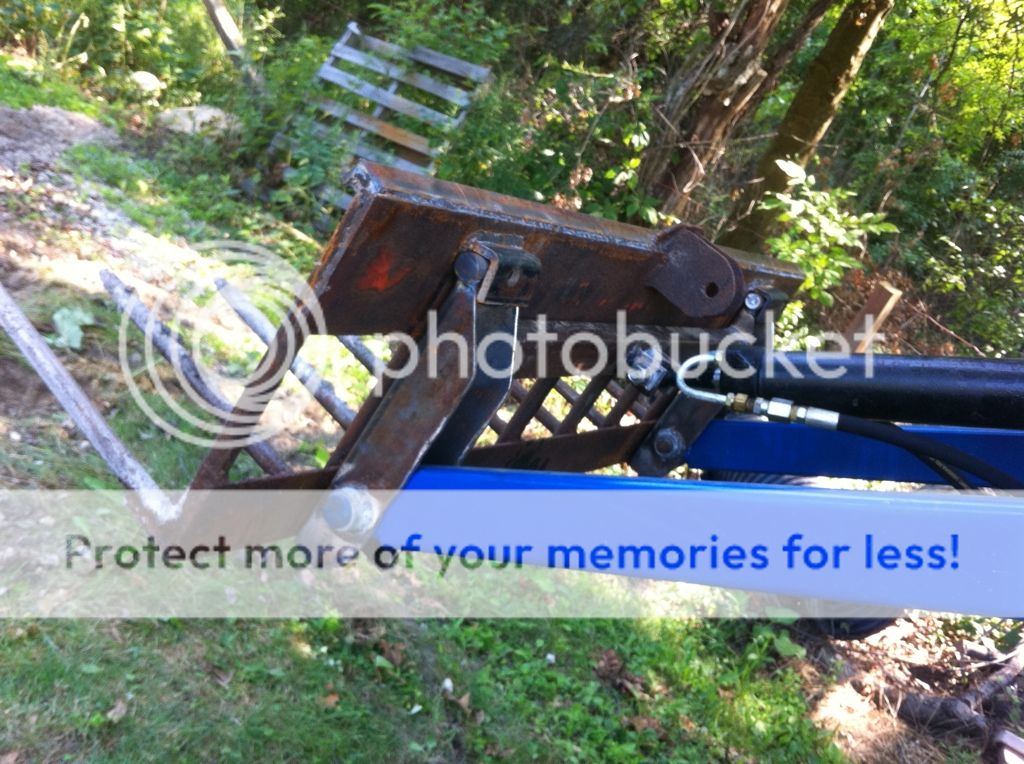
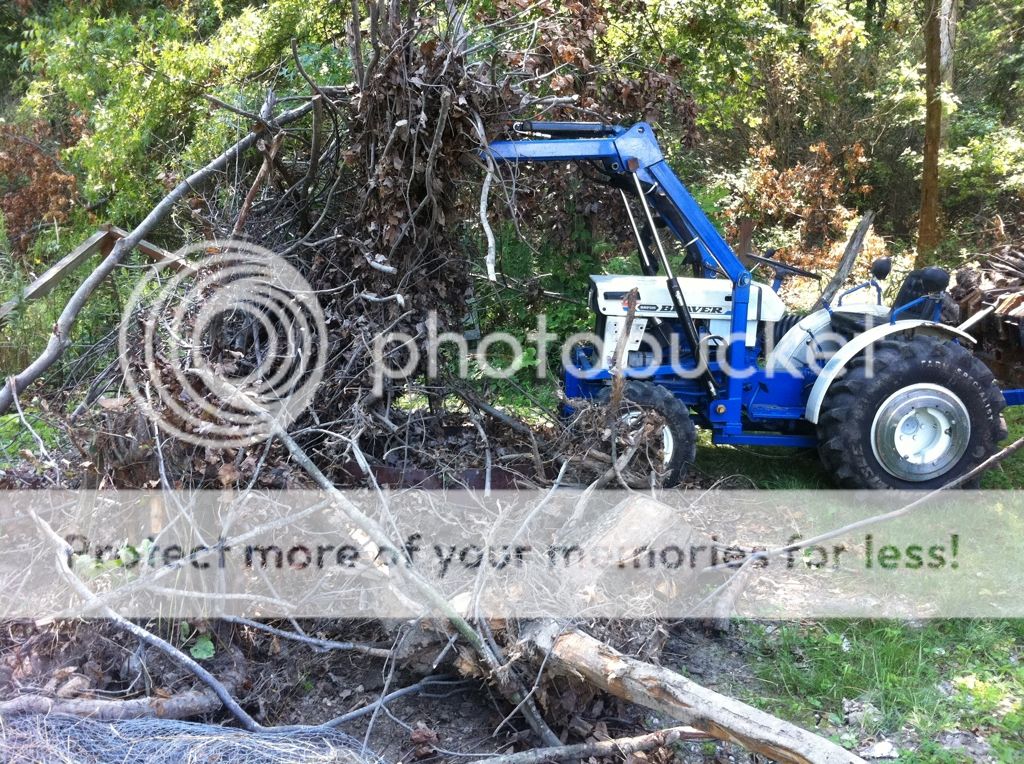
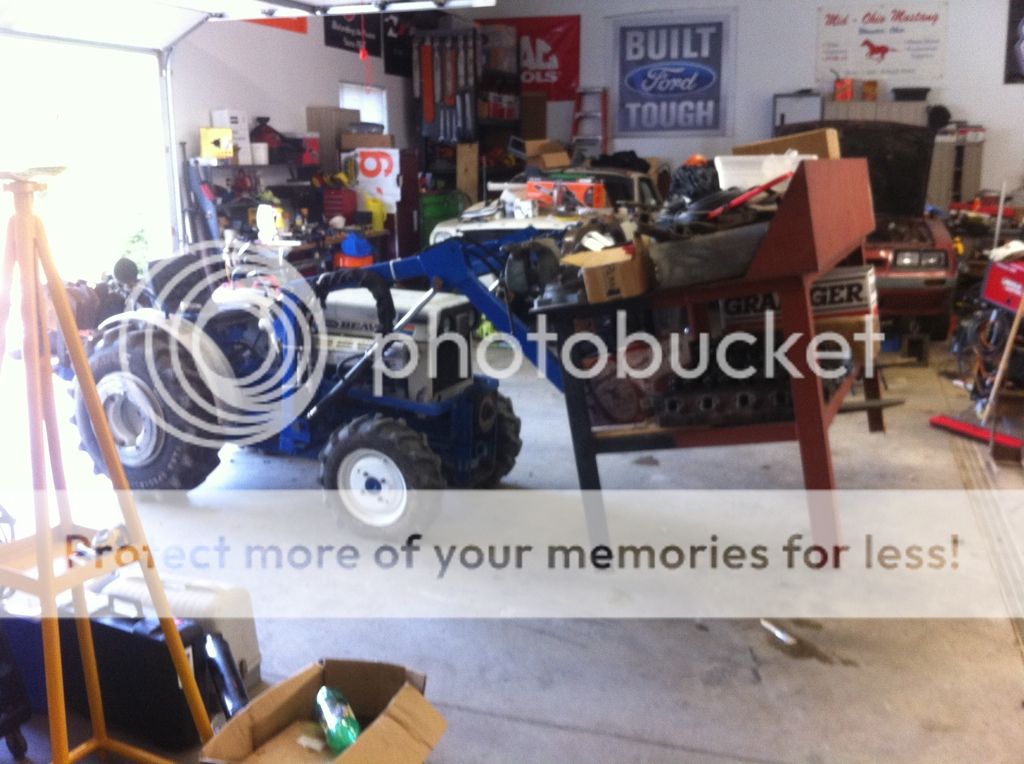
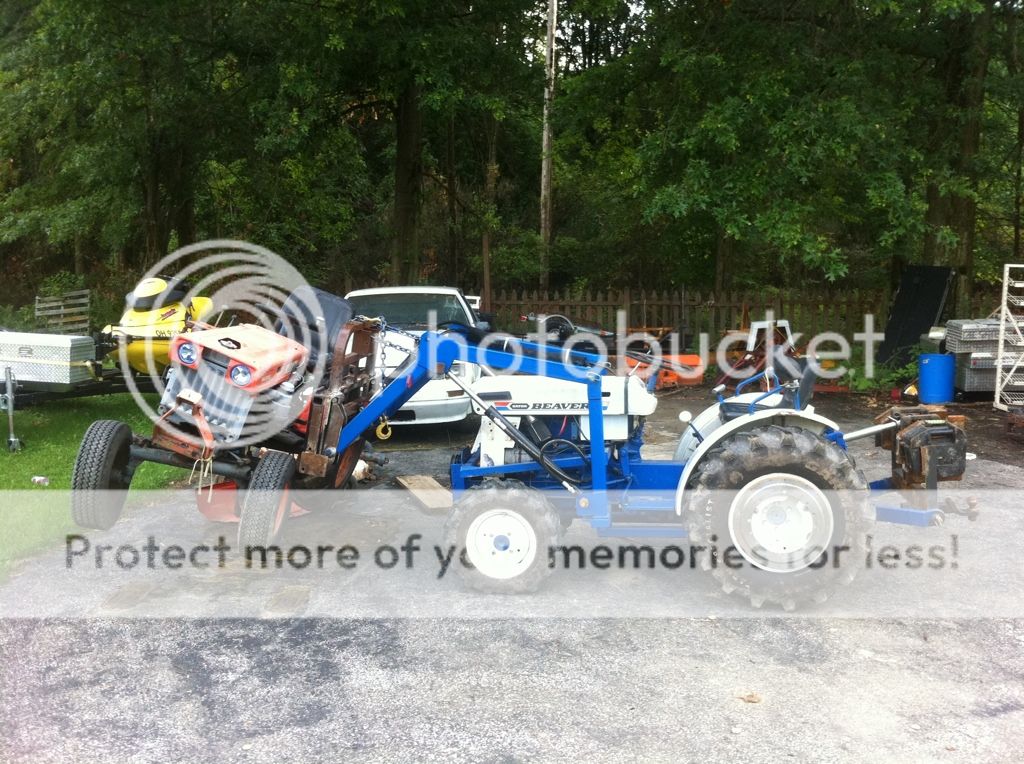
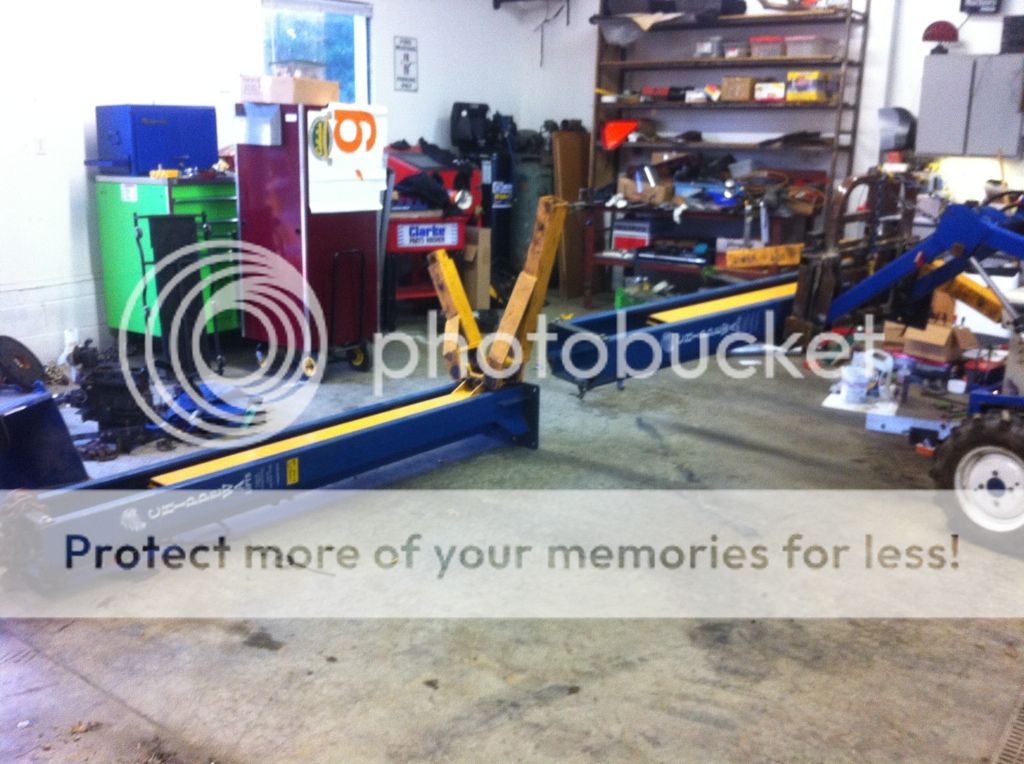
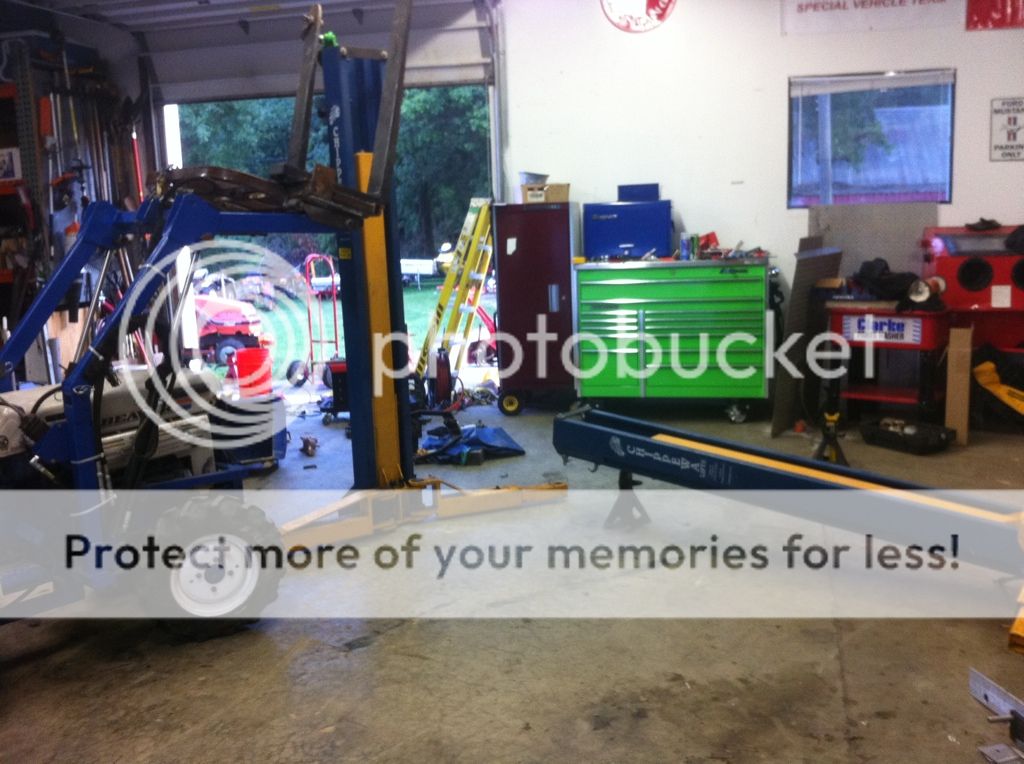
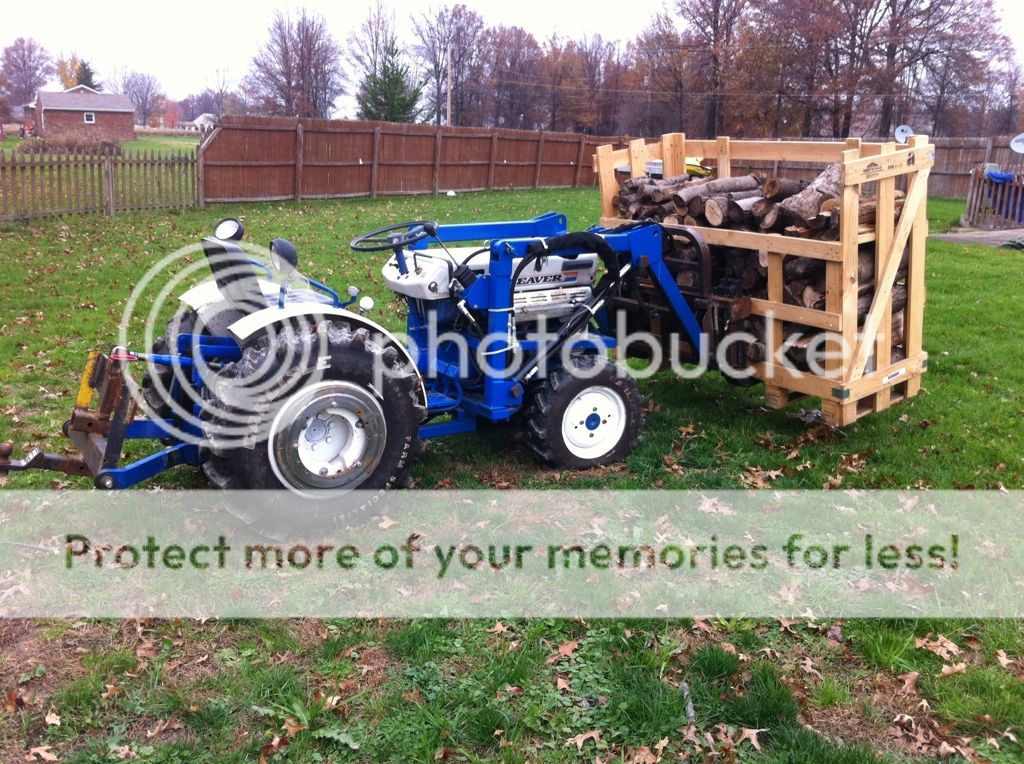
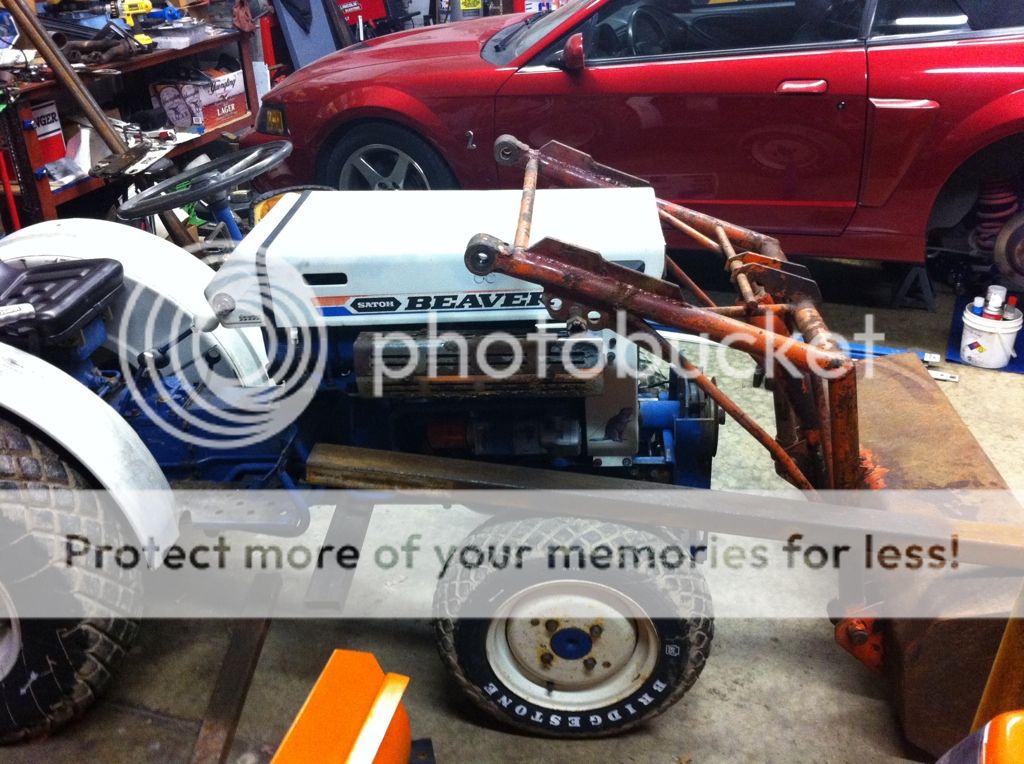
I thought I would post up what i've been up too. i bought my first house last fall and still getting the property in order. I don't travel as much as I used to, but I did spend the first 6 months of this year out of town. I had a ton of tractor work to do on my land to resolve drainage issues... Traded a junk mustang roller for this running tractor. I Did some wheelin' and dealin' over the last couple weeks and ended up with this loader setup off of an old economy tractor. I believe it was home made at some point in time... It was a complete setup with hydraulics, hyd tank, pump, cylinders, spool valves and hoses. The bucket is 42" wide and seems like a perfect match for the little beaver.
bc70a633.jpg

35c81f7c.jpg

ef1df684.jpg

276c583d.jpg

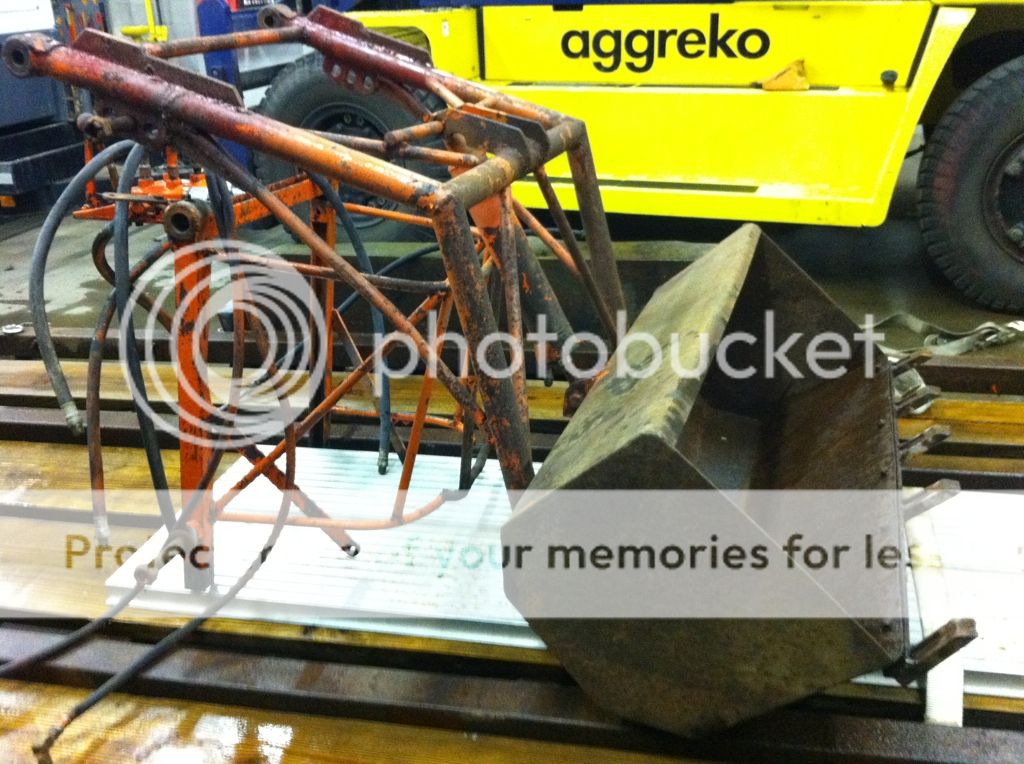
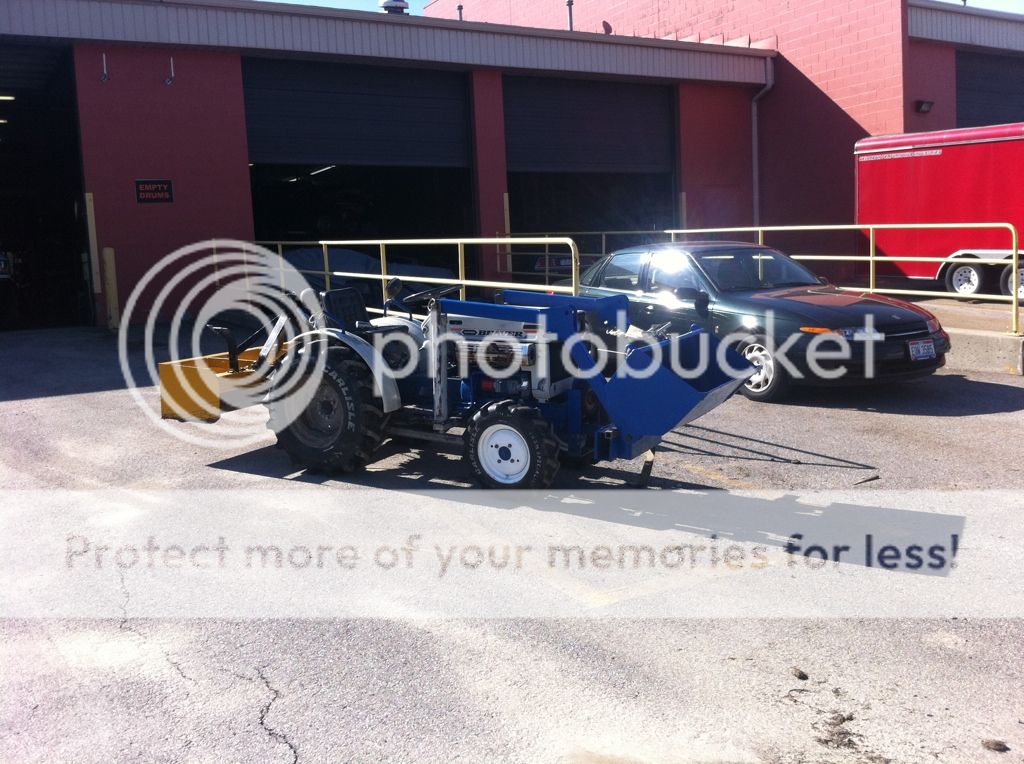
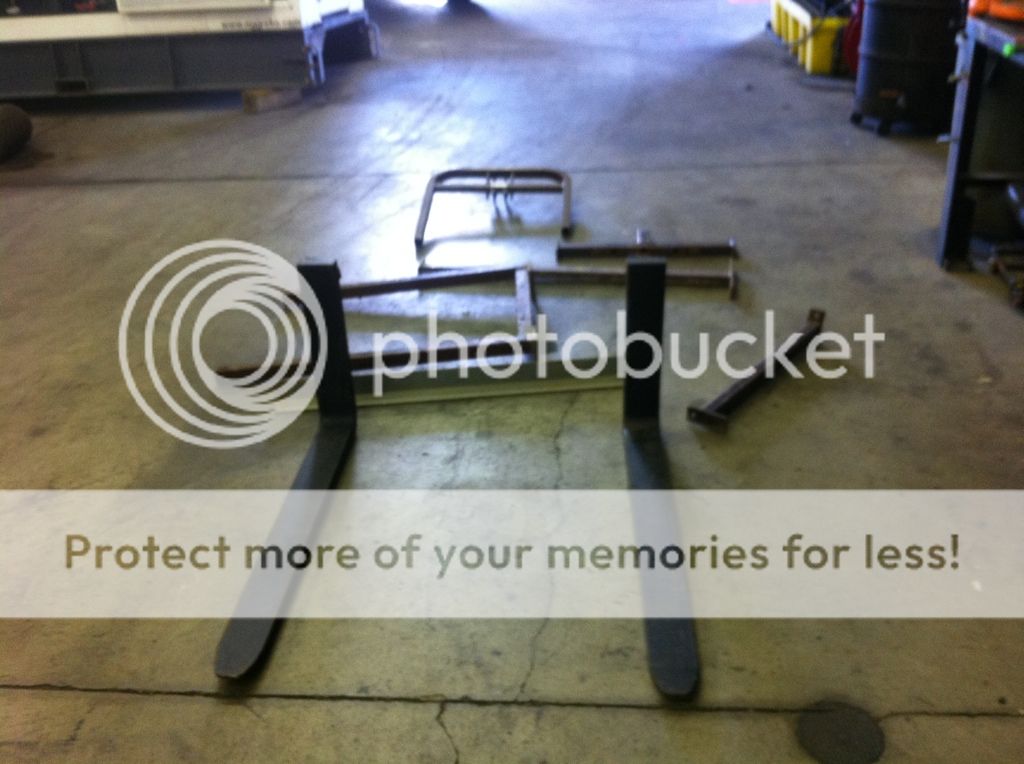
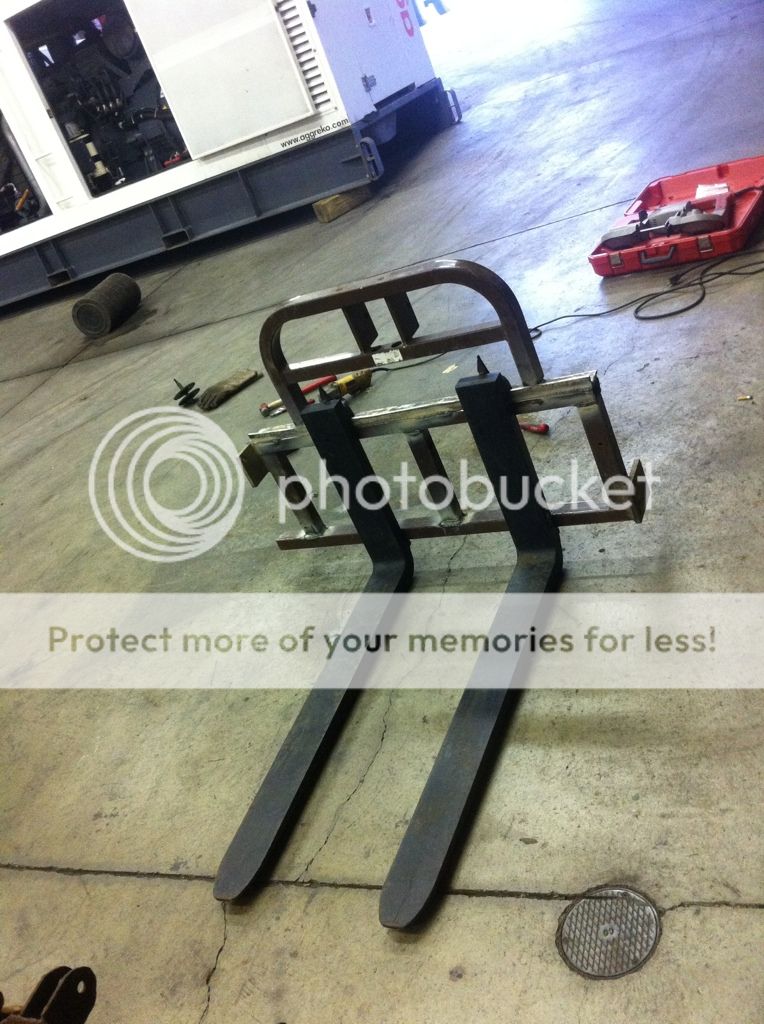
even got a set of hayforks with it. I'll eventually make a grapple for this so I can use it to move brush and trees around.
28cb86b6.jpg


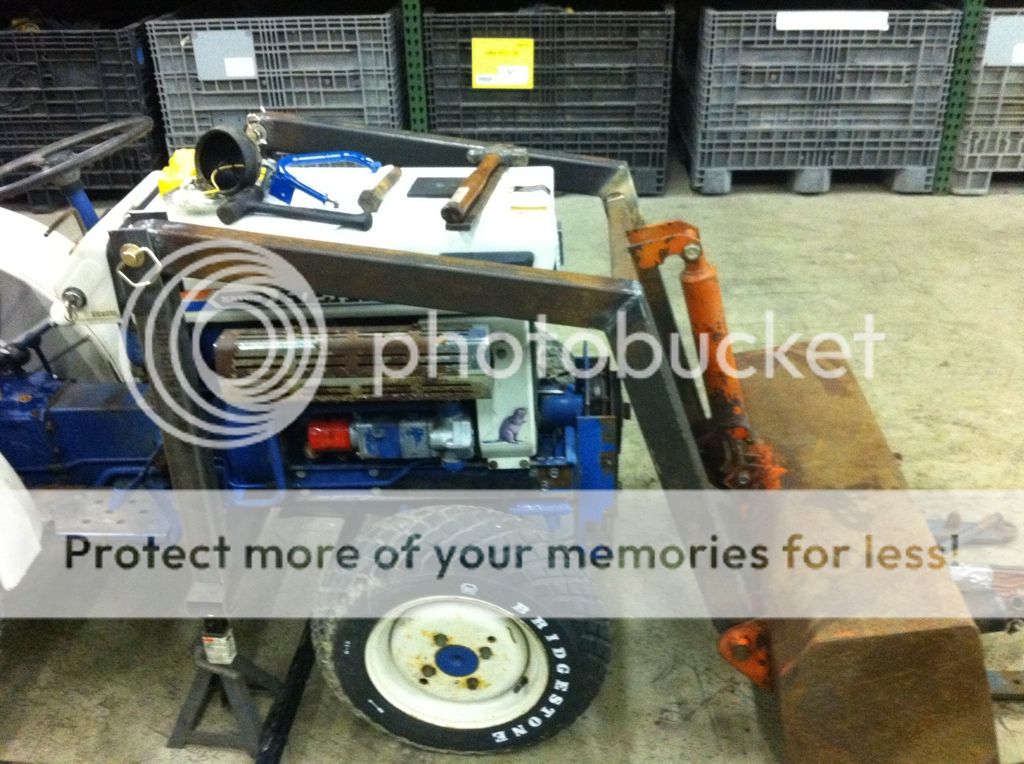
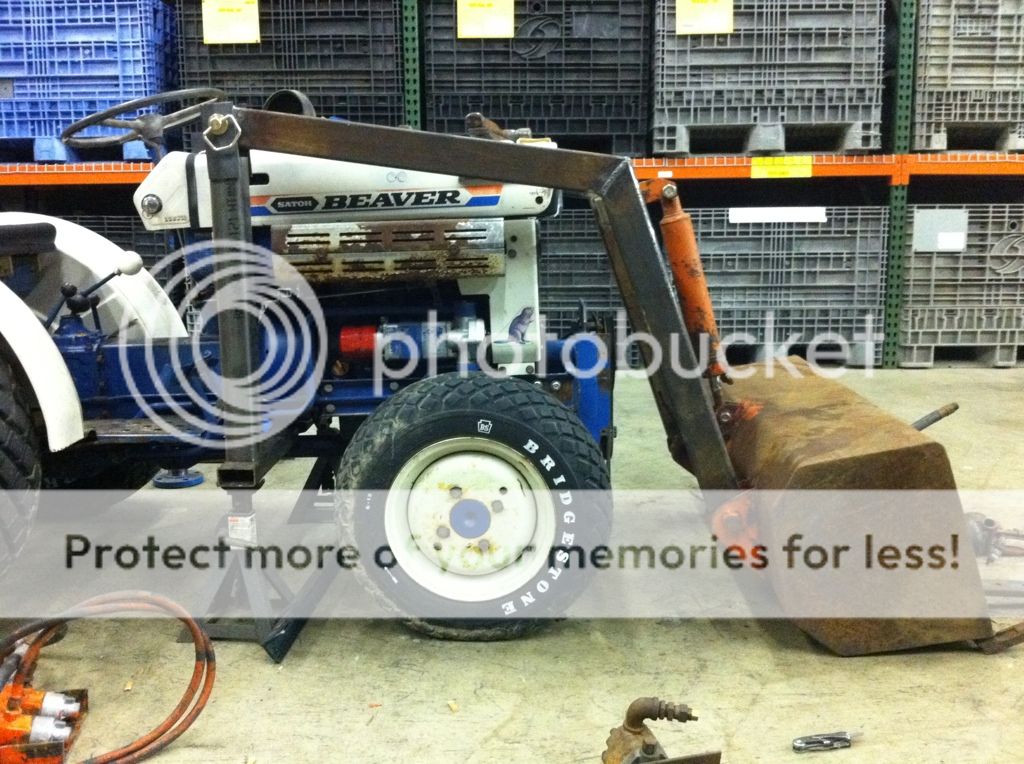
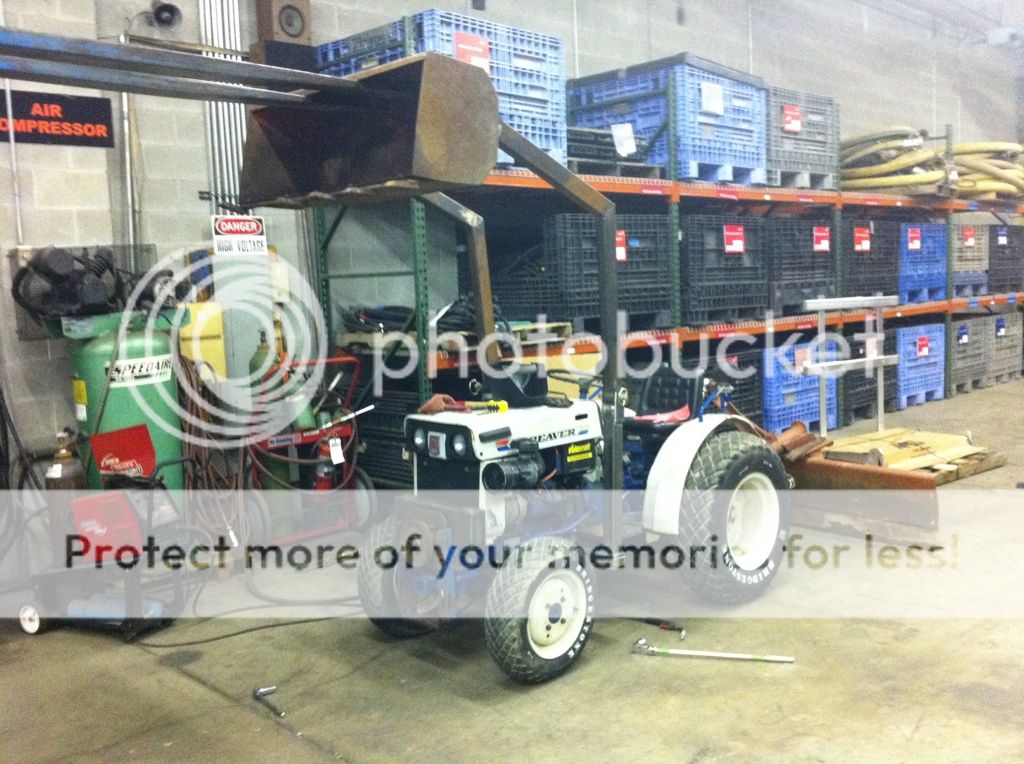
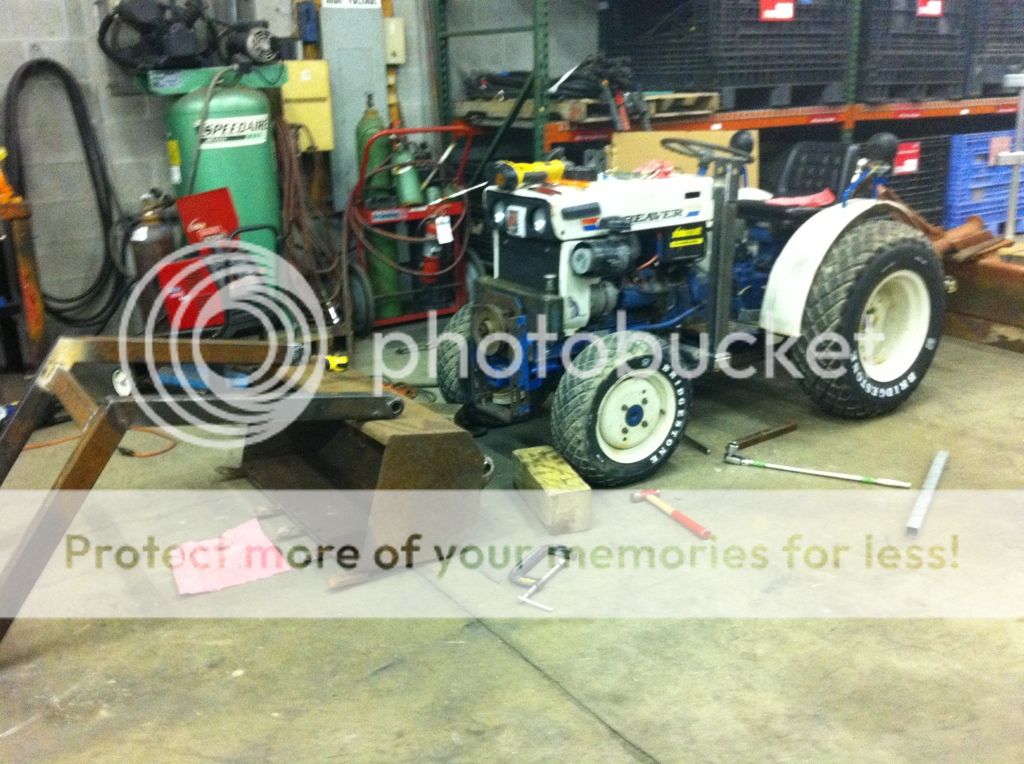
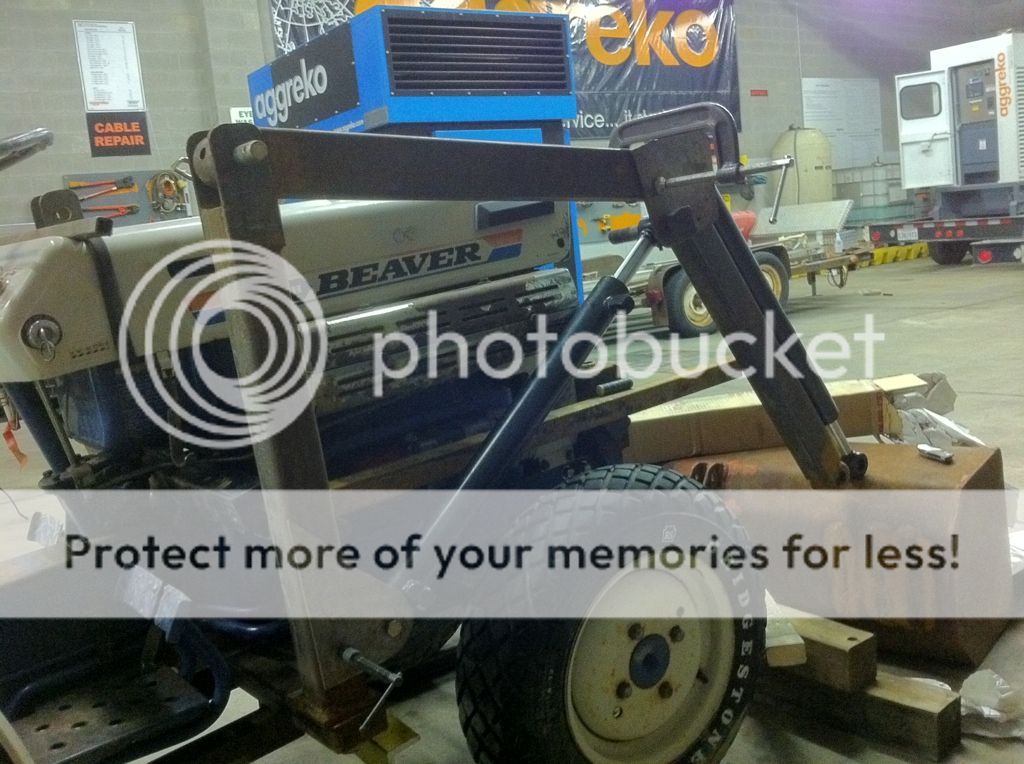
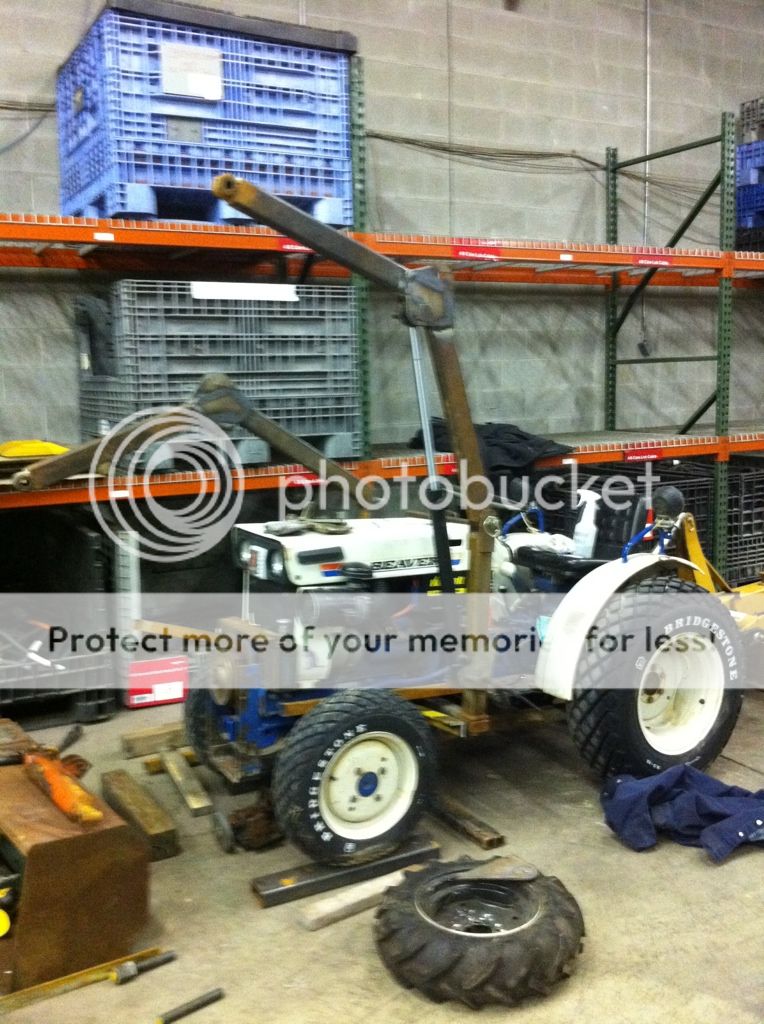
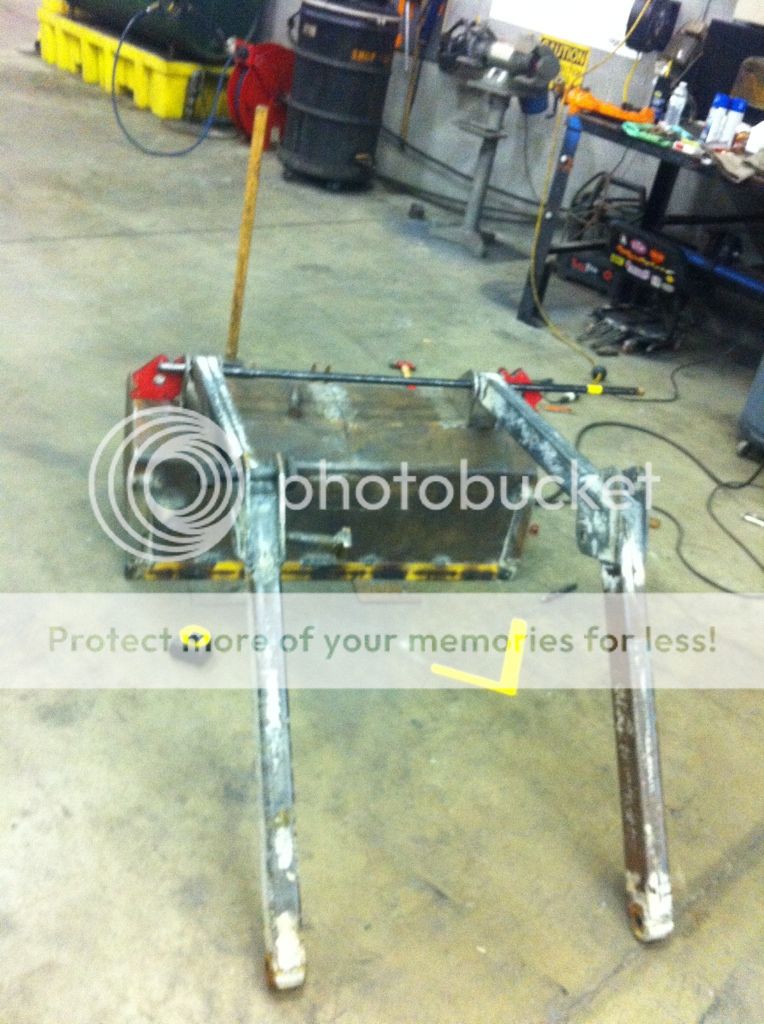
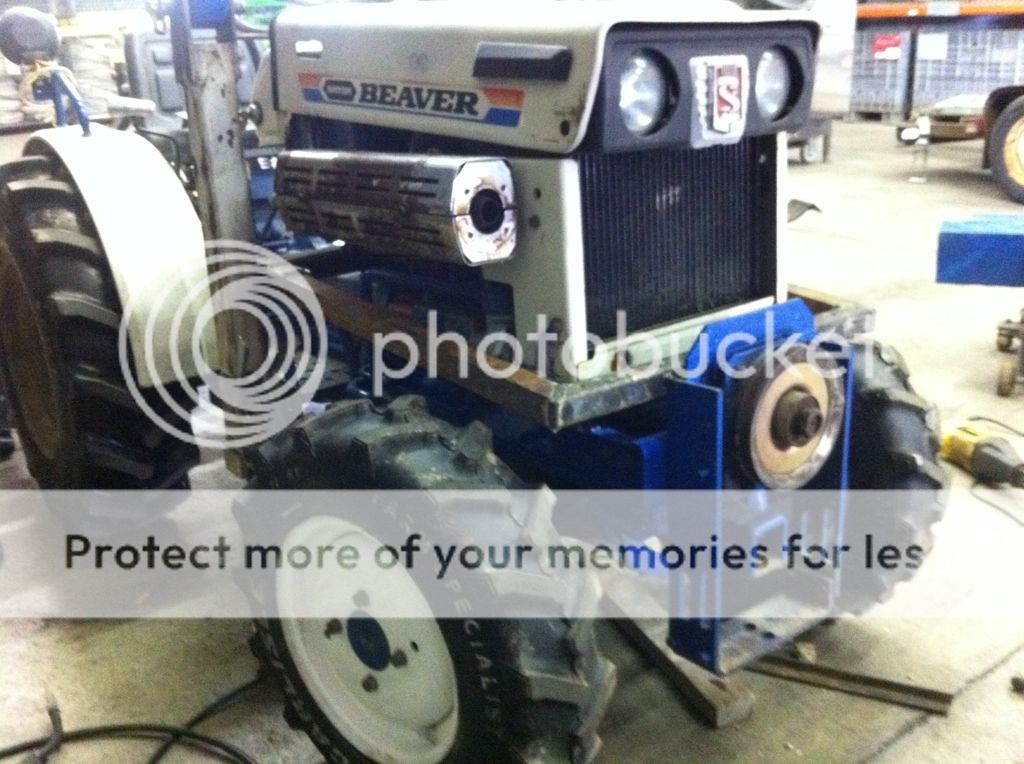
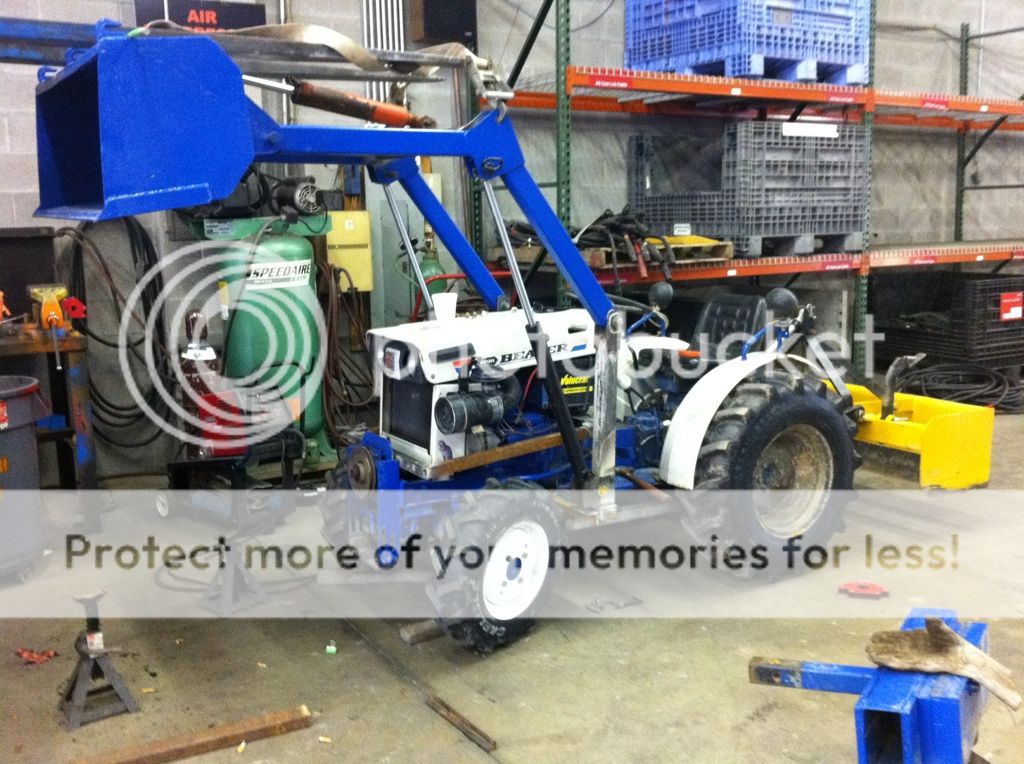
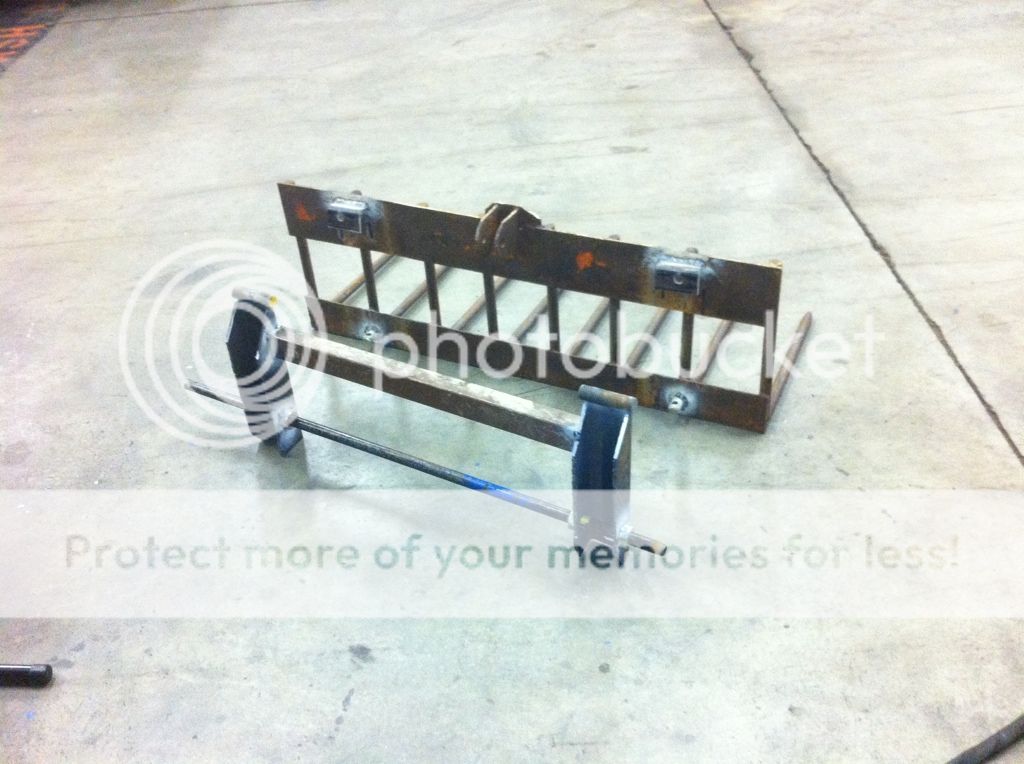
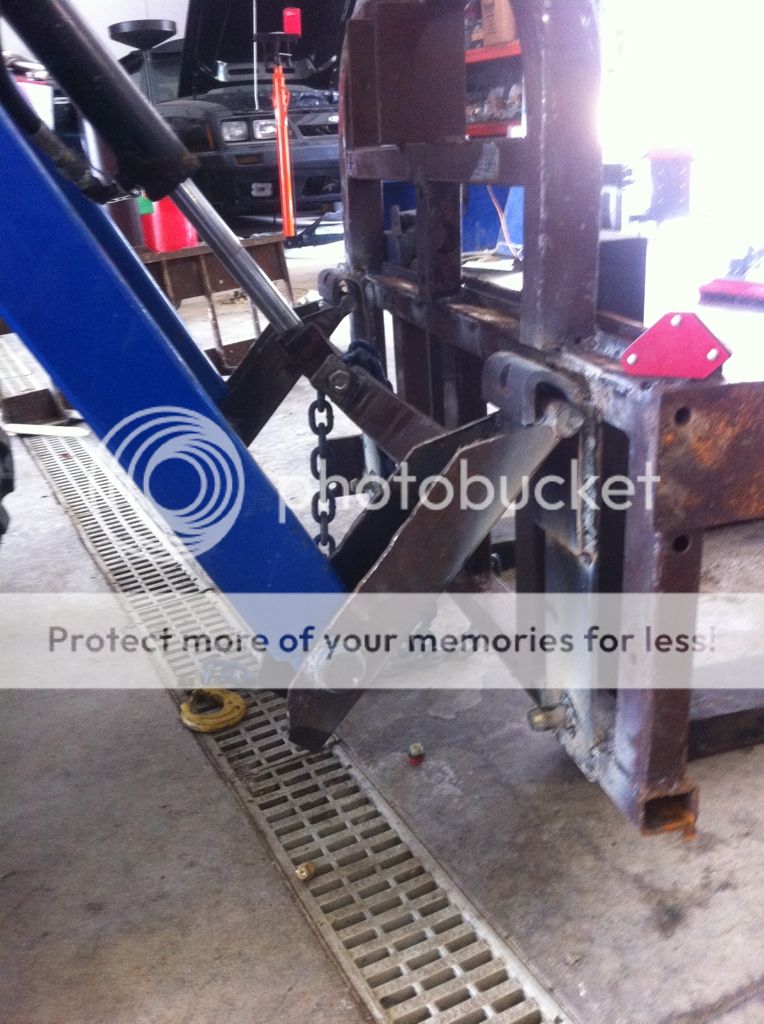
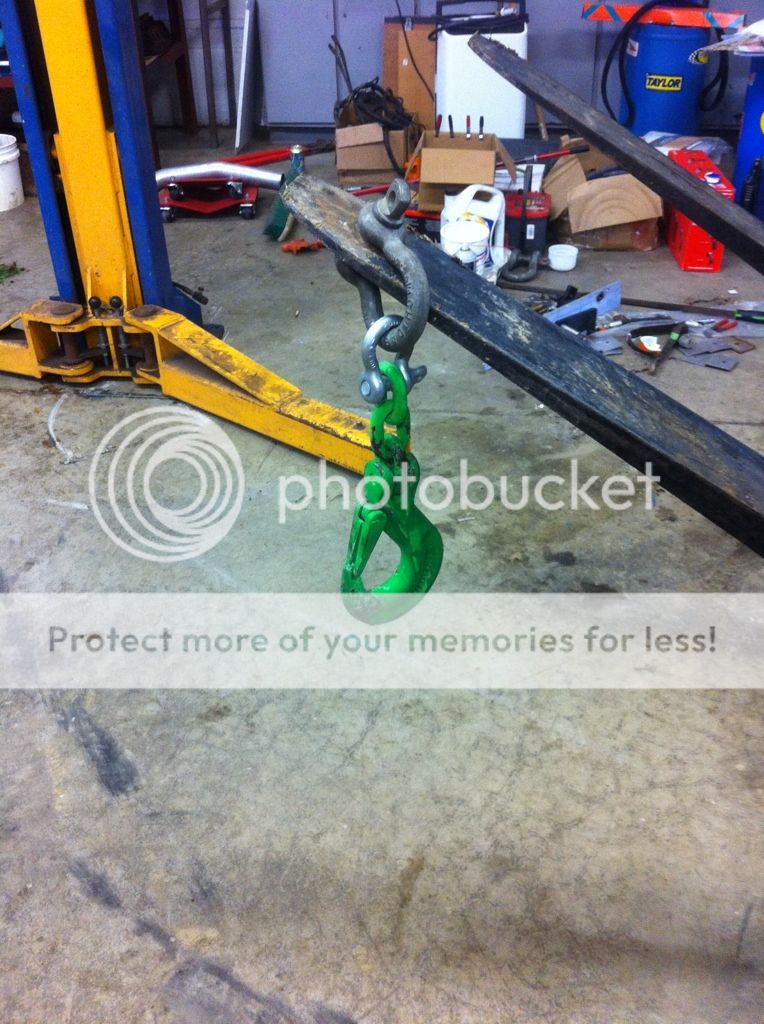
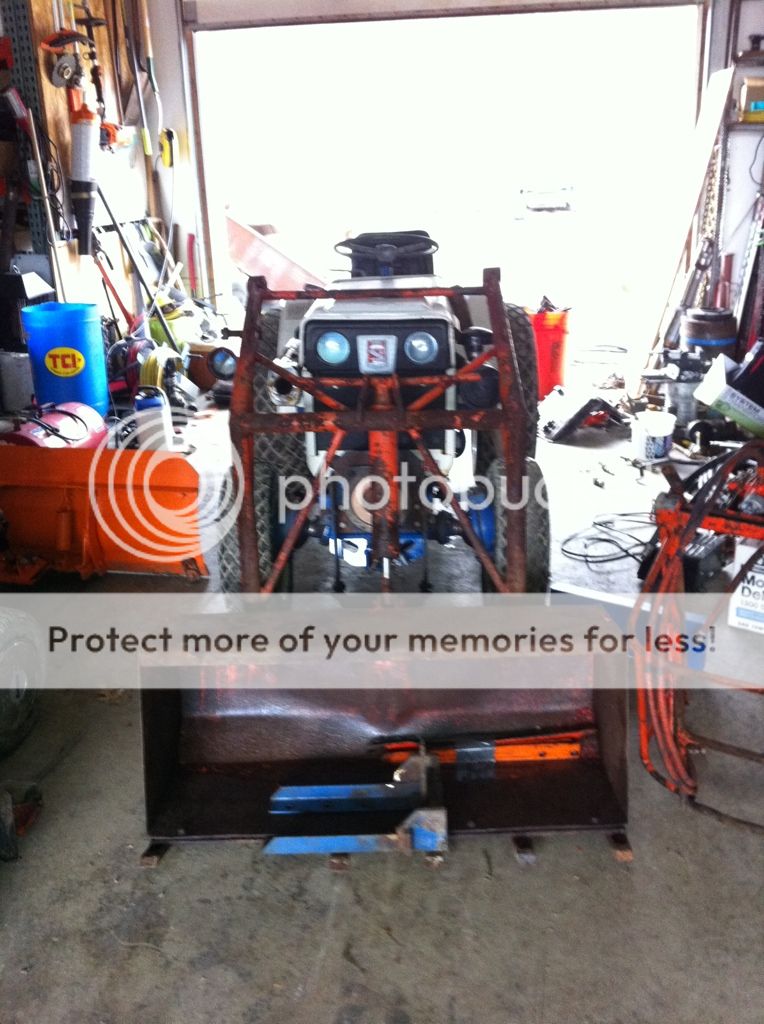
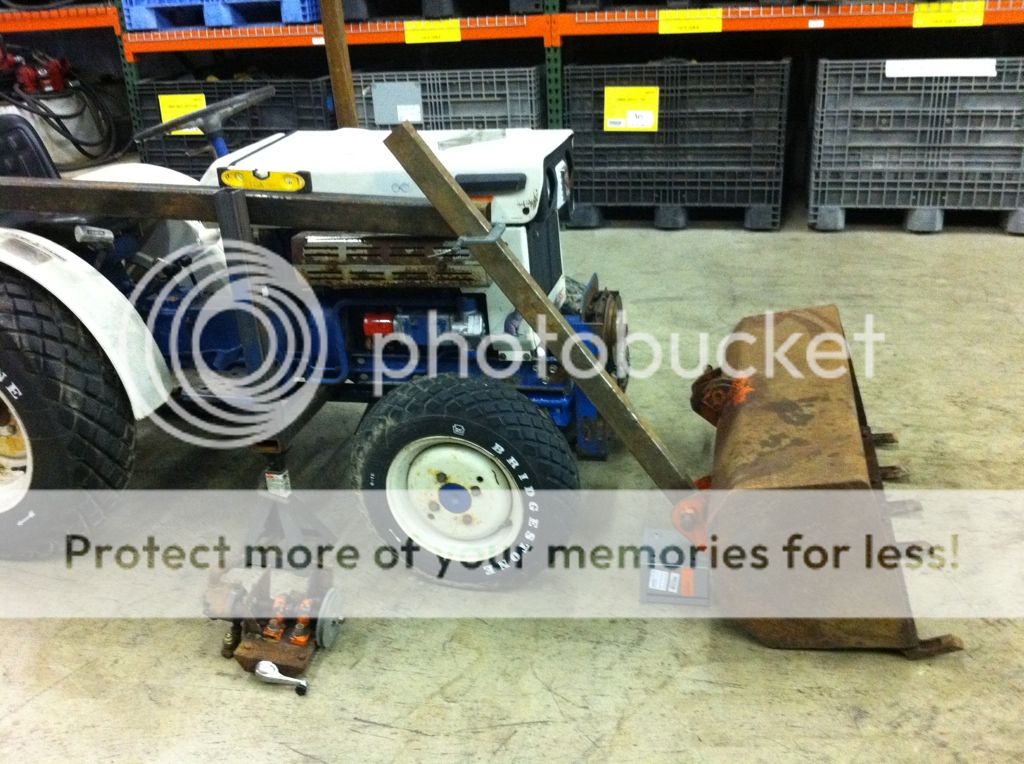
instead of trying to modify what was there....I just started over....
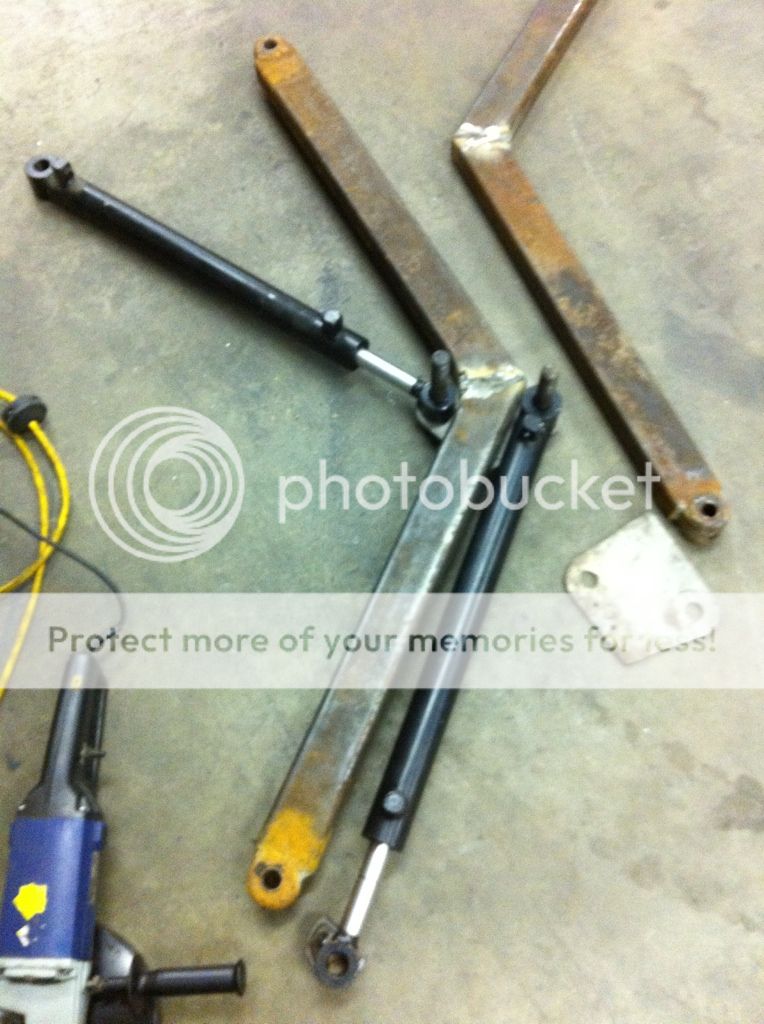
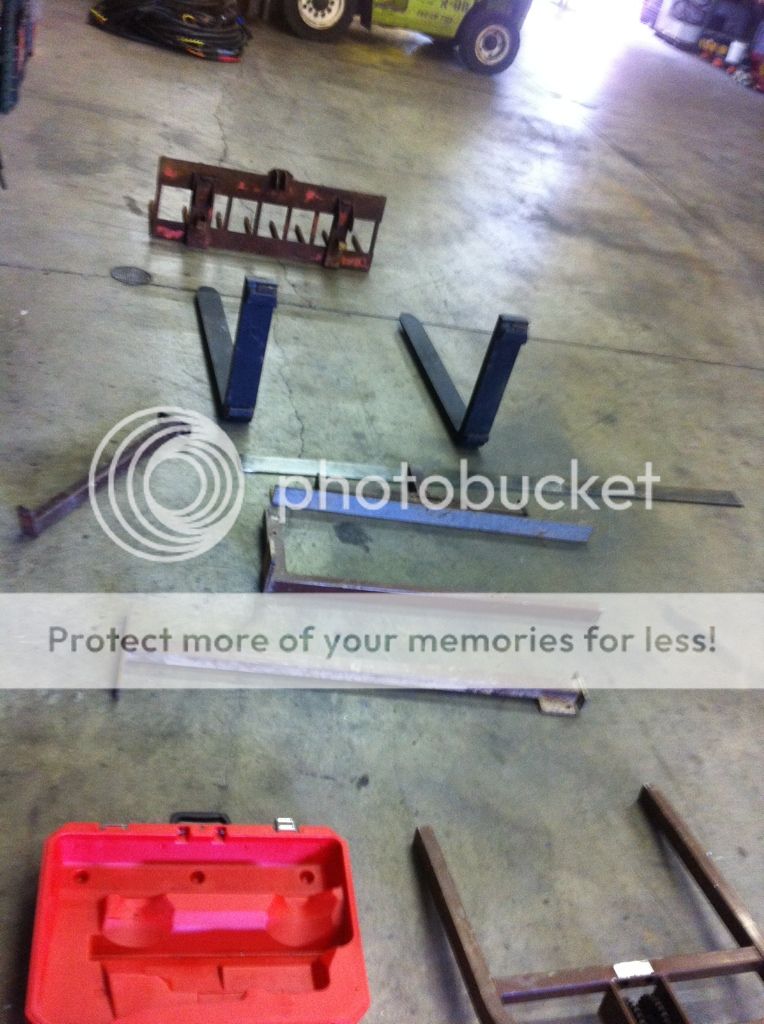
I did resuse the sleeved bushings off of the old loader frame.... Here are my sophisticated set of Freakin' plans...lol
bfdb0855.jpg

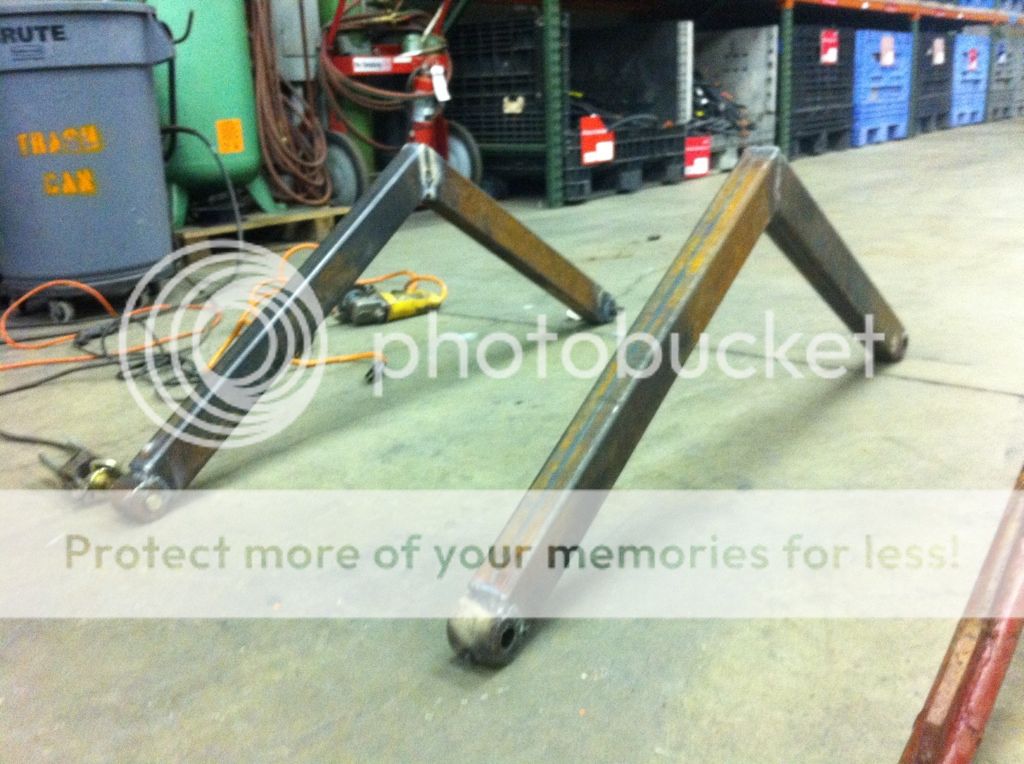
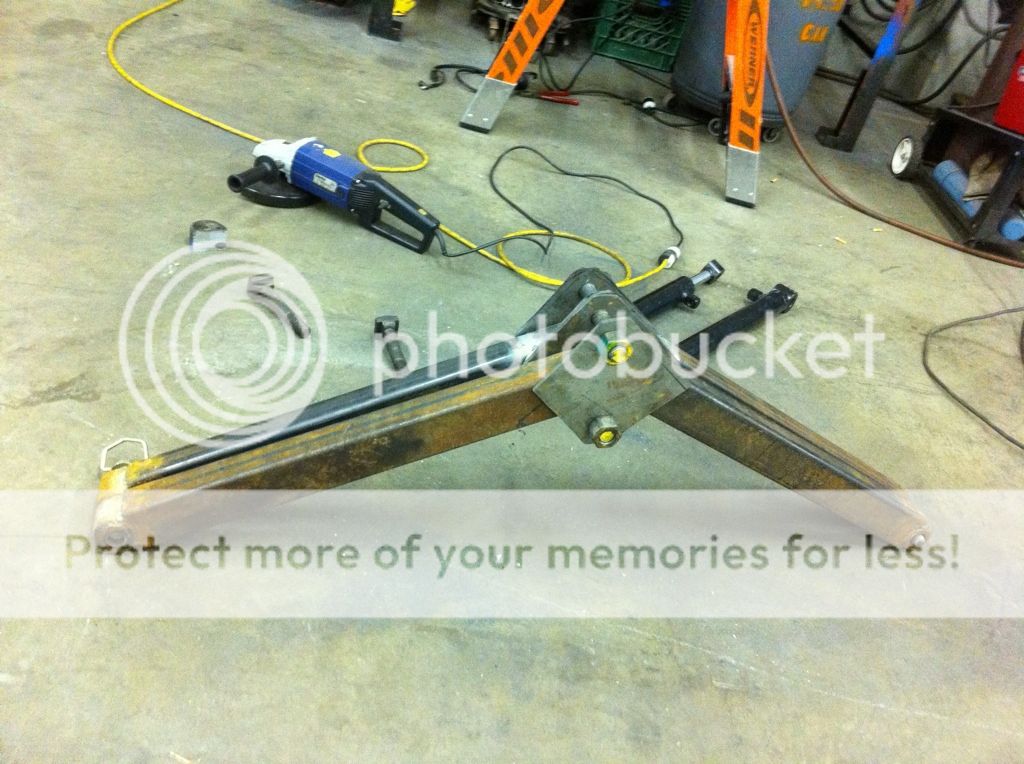
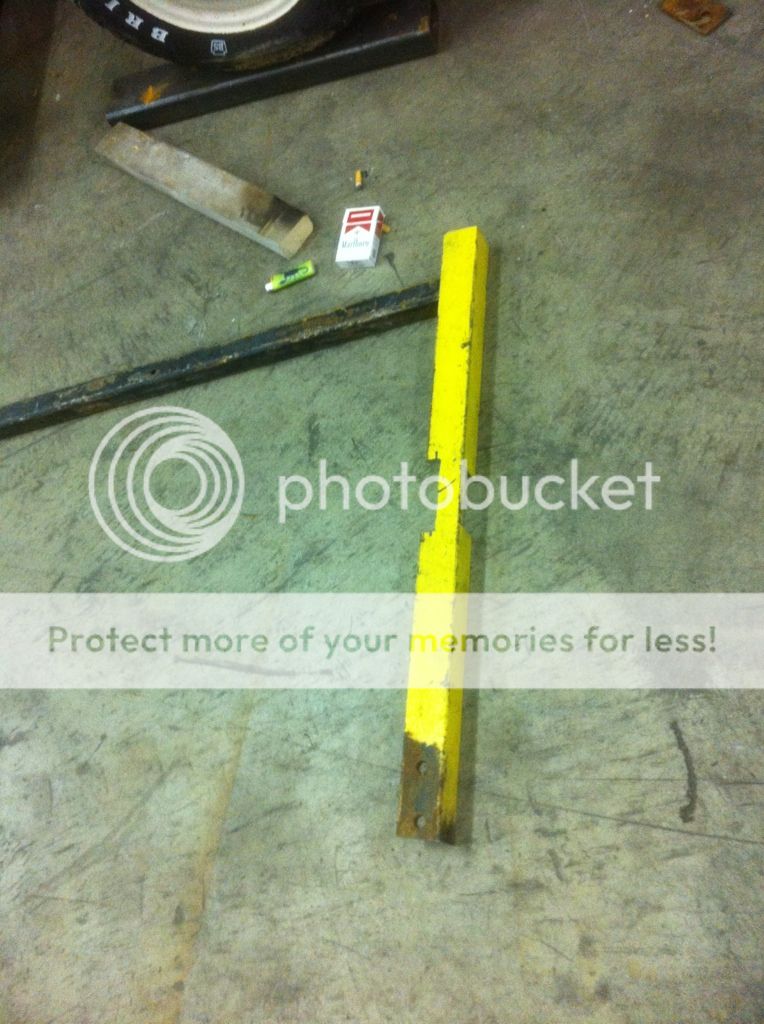
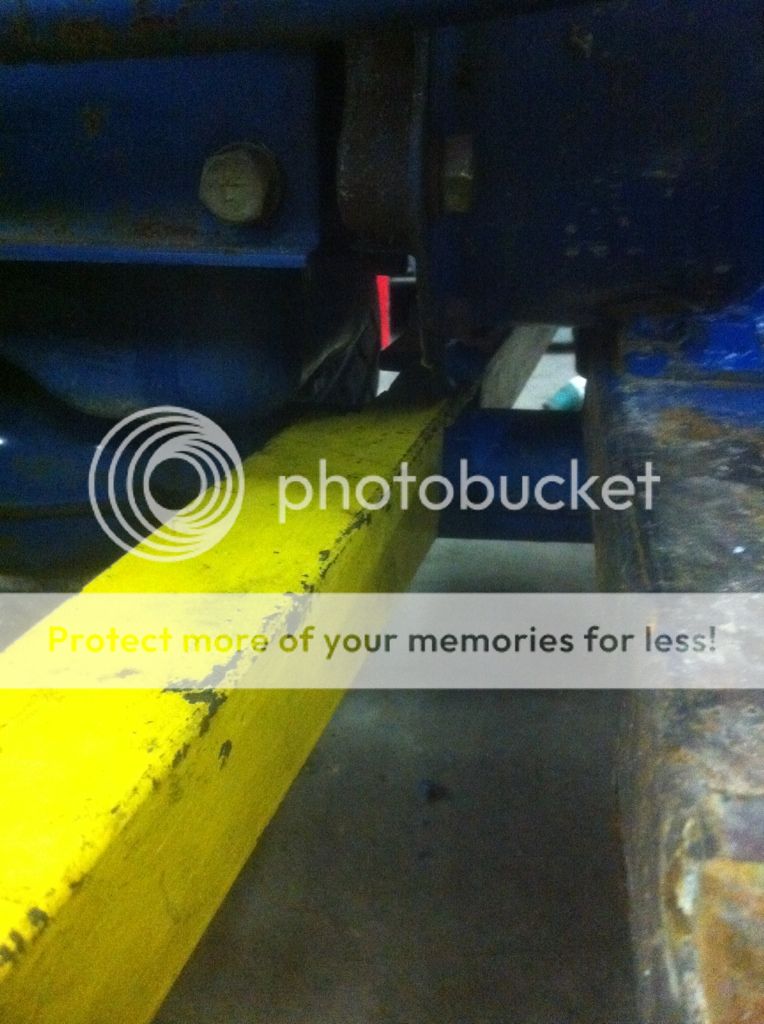
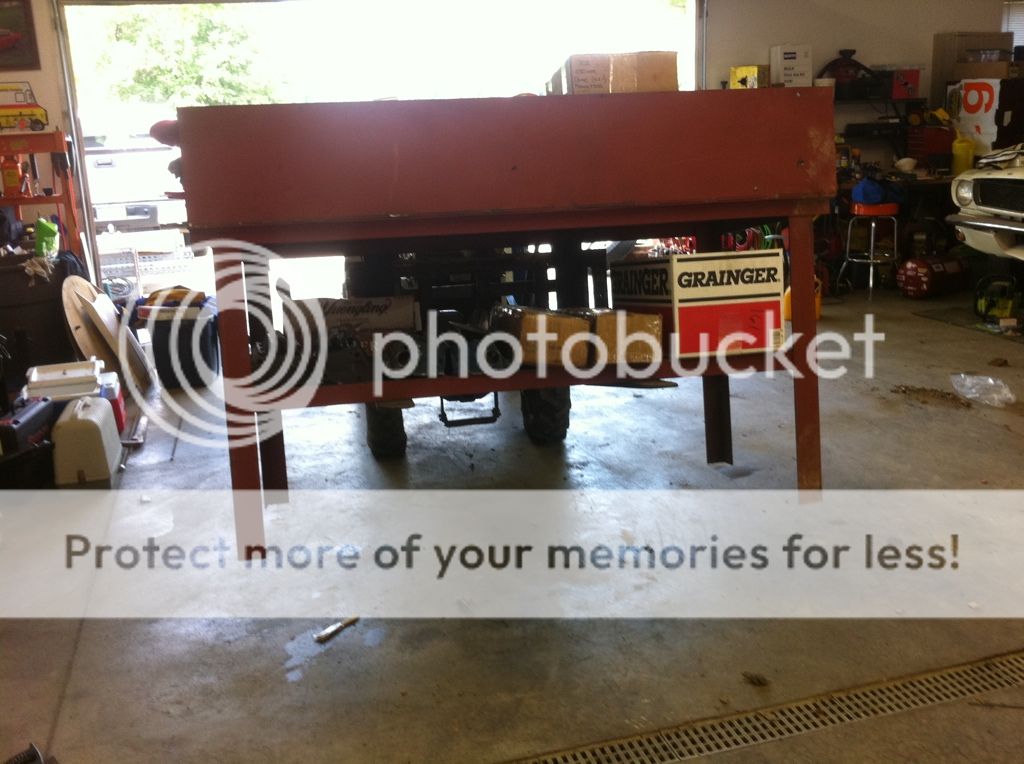
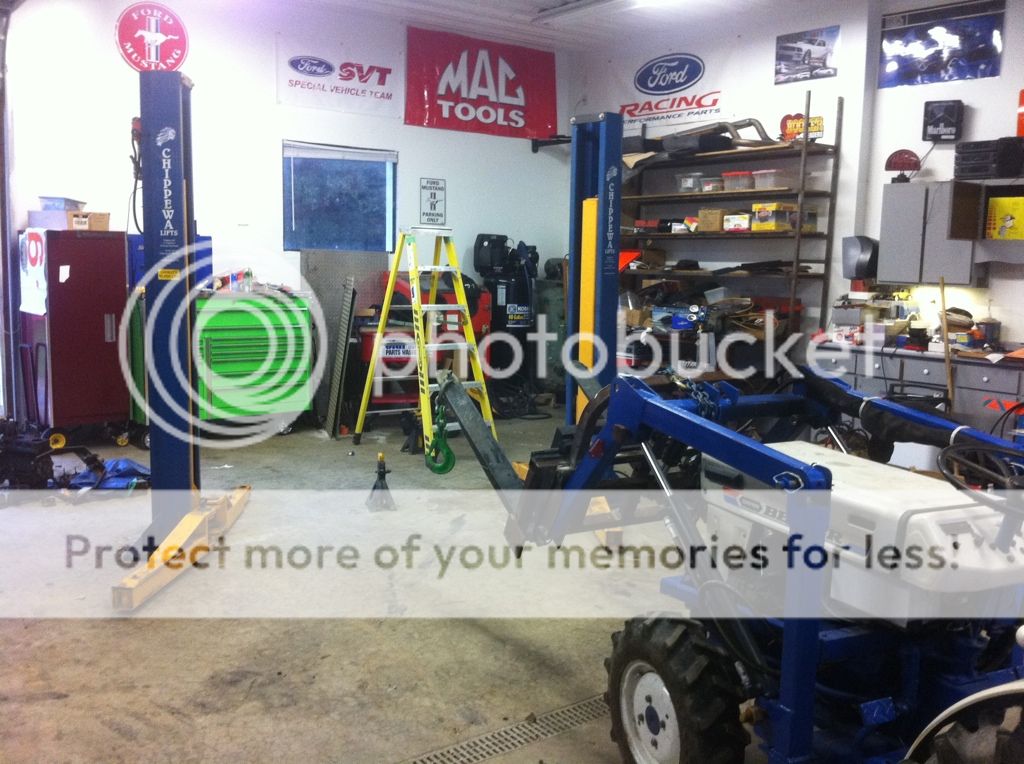
here is the start of the mockup....I used some 2x4's to get the propper angles...(no pics, sorry) easier and cheaper trial and error with free 2x4's...
839224bc.jpg

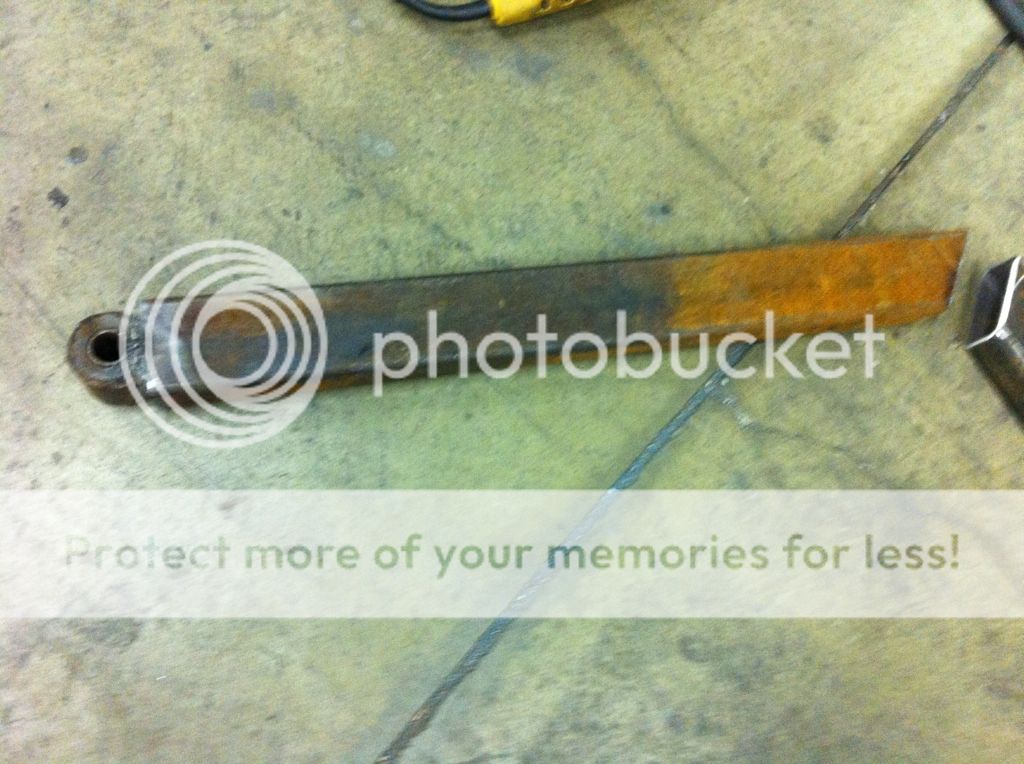
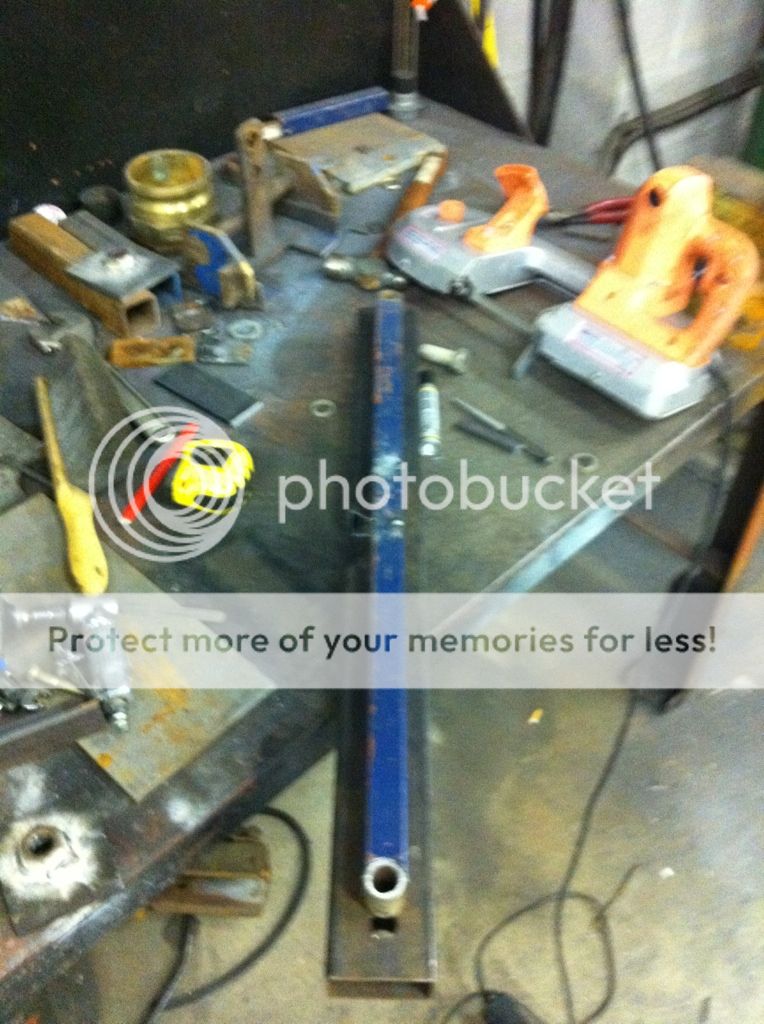
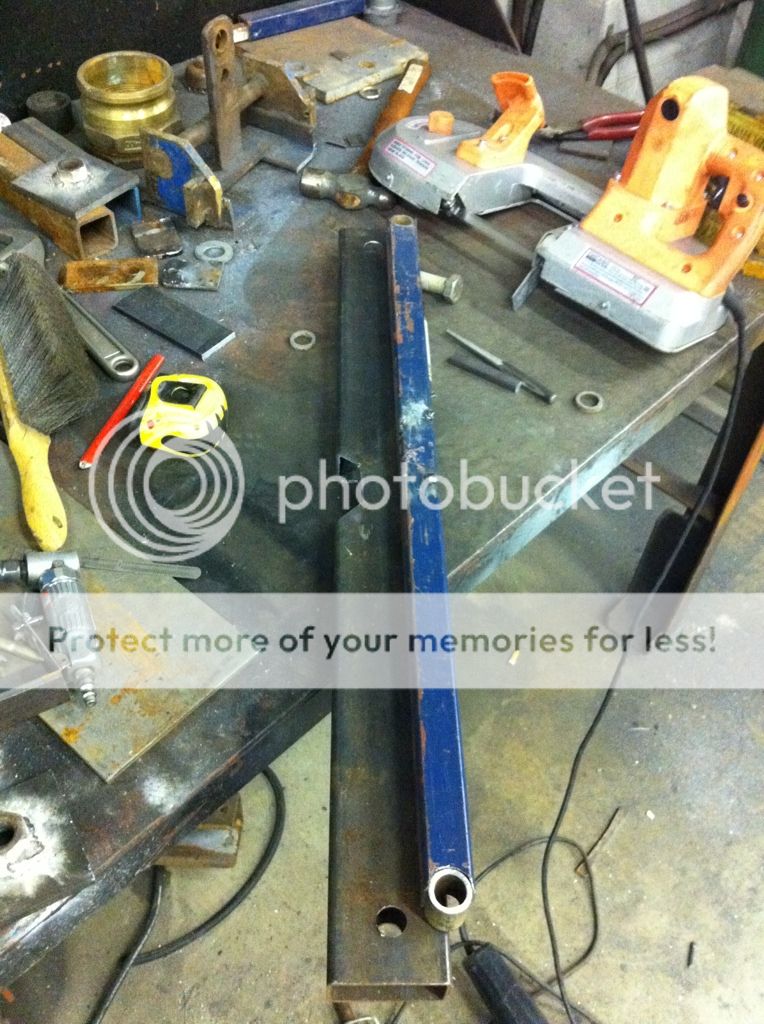
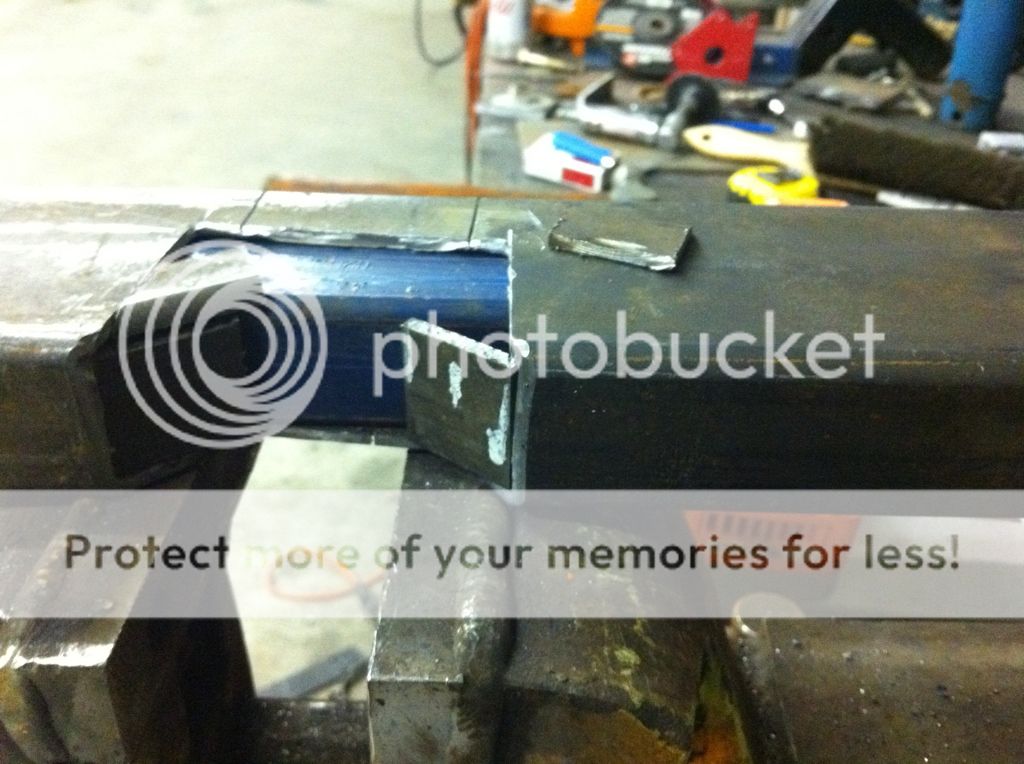
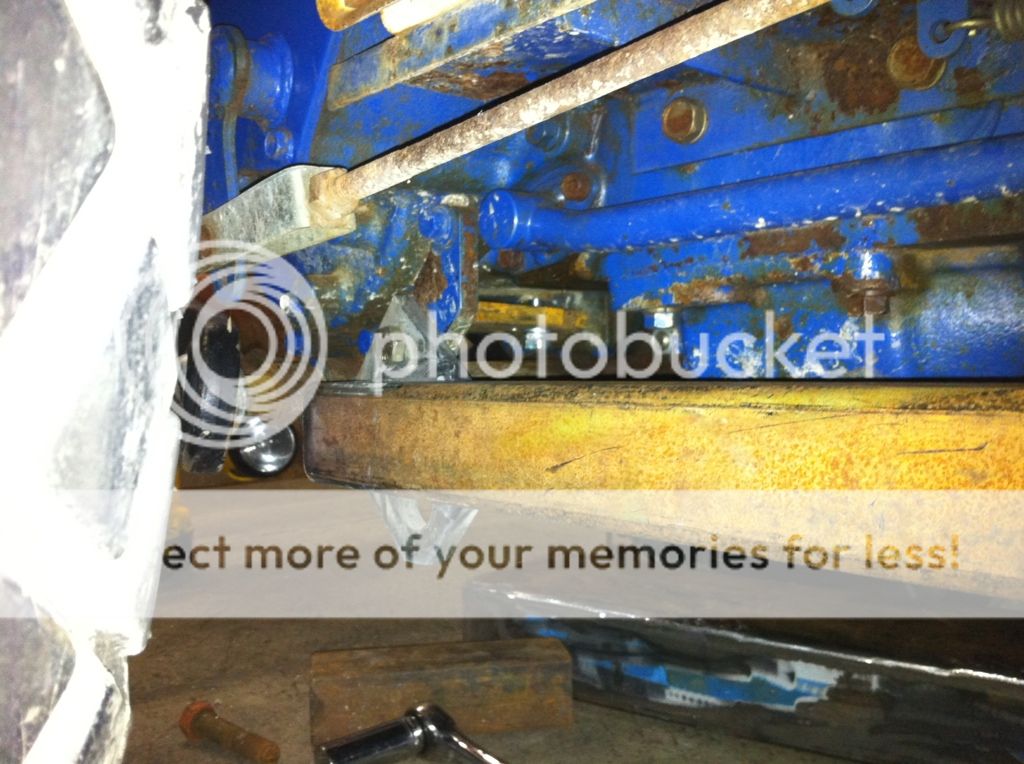
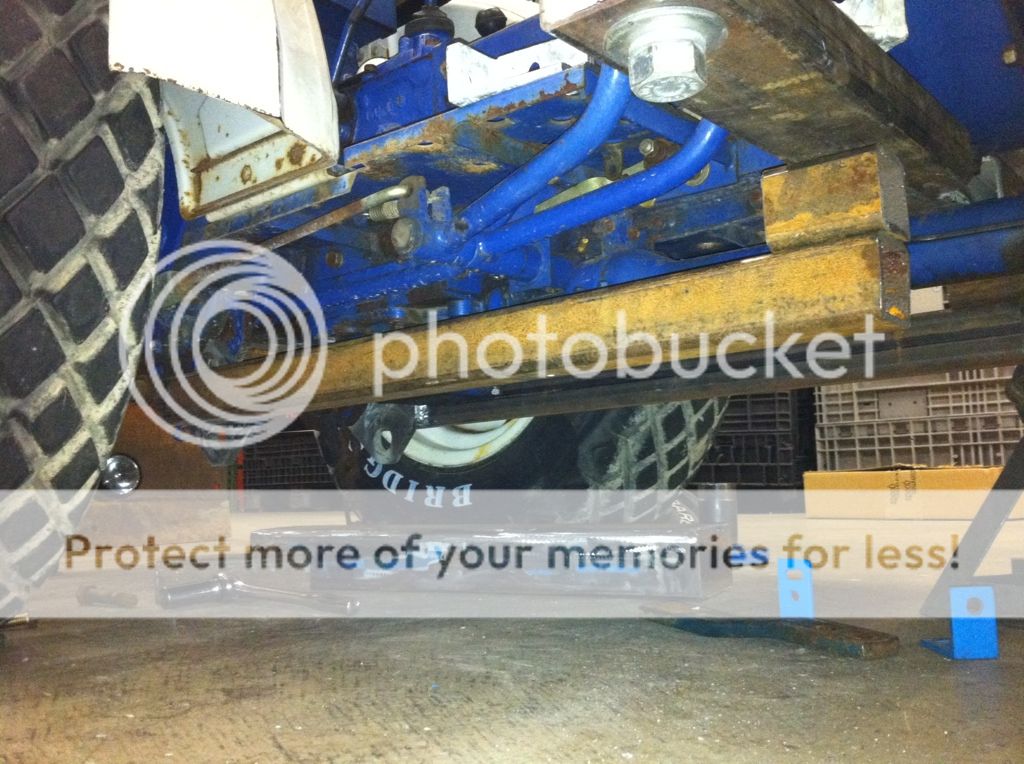
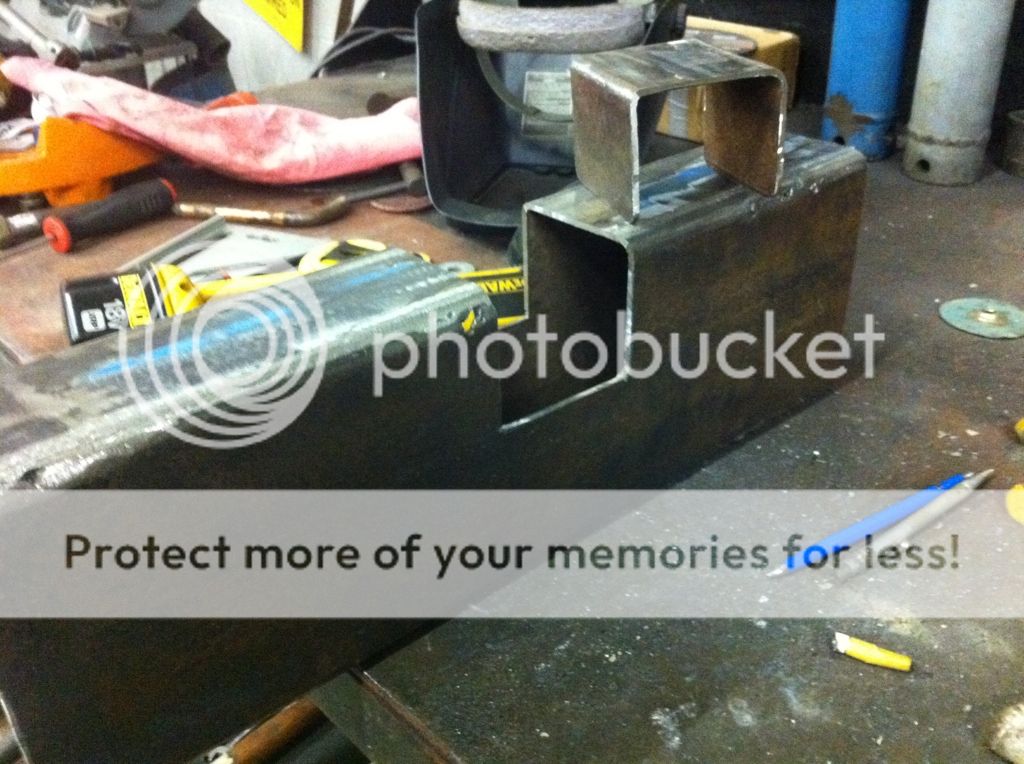
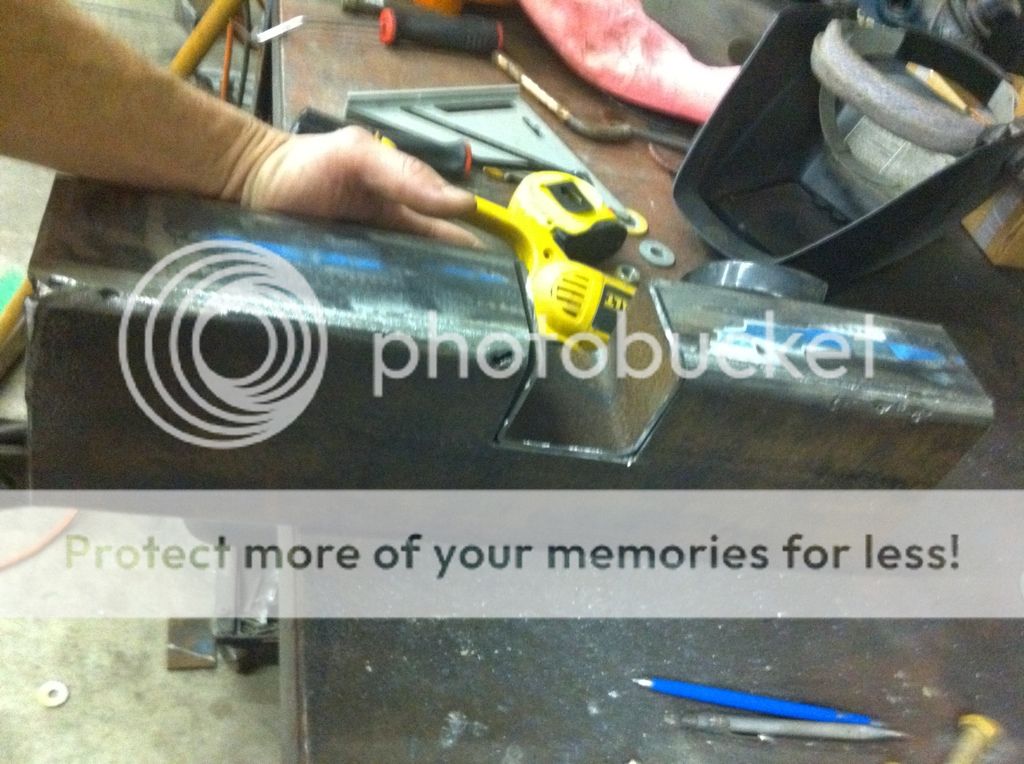
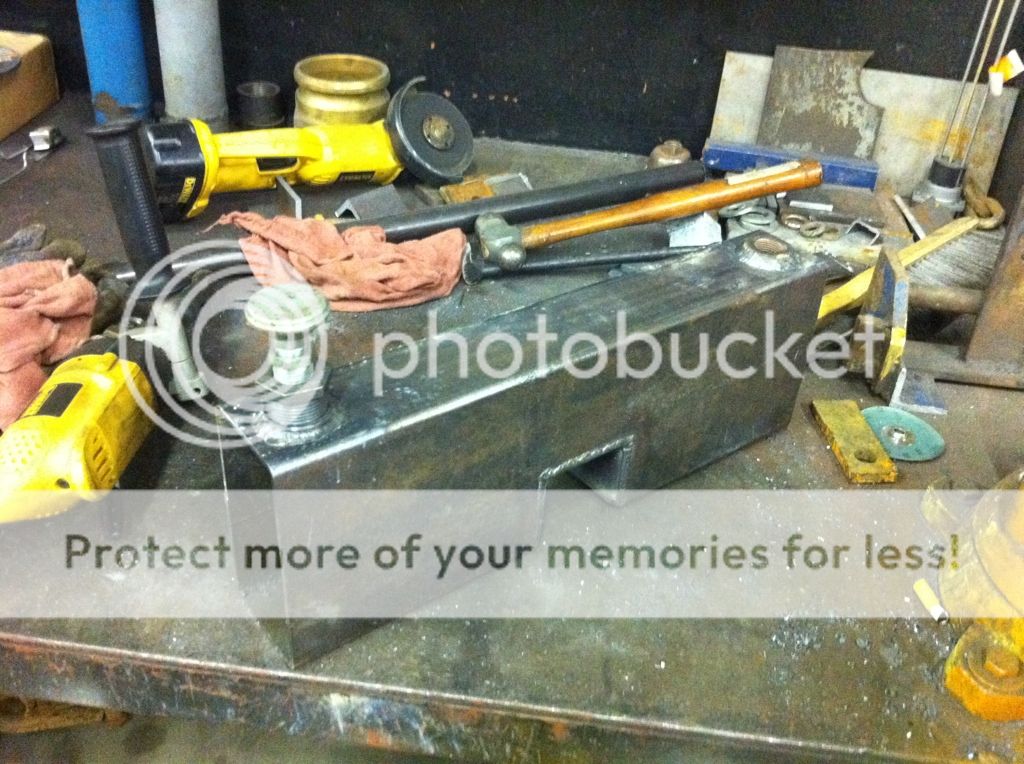
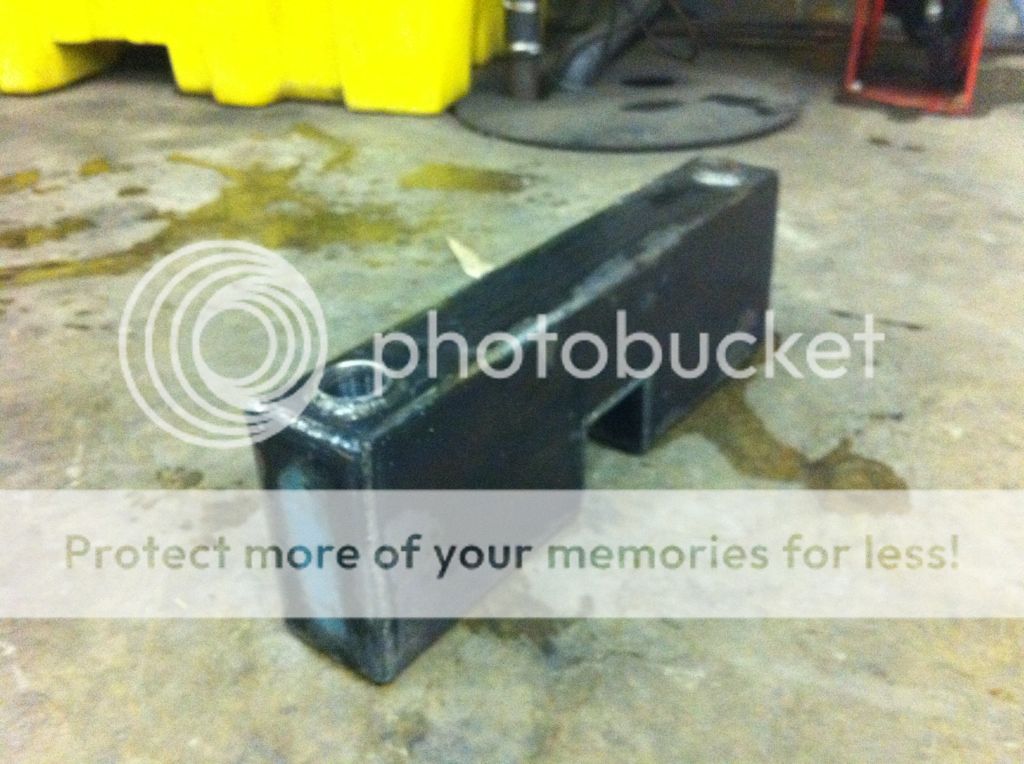
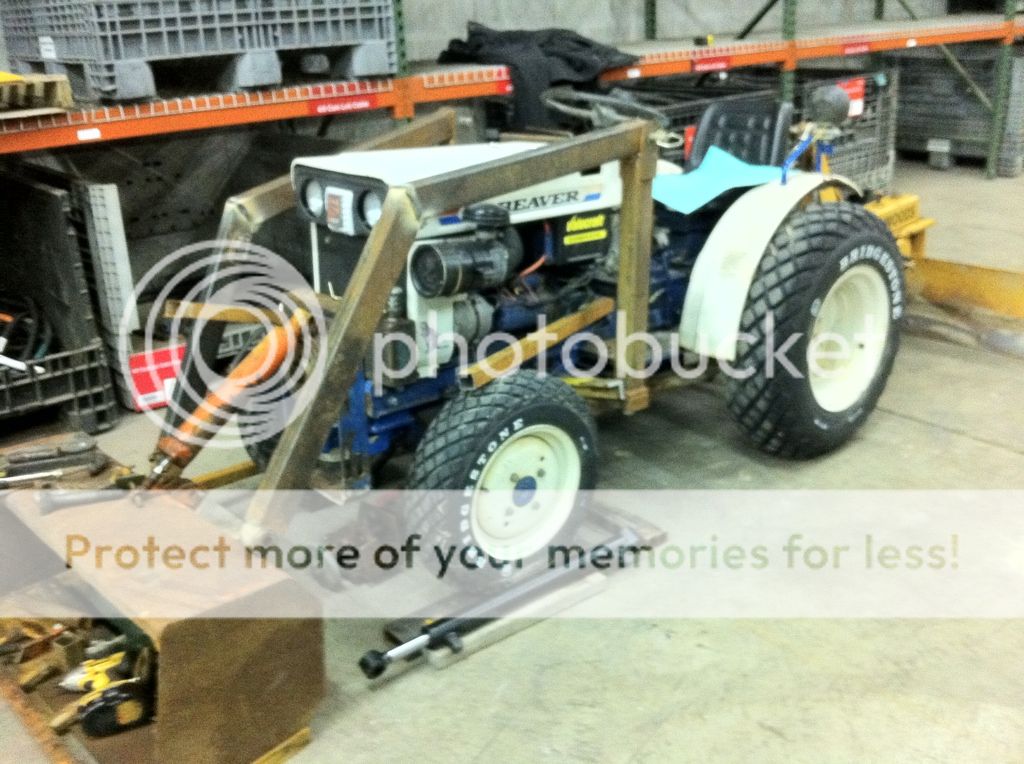
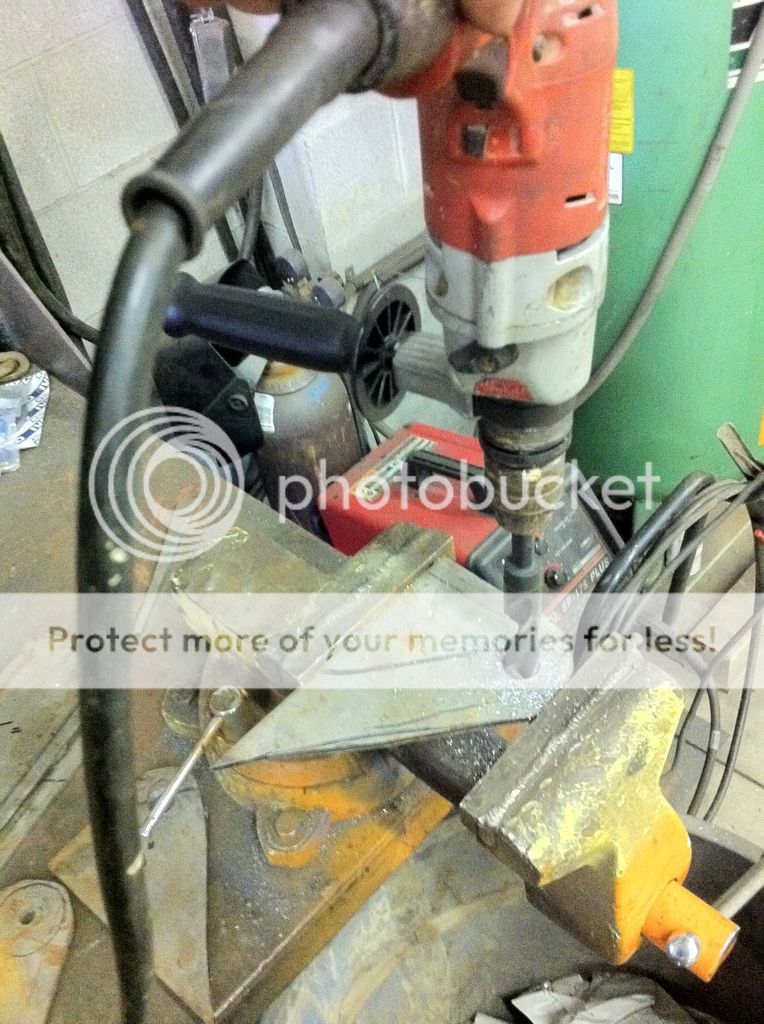
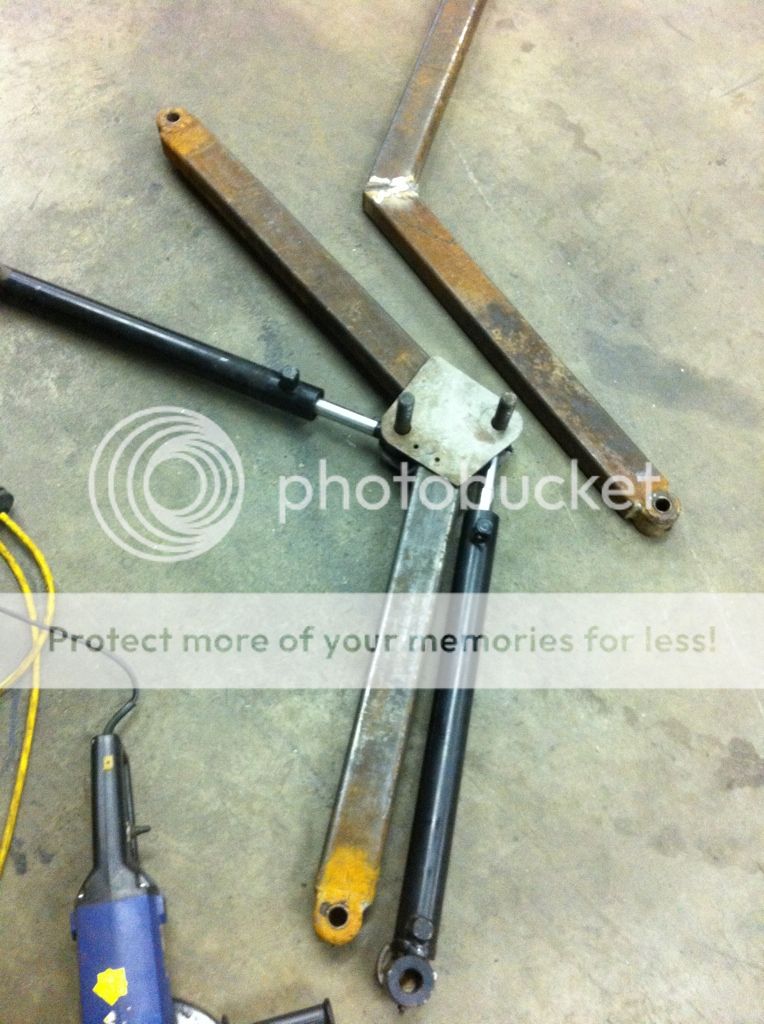
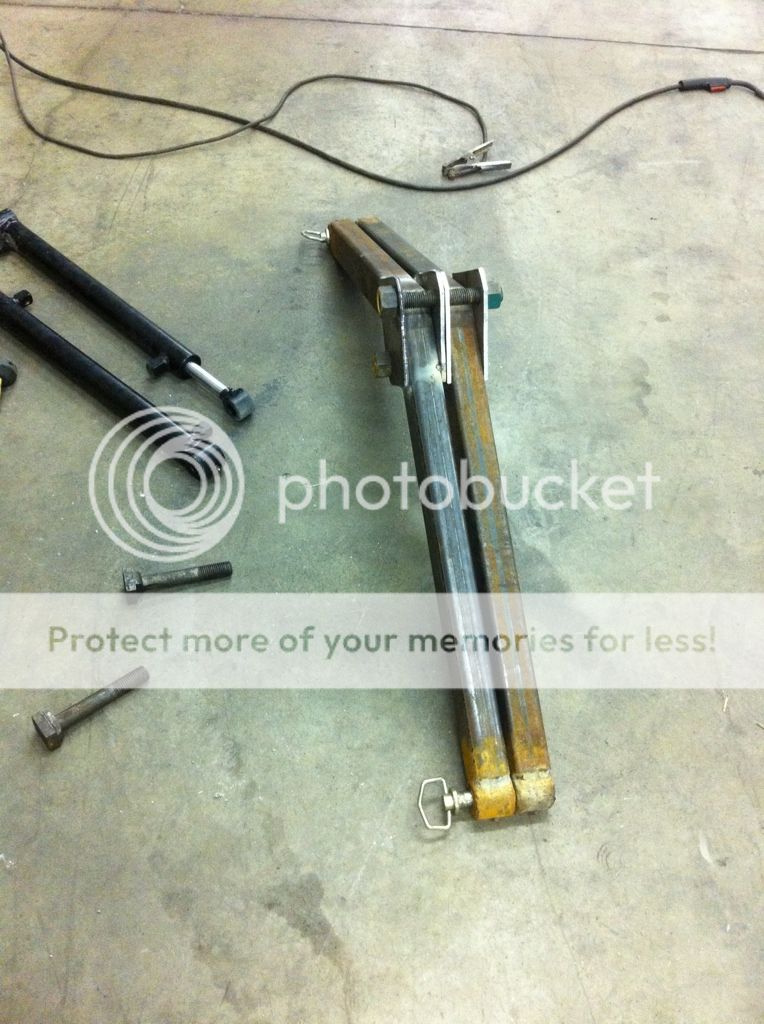
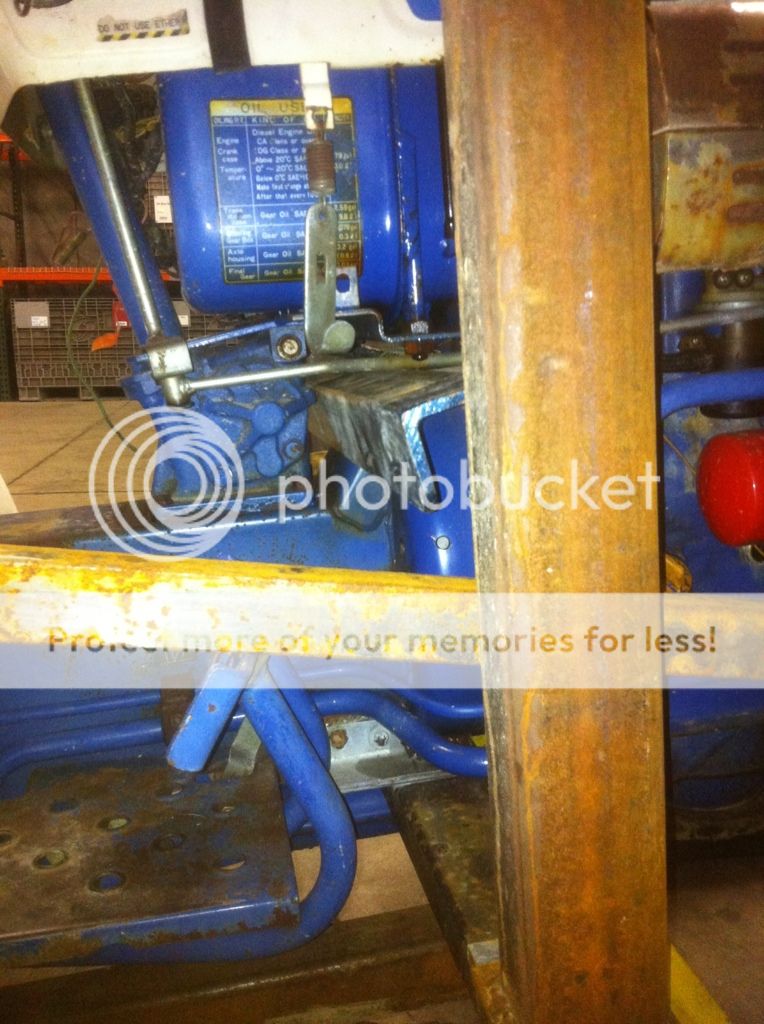
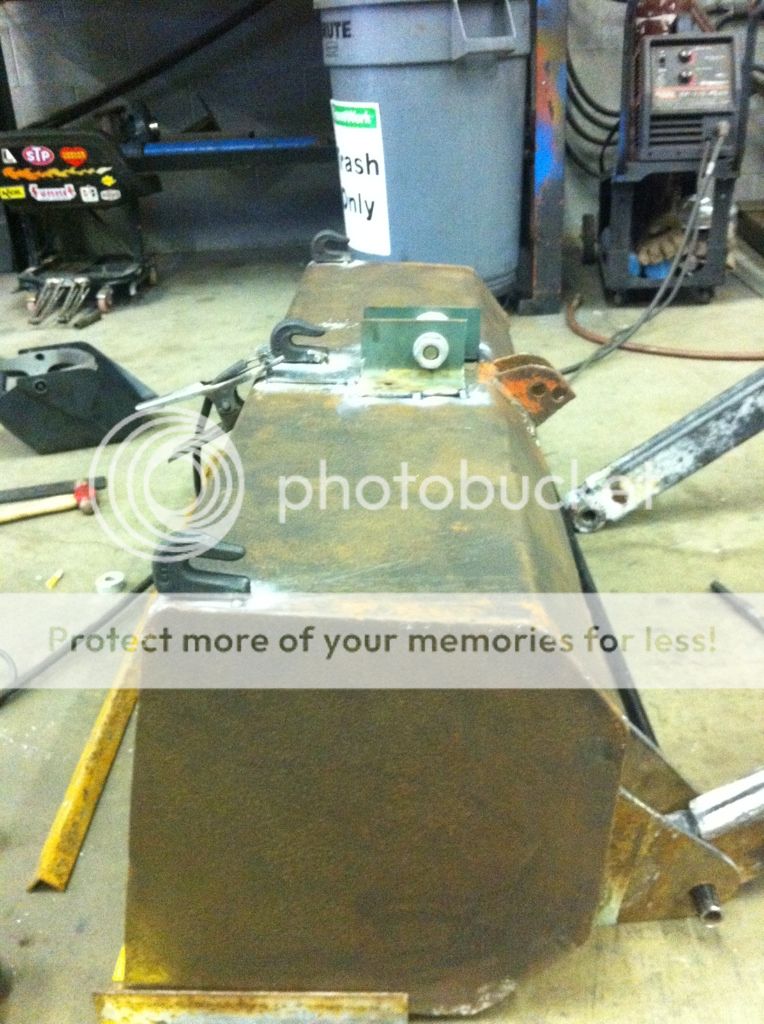
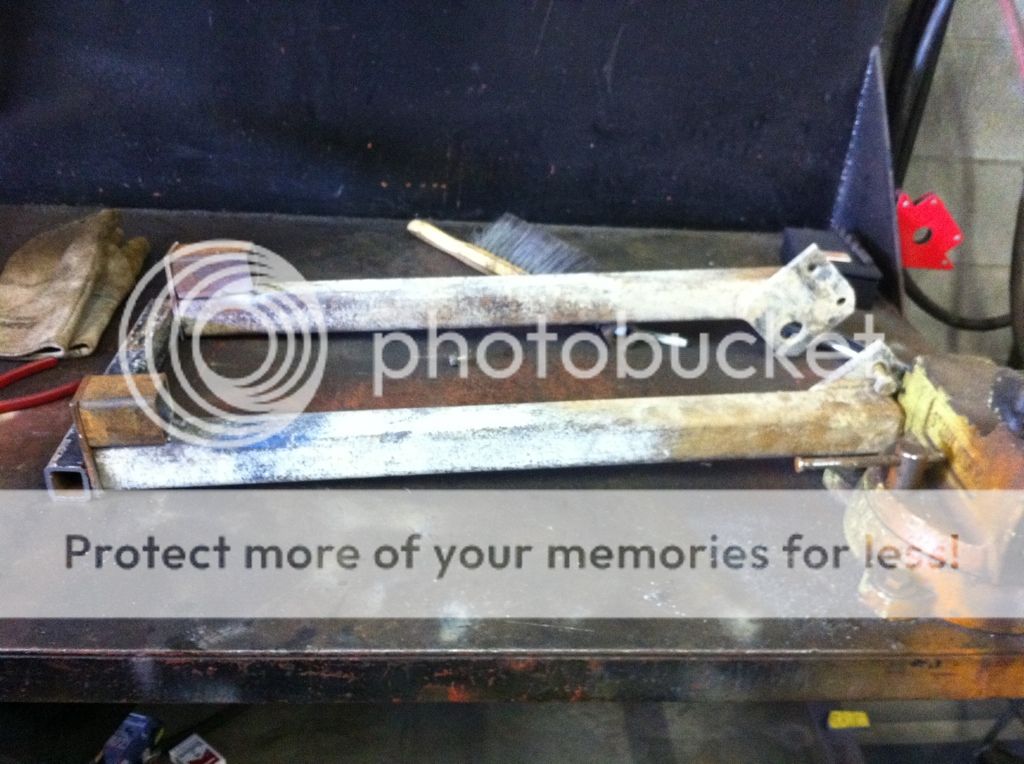
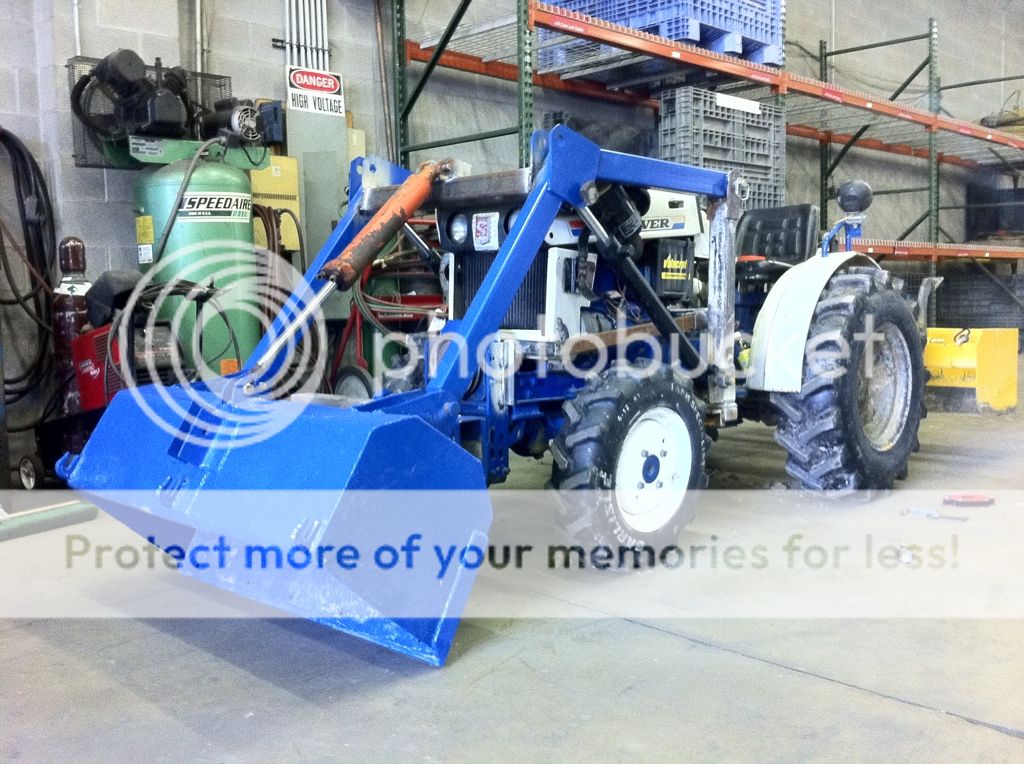
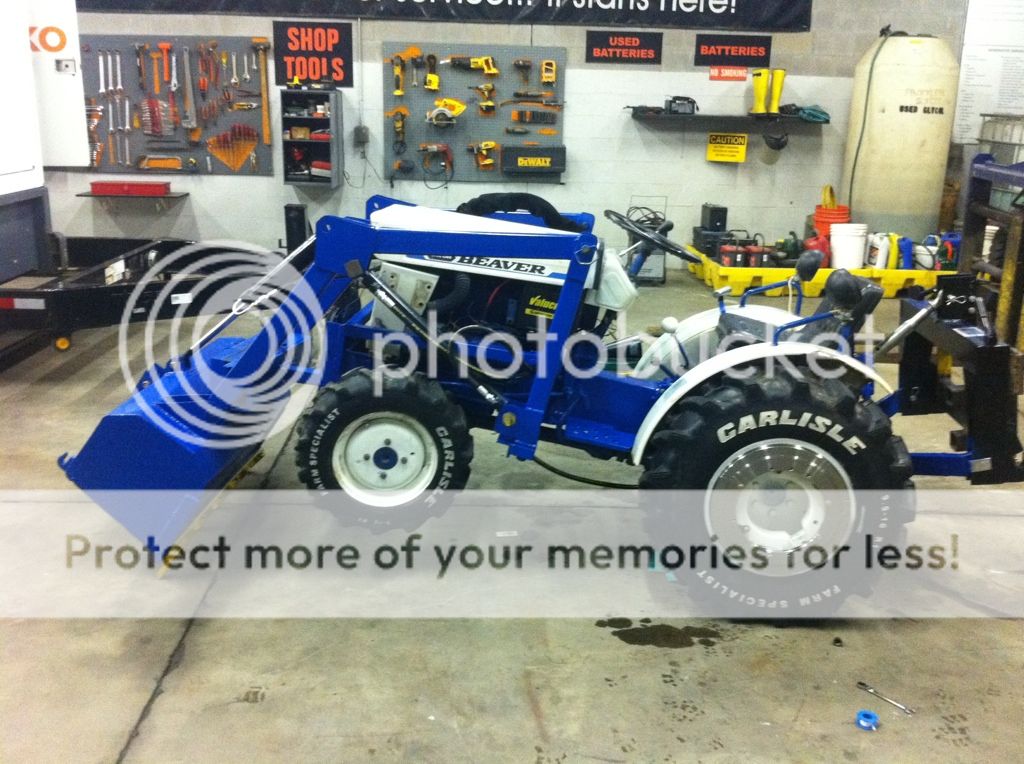
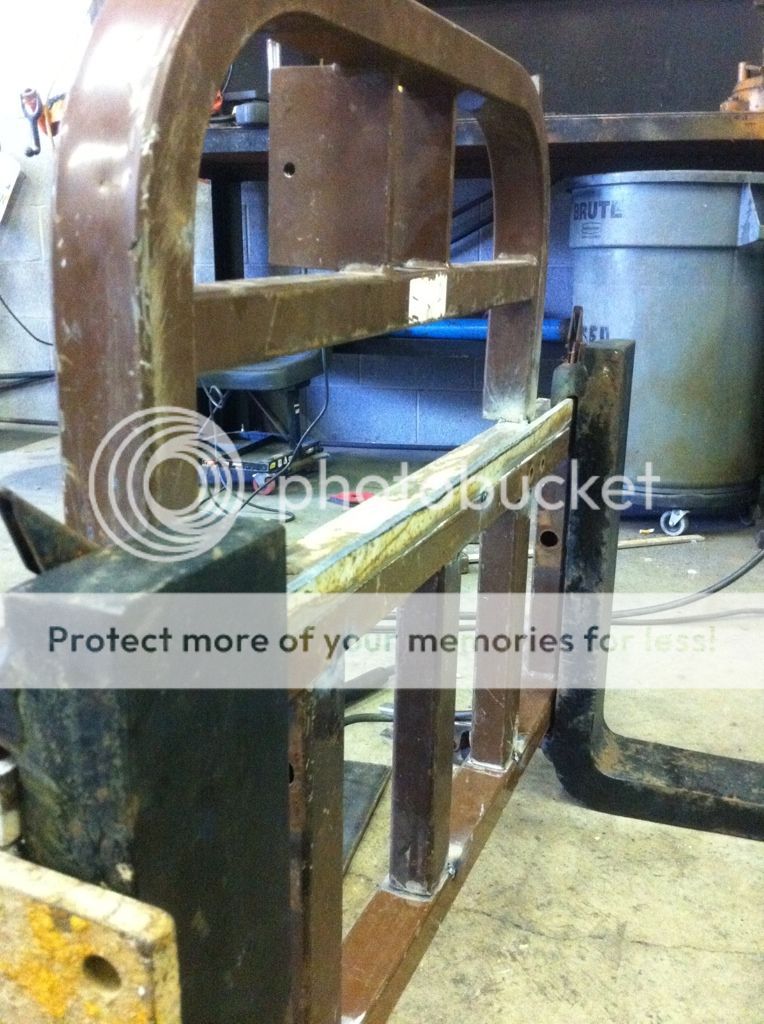
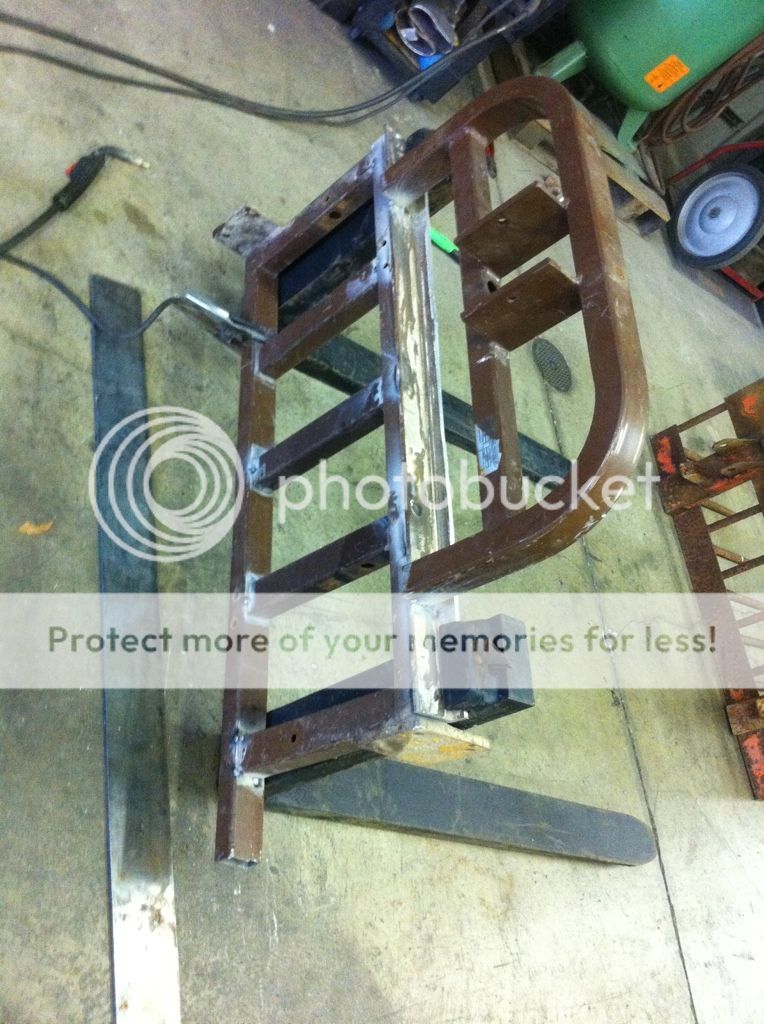
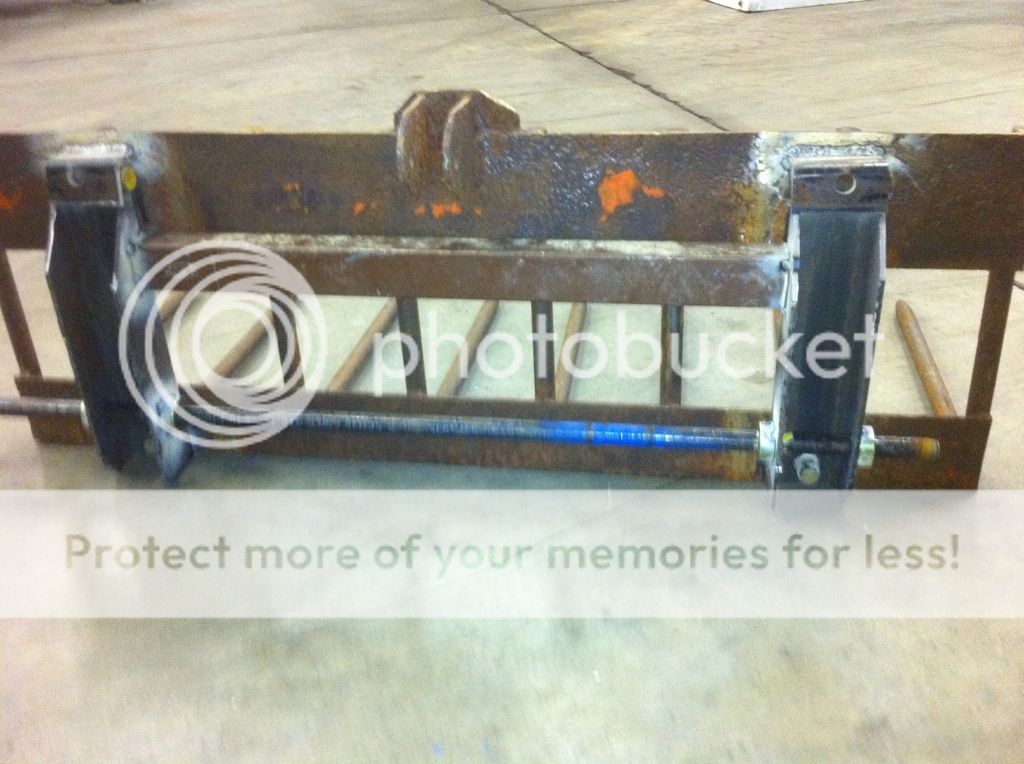
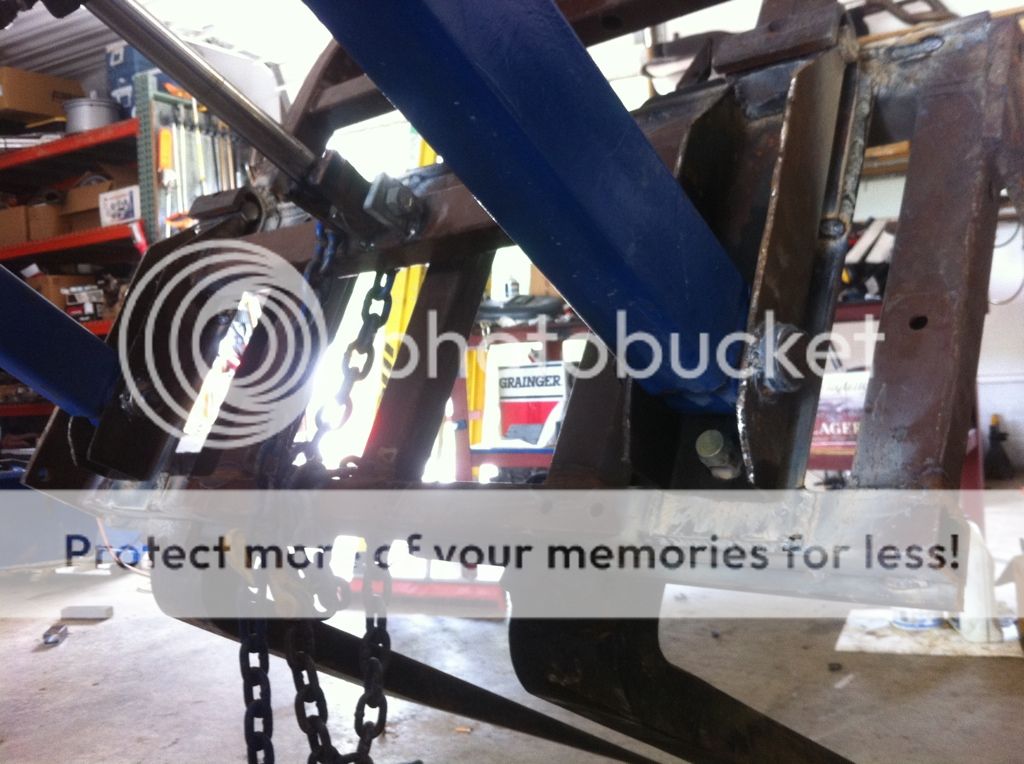
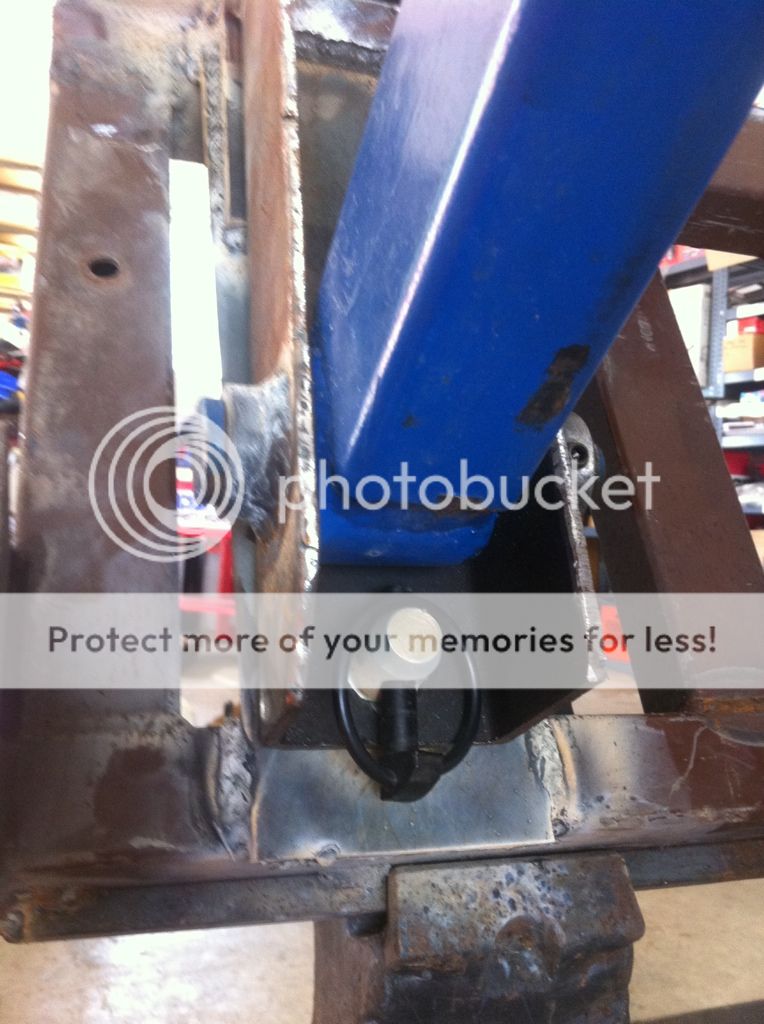
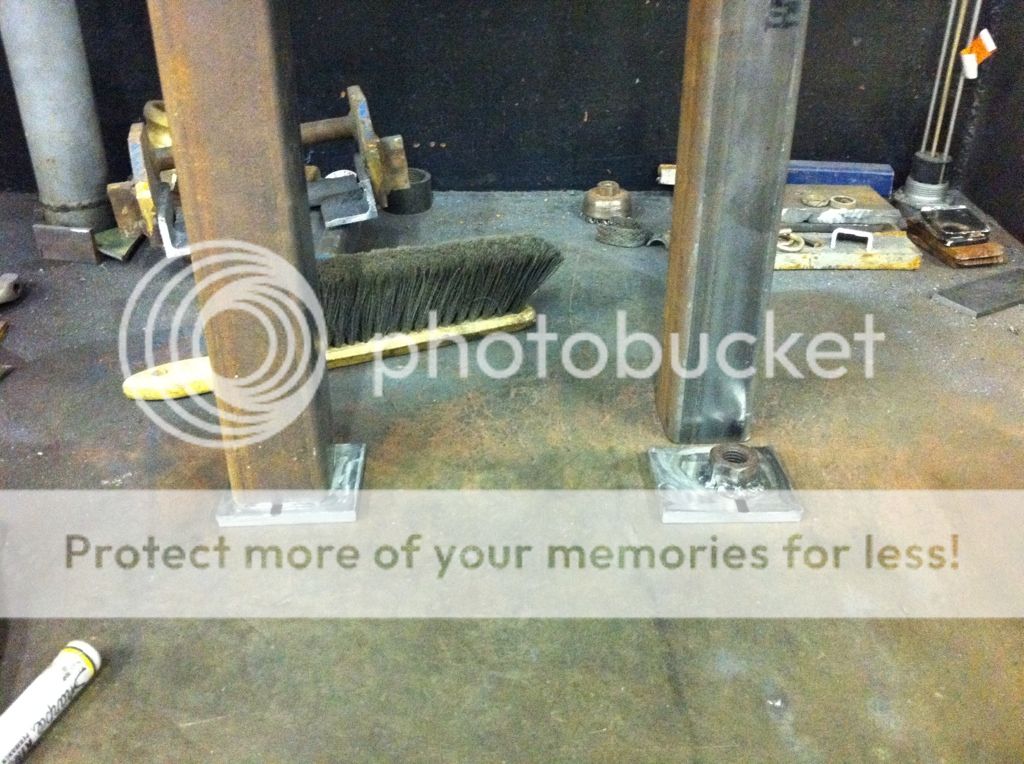
For the upright posts, I used 2 1/2" box tube, 1/4" wall. I used 3/8 plate and drilled 7/8" holes in the pivot plates and welded them to the tubes. I'll eventually box in the backside and add some more reinforcement to them.
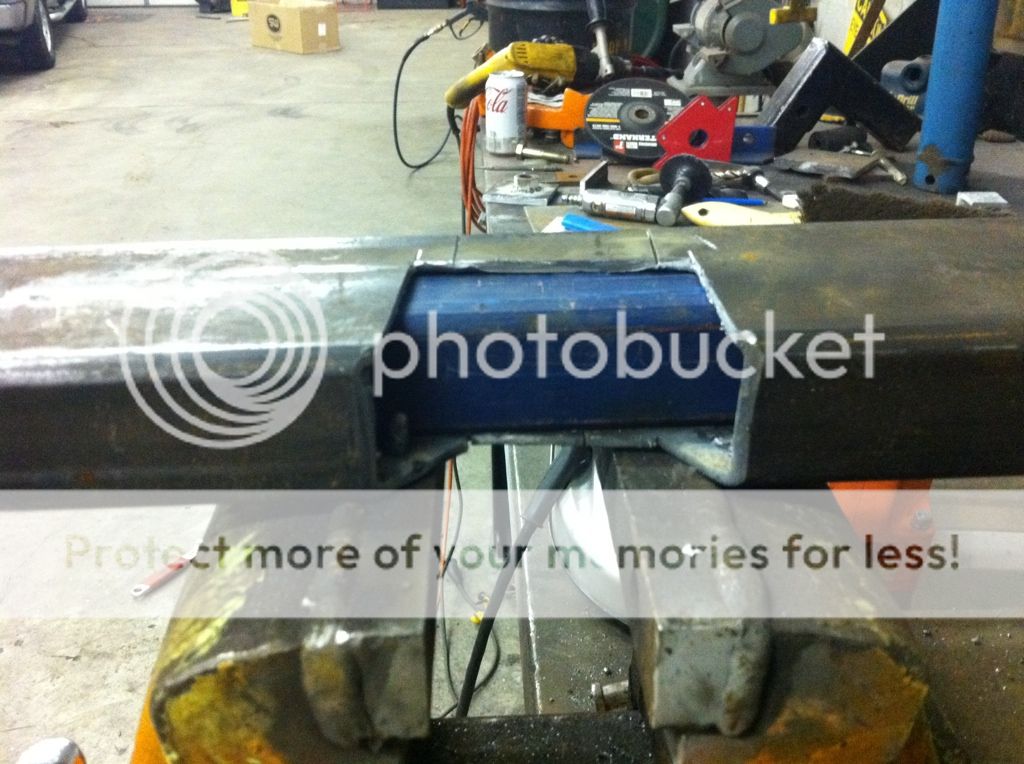
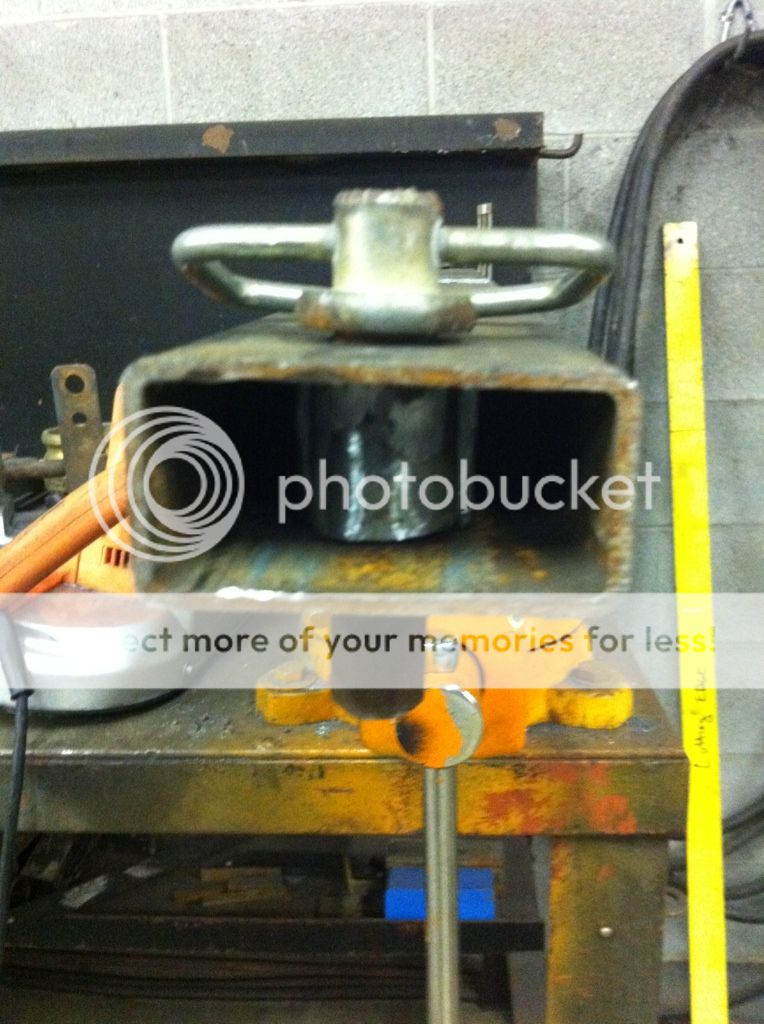
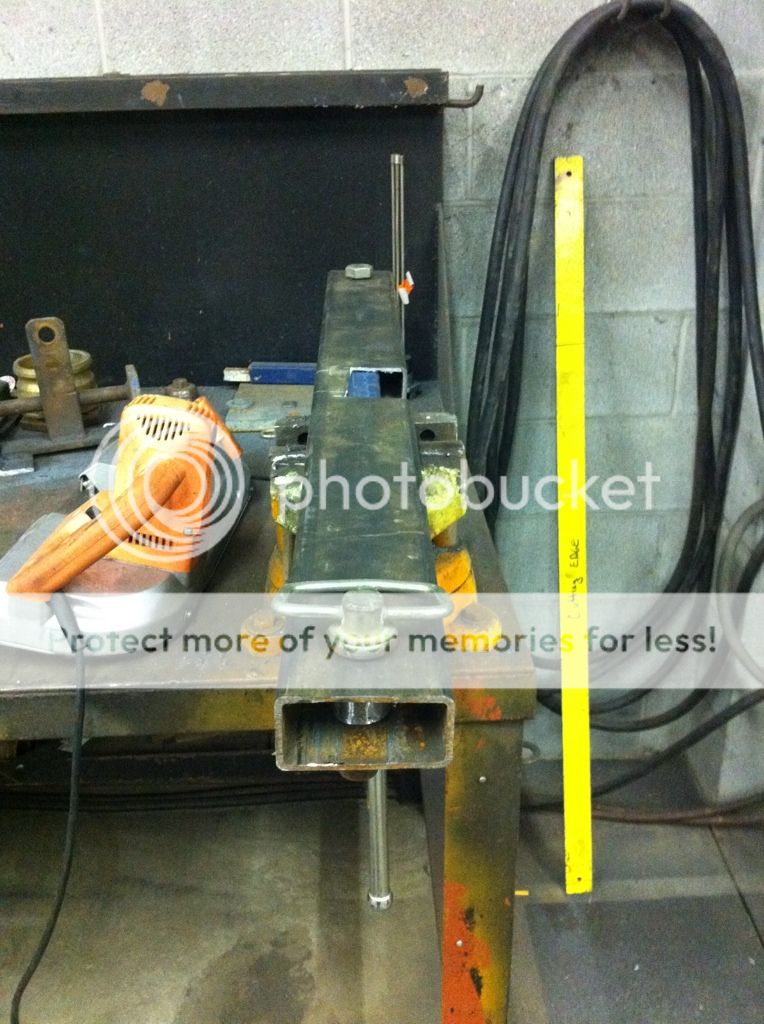
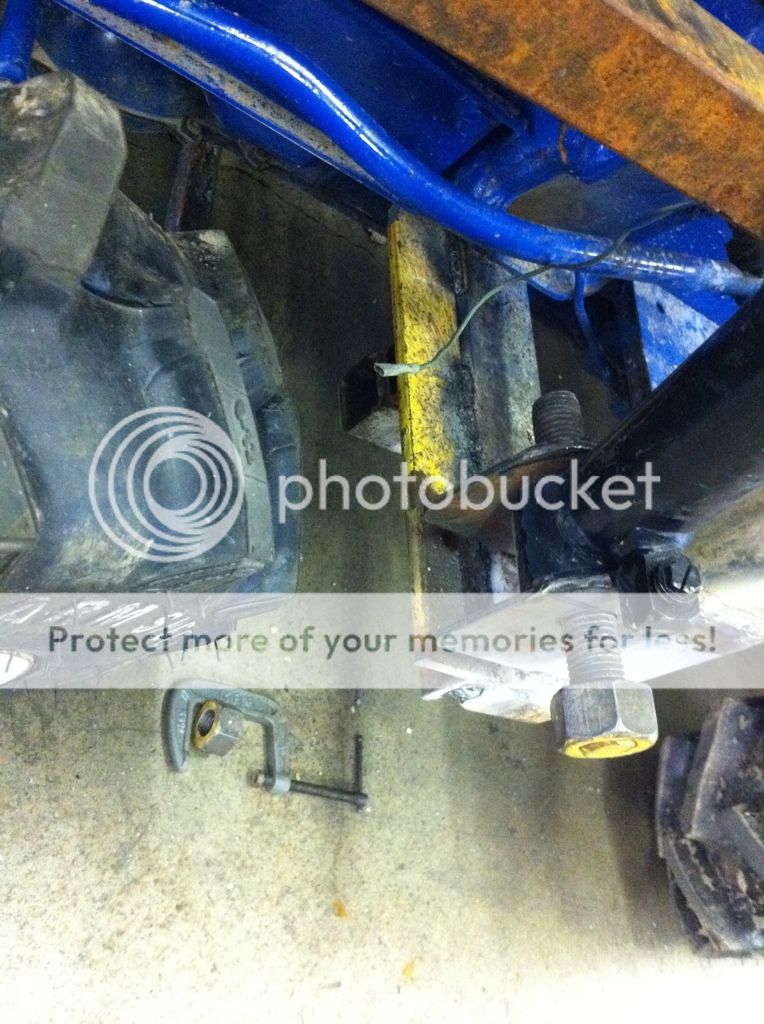
For the bottom of the upright tube, I used a 4"L x 3"W 1/2" plate. I drilled a 1" hole in the plate and then welded a nut on the topside of the plate. The nut will sit inside the box tube upright. I did this incase I want to ever remove the setup.
47b6d6ec.jpg
 
now it was time to build the boom arms. I had two 6 foot sections of 2x3" 1/4" wall tubing just laying around for a special project.... I cut the bushings off the old loader boom and squared everything up and welded them in place...they have bronze inserts that can be changed if needed. They use a 7/8" pin.
53a65b8b.jpg

f765fa9d.jpg

7c18608a.jpg

bfaf5bcc.jpg


I started with a 32" piece of 1 1/2" x 3" tubbing as the cross beam for the uprights. This is what the uprights and rear sub frame will hook into. This tubing is 3/16" wall. I then took a piece of 1" box tube, 1/4" wall and slid it inside. I did this to maximize support and minimize clearance issues as the cross beam will sit between the trans tunnel and the driveshaft. I did this to utilize ground clearance. I made a wide "V" notch in the center of the tube for clearance on the drain plug of the bellhousing. It will be fully reinforced and boxed back in before it is all said and done
7a675c61.jpg

70ec4bb7.jpg

then, after much measuring and spacing, I decided to make the uprights removable. I cut some 1" ID tube and notched the inner support tube to act as a sleeve for the 1" bolt that will come up through the bottom into the upright posts.
70b64097.jpg
 
  • Like
Reactions: Ashful
b8b31371.jpg

093e27e7.jpg

8d06af65.jpg

a52bc25b.jpg

with the uprights and boom arms almost finished, it was time to start putting pieces in place.
c0830adb.jpg

for mockup I'm using the one single bucket dump cylinder that I have. I cant afford to buy a matched set right now (new home owner) so I'll probably just use what I have for now until I can afford to put a twin dump cylinder setup on it, but will make it so I can easily add the twin cylinders down the road
5227c638.jpg

c2d8b958.jpg

cc0963d2.jpg
 
this was from the initial mockup before much welding had been done. Notice the clearance issues on the right side where the air cleaner is... I ended up cutting the mounting ears off the bucket and moving the arms out from 24" inside to 28"...I need to fab up a need boom crossmember and bucket cylinder mount.
94b2babd.jpg

I started on the rear subframe today. It will tie the cossbrace (under the uprights) into the rear. I'm using some 4x4" 1/2" plates that will be bolted to the rear end. From there 2x2"1/4" wall box tube will tie in on each side ofcross brace.I forgot my phone when I was at the shop today, so you'll have to wait for pictures. I hope to get 99% of the fabrication done tomorrow on my day off so I can start working on the hydraulics.

For the hydraulics, I have an Electric PTO on the front of the tractor. I'm thinking about using that with the aux oil pump that I got with the loader setup for faster cylinder times than the tractor hydraulics. Only issue I can forsee with that is the location ofthe hydraulic resevoir. I'm contemplating making a resevoir built into the boom as a cross brace out of 6"x3" 1/8" wall tubing......

Completed the rear subframe, built a Hyd tank, built mounts for the trans to crossmember and built more support brackets to help tie in the subframe to the chassis.
7900b569.jpg

2e890260.jpg

03425446.jpg

Started my Hyd tank with a piece of 1/8" wall 3x6" tubing x20" long. If I did My calculations right it should be close to 1 1/4 gallons with the knockout for the pto shaft.
d95789d4.jpg

88dc46a6.jpg

7292f8d7.jpg

Welded in 1/2" NPT bungs for the feed and return. And then a 1" bung for the fill/breather
7b5f37d5.jpg
 
a6e2abab.jpg

14c4713b.jpg

d6db9dfe.jpg


Did some measuring. With the 18" stroke cylinders should be in the 6'3" to 6'6" lift to the bottom of the bucket when level (depending on mounting tab location). should be plenty for my needs!
bae3da90.jpg

I still have to make some upright supports. I would like to tie the uprights into the front and tie the cross beam into the engine frame plates. I think I'm going to plate and weld the engine "frame" plates with some 1/4".

Worked on the lift cylinder mounts today. I made the upper plate long enough to use my current 3"x12" cylinders. Once I can afford the 18" stroke cylinders, I will trim off the extra plate and make it look a little more appealing than just a slab of steel. Lol. Plates have not been welded or even shaped yet. Just got rough measurements and drilled one set of holes.
I may cut the boom xmember off and lower it, just depends on how much OT I get the next week or two as I will use the current twin 3x12" lift cylinders for the bucket curl.
7de72ce6.jpg

879b886f.jpg

Everything on the loader setup has been made removable, only exception are these brackets welded to the trans tunnel. Those will remain there forever...
ff07f451.jpg

e63047e5.jpg
 
I went out of town for about two month to work the super bowl... I ordered new lift cylinders while I was gone, and Got back into the groove this week. I ended cutting the lift/boom arms apart and changing the angle to push the bucket out a little farther. I ordered the new cylinders, and was able to fab up my new boom arm mount/reinforcements. This was very time consuming as the motor on my ancient drill press died, so with a 1/2" milwaukee hand drill....
ee1c577e.jpg

45bd821d.jpg

cd57d2c8.jpg

fcef5979.jpg

122d4c78.jpg

a43b83f9.jpg

1e6bc5f4.jpg

f5d6eb60.jpg
 
82b0c8b7.jpg

de851994.jpg

6c2a6cbb.jpg

a645a0fb.jpg


I also made some modifications to a piece of 2" angle iron that was 1/2" thick. I notched it for the driveshaft and the bellhousing nuts. This will get welded to the main cross beam for additional support. I also found a piece of 1 1/2" angle iron (1/4") that will slide between the two uprights and underneath the battery/fuel tank. I'm going to drill and tap the uprights and then weld some small tabs on the upper cross brace, again so everything is 100% removable. Once I get that done, I'll use some 1 1/4" box tubing from the uprights forward to the front frame crossover.
bd83dd3e.jpg

3a66921f.jpg

a89e2b79.jpg

b3b864f6.jpg
 
ace6bd73.jpg

Was able to get some work done the last couple days. I rebuilt the bucket. I added new pivot mounts and a new curl/dump mount. I didn't have thR tractor at work so I haven't welded in the cross tube yet. I ground down all the rust, rewelded most of the bucket welds and added a new 1/4"x3" cutting edge. I even made a tooth for the one missing on the tooth bar. Then it was wire wheel time, followed by POR-15 metal ready. (spray on bare and rusted steel and turns white. It gives POR-15 a zinc phosphorous coating to adhere to). I used POR 15 chassis black then misted on some true blue while it was still tacky. Another coat followed by some clear and she'll be good forever!
All i have left to do on the fab Is install the dump cylinder crossmember, then it will be ready for hydraulics!
2661a539.jpg

3c53c64c.jpg

df0280a3.jpg

32e5935b.jpg

4b9d361d.jpg

60dc5311.jpg

a8d4af2e.jpg
 
Well, I got all the fab work done this week. I shortened the lift cylinders (removed extra material from the shaft when it was fully retracted), added the boom crossmember, made up a removable front hoop, and welded in the center tie support, as well as the rear subframe. All that is left is running some hydraulic lines and hoses and ordering a joystick valve. I don't know if Im going to tap intothe tractor hydraulics or mount my aux pump setup yet.
this is the rear subframe arms. they mount to the rear, right where the three point pivot shaft is. you can't tell from the pics, but the 1 1/2" cross tube bolts on, and then the front of the arms bolt into the main crossmember
839438b7.jpg

b53006c3.jpg

This is the front hoop. It ties the uprights into the front frame crossmember. I still have to drill two holes to boltor pin the removable hoop section into the upright (reciever)
c8d7d547.jpg

bf123b21.jpg

8a0d6762.jpg

583c76fd.jpg

6b374761.jpg

1b3cd56c.jpg
 
4db847a0.jpg

6025df3f.jpg

18a65a12.jpg
 
  • Like
Reactions: vinny11950
I got all the hydraulics plumbed, other than tying in the adapter because I need to get three longer bolts. I mounted the valve to a plate that bolts on the upright. Everything is tucked out of the way from heat, any moving parts, and high vibration areas. I used about 2 1/2' of Parker hose wrap on the hoses going along the boom arms.
I originally laid out the hoses to tee them at the center of the boom cross member, but I didn't like the way it looked or the way the lift cylinder hoses laid. I ended up running down to a napa truck store and had a 1' hose made up with a jic 90 on the valve end for clearance issues. From there it's tee'd for both the boom up and boom down. I made sure the short hose came into the center of the tee, and same length hoses so both cylinders (hopefully) lift equally. All the other hoses are 3/8 NPT 4000psi hoses from Surpluscenter.com. I used swivels on both ends for ease of installation. The bucket curl/dump circuit is just two hoses because I only have one cylinder for now. The feed to the joystick valve follows the factory routing along the floorboard up to the Hyd tap on the side of the case. The pressurized return follows My fabricated crossmember then run along the rear subframe and comes up in a hole at the rear of the driver side floorboard.
I flushed the system and filled with fresh Hyd fluid and am ready to put her in some dirt! I just need to install some rubber coated hose clamps and some wire ties to finish up the hose installation.

95aa8ad4.jpg


The muffler cover is getting coated... Plenty of clearance from heat..

e630ebe6.jpg

4d4c4fac.jpg

51e32e5b.jpg


Clearance on the hood is tight, but no rubbing anywhere. Hoses are succeptable to chaffing, so you should pay attention to any areas where a hose is contacting a metal surface.

78e17176.jpg


3011a66d.jpg


And while I was at it, I painted some other things...

f88c26f0.jpg

734e0ba8.jpg
 
  • Like
Reactions: pen
After months of fabrication, blood, sweat, tears, trials and tribulations...she made her first stroke on her own.
The first Hyd block adapter had some issues.. When i drilled and tapped the 3/8 NPT threads, they were too close to the bolt holes. Once the cylinder bottomed out...she leaked like a sieve. I thought it was the orings at first, so I got fatter O-rings.. Negative....
Took the last cylinder I had and chopped it up again.. Learned my lesson and used a 1/4 NPT this time....


22af0920.jpg


I got a real end mill and "machined" it for brass washers instead of Orings.

259b231f.jpg

f0de28a4.jpg

80ef84ef.jpg

d99c9be2.jpg

ac047286.jpg

c5cef13f.jpg
 
That's a Clarke 8K forklift for size comparison...

8a739bcf.jpg

9a7f6f9b.jpg

500c99f4.jpg


Got all the supports and subframe bolted in and buttoned up. She is ready to work!
Picked up my 6' landscape rake. Not sure what it weighs, but she didnt grunt even at idle. Cylinder speed isn't that fastest, but IT WORKS!!

3aa1fc65.jpg

ef1ffe00.jpg

19fd27b1.jpg

56812a32.jpg
 
Dang, someone paid attention in metal shop.

Looks great.

pen
 
Got some action pics of it today.... I only found one problem.... the bucket isn't big enough...... Seems the seal on the bucket cylinder is leaking.... thats ok, I need to either get a longer stroke cylinder, or get two and change the geometry a little....whats the benifit of 1vs2 dump cylinders on a smaller machine with a slow pump?
fc2695cf.jpg

20b0cd45.jpg

84fee72a.jpg

16479097.jpg

0111cc0c.jpg

a774937c.jpg

4c633b0d.jpg
 
And here is some size comparison pictures. Most people don't realize how little this Satoh Beaver really is, and how capable of a machine it is. Just a little 2 cyl 15 hp diesel and 4 wheel drive.... I like it, even if it is considered a garden tractor by most people....
2c2b5046.jpg

be2806bd.jpg

a5031708.jpg

437f5ee8.jpg


I think it looks 10 times better than the way it did when I got it... Kinda resembles and airport tug doesn't it? lol
5c2c58c0.jpg
 
  • Like
Reactions: vinny11950
Well, I started on my forks today. I went to one of the local scrap yards that sells scrap. Most steel is 25 cents a pound.... The tubing and angle cost me 23 bucks. The 39" forks were 129 bucks off of craigslistnn.
About two hours, cutting, grinding and fitting. Then about an hour welding. I have not made the mounts yet, as I want to swing by the John Deere dealer and get some measurements on their quick attach system.
5daa6695.jpg

971d7930.jpg

82442fdc.jpg

d7e2c32e.jpg

04ea43cb.jpg

d4da06ed.jpg

e4a331f2.jpg


I got to try out my rock/brush/hay rake today. I got this with the old loader setup that I cut apart and re-engineered to fit my tractor. I believe it was a hay fork. I added some 1/4" angle to the top of the 1" tines. I'm going to weld in some supports on the bottom of the tines and and a grapple for moving brush and rocks. I also added a quick attach similar to john deeres QA
b7dfb1dd.jpg

f353eded.jpg

2c723f3d.jpg

b278c4f6.jpg

78f56786.jpg

0dd0999b.jpg

1627736e.jpg

f23855cf.jpg
 
The Angry Beaver saves starving children in africa! Not really, but I really put her to work this weekend! I'm quite impressed with MY BUILD!'
got the quick attach welded on the fork cage so I could use them today.
2f3f166e.jpg

d15bb2c0.jpg

53056450.jpg

f6aca8c0.jpg

how about a thousand plus pound all 1/4" steel work bench, loaded with tons of stuff? three sets of SBF cast iron heads on the middle shelf
425f8659.jpg

353f21e9.jpg

one more parts shelf...why unload? lol
b9f5b52d.jpg


Before my big lift, I thought I would try it out on a parts Kubota B6000 I had sitting out back... a good 1200lbs...
c0f82591.jpg

she suceeded!
 
so I moved on to my big project for the day... MY 21' Heavy duty trailer with my 10K chippewa 2 post lift. I've had this sitting in the back garage for about 6 months now... haven't had time to rearrange the garage to install it with all the time I've spent working out of town.
79940a72.jpg

7909e3f1.jpg

dc8bc90c.jpg

17e6585a.jpg

stood the lift up using a 5/8" certified lifting chain from work...
84504def.jpg

abde564b.jpg


Came home from work with no power and a couple trees down.... I got out my little honda 2K and let the sump pumps run before my bsement flooded. Each pump (2) ran for at least 10-12 minutes.
So, after that was square, i plugged in the fridge and headed outside to check out the damage. This particular one was my pos neighbors apple that had grown thru the barb'd wire fence. I've been trying to get him to clean up his fence line since I moved in. I "found" 8-10 of my property by cleaning up his over grown mess. I checked Ohio laws and it states you must maintain the fence to 6 foot away.....This is the same neighbor that called the county when I was re-grading my property. Told the county I was "going to flood him out. Had my buddy Turbo helping me too. She's a real sweat heart. Got her as a stray right after I moved in. She's part Pitt, boxer, and I'm thinking beagle only because she howls from time to time and is only 47-48lbs. Nicest, best mannered dog you'd ever meet. She's my buddy. Haven't had her on the tractor yet, but I can't walk outside without her being right beside me. Anyways.....
Got out the beaver. I've moved some top soil since I built the front end loader this winter. I just built a set of forks for it. Haven't really got a chance to try it out and work it hard. The weak link seems to be the 1/4" flatbar that was a homemade tooth bar... It worked to shred/tear the roots but the soft steel didn't fare to well... Everything seems top notch, had the filled and weighted tires off the ground with a woods 59" mower a couple times.. No hose leaks, nothing broken, all in all it was a good day!

b068e6a1.jpg

d0ff712e.jpg

39cd7e00.jpg

811503b7.jpg


The badass beaver even helped get some of the roots out

843122ce.jpg

While I was at it, I dug, pulled, ripped a three foot tall cherry stump out. It got cut down last fall from a lightning strike
e947cfa8.jpg

56855c15.jpg

edc894b8.jpg
 
The Angry Beaver makes for some awesome firewood handling skills... I hate handling wood 2 and three times... I can load up one of these crates and with 500lbs of counterweight, it is just enough to safely move it around the property. It also makes an easy cleanup after dropping a tree!

7FCB672C-E90E-45D0-88D7-227E8EA656DC-157-0000003B84E6F531.jpg

8EFA945B-E9DE-43E5-B461-9E23841E494A-3858-0000074EB092AE9D.jpg

1CC98FF5-37A9-4F5F-BF08-8757FDAB9991-3858-00000736C5E557AC.jpg

4AF0A143-C396-40B4-A89B-73B9FA25ED50-3858-00000736C29D2F3A.jpg

1C2B473B-902B-4807-889D-63E47BE43E5F-3858-00000736BE111522.jpg

E7740867-4ACF-4506-BB73-904AEB357287-55-0000000046C67747.jpg
 
  • Like
Reactions: Ashful
Nice toys you've got there. Also nice that you can use the shop at work. I see your company's stuff here in NYC often.
 
Nice toys you've got there. Also nice that you can use the shop at work. I see your company's stuff here in NYC often.

We just had a guy killed on a jobsite at a hospital in the bronx a few weeks ago... He got pinned between a piece of equipment and a building when the chain broke on the crane. Bad news... our local shop out there in in Linden, NJ just across the river. I'vespent alot of time out there!

anyhooters, all of it was done after work and days off (weekends). The bosses were cool about it, but I couldn't leave it there and it got old dragging it home and back eveytime I wanted to work on it. I didn't have my shop at homesetup then. Its still getting there, but at least I can work on stuff now!
 
Jealous...

Wife says a welder would be a silly purchase. "You don't need that." :confused:
 
Good work especially with regards to persistence until completion.

Looks like a danged handy machine.
 
Status
Not open for further replies.