Interior storm window for basement

  • Active since 1995, Hearth.com is THE place on the internet for free information and advice about wood stoves, pellet stoves and other energy saving equipment.

    We strive to provide opinions, articles, discussions and history related to Hearth Products and in a more general sense, energy issues.

    We promote the EFFICIENT, RESPONSIBLE, CLEAN and SAFE use of all fuels, whether renewable or fossil.
Status
Not open for further replies.

mole

Member
Oct 23, 2008
158
Western NY
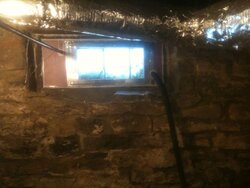
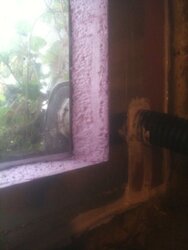
Here's sort of a copycat idea that was inspired from the recent threads here on interior storm windows... I have a real old single pane basment window that was leaking really bad. To seal it, I took a scrap piece of 2" thick pink foam insulation board and first cut it to the dimensions of the window opening. Then I whittled the edges with a sharp knife until I got a nice tight fit into the window recess. Next I removed the foam board and cut a new "window" (12"x20") out of the center of the foam board. I bought two pices of polycarbonate sheet (about 14"x24", maybe) at HD and glued the outer perimeter of the polycarbonate sheet to one side of the insulation board with silicone sealant. Then I overlapped some spare foil tape (maybe 3" wide) over the top of the polycarbonate where the glue line is to give it some quick strength and hide the silicone. I did the same with the other side of the polycarbonate. I pressed my new window into place and caulked it with silicone. As you can see from the pictures, it's not pretty to look at, but it did an EXCELLENT job sealing it up. The window stopped sweating on the inside, and all of the draft is gone. Thought somebody else with an unfinished basment might find this useful. I forgot to mention earlier, but I also had to cut out holes for my sump pump hose and my wood boiler pressure relief piping, both of which pass through the window, which I modified years ago. This foam board was a simple solution to an otherwise messy problem, since I could cut around the obstacles and then reglue the cut-out pieces.

Cost: $20 for the glazing, $4 for the caulk, about 3hours work, and 3 beers for the laborer :)

Thanks for the idea! window 3.jpg window 2.jpg
 
I just finished doing almost the same thing, but on the outside. All I did was cut the polycarbonate to the exact size of the insect screen, and caulked it in place where the screen would go. This was inspired by my son breaking one window last year, I replaced the glass with Lexan, glued the frame back together then put another sheet on the outside of the frame for good measure. Much less expensive than ripping out an entire wall to install a new window since this was in a finished part of the basement.
I have some concerns about condensation in summer, so I'm going to watch that carefully.

TE

Yeah, it was much faster than replacing the window in my case too!
 
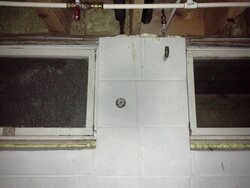
I wasn't sure how effective this was until last night. I never got around to installing lexan on the window on the left. It was 12F last night, and that's ice on the inside of the left pane, while the temperature of the pane on the right was about 49F, same as the rest of the basement walls.
Great weather for finding air leaks.:)
TE


0122132307.jpg
 
ANy thought of insulating those stone walls?
 
ANy thought of insulating those stone walls?

Yeah, the basement walls are a work-in-progress. The section you see in the pictures is the only section of wall where I haven't done anything but repoint the bad mortar between the stones. Being over the sump pump, and the lowest corner of the basement (yes, the floor slopes, by design for drainage,) its a damp corner. In the rest of the basement, where its more dry, I built either partial or full interior walls, spray foamed, and I'm sheetrocking them with the green board stuff. That corner where the window is is also next to my wood boiler, and I didn't want any combustibles near the boiler or flu pipes, so for lack of a good plan on how to deal with those issues, I left it uninsulated. Suggestions?
 
didn't want any combustibles near the boiler or flu pipes, so for lack of a good plan on how to deal with those issues, I left it uninsulated. Suggestions?
I have an area like that and i was thinking about covering it first with cement board so any water coming down the wall(as it does after heavy and extended periods of rain)will stay behind the cement and drain into the perimeter drain channel and not come in direct in contact with insulation board and studs.
 
my suggestion would to be to leave the stone open, so the mortar can be maintained... and then get the highest R-value you can stuff between your floor joists, and then use at least a 6 mil poly as a vapor barrier... and seriously consider adding controlled ventilation to the cellar space...
 
Thanks for the suggstions. I just need to get my a** in gear and get it done.
 
Status
Not open for further replies.