jjs777_fzr
Feeling the Heat
Welcome to the forum - and yes this is the place to be!Hello all, new member here, just joined today. What a fantastic Forum! I have had my Fisher stove for 31 years and recently decided that I would like to decrease the amount of wood cutting/splitting that I do so wanted to increase my stoves efficiency. I thought about the new baffled stoves and sketched up a baffle for my stove, decided to Google it and low and behold I find this Forum and the wonderful posts herein, with tons of info on baffles! Looks like brilliant minds think alike (cough, cough)
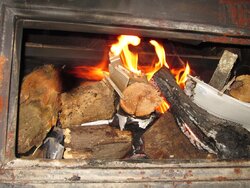
I am overwhelmed by the amount of information on this forum. I found that the dimensions of my stove don't match stoves listed (or I am not looking correctly) so I am wondering which model I have. I have always called it a Momma Bear but I see that it is likely a Grandma Bear (?) Mine is a two square door model, that I bought used in 1981. It measures 25 1/2" across the top plate, 26 1/2" deep including the ash tray and 33 1/2" tall at the back, 27 1/2" in the front. It has angle iron legs (with the feetand I have the screen for the front doors when open) top 8" vent. I have a damper installed in the stove pipe about 20" above the stove. I have some 3/8" steel plate so I will use that for a baffle, maybe do that tomorrow. I like the round baffle suspended below the pipe opening as well but I imagine that the plate baffle would be more efficient, just a guess.
Thanks to all who have contributed to this forum, I am happy to belong.
Tom L.
Hingham, MA
")
Yep - the baby, mamma and papa bear stoves had single doors so easy to tell apart from the double door models. Good luck with the baffle install and be sure to post pics if possible before/after.
So I'm confused does your stove already have the round baffle just below the exit flu or no ? I understand certain stoves had that as original to the stove and others did not. I can't recall if anyone with top exit is running both the round baffle just below the exit together with a smoke shelf 'baffle' horizontal from side to side. If it were me I'd probably try both!


 . Just yesterday I removed my old fire brick, while your stove is down or the brick is in bad shape it's cheap enough to put fresh brick in "and worth it". "Be for warned", have a jackhammer, hand grenade, and large box of bandaids when and if you start the process. my bricks seemed to have welded themselves together and to the sides of the stove. I had to break most of them out with a pry bar and hammer. My baby bear will require a little different application for the baffle that Coaly has been helping me out with, smaller inside. When I'm done I'll get some pictures out, I'm not super computer savvy so I'll get the wife to help out.
 degrees the lower step on the top's 620