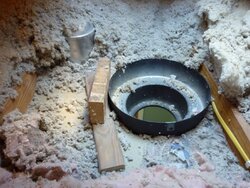
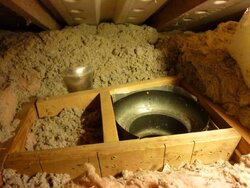
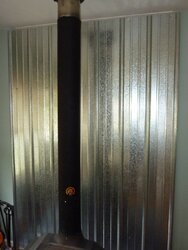
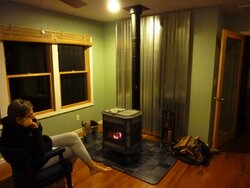
We're installing my old Fireview at my BIL's. Metalbestos Ultra Temp class A above what I assume is a Selkirk ceiling support box, although I haven't looked at the box for a label yet. I think the smoke pipe adaptor is probably a 6T-DSCA....dimensions look about right.
http://www.selkirkcorp.com/installation-planners/premium_planner/support/Premium-Offset.pdf
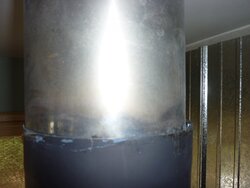
We want to put a Heat-Fab 38-70" telescoping single-wall from the 90 elbow in the flue collar up to the support, but it isn't slipping right on there. There is an 1/8" overlap of pipe wall on the adaptor after the weld. I'm not sure if they left that on there to act as a spring to make a tight fit, or what?


When I pushed up on the adaptor, it and the class A lifted up out of the support box (if the box and the labeled 206410 6T-FSP are fastened together.) So do I need to have somebody hold the class A down in the attic, lube up the telescope, and jam in on there? Or could I grind down the "spring flap" to loosen the fit?
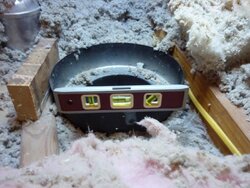
We've got another issue; It looks like instead of building a proper frame for the support box, the guy just put a screw or two to the joists. Will I be able to frame it in place or will I have to lift the class A out to be able to frame it (there is an insulation shield...will that just slide up the class A, out of the way?)
In the meantime, we're going to hook up the Resolute to the basement fireplace, and it looks like it will bolt right up to the previously installed rigid liner we put in last year. But here's another question; Should we use a 90 elbow (which we have) with the 20' insulated rigid liner just supported by the top plate and clamp? Or should we set it up like mine....tee on the bottom of the flex liner, and the chimney weight supported by the top clamp and a block under the bottom of the tee? Another option; We could use the elbow (since it has the ridges to work with) and rig up some kind of support under it, or wire it up to the masonry....
Some of you guys have done a lot of installing and have pretty much seen it all, so thanks in advance for any input you've got!

http://www.selkirkcorp.com/installation-planners/premium_planner/support/Premium-Offset.pdf
We want to put a Heat-Fab 38-70" telescoping single-wall from the 90 elbow in the flue collar up to the support, but it isn't slipping right on there. There is an 1/8" overlap of pipe wall on the adaptor after the weld. I'm not sure if they left that on there to act as a spring to make a tight fit, or what?


When I pushed up on the adaptor, it and the class A lifted up out of the support box (if the box and the labeled 206410 6T-FSP are fastened together.) So do I need to have somebody hold the class A down in the attic, lube up the telescope, and jam in on there? Or could I grind down the "spring flap" to loosen the fit?
We've got another issue; It looks like instead of building a proper frame for the support box, the guy just put a screw or two to the joists. Will I be able to frame it in place or will I have to lift the class A out to be able to frame it (there is an insulation shield...will that just slide up the class A, out of the way?)
In the meantime, we're going to hook up the Resolute to the basement fireplace, and it looks like it will bolt right up to the previously installed rigid liner we put in last year.
 But here's another question; Should we use a 90 elbow (which we have) with the 20' insulated rigid liner just supported by the top plate and clamp? Or should we set it up like mine....tee on the bottom of the flex liner, and the chimney weight supported by the top clamp and a block under the bottom of the tee? Another option; We could use the elbow (since it has the ridges to work with) and rig up some kind of support under it, or wire it up to the masonry....
Some of you guys have done a lot of installing and have pretty much seen it all, so thanks in advance for any input you've got!


Last edited:


 Well, I guess there's no way to avoid that. It's not like any creo is going to be running down inside the pipe; We stacked his stuff a couple years ago, mostly White Ash.
 I guess I would be chompin' at the bit too, if I had a different stove to try....


