
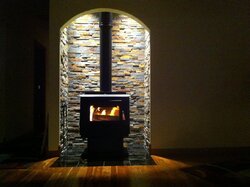
Greetings my fellow wood stove lovers.This is my first thread post but ive been lurking around here for a little while now and i must say theres alot of great info on this forum.A little background on myself .My name is steve, I have been working in the hearth industry for the last 22 plus years .I have installed and serviced well over a 1000 stoves/inserts and chimney systems in my many years.It would be safe to say there are not to many stove manufacturers that i have not had my hands at one time or another.Well enough about me lets get to the good stuff.In the first photo you will see the reef aquarium that i built into the wall of my home ..This is where the alcove will be built after the aquarium and inhabitants are sold.

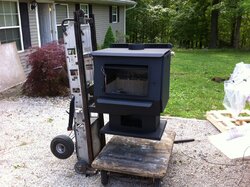
 About a month later its gone to a new home.
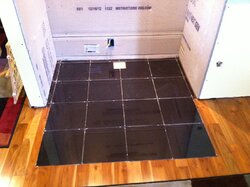
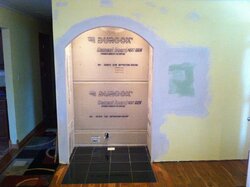
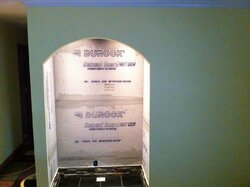
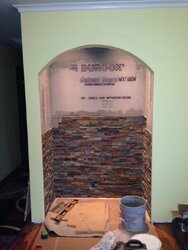
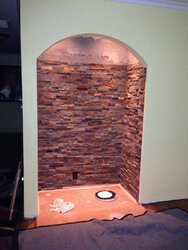
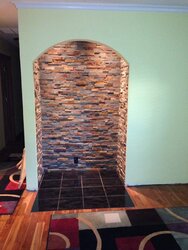
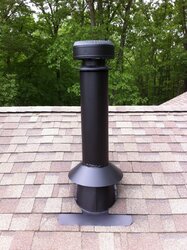
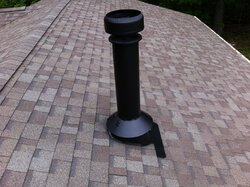
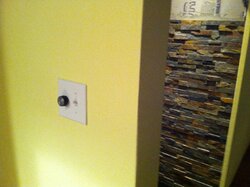
 After a little planning for the stove clearances the framing is completed.I then wired the in the alcove lighting and blower outlet .I will post a pic of the alcove lighting dimmer and blower rheostat installed in a double gang box just around the corner of the alcove later.All the durock is up and the floor is pulled to get ready to set the black galaxy granite hearth tiles.I spent some time getting the floor height perfect before the granite tiles were layed .I wanted the hearth exactly the same height as my hardwood floor.It came out beautifully!The drywall was then taped and mud was applied and sanded.Everything is primed and painted and ready to start laying the stone.The stone went up pretty slow due to the fact none of them are perfectly flat ,so alot of trips outside to the grinder for some small tweaks.I didnt want a bunch of gapes between the stones so the extra effort payed off in the end result. The chimney is up next i will be using T.L.C brand 6 inch pack pipe hooked to duravent double wall down to the stove.....Stay tuned more to come....
About a month later its gone to a new home.After a little planning for the stove clearances the framing is completed.I then wired the in the alcove lighting and blower outlet .I will post a pic of the alcove lighting dimmer and blower rheostat installed in a double gang box just around the corner of the alcove later.All the durock is up and the floor is pulled to get ready to set the black galaxy granite hearth tiles.I spent some time getting the floor height perfect before the granite tiles were layed .I wanted the hearth exactly the same height as my hardwood floor.It came out beautifully!The drywall was then taped and mud was applied and sanded.Everything is primed and painted and ready to start laying the stone.The stone went up pretty slow due to the fact none of them are perfectly flat ,so alot of trips outside to the grinder for some small tweaks.I didnt want a bunch of gapes between the stones so the extra effort payed off in the end result. The chimney is up next i will be using T.L.C brand 6 inch pack pipe hooked to duravent double wall down to the stove.....Stay tuned more to come....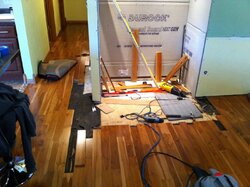


 I'm going to keep a close watch on your thread. This is what I'm going to start this coming summer. I'm removing a gas fireplace and then extending the hearth, removing the wall where the mirror is at, pushing it back 24" and then installing rock facia on the back.
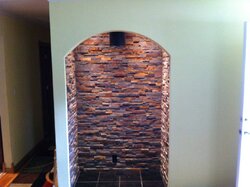

")