1st post, 1st wood stove, DIY install...yikes

  • Active since 1995, Hearth.com is THE place on the internet for free information and advice about wood stoves, pellet stoves and other energy saving equipment.

    We strive to provide opinions, articles, discussions and history related to Hearth Products and in a more general sense, energy issues.

    We promote the EFFICIENT, RESPONSIBLE, CLEAN and SAFE use of all fuels, whether renewable or fossil.
Status
Not open for further replies.

SushiStalker

New Member
Nov 18, 2011
14
Long Island
Hi All


Great site wish I found it a few years ago, forum sites like this are priceless for knowledge and information.
I'm a DIY so I'm going to try and doc. the whole process for your entertainment(pic's) and for you help answer all my dumba$$ ?'s and not screw up too bad.


Alitte history/backround
I have an small older home(40's), was pretty much a time machine when I bought it. 3rd owner, 2nd owner didn't do much except replace the electrical panel & cover it with vinyl.
I've added insulation, replaced all 21 windows, gut'd down to the stud's the 1 bathroom and tiled it back up. (Took 14 days straight, link drop http://www.johnbridge.com/ is another great site for tile advise.) And a number of other projects completed.

So for this one

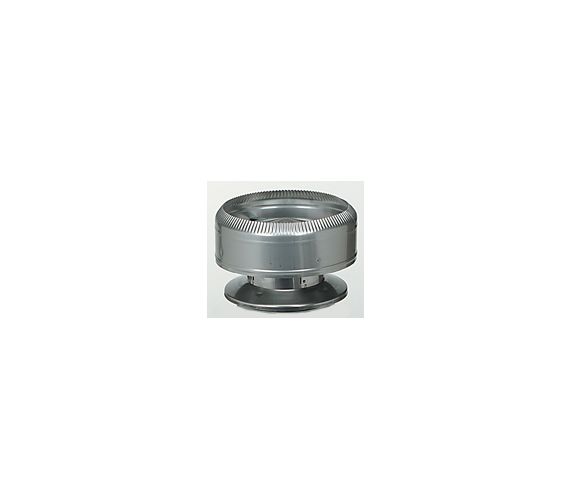
Material collected - I updated as I go, I'm sure I'll be going to various B/B and Hardware stores to complete this one.
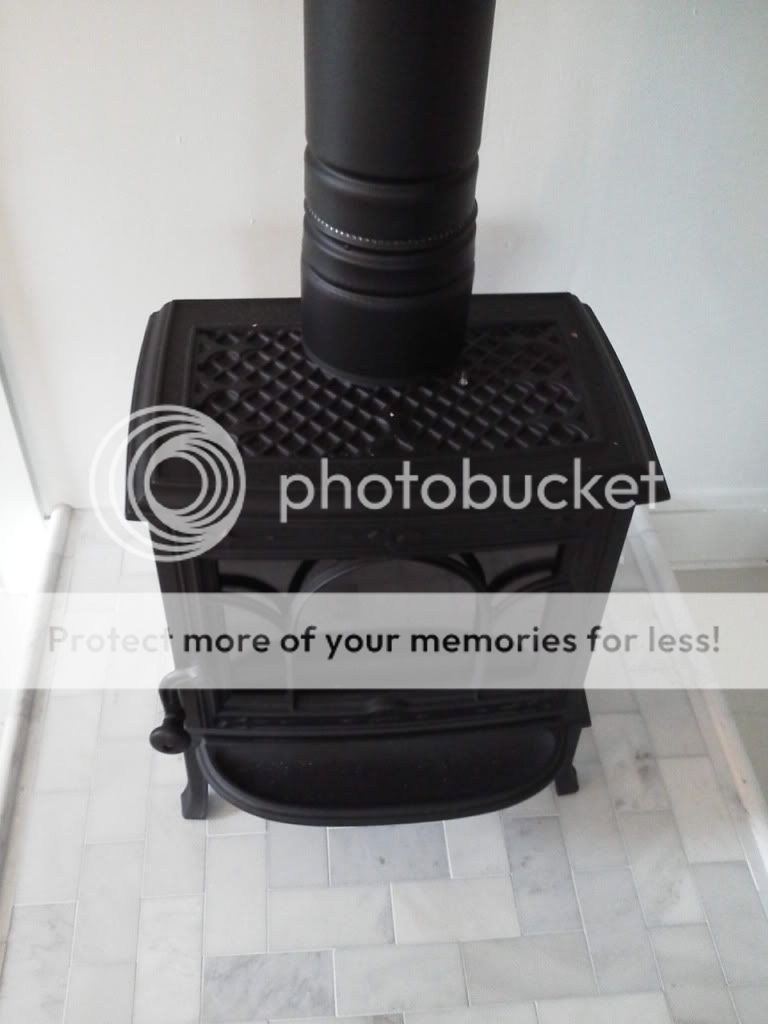
Jotul Nordic QT
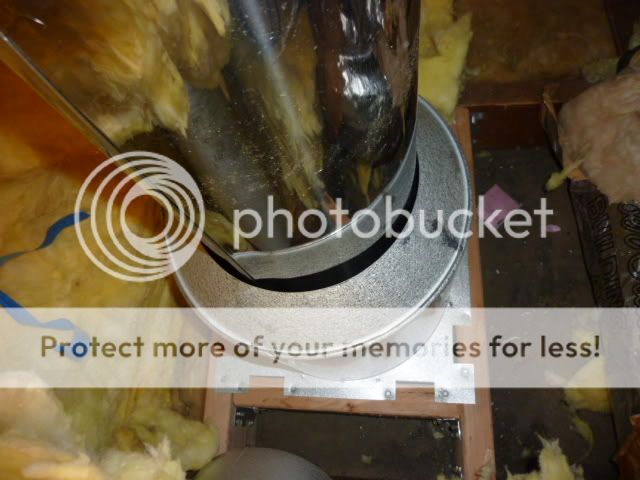
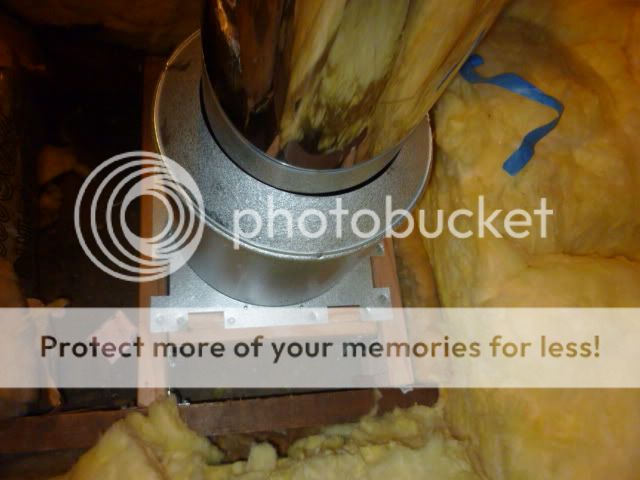
SuperVent Ceiling Support Kit Model #: JSC6DCSP
SuperVent DSP6-6 Vertical Installation Kit Model #: DSP6VIK
SuperVent 6" x 36" Stainless Steel Chimney Pipe Model #: JSC6SA3
SuperPro JSC6RRS 6" Superpro Rafter Shield
Metalbest 6TAF-12 Sure-Temp 6" Class A Chimney Pipe Adjustable Roof Flashing for 6/12 to 12/12 Roof Pitch
Locking bands
Hight Temp Spray paint
and misc. stuff

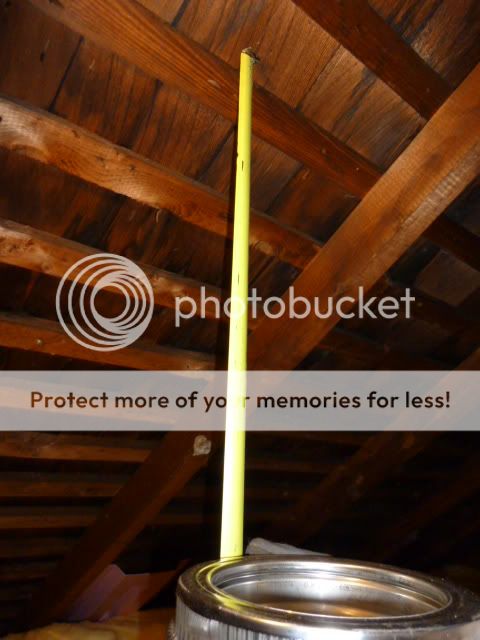
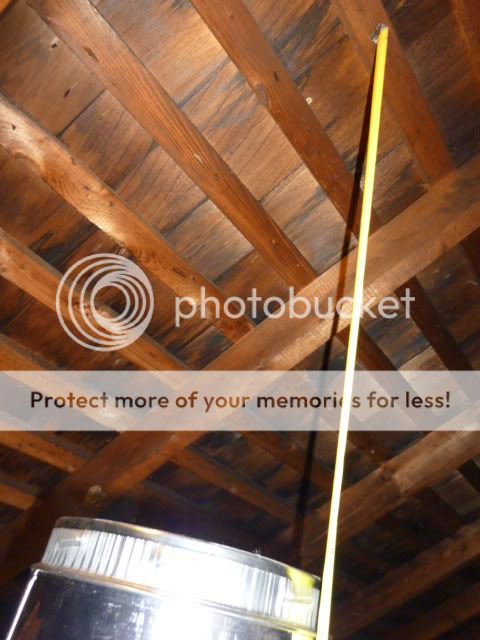
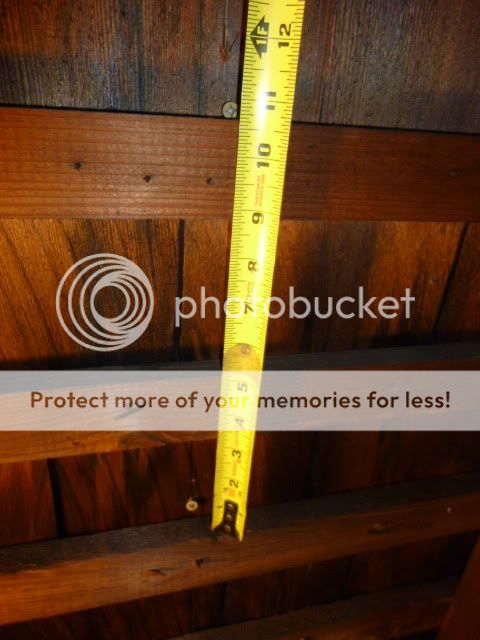
Stove will be installed in my living room. Everything is going straight up, 1st through the ceiling then 5-6ft of attic space, and then the roof, should be justoff the peak.


Concern's so far are.
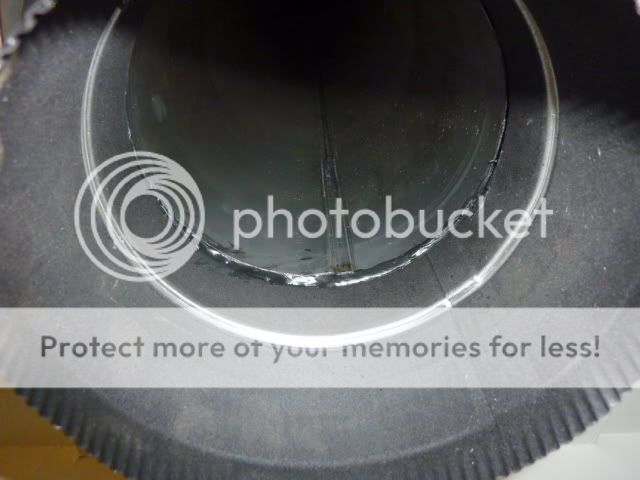
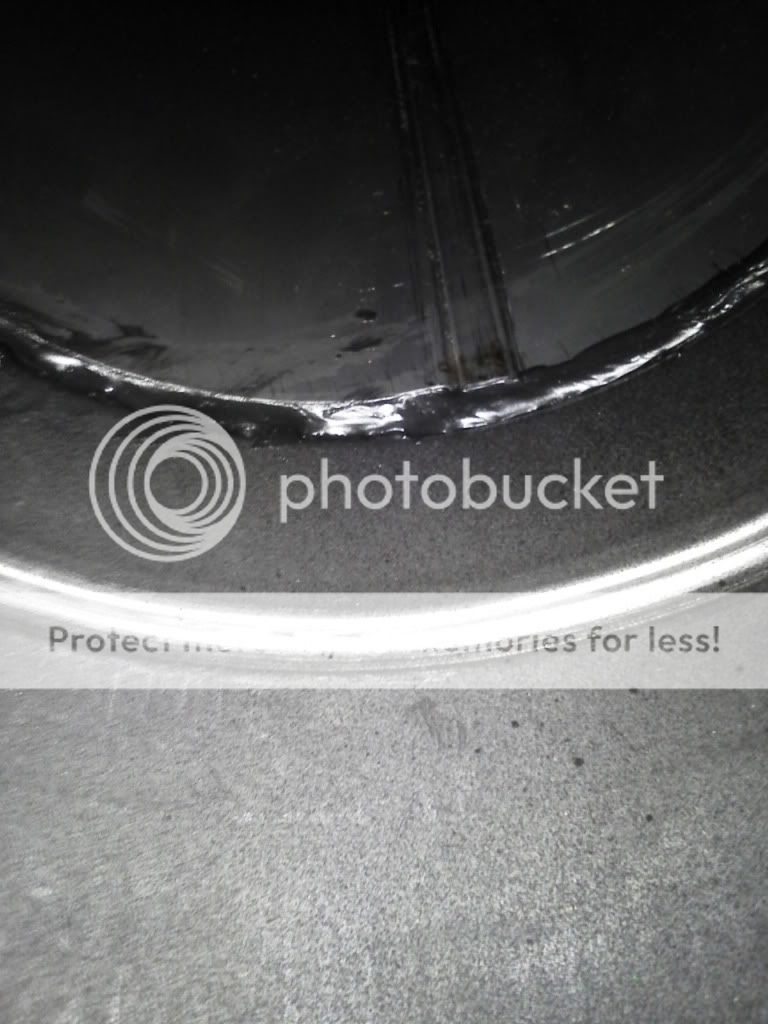
After dry fitting the vent conn. in the barn. I'm not that impressed with quality of these connections so RTV and/or Purpose specific GOO will be applied were needed.

?????
What's the best method for this?

RTV
Stove Gasket Cement
Other?


Thanks
 
Welcome. I would advise against using any sealant here. The double-wall connector is a pipe within a pipe. As long as there is adequate vertical height to your installation it should draft fine. If you have to use something only use Rutland furnace cement, do not use silicone or RTV or you will have a smokey house as that stuff bakes and burns off. It is not meant for the very high temps a wood stove flue sees. The only place you need to use silicone is under the flashing and around the storm collar, where it touches the pipe. At that point the pipe is insulated and cool enough that regular silicone works fine.

What is more important is to have the proper amount of class A above the roof. This stove will want at least 14' of pipe from stove to cap. Code says you need to have at least 3ft from the roof up to the top of the pipe and the top of the pipe must be at least 2 ft higher than the nearest roof structure 10 ft away.
 
So far so good.

Made circle jig for the dremel out of scrap plywood, forstner bit a recess for the dremel with a spiral bit.
Had to disco and move an electrical line to installing the framing on west side of the ceiling support, and I had to notch bottom the 2x6 framing on the east side. There was add. wood inplace for a drywall seam.

Used Simpson strong tie's and 1/4 bit Simpson screw on everything I could.
Stove pipe to chimney adaptor had decent gap on the inside so I filled it rutland furnace cement. Plus 3 selftaping SS 3/4 screw around the outside (no room for locking band once is it seated in the ceiling support)

Jotul dbl wall Stove pipe adaptor only has 2 bolt(one the sides) to secure the vent pipe adaptor so I cemented the in the bottom of that also.


Well with no light and alot of rain I didnt climb up on the roof to cut a the next hole.

???????????????

I read in another post, do you need a storm collar inside the attic, on top of the Insulation shield?


Also any suggestion sealant for the roof flashing-tothe-roof. PL or other product?
 
Here are some pics

Furnace cement in gap
P1020526.jpg

Close up
IMG_20111122_122109.jpg

ceiling support
P1020525.jpg


Drilled out holes
P1020528.jpg

wasnt crazy about this connection
P1020527.jpg

Additional cement was place here,
IMG_20111122_122130.jpg


It got an extra Inch. at least of clearance all round.
IMG_20111122_121852.jpg


Next stop the roof.
 
More photos

Attic Shield
P1020529.jpg

P1020530.jpg


Marking for hole
P1020532.jpg

other side.
P1020533.jpg


Used screws to locate where to start on the outside
P1020534.jpg


All the roof flashing, cap and clamps are done. Building/Fire Inspections is scheduled tomorrow.
 
SushiStalker said:
So far so good.


???????????????

I read in another post, do you need a storm collar inside the attic, on top of the Insulation shield?


Also any suggestion sealant for the roof flashing-tothe-roof. PL or other product?


I never heard of anyone using a collar inside the attic on top the insulation shield - but for the projects I do...if it makes sense and you think it adds value then it can't hurt.

When you flash the roof - don't make the same mistake some folks have made - do not caulk or seal the bottom of the flashing.
'bottom' means the downward slope side of the flashing
you still need to run a bead of flashing cement (or silicone) on the underside of the flashing where it touches the asphalt roof shingles (again not on the downward slope side)

Also dont forget to use high temp silicone around the outside collar - against the class A and along the seam of the collar where it comes together.

Nice project -
 
jjs777_fzr said:
SushiStalker said:
So far so good.


???????????????

I read in another post, do you need a storm collar inside the attic, on top of the Insulation shield?


Also any suggestion sealant for the roof flashing-tothe-roof. PL or other product?


I never heard of anyone using a collar inside the attic on top the insulation shield - but for the projects I do...if it makes sense and you think it adds value then it can't hurt.

When you flash the roof - don't make the same mistake some folks have made - do not caulk or seal the bottom of the flashing.
'bottom' means the downward slope side of the flashing
you still need to run a bead of flashing cement (or silicone) on the underside of the flashing where it touches the asphalt roof shingles (again not on the downward slope side)

Also dont forget to use high temp silicone around the outside collar - against the class A and along the seam of the collar where it comes together.

Nice project -


Thanks

I never did install the extra storm collar on the AIS., I thought I saw that on another post.

Another silly ? why would you not caulk or seal the bottom of the roof flashing?

I can understand water/moisture getting trapped and causing rot, and by not caulking it would provide an exit/drainage.
Is there another reason for not caulking the bottom edge?

If water is getting in, I would assume you have a bigger problem and the damage most likely has already happened.
 
exactly - not caulking or sealing the downward slope side of the flashing allows gravity to do its job - and prevents ice dams etc from forming then finding its way in
 
Well its is been a month

And I have few issues.
It all started when the weather got alttile colder, I noticed some smoke leakage at top of the stove pipe @ the Stove Pipe Adapter.
It. would get worse if opened the door.

So I decided todo a sweep of the chimney to see what a month of burning would produce and take care of the leak.

I took the stove pipe outside and and got maybe a 1/2 a cup of soot and stuff.
Chimney produced about the same or less, mostly likely less.


After putting everything back together the leak was worse. I used some gasket roping stuffed up inside but that did work.
Before I could open the door a few inchs and no smoke but now open it a crack and some comes out the door and out the seams.

I went out and got the Rutland RTV Clear and applied it to the TOP adapter.
TOP got better, but now the bottom & even telescopic was leaking.

This leaking issue is really starting to get mad. Everything was working great for a month and now the stove pipe is leaking like a sieve.
I assume its combination of poor draft and poor wood. Since this is my first winter with stove I dont have stack of wood thats been seasoned for sure. Everything I'm burning is from a family member who is in the tree business.


Who makes the nice tight fitting stove pipe?
 
Leaking stove pipe means your chimney dont suck enough usually. What brand of stove pipe do you have now?
 
SushiStalker said:
I have 3 - 36" sections of chimney
and 5' of Supervent stove pipe.

That 14ft total.
Any 90's at all, that will make it worse.
 
BAD DRAFT, Chimney not tall enough. No ill intent but it is not tall enough. Go out and see what your clearance is around your pipe. If your only a foot above your peak or within 10ft. as others have said of another obstacle you got to make an adjustment. There should be no smoke coming back in through the pipe or stove.
 
So do I put another 36" or 24".

Now this means I have to put a roof support also.


Just to give you a play by play is 54deg outside with SSE winds at 31mph gusting to 50mph & Pressure: 29.41.
Right now I have smelly smoldering fire that wont light, and masking tape around every joint, and if I open the door more then a 1/2 inch I get smoke in the house.

whopee!
 
Stick a 4 foot chunk on there, no reason to hold back at only 14 feet, you have to have a support any way and you get more bang for your buck.
 
oldspark said:
Stick a 4 foot chunk on there, no reason to hold back at only 14 feet, you have to have a support any way and you get more bang for your buck.

Big Box stores around here only stock 36" & 24". I havent seen 4' sections on shelves around here.
 
The colder it is outside the better it'll draft too.
 
What your system is consistently telling you is just what folks here have told you...you have insufficient draft. The piping joints in a properly drafting system don't even need to be all sealed up perfectly tight, because any leaks will simply allow air to be drawn into the flue. Smoke should never come out. A little whiff out the door occasionally when reloading, perhaps, but that's it. All the goop and sealant and tape you've smeared on your stovepipe is a complete waste of time and material. Rick
 
Do you have a chimney cap? Did it get cleaned when you swept chimney and stove pipe? Did you check all connector joints after sweeping?
 
Are you sure there isn't something out of place above the baffle? Some Jotuls use a ceramic wool blanket in the baffle, if this one has it make sure it isn't somehow restricting the flow. Even with a 10' flue, a small stove like this shouldn't be smoking out of the pipe joints. I think you might have a bigger problem here.
 
pgmr said:
Do you have a chimney cap? Did it get cleaned when you swept chimney and stove pipe? Did you check all connector joints after sweeping?
Yes there us a cap.

No I did not clean it, I did not think it was ness. with only 1 month of burning.
This is model cap I have.
sp_raincap.jpg


No I did not check the connections. When I did the install, I used screws and bands on each connections.

I'll check the connections when I install another section and support bracket.
 
also how green (season) is the wood your burning?
 
Any way you can post a pic of chimney pipe coming out of the roof?
(Plus 10 to 15' in all directions)
 
Status
Not open for further replies.