
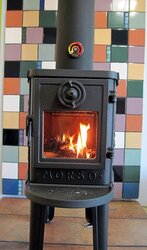
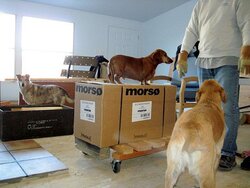
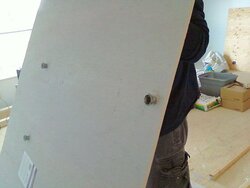
Here are some photos of the construction and finished look of our hearth for the new Morso 2B Standard stove. The stove came in a little box, which we could easily lift. Our fine inspectors made sure all was well before we unpacked it.
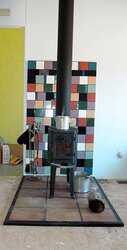
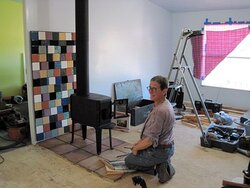
Because this went in a little POS double wide which is temporary, we agreed to construct the hearth as cheaply as possible. Making sure to line up the stove vent with the existing ceiling box, we screwed 2 sheets of 5/8" Durock to the floor, with a layer of thinset in between. We then laid 13"x13" ceramic tiles from The ReStore on top of this, and grouted with epoxy grout. (Epoxy grout is very difficult for the non-muscle bound to work with. Just FYI-) The floor trim is routed 2x2s, ripped beforehand to be the same height as the floor hearth sandwich. I painted it with the same black heat resistant paint I'll use for stove body touch up in the future. (Two birds, one paint can.)
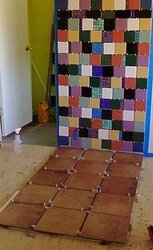
The wall shield, which we realize now was overkill for the stove given its 18" distance from the wall, is one piece of 5/8" Durock with metal spacers, screwed into 1"x2"s that were screwed into the studs. That was then covered with a mix of 4" wall tile from the local ReStore and opalized glass tile leftover from a bathroom floor. We joke that it looks OK, except the wall tile "is so dated". The fella helping us at The Restore was a tile setter, and he gave us his opinion as we searched for various colors. If he only knew where this was installed! The mice lived well before we got there and evicted them.
Thanks so much all the great advice we got before beginning this project!
Here is a link to my blog post on the installation: http://polishingthedoublewideturd.blogspot.com/2012/01/morso-wood-stoves-rock.html
Because this went in a little POS double wide which is temporary, we agreed to construct the hearth as cheaply as possible. Making sure to line up the stove vent with the existing ceiling box, we screwed 2 sheets of 5/8" Durock to the floor, with a layer of thinset in between. We then laid 13"x13" ceramic tiles from The ReStore on top of this, and grouted with epoxy grout. (Epoxy grout is very difficult for the non-muscle bound to work with. Just FYI-) The floor trim is routed 2x2s, ripped beforehand to be the same height as the floor hearth sandwich. I painted it with the same black heat resistant paint I'll use for stove body touch up in the future. (Two birds, one paint can.)
The wall shield, which we realize now was overkill for the stove given its 18" distance from the wall, is one piece of 5/8" Durock with metal spacers, screwed into 1"x2"s that were screwed into the studs. That was then covered with a mix of 4" wall tile from the local ReStore and opalized glass tile leftover from a bathroom floor. We joke that it looks OK, except the wall tile "is so dated". The fella helping us at The Restore was a tile setter, and he gave us his opinion as we searched for various colors. If he only knew where this was installed! The mice lived well before we got there and evicted them.
Thanks so much all the great advice we got before beginning this project!
Here is a link to my blog post on the installation: http://polishingthedoublewideturd.blogspot.com/2012/01/morso-wood-stoves-rock.html


")