Everything Fisher

  • Active since 1995, Hearth.com is THE place on the internet for free information and advice about wood stoves, pellet stoves and other energy saving equipment.

    We strive to provide opinions, articles, discussions and history related to Hearth Products and in a more general sense, energy issues.

    We promote the EFFICIENT, RESPONSIBLE, CLEAN and SAFE use of all fuels, whether renewable or fossil.
Status
Not open for further replies.
Welcome to the Forum;
Congrats ! You've got a female Insert ! :cheese:

Actually, you have an earlier Insert with a chain control; Pull the plate to see if the end came off and it fell through the hole first. They are also found on post 270 and 396 of this thread.

(Below is Finest Fisher's fingers ! He can tell you all about it. It's not just a California thing)
 

Attachments

  • Insert Nickel Napa 6.jpg
    Insert Nickel Napa 6.jpg
    25.1 KB · Views: 1,419
  • Insert Nickel Napa 1.jpg
    Insert Nickel Napa 1.jpg
    37.9 KB · Views: 1,460
  • Insert Nickel Napa 5.jpg
    Insert Nickel Napa 5.jpg
    30.5 KB · Views: 1,294
Many thanks for the replies!

tendencies-
Thats a beautiful unit. I'd hope to make mine look that nice at some point.

jacksnipe-
Your offer is most generous; restores faith in humanity.
It seems like mine is a chain operated damper mechanism.

Coaly-
Many thanks for the heads-up. I'd read the entire thread, and seen those units. But my neophyte ranking in these things didn't draw my attention to the mechanism detail. Thanks for taking the time to find those posts; most helpful.

[strike]Could a flat bar mechanism be used in place of the chain? I think that I like the flat bar and spring handle appearance more than the chain.[/strike] -> there is no easy way to connect the flat bar to the damper mechanism.
As a followup to this, and to Coaly's suggestion of taking the side plate off, I did, and the chain was still there, but rusted. So, I'm going to buy some replacement chain. I might try some larger diameter ball/bead chain like you see on keychains, but in appropriate size to slip and hold into the stop slot. Off to Joes hardware,....
 
That first style must have been made for only a short while. You don't see many of them. It would be a shame to wreck the keyhole and butcher the plate for a flat bar.
 
Ahhh,... learning and learning. Thanks.
My area of specialty in collecting/restoring/modifying/obsessing is in old radio station broadcast record players (most from 1950->1964). With some of them, you can feel free to completely cut them up, and modify to your hearts content, as they were produced in mass numbers; others, far more rare. I have some that I've drastically changed, and others, as faithful restorations to original, with some in between that were renovated, but in ways that can easily be reversed back to standard original condition.
My thought with the flat bar was to work with what was there, and perhaps create a flat bar handle that would easily fit the keyhole, without damaging or altering it.
To attach a flat bar mechanism would have taken pulling the insert out, and creating a bolting feature to the arm of the damper mechanism. The chain damper mechanism arm is different than the flat bar style, so I would have had to drill a thru-hole to accomodate a horizontal bolt to attach the flat bar to. In truth, I have my hands full for quite a long time, with just bringing the house back into line, let alone spending so much time on a single area item such as the insert.

I love getting to know the history of the gear, and then taking the thoughts of those in a mentorship level (you and this forum), and working within those parameters, as suggested.
If this piece is of a lower production run, early model, rare, etc., then it will be treated as such, and restored faithfully rather than altered.
In that light, I stopped by the hardware store, and got some chain, and have the chain damper mechanism back in functioning condition again for this evenings heating session.
 
I am new to this site and new to wood stoves. I boughta large fisher stove and seems that I cant find out what model I have. It is 30 inches wide across the top plate and 37 inches deep, has the fir trees on the doors and no sign of firebrick retainers on the sides. It has a 6 inch flue on top and a baffle inside. Could this be an Xl? I ve looked for info every where on the web and it all seems to tell me to check this forum and a guy named coaly. Any help would great. Thanks
 

Attachments

  • 2012-02-23 13.02.48.jpg
    2012-02-23 13.02.48.jpg
    36.7 KB · Views: 1,102
coaly will be here soon! If the word Fisher is spoken anywhere in the world, like magic he will appear. Cool looking setup!
 
Original Goldilocks. Has awesome original screen with heavy woven mesh also a lighter screen with closer o.c wire for greater spark control...rare original. Nickled Doors. Sheet metal rear shroud has metal brake x for stiffining, sheet metal on rear is perfectly flat and clean (no bends or marks) and has door pin on top middle used to hold and separate the two plates, caution safety tag still on ash fender. Plate for floor for modular or mobile home. Front body stamped 297 c. UL tag G631155 Crown E.S.D Eugene Oregon...... Stove was sold new in Marysville Ca.....Just a nice stove.
 

Attachments

  • Gorgeous Gld 002.jpg
    Gorgeous Gld 002.jpg
    28.1 KB · Views: 1,080
  • Gorgeous Gld 003.jpg
    Gorgeous Gld 003.jpg
    30.5 KB · Views: 963
  • Gorgeous Gld 004.jpg
    Gorgeous Gld 004.jpg
    29.3 KB · Views: 937
  • Gorgeous Gld 006.jpg
    Gorgeous Gld 006.jpg
    60.5 KB · Views: 1,021
  • Gorgeous Gld 007.jpg
    Gorgeous Gld 007.jpg
    65.8 KB · Views: 1,012
  • Gorgeous Gld 008.jpg
    Gorgeous Gld 008.jpg
    58.6 KB · Views: 1,016
  • Gorgeous Gld 010.jpg
    Gorgeous Gld 010.jpg
    70.1 KB · Views: 1,069
  • Gorgeous Gld 012.jpg
    Gorgeous Gld 012.jpg
    52.7 KB · Views: 950
Nice example of clean and preserved Papa Bear. Baffle, 4 fin draft, double row of bricks on sides....sweet stove!
 

Attachments

  • sweet papa bear, baffle, original two rows of bricks up sides 001.jpg
    sweet papa bear, baffle, original two rows of bricks up sides 001.jpg
    22.9 KB · Views: 979
  • sweet papa bear, baffle, original two rows of bricks up sides 002.jpg
    sweet papa bear, baffle, original two rows of bricks up sides 002.jpg
    40.9 KB · Views: 954
  • sweet papa bear, baffle, original two rows of bricks up sides 003.jpg
    sweet papa bear, baffle, original two rows of bricks up sides 003.jpg
    27.5 KB · Views: 1,013
  • sweet papa bear, baffle, original two rows of bricks up sides 004.jpg
    sweet papa bear, baffle, original two rows of bricks up sides 004.jpg
    33.8 KB · Views: 989
  • sweet papa bear, baffle, original two rows of bricks up sides 005.jpg
    sweet papa bear, baffle, original two rows of bricks up sides 005.jpg
    30.1 KB · Views: 909
  • sweet papa bear, baffle, original two rows of bricks up sides 006.jpg
    sweet papa bear, baffle, original two rows of bricks up sides 006.jpg
    27.9 KB · Views: 978
  • sweet papa bear, baffle, original two rows of bricks up sides 007.jpg
    sweet papa bear, baffle, original two rows of bricks up sides 007.jpg
    20.5 KB · Views: 1,057
  • sweet papa bear, baffle, original two rows of bricks up sides 008.jpg
    sweet papa bear, baffle, original two rows of bricks up sides 008.jpg
    21.1 KB · Views: 929
Hello Everybody;

I was tracking down a nasty draft and found a drywall wall in the basement that didnt seem right. A little smashing and... I found a stone wall with a chimney in it!

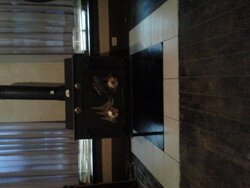
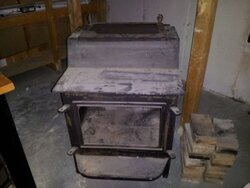
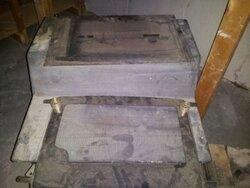
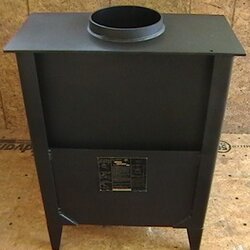
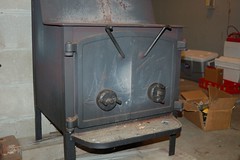
While I was making a mess I thought I would also bust open the under side of the stairwell, the previous guy had done a very poor drywall patch to wall off the stairs. It looked like he was hiding something... I busted that open and found THIS!

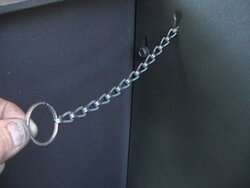
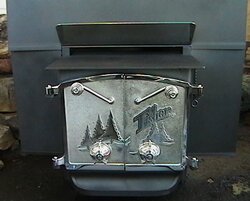
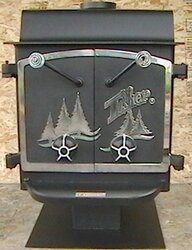
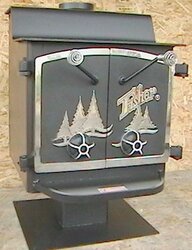
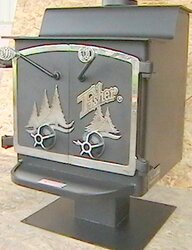
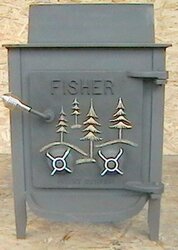
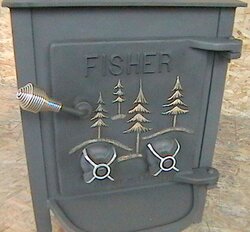
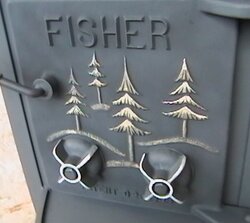
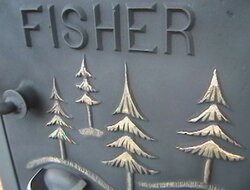
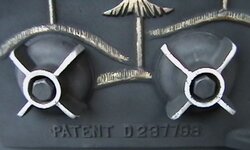
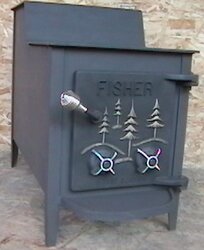
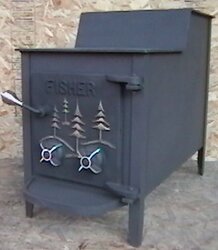
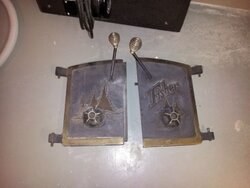
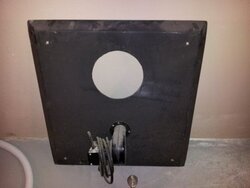
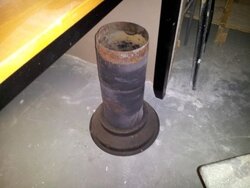
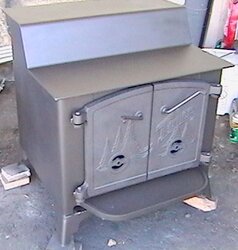
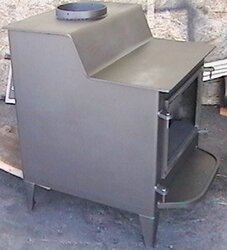
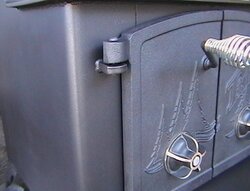
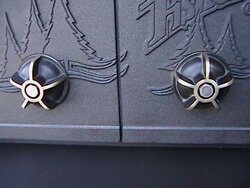
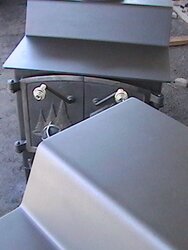
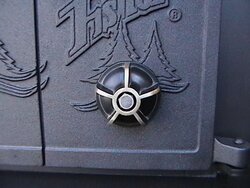
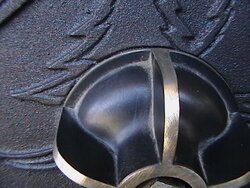
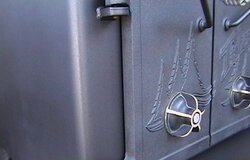
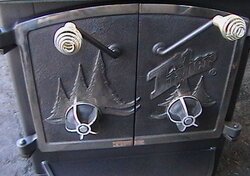
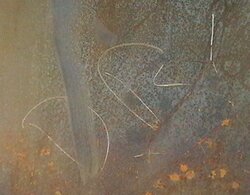
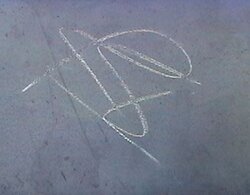
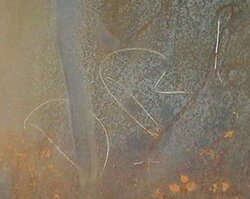
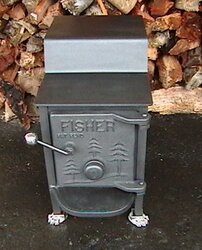
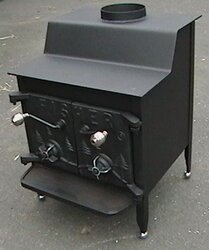
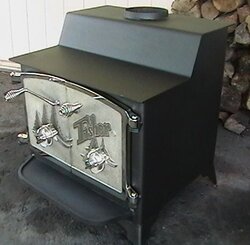
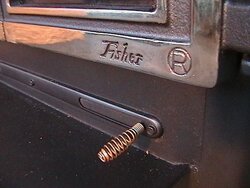
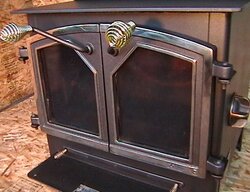
This thread has been incredibly helpful. Looks like a Grandma after the smoke shelf modification was made, everything is there, doors, pins, rear shield (including a fan that looks like he might have added after), spark shield, a whack of fire bricks, and a weird thin piece of metal similar in size to the spark shield. There was also a large diameter (10" maybe) single wall section of chimney that would connect this stove to that hole in the wall.

On the upper floor there is a large brick wood burning fire place (with an insert) that matches the same size as the stone wall.

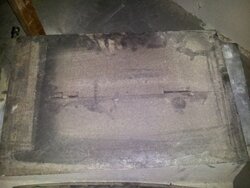
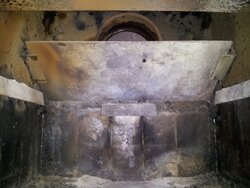
It looks like it is all complete, I saw some pics in here, it looks like I just need to arrange the a single layer of bricks on the bottom, back and sides. It looks like he put in a diagonal mounted baffle in the back.

However did the install was a craftsman, the stone is nice (like the rest of the masonry in the house), the hearth area where the stove was HAD tiles laid into the wet concrete... but the previous fool broke them all out... same fool who would wall up a stone wall, leave the chimney WIDE open, and then wall up a stove under the stairs.

Question is how code compliant and safe is it to re-hook up this stove in the original location? I need to check out the chimney from above and below. I need to remove the carpet in that whole area, probably to the same extent as to the old tile, but I will check code. The stove does not have any UL compliance tags on it, nor does it look like it ever did. I live in Alberta, Canada, so the UL number is somewhat grey anyway... a ULc number seems out of the question.

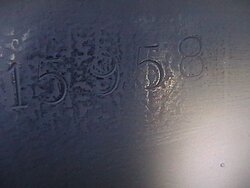
The stove was quite obviously installed when the house was new back in 1980. So it isnt a new install, I merely am cleaning it and putting it back ;)

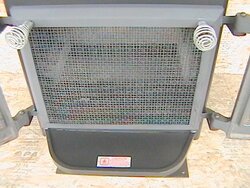
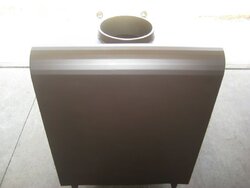
Another question is there is a thin gauge plate with 2 small bent tabs on it, it is very similar to the spark shield... I havent figured out what this plate is for. Is it some kind of holder for the shield? The plate seems quite well made and very deliberately formed. Ideas as to what it is?

Thanks!

Nick
 

Attachments

  • 20120304_142838.jpg
    20120304_142838.jpg
    21.3 KB · Views: 1,084
  • 20120304_141308.jpg
    20120304_141308.jpg
    17.8 KB · Views: 1,090
  • 20120304_141248.jpg
    20120304_141248.jpg
    14.3 KB · Views: 1,088
  • 20120304_141318.jpg
    20120304_141318.jpg
    20.6 KB · Views: 1,175
  • 20120304_141337.jpg
    20120304_141337.jpg
    22.4 KB · Views: 1,014
  • 20120304_141349.jpg
    20120304_141349.jpg
    22.6 KB · Views: 1,061
  • 20120304_141355.jpg
    20120304_141355.jpg
    19.9 KB · Views: 1,060
  • 20120304_141417.jpg
    20120304_141417.jpg
    25.7 KB · Views: 1,126
Welcome to the Forum and congrats on the new find !

Different areas use different codes in Canada as you know, so the local official would be the one to ask. Most people would hook it up and call it a Grandfathered Grandma. :cheese:

Without making sense of the plate in the picture, it could be the type with double shield in the back. The shield closest to the stove only goes up the stove about 3/4 the way up. Mounting holes should line up somewhere. If it's on a masonry hearth with masonry to the rear, no shields are required.

The bottom shield was bent on a 90* and screwed on the sides.

Here's the back of a Grandma III with welded shield and a Grandma IV with double shield. (This is a glass door stove and has double rear shields with a smaller one behind the larger on rear) Is the sheet metal the size of the stove back? They were short in case they were used on a rear vent.

That is testament to a straight baffle plate that will not warp with normal useage.
 

Attachments

  • Grandma III 3.jpg
    Grandma III 3.jpg
    26.5 KB · Views: 925
  • GM IV Ohio 6.jpg
    GM IV Ohio 6.jpg
    27.6 KB · Views: 897
Thanks to the people here on the board for the kind emails and p.m's. Here is some pics of a rare stove, both stoves went to a new home this weekend. Nickled Grandma III and a Grandpa body with Grandma doors, solid brass draft knobs. Stoves went to Northern California to a gentleman who relocated from PA, he just loves em!
 

Attachments

  • Grandma Bear III, Grandpa o.d with Grandma Doors 002.jpg
    Grandma Bear III, Grandpa o.d with Grandma Doors 002.jpg
    25.3 KB · Views: 1,029
  • Grandma Bear III, Grandpa o.d with Grandma Doors 001.jpg
    Grandma Bear III, Grandpa o.d with Grandma Doors 001.jpg
    19.3 KB · Views: 970
  • Grandma Bear III, Grandpa o.d with Grandma Doors 015.jpg
    Grandma Bear III, Grandpa o.d with Grandma Doors 015.jpg
    39.4 KB · Views: 987
  • Grandma Bear III, Grandpa o.d with Grandma Doors 010.jpg
    Grandma Bear III, Grandpa o.d with Grandma Doors 010.jpg
    51.1 KB · Views: 912
  • Grandma Bear III, Grandpa o.d with Grandma Doors 030.jpg
    Grandma Bear III, Grandpa o.d with Grandma Doors 030.jpg
    20.7 KB · Views: 945
  • Grandma Bear III, Grandpa o.d with Grandma Doors 017.jpg
    Grandma Bear III, Grandpa o.d with Grandma Doors 017.jpg
    41.4 KB · Views: 919
  • Grandma Bear III, Grandpa o.d with Grandma Doors 035.jpg
    Grandma Bear III, Grandpa o.d with Grandma Doors 035.jpg
    50.7 KB · Views: 905
  • Grandma Bear III, Grandpa o.d with Grandma Doors 038.jpg
    Grandma Bear III, Grandpa o.d with Grandma Doors 038.jpg
    56.3 KB · Views: 909
.......some more views of stoves. primer from Stove Bright helps give the metallic black #6309 a rich even finish. Stoves have perfect bricks which is amazing...I think just 1 brick was replaced on the nickled gm bear. Tags also are sweet! Pic shows tape by raduised front corner and face of stove by door reveal on 29" deck one with gm doors, as well as the standard or common gm bear with tape.
 

Attachments

  • yearlings fall drop-stove 006.jpg
    yearlings fall drop-stove 006.jpg
    43 KB · Views: 810
  • yearlings fall drop-stove 012.jpg
    yearlings fall drop-stove 012.jpg
    43.5 KB · Views: 882
  • yearlings fall drop-stove 011.jpg
    yearlings fall drop-stove 011.jpg
    17.8 KB · Views: 861
  • yearlings fall drop-stove 014.jpg
    yearlings fall drop-stove 014.jpg
    17.9 KB · Views: 799
  • yearlings fall drop-stove 005.jpg
    yearlings fall drop-stove 005.jpg
    33 KB · Views: 862
  • Grandma Bear III, Grandpa o.d with Grandma Doors 008.jpg
    Grandma Bear III, Grandpa o.d with Grandma Doors 008.jpg
    51.3 KB · Views: 957
  • Grandma Bear III, Grandpa o.d with Grandma Doors 014.jpg
    Grandma Bear III, Grandpa o.d with Grandma Doors 014.jpg
    57.9 KB · Views: 893
  • Grandma Bear III, Grandpa o.d with Grandma Doors 016.jpg
    Grandma Bear III, Grandpa o.d with Grandma Doors 016.jpg
    32 KB · Views: 856
Soapstone marks on ash fender and heat sheild of nickled grandma bear, most likely initials of assembler-welder at shop. Notice caution safety tag reflects in nickle door from ash fender. One stove is into cabin this morning! ;-) . New owner is so excited to fire up his "new" old Fisher.
 

Attachments

  • Grandma Bear III, Grandpa o.d with Grandma Doors 023.jpg
    Grandma Bear III, Grandpa o.d with Grandma Doors 023.jpg
    31 KB · Views: 895
  • Grandma Bear III, Grandpa o.d with Grandma Doors 005.jpg
    Grandma Bear III, Grandpa o.d with Grandma Doors 005.jpg
    46.5 KB · Views: 859
  • Grandma Bear III, Grandpa o.d with Grandma Doors 026.jpg
    Grandma Bear III, Grandpa o.d with Grandma Doors 026.jpg
    50.7 KB · Views: 972
  • Grandma Bear III, Grandpa o.d with Grandma Doors 028.jpg
    Grandma Bear III, Grandpa o.d with Grandma Doors 028.jpg
    64.5 KB · Views: 911
  • Grandma Bear III, Grandpa o.d with Grandma Doors 029.jpg
    Grandma Bear III, Grandpa o.d with Grandma Doors 029.jpg
    42 KB · Views: 841
  • Grandma Bear III, Grandpa o.d with Grandma Doors 032.jpg
    Grandma Bear III, Grandpa o.d with Grandma Doors 032.jpg
    38 KB · Views: 836
  • Grandma Bear III, Grandpa o.d with Grandma Doors 033.jpg
    Grandma Bear III, Grandpa o.d with Grandma Doors 033.jpg
    15.5 KB · Views: 845
  • Grandma Bear III, Grandpa o.d with Grandma Doors 034.jpg
    Grandma Bear III, Grandpa o.d with Grandma Doors 034.jpg
    34.1 KB · Views: 910
....spring is here, cant wait to see what fisher stoves can be found during spring and summer ;-) . its a blast making them as good...or better than new.
 

Attachments

  • Honey Bear Baby 024.jpg
    Honey Bear Baby 024.jpg
    36.5 KB · Views: 916
  • Honey Bear Baby 029.jpg
    Honey Bear Baby 029.jpg
    50.1 KB · Views: 893
  • Grandma Bear W-Vent 010.jpg
    Grandma Bear W-Vent 010.jpg
    21.3 KB · Views: 915
  • fisher picky picky! 004.jpg
    fisher picky picky! 004.jpg
    52.2 KB · Views: 890
  • grandpa bear 004.jpg
    grandpa bear 004.jpg
    29.7 KB · Views: 879
  • grandpa bear 006.jpg
    grandpa bear 006.jpg
    23 KB · Views: 869
  • Like
Reactions: jjs777_fzr
What beautiful work on these stoves!! I have a question for Coaly or one of you other wood stove experts....this is not a Fisher question but I love this thread! I am building a house this spring and am planning on putting in a Lopi Endeavor...it will be in the main room downstairs towards the center of the house. The chimney will go through the second floor (which is an open peaked loft about 13 feet high..and then out to the roof which is a 7/12 pitch. I have had two bids on the stove pipe which apparently has to be insulated once it goes through the first floor the first one was for 1,400.00 which I thought was high but reasonably so..the other was for 3,500 for just the venting system! Wow the stove is around 2,200 with air intake and pedastal base. Something seems very off here...maybe the second bid was for the insulated stainless steel going through the whole second floor? I am calling him tomorrow to find out. So does anyone know for sure what I have to have in the second floor? Does it have to be insulated all the way from first floor to the roof? Does the chimney need to be enclosed?? I have heard that it does...I miss my old Fisher in my old house!! Thanks for any info you can give me. Rexanne
 
Hi Rexanne, good hearing from you;
Yes, these stoves are customized and reconditioned for higher resale value. Many have replated parts and modified doors that are no longer original. Notice the Grandma IV below was actually a more desireable Metallic Brown and has been repainted black. The door was left brown as a highlight, but the ash fender and entire stove body is now black. (Satin black is only $10 a can compared to Metallic Brown at $17) Doors that are remachined and replated to change the texture can appear to be a different or rare version, but I've found these abnomalties to be selling tactics or removal of material to "recondition" the original plated finish.
The lower price could be for double wall pipe, and the higher for insulated chimney pipe?? As far as I know, the newer stoves that require more draft should have the double wall insulated chimney all the way. But newer stoves aren't my thing. That would be better answered in the main Forum. (The Hearth Room)
I'm no longer heating with a Fisher as well. Installed a brand new Kitchen Queen wood burning cookstove in the kitchen last week for the main heat source, cooking and water heating. Even though the firebox is huge compared to the Mama Bear, loading only half to 3/4 the wood I was using is leaving me with more fire in the morning. That's only a half firebox full. And it takes off like turning a light bulb on in the morning when opened up. Roaring like an oil burner in literally 10 to 15 seconds. I found out talking with the builder that he sets them up with a thermostat on the back of the ashpan for the Amish that don't care about loosing the UL rating, so next year I'll be thermostatically controlled as well. I get to burn wood all summer when we can stand it !! If it wasn't 800 pounds to move, I'd use it on an open porch outside all summer. A big operable roof window over it would be nice. We'll see.

I solved my downstairs venting with a masonry chimney up the center of the house with 3 flues. Round 6 inch in the center, and two 8 inch square on the sides that can have a liner insulated in either one. The masonry works as mass to radiate, and it gives me both sizes in case I want different stoves. The third flue is unused and terminates downstairs in case I want to connect a water heater or boiler some day. With the kitchen stove going 24/7, I'll only need the Mama Bear downstairs when I want heat down there. It was a ridiculous expense for the big chimney that isn't used much anymore !
 
Rexanne,
It would be foolish for one to speculate what type of stove pipe was into those estimates based on cost. Most all licensed chimney outfits have local codes to abide by. Your on the right track asking the companys what is entailed and whats needed like you stated. Possibly ask if its T&M or a flat bid. Don't be shy not to ask for a break down on cost, your the consumer. I just recieved estimates for a 56,000 sq ft parking lot for asphalt, bids were from 104k to 148k......rediculous spread from reputable outfits. Those calls will get you facts on the stove pipe, not hot air....you got it.
 

Attachments

  • grandma IV SWEET!! 004.jpg
    grandma IV SWEET!! 004.jpg
    34 KB · Views: 607
  • grandma IV SWEET!! 005.jpg
    grandma IV SWEET!! 005.jpg
    48.2 KB · Views: 683
  • grandma IV SWEET!! 006.jpg
    grandma IV SWEET!! 006.jpg
    53.8 KB · Views: 693
Hello, new to the forum. Just purchased a Grandpa Insert today. Made my decision based on the information in this forum and couldn't be happier. We have a large open fireplace that we have been using and were looking to get more out of it than just heating the room which it is in. The Grandpa is in good condition, just needs cleaned up and repainted. A few broken firebricks also. As you can see (sortof) it has the nickel plated doors and is an earlier model with the chain to control the baffle. I plan to get it in working order as well as add a baffle and may try to fabricate some sort of a blower. Let me know what you think.

DSC01929.JPGDSC01931.JPG DSC01930.JPG DSC01932.JPG
Fisher%20Insert
 
Welcome to the Forum, and the family of Fisher Stoves ! But there is no Grandpa Insert, it's only called a "Fisher Fireplace Insert", no bear name given.
They do use Grandma size doors. You'll be very happy with the heat output.
 
Great thread! I found lots of useful information about my Fisher. This is my Grandma stove. It was in my parents modular home basement when it burnt down in an intense fire. The stove survived and now lives in the basement of my house (the same basement as the house that burned down) as secondary heat to the oil furnace based hydronic radiant heat system. Still burns good, although a couple handles would be nice.

 
Welcome to the forum; That's the first of the Grandma III that started in 1979 with optional Cathedral doors. (they were still available with flat top as well)
The aluminum draft caps that melted in the fire are still available here;
http://www.barrcasting.com/draft.html
And replacement door handle springs are available in nickel #RH-LDN or brass #RH-LDB at Woodmanspartsplus.

The 3/8 bolt being used for the left lower hinge pin can be ground round on a bench grinder spinning the bolt with a drill against the running grinder. It makes nice round heads that look just like the original solid rivets used for hinge pins. You should use a bolt long enough with no threads for 1 1/2" under the head, and cut the threads off so the threads are not used in the hinge plate. Makes a perfect hinge pin.
 
Hi. First post, great thread. I would like to spruce up my Papa Bear...I'd appreciate any advice. Especially as to the first step I should take?
 
Welcome to the forum; I start with a baffle plate, and grease the air damper threads and hinges. They were built to be more utilitarian than pretty, but you can do that too.
https://www.hearth.com/talk/threads/simple-baffle-solution-for-your-old-fisher-more-heat-less-smoke-under-25.74710/
Simply buffing off the paint on the draft cap edges with wet Scotch Brite or metal polish highlights the caps nice.
Setting it in a set of bear paw feet is quick, but hard on the bank account. Papa Bear ebay 12-11 2.jpgPortage WI 1.jpg Many on the thread have the raised image and name highlighted with paint or even plated with nickel or brass. Stove Brite Satin Black is the best paint closest to original. Tu-Tone paint schemes seem to be catching on too;

Bob is a John Deere man, maybe a green and yellow motif as a tribute to the man??
 
Status
Not open for further replies.