Natural slate for hearth

  • Active since 1995, Hearth.com is THE place on the internet for free information and advice about wood stoves, pellet stoves and other energy saving equipment.

    We strive to provide opinions, articles, discussions and history related to Hearth Products and in a more general sense, energy issues.

    We promote the EFFICIENT, RESPONSIBLE, CLEAN and SAFE use of all fuels, whether renewable or fossil.
Status
Not open for further replies.

slofr8

New Member
Sep 19, 2006
60
Northern Maine
Hi all,
I just picked up some natural slate to make my hearth pad with and was wondering if I cut it the same way as tile.
If any of you has ever worked with this stuff, is there anything I should know about before I start?
Should I seal it with anything when I'm done?
Thanks, Dan.
 
I used slate for my hearth also. First, you cannot cut slate with the scoring type of manual tile cutter - it will not work. You have to use a tile saw or a saw with a masonry or diamond blade. For the mortar, you need a trowel with large notches (3/8 x 3/8). It is best to mix the mortar fairly wet, or mist the bottom of the tiles before laying. Slate is very absorbent so if you don't mist (don't soak it though) the bottoms or mix your mortar wet, it will suck too much moisture out of the mortar causing a poor cure. You don't HAVE to seal it, but you should seal it for the same absorption reason.

I don't like the gloss wet look sealers as they make it look cheap and artificial. The problem is it's difficult to find a true matt sealer. A lot of sealers say they are matt, but actually cure glossy. I returned a couple of brands where the packaging said it was matt, but ended up to be even higher in gloss than one packaged as "wet look" gloss.

Slate does look good IMHO. Good luck in your install.

Wayne
 
For cutting the slate, depends on the type of look you want, precision then exactly as above, if you want the rustic look you can use the tool that basically notches the slate, on backside, then break with hands along the line..second on the wet mortar.

We sealed ours prior to putting the tile down, top only, put 3 coats on prior to setting the tile. Made the grouting easier. Then added another 2 coats on top of the grout for good measure, it is the downstairs entry. We used a semi gloss and are happy with the look.
 
Natural slate: are we talking about cut and packaged slate or bulk flagstone type here
 
wty said:
I used slate for my hearth also. First, you cannot cut slate with the scoring type of manual tile cutter - it will not work. You have to use a tile saw or a saw with a masonry or diamond blade. For the mortar, you need a trowel with large notches (3/8 x 3/8). It is best to mix the mortar fairly wet, or mist the bottom of the tiles before laying. Slate is very absorbent so if you don't mist (don't soak it though) the bottoms or mix your mortar wet, it will suck too much moisture out of the mortar causing a poor cure. You don't HAVE to seal it, but you should seal it for the same absorption reason.

I don't like the gloss wet look sealers as they make it look cheap and artificial. The problem is it's difficult to find a true matt sealer. A lot of sealers say they are matt, but actually cure glossy. I returned a couple of brands where the packaging said it was matt, but ended up to be even higher in gloss than one packaged as "wet look" gloss.

Slate does look good IMHO. Good luck in your install.

Wayne

We have found that a matt spray sealer from a duncan craft ceramic supplier works great, it is a little spendie but works great.
I am a huge fan of wet saws . If you want a rough edge just use a ball peen to knock the sharper edges off.
Slate can also be sliced in layers with an old single edge ax head and 2lb hammer.
Another tip with slate is to butter the back before setting it.
Sealing it before setting is a must as stated above or you will have an extremely difficult tie cleaning up your grout.
 
I didn't seal my slate tile before putting it down on the floor, but I would suggest using copious amounts of water when cleaning up your grout, and do it soon after you put the grout down, otherwise you'll be using some caustic stuff to remove the bits that invariabley get caught in the natural voids of the stone. However, with time and lots of water, you get a great look - see pic.
 

Attachments

  • IMG_0980b.jpg
    IMG_0980b.jpg
    67.4 KB · Views: 996
This is exactly the type of feedback I was loking for.
Elkimmeg, this is the cut and packaged stuff from Home Depot.
NICE floor Bushfire!
It'll be a little while before I get around to it but maybe I try and post some pics when it's done.
Thanks everyone. Dan.
 
Definetely seal it prior to grouting. Look for a product that is called "grout release". This is a generic term for a coating that is easily removed after grouting. The grout release is applied on the face of the tiles only (take care to not get it on the edges or the back of the tiles as this will affect the bond of your grout or thinset. It washes off easily with water used to clean up the grouting. It is good stuff. One company that makes it is Bostik/Hydromet, but there are others. Check a floor covering dealer as Home Cheapo probably won't have it. Rent a wet saw or use a dry masonry blade OUTSIDE, as dust will be everywhere.

I think soaking the slate is a good idea, but, take it out of the water an hour or two before installing. What you don't want to do is stick a wet (shiney wet) tile on your thinset as you will get a poor bond. The reason for soaking or getting the slate moist is because it is dry and very absorptive. It will suck all the moisture out of your thinset and you will get a weak bond. Also, if going over durock (or a mud bed if you know what that is), I highly reccomend Latex modified thinset. It improves bond strength and does allow for a little flexing of the substrate (although it should not flex).

Do not use allot of water with grout cleanup. It will weaken the grout and could wash the pigments away or cause them to settle in the joint, and this will give you blotchy looking joint.

Finally, when all done and looking good, seal it with a penetrating sealer designed for slate, limestone, or marble. You will get this at the same floor covering dealer or a ceramic tile distributor. As a matter of fact, your local ceramic tile distributor (wholesale distributor) will probably sell you a bottle of the stuff. Just tell them what your using it for and they will hook you up. The penetrating sealers they have offer a natural finish (can't even tell anything is on there except when wet the water beads) or a stone enhancer sealerthat help brring out some of the color (still no sheen to it), or a sealerthat will give you some sheen, the choice is yours. The key here is penetrating sealer. It is designed to be absorbed into the stone for durability. It also seals your grout. The distributors carry many maintenence items that your retailers don't, and they know allot more as it is their business to.

Twenty years in the tile business, I learned from a 3rd generation Italian tile setter. I don't think to many new guys even know how to float mud anymore, or even care to. Durock is a good product if used properly, but it won't level an uneven floor. KD
 
slofr8 said:
This is exactly the type of feedback I was loking for.
Elkimmeg, this is the cut and packaged stuff from Home Depot.
NICE floor Bushfire!
It'll be a little while before I get around to it but maybe I try and post some pics when it's done.
Thanks everyone. Dan.

Be careful. The stuff at our local Home Sleepo is crap. It constantly sheads off pieces. I've seen better slate at other stores, so be watchful of the quality. You may want to find a better supplier if you like slate.
 
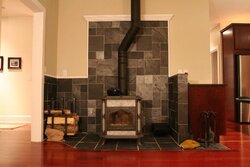
Thats a tough one. It depends on the type of surface. Is it tile, stone, or slate?

I'm gonna guess it's a natural stone to match your Heritage.

First a little info: The grout is a cement based product designed to fill gaps and bond to the edges of the stone. Part of the strength in the bond is from part of the grout actually getting absorbed into the pores of the stone itself. When grouting, we clean the surface of the stone to remove any wanted grout before it completes this bond. When residue is left in place on ceramic tile, it's no problem because the glaze is impervious to any absorption of the grout and removes easily. It stays stuck to the edges of the tile becouse there is no glazing. Stone does not have glazing, and is much mor porous, and the pores are fairly large, so it has a tendency to hold the grout residue.

The other problem is that natuaral stone is very acid sensitive when compared to ceramic tile (however you can still damage ceramic tile with acids). If this is a polished stone then your in trouble. But, I'm gonna guess that it is not polished. If it is a rough or honed finish, or even a smooth satin finish, then you in pretty good shape becouse acid will remove any shine on a polished stone instantly, but will not really eat up the stone (within reason).

If this was my stone (and I have done this before on my own stone), I would contact my local ceramic tile distributor and look for a PHOSPHORIC acid based tile and grout cleaner. The reason I stress PHOSPHORIC acid is this. All acids can harm your stone and grout. PHOSPHORIC acid has been found to harm the stone and grout the LEAST (this is according to the tile and grout industry). DO NOT USE MURATIC ACID ON ANY TILE, STONE, SLATE, GROUT, OR WHATEVER! You don't know how much money muratic acid has made for me from joe blow using it to clean grout and ended up damaging the tile! Besides the phosphoric, you will need a 3-M scrub pad and a stiff nylon brush. The tile distributor should have these, if not, stop at an automotive paint supply store and get the brown 3-m scrub pads, and any type of scrub brush you use for cleaning your hands after an oil change or something would work.

Soak the stone with water. What I mean is get a bucket with water and a rag. Wipe it all down with water. Let the water stand. Keep doing this for an hour or two. You want the stone to absorb as much water as possible so that it will not absorb any of the acid solution (putting the acid on a dry stone will get sucked into the stone and cause it to breakdown over long term).

Once you did the water thing, dry the surface and let the surface get dry to touch. Also the surface should be at room temp. Now, in an inconspicous area, try to clean a spot of the residue with the cleaner and the scrub pad. It may come off right away, or you may need to let it sit for a few minutes. Let the acid soften the grout residue, and use the scrub pad to help it along. Hopefully this removes it. Once it looks like it is gone, rinse it twice with water and let the area dry then check for damage to the stone. If no damage, continue. If you have damage (I doubt it as the concentration of phosporic acid in the cleaners is only about 10%), stop and let me know.

Do not let the acid dry on the surface, and you need to rinse with water at least twice when all done. Also use the scrub brush when rinsing becouse acids have a tendency to "cling" to surfaces and need agitation to remove it. Also change your rinse water often. If everything looks good, then wash one more time with a touch of dish soap (not dishwasher soap) in water, let dry for a week or two, then seal it as mentioned in my earlier post. Use common sense, protect other surfaces, open a window, wear gloves, read labels, etc. This is not a miracle worker, but will work good for mild residue. The problem is stone can be damaged easily and there are less choices of acids to use than with ceramic tile.

Here is a link to the product I am most familiar with: http://www.aquamix.com/for_professionals/products/pg_detail.asp?pdid=44159&pgid=9833

It is a very complete product line, sold thru tile distributors. Great resource for problem solving. Take the time to do your homework on their website. Here is a link to find a dealer:

http://www.aquamix.com/where_to_buy/

Here is their line of sealers, I personaly like the Ultra-solve: http://www.aquamix.com/for_professionals/products/product_group.asp?pgID=37155

Here is the grout release product I mentioned earlier: http://www.aquamix.com/for_professionals/products/pg_detail.asp?pdid=26171&pgid=9833

Man, I just wrote a book! Hope this helps, KD
 
BikeMedic said:
Bushfire, that is beautiful! I am very impressed. How long did it take?

Thanks so much for the kind comments. About 2-3 days to put the tile down - I was working alone so mixing the thin set, buttering the tiles, cutting tile to size, making sure I had a "random" pattern etc. all adds to the time. Then basically about a day to grout and clean-up. Its actually in our basement (family room and office, oh, and a morso 3450) that we finsihed over last winter, so it doesn't get to be seen much by outsiders, so I'm always happy to show it off a little :)
 
First class job Bushfire. You should be proud.
 
slofr8 said:
Hi all,
I just picked up some natural slate to make my hearth pad with and was wondering if I cut it the same way as tile.
If any of you has ever worked with this stuff, is there anything I should know about before I start?
Should I seal it with anything when I'm done?
Thanks, Dan.

Here is a picture of my setup - I used 1/2" African slate for sides and back; 1/4" NY slate for floor.

Starting with 12x12s, I cut them into 6x6s and 6x12s and formed a pattern with it. I used a $77 wet saw from Lowes - burned the first one up, returned, and second one made it through. I'd recommend going up to something in the $150 range for this much cutting. Other than really stressing a saw when cutting so much volume, it was very easy to manage - my first major tile project. As others advised, more water is good on natural stone. I cheated and used some mortar a bit too long - was getting too dry. After a few long hot fires, a couple tiles were loose prior to grouting. I ended up leaning on all of them hard to check for weakness and found 4 that I ended up using a high temp epoxy on in order to avoid redoing mortar. Since that, and grouting, no further issues.

-Colin
 

Attachments

  • Wood Stove_small.jpg
    Wood Stove_small.jpg
    71.5 KB · Views: 1,740
NY S. You put my tile job to shame. That's one of the most spectacular set-ups I've ever seen.
 
As an FYI with slate, my hearth was originally slate, looked to be Vermont (purple & green). When my mason came over to remove the smokeshelf of my fireplace, he looked down and saw gouges on our current slate hearth of something big & heavy dragged over it and told me now's the time to redo your hearth if you're planning on putting an insert in here and slate being soft, if you need to drag your insert in/out he doesn't recommend using it again. Since our insert is 550 lbs we agreed and he removed the tiles & mortar of our hearth.

So, he says slate is soft and as a tip try not to drag heavy things across it without protecting it with cardboard or wood or something. I don't know if it's soft or not, but that's what he said and judging by the gouges in ours when we bought the house that seemed to be the case.

I second the tile saw, they're awesome and the one we got was from Home Cheopo for like $99 and worth every penny. Make sure you get a full face shield, they spit at you. The best protection to have using one is a loggers helmet with a plastic face shield (not screen) and ear protection because they are unbelievably loud. Here's a picture of a cheap one http://www.elvex.com/Images/HM-2093-FS12L.jpg
 
Beautiful setup Colin, nice job. The house looks nice too. Is this new construction or old?
 
NY S,
Holy cow, VERY nice set up.
Two Questions,
-How much clearance did you need behind the stove ?
-It looks like the slate is flush to the floor. What do have under the slate or did you need anything?
To meet the R-value for the stove I'm getting I'm gonna have to build up about 1 1/2" to 2". with Du-rock or Wonder-board.


I might not need to cut very many pieces. I laid some slate out last night and we might be able to get away with just cutting the corners and a few in back. Masonry blade on my cicular saw? I'll need more slate though. I'm in Northern Maine and everything is so far. Home Depot is 180 miles away. Slate, wet saws, sealer. I'm moved into a new (unfinished) home I've been building for a year and a half and do as much buisness as I can local but local hardware stores don't and can't stock all this stuff. To do a project like this takes forever by the time you figure out everything you need. Lowes is opening up soon 50 miles away. I'll check them out for the rest of the stuff I need.
Thanks. Dan.
 
Very Beautiful, it looks just amazing! You are going to have a great winter.
 
BeGreen said:
Beautiful setup Colin, nice job. The house looks nice too. Is this new construction or old?

Thanks - house was built in early 2002. Originally, the area with the stove had the fridge and upper cabinet where the counter is currently located, and the rest of the space was a writing desk area with cabinets above and below. Turned out in an upstairs loft/office, we had a recess 2" longer than the entire writing desk setup. So, when I decided I wanted a woodstove last year, I pulled out all those cabinets, moved them upstairs into that location, moved the fridge over to current location swapping it with the section of base cabinet you see next to the half wall. Amazingly, all this shuffling just happened to work. To top it off, the pipe goes up through a space on 2nd floor that happened to have just the right class-A chimeny clearance after pulling a central A/C duct. (roughed in but I don't use) When planning this and doing the measurements and seeing how interchangeable everything was, I realized this was divine intervention that we were destined to put in wood heat. Still a heck of a lot of work, but amazingly little new expense for all the moving stuff around and now I have an awesome office upstairs, it opened up the flow of the kitchen more, and let us get the stove centrally located.

Dan asked about the floor - it's a stack of sheet metal, cement board, and 1/4" slate on subfloor. Woodstock recommended using 1/2" non combustible material over sheet metal. My stack is closer to 3/4" with the cement board, mortar and tile so it lines up flush with the surrounding hardwood floor. I designed the tile floor such that it ended with a full strip of wood flooring. This way I could rip out the floor roughly with a circular saw just inside the last piece of strip floor, but I didn't have to make a straight saw cut all the way along the floor - allowed a very sharp clean edge. For the diagonals and 90 deg. corner cutouts, I did what I could with the circular and then detailed it with a dremmel tool to get the corners nice and crisp. The varigated african slate only comes in 1/2" thick so it would have sat too high, thus we used the simple 1/4" slate on the floor.

Rhonemas mentioned scratching as a concern - yes, I imagine it would if you slid an insert on it. To install the stove, I balanced it on a floor jack with plywood on the lift pad to protect the bottom and rolled the floor jack on a piece of plywood to protect the floor. Then I just dropped it right into place. I suspect nearly any natural stone would have this issue as would many tiles - not sure how people work around that.

The half wall is just a dummy wall I built to back up to the counter, and tile wraps all around it. This was the one that in another thread I mentioned gets quite toasty - I should have filled it with something to soak up even more heat.

Back wall in center is mounted on 1" offset for extra wall protection, and then I decided to carry the half wall tile theme around the sides to end on the dropped header trim, topped it with base cap molding and did the rest out of 1x4 pine cut to size on sides, cutout on top for heat flow behind offset wall, and standard crown moulding at top.

The stove has been running since last October - took me until spring to get around to finishing up the grout and late this summer to complete the paint work where the cabinets used to sit hence a long delay in posting a picture :)

Some advice I'd give is that anyone can do this stuff... just research it on the internet and plan carefully. This was my first tile job other than a table once and I think it came out fine despite the one issue mentioned before which seems to have never come back. Also, we saved a ton on the tile by going direct through a NYC distributor. Our local tile shop wanted $8/SF plus tax plus significant $200+ shipping expense even though we were buying locally. I thought that was ridiculous. Online, we found it for $4/SF and had it delivered to a local freight dock for less than the local store was charging us to still have to pick it up at their store. In the end, it was a miniature pallet with something like 10-12 boxes that they put on our pickup and we easily carried the individual boxes into the house. Not a big deal at all and it gives you way more selection than home depot.

-Colin
 
This set up and slate tile so perfectly complements your beautiful soapstone stove!
I'm totally knocked out! Looks like it could be in a beautiful home design magazine.
Excellent job ! Really really cool.
 
Status
Not open for further replies.