Greetings Burners, n00b here.
Just wanted to post my cheapskate version of a block plate as referenced by the resourceful lot here at Hearth.com. Just so you responsible parties realize, you influence a spate of lurkers out here who've gained some valuable knowledge while prowling these heralded pages, so this thread is a big Thank You for the inspiration. I've broken more things in my quest for a more pleasant home than I'd care to admit here.
Now. We've had our insert for six years and LOVE it. But it needed ... something. I thought a block plate would help it, since we've no fan and don't intend to buy one. Not just because I'm cheap, but because it kinda defeats the whole idea behind the wood burning stove. Yeah ... I'm one of those.
Here's the deal: There was NO WAY I was gonna trek up on my roof to perform the advantageous task of hiking up the flue liner to gain clearance, as I'm scared to death of its pitch, so I cut to Plan B, which was to cut the plate in half and collar the liner in a poor layman's version of a circle. This I did using flashing. And tin snips. Yes, flashing, not a respectable sheet of steel for this fireplace, oh nooo.
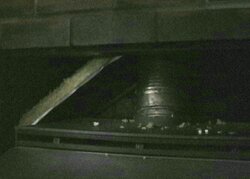
Plate Going in with Roxul®
Stuffed the chimney and flue with Roxul®, the only thing I spent money on save the cements, suspended the plate using carriage bolts hanging from some metal bars left over from our move here, and fastened it in. Probably spent ten times the effort most of you did doing the same thing, but it's done. It don't look perty, but since Mrs Driftwood insisted the shroud be replaced, despite my less-than stellar paint job, the final results don't wear on the eye. Sorry 'bout the photography.
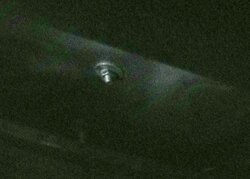
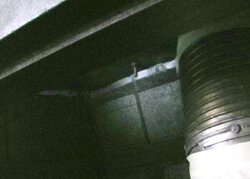
Carriage Bolt Suspension
The only thing I can add to this conversation of my own device is that I'd try not to damage any of the brick face if one can help it. I got the idea to suspend the plate from various members here and I think it's the best approach. However, if you're not chicken of falling off the roof, I'd definitely try to raise that liner pipe out of the way. That was the biggest pain to work around.
While puttying in new furnace cement around the gap of the plate and liner and connecting collar I found rolling a wad of it between the thumb and index finger and pushing it in place the best method. Don't skimp here, get some furnace cement. Oh ... I got big and masked the liner to avoid a mess with the cement – totally unnecessary. The stuff was very easy to work with. The worst part was keeping the Roxul® in place while hanging the plate. That's probably why most folks opt with screwing the plate in, it helps to keep things stable, 'cuz folks, gravity works. Silicone seal, paint, dun.
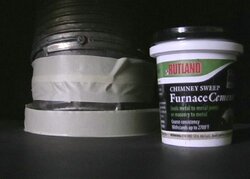
Cement Mask; Unnecessary
I kinda wish now I had an insulated liner but with those prices and the prospect of yanking the thing out and putting it back in again I think I'll pass on it. Still, I think the whole process will be worth it and less heat will waft up the chimney and more convection coming from the insert.
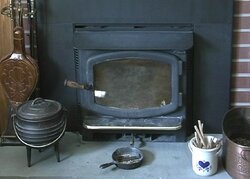
The End
Just wanted to post my cheapskate version of a block plate as referenced by the resourceful lot here at Hearth.com. Just so you responsible parties realize, you influence a spate of lurkers out here who've gained some valuable knowledge while prowling these heralded pages, so this thread is a big Thank You for the inspiration. I've broken more things in my quest for a more pleasant home than I'd care to admit here.
Now. We've had our insert for six years and LOVE it. But it needed ... something. I thought a block plate would help it, since we've no fan and don't intend to buy one. Not just because I'm cheap, but because it kinda defeats the whole idea behind the wood burning stove. Yeah ... I'm one of those.
Here's the deal: There was NO WAY I was gonna trek up on my roof to perform the advantageous task of hiking up the flue liner to gain clearance, as I'm scared to death of its pitch, so I cut to Plan B, which was to cut the plate in half and collar the liner in a poor layman's version of a circle. This I did using flashing. And tin snips. Yes, flashing, not a respectable sheet of steel for this fireplace, oh nooo.

Plate Going in with Roxul®
Stuffed the chimney and flue with Roxul®, the only thing I spent money on save the cements, suspended the plate using carriage bolts hanging from some metal bars left over from our move here, and fastened it in. Probably spent ten times the effort most of you did doing the same thing, but it's done. It don't look perty, but since Mrs Driftwood insisted the shroud be replaced, despite my less-than stellar paint job, the final results don't wear on the eye. Sorry 'bout the photography.


Carriage Bolt Suspension
The only thing I can add to this conversation of my own device is that I'd try not to damage any of the brick face if one can help it. I got the idea to suspend the plate from various members here and I think it's the best approach. However, if you're not chicken of falling off the roof, I'd definitely try to raise that liner pipe out of the way. That was the biggest pain to work around.
While puttying in new furnace cement around the gap of the plate and liner and connecting collar I found rolling a wad of it between the thumb and index finger and pushing it in place the best method. Don't skimp here, get some furnace cement. Oh ... I got big and masked the liner to avoid a mess with the cement – totally unnecessary. The stuff was very easy to work with. The worst part was keeping the Roxul® in place while hanging the plate. That's probably why most folks opt with screwing the plate in, it helps to keep things stable, 'cuz folks, gravity works. Silicone seal, paint, dun.

Cement Mask; Unnecessary
I kinda wish now I had an insulated liner but with those prices and the prospect of yanking the thing out and putting it back in again I think I'll pass on it. Still, I think the whole process will be worth it and less heat will waft up the chimney and more convection coming from the insert.

The End


