CamFan
Feeling the Heat
If you want to replace the short legs on the stove's let me know, it is easy. I can talk you throught that one. There are two ways.
That would be the third option and In my opinion the wrong option. It would not look right.comstock1869 said:I would like to hear your thoughts on replacing the short legs. If I could come up with the bear legs, I would like to hack off the L-bracket legs on my recently acquired GP stove and add those.
") I have kept them for 20 plus years and have moved them so many times I made it worth my while for saving them. I did sell qutie a few and my wife wants me to make some stools for grandkids. She does not know how many I have. I will be dead and gone before I have that many grand kids. But I did stop selling the Bear legs for now. I did not stop selling the others. I will make a stool this year and see what she thinks. I will have to bend a metal band with the same radius as the sides for the stools to look good. I will paint the feet and band and make a unique stool top. I may take a 1/4" plate and have the original Fisher logo engraved with a water jet and who knows. What else. I may put stainless under the 1/4 plate to make the logo stand out. Now I am rambling....Sorry
I have kept them for 20 plus years and have moved them so many times I made it worth my while for saving them. I did sell qutie a few and my wife wants me to make some stools for grandkids. She does not know how many I have. I will be dead and gone before I have that many grand kids. But I did stop selling the Bear legs for now. I did not stop selling the others. I will make a stool this year and see what she thinks. I will have to bend a metal band with the same radius as the sides for the stools to look good. I will paint the feet and band and make a unique stool top. I may take a 1/4" plate and have the original Fisher logo engraved with a water jet and who knows. What else. I may put stainless under the 1/4 plate to make the logo stand out. Now I am rambling....SorryRedbear86 said:Sounds like some deals worked out through PM's or e-mail would be more profitable!
PS. are the legs meant to be welded cast iron or reg steel? I've never tried but have been told cast iron is hard to weld
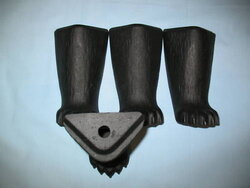
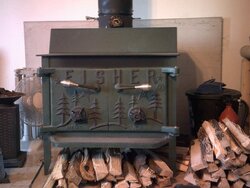
The bear legs fit the radius corner of a series III, not a square corner of what you have.
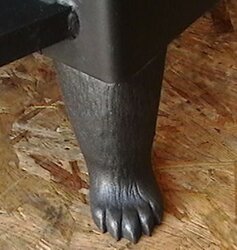
The paint pictured below is Stove Bright Metallic Black. Courtesy of Finest Fishers. It's the best finish, but not original. The bear legs bolt on the same way as the "scroll" cast legs.