Englander 28-3500 furnace install / mods

  • Active since 1995, Hearth.com is THE place on the internet for free information and advice about wood stoves, pellet stoves and other energy saving equipment.

    We strive to provide opinions, articles, discussions and history related to Hearth Products and in a more general sense, energy issues.

    We promote the EFFICIENT, RESPONSIBLE, CLEAN and SAFE use of all fuels, whether renewable or fossil.
Status
Not open for further replies.

mustash29

Minister of Fire
Feb 6, 2012
701
SE CT
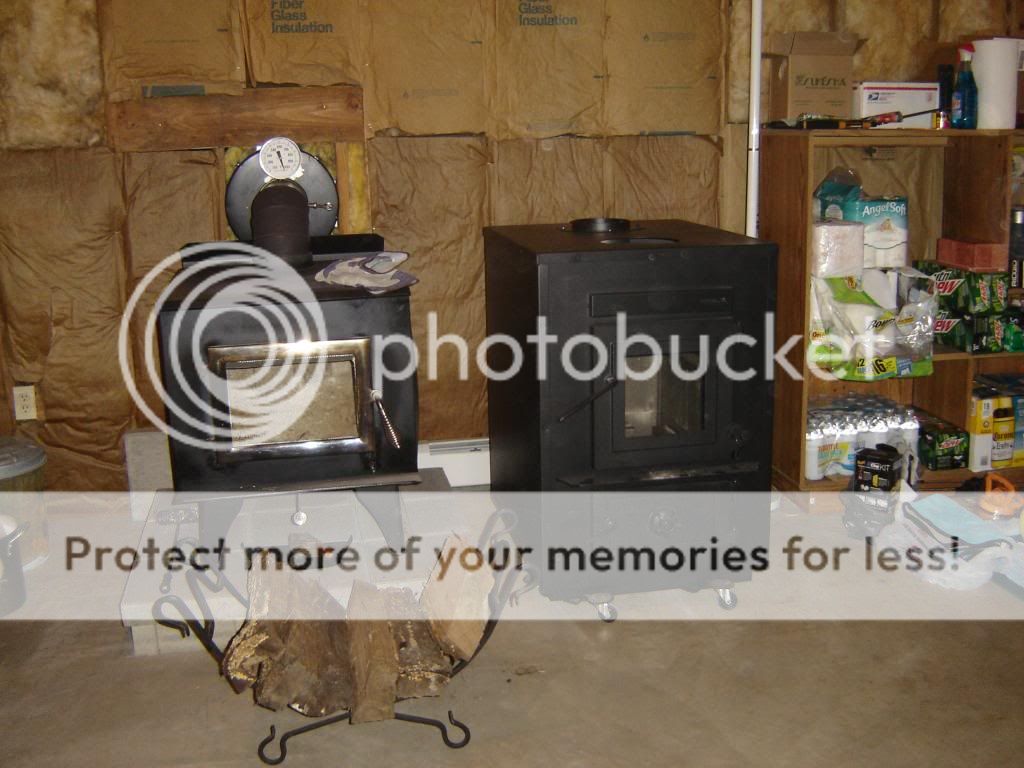
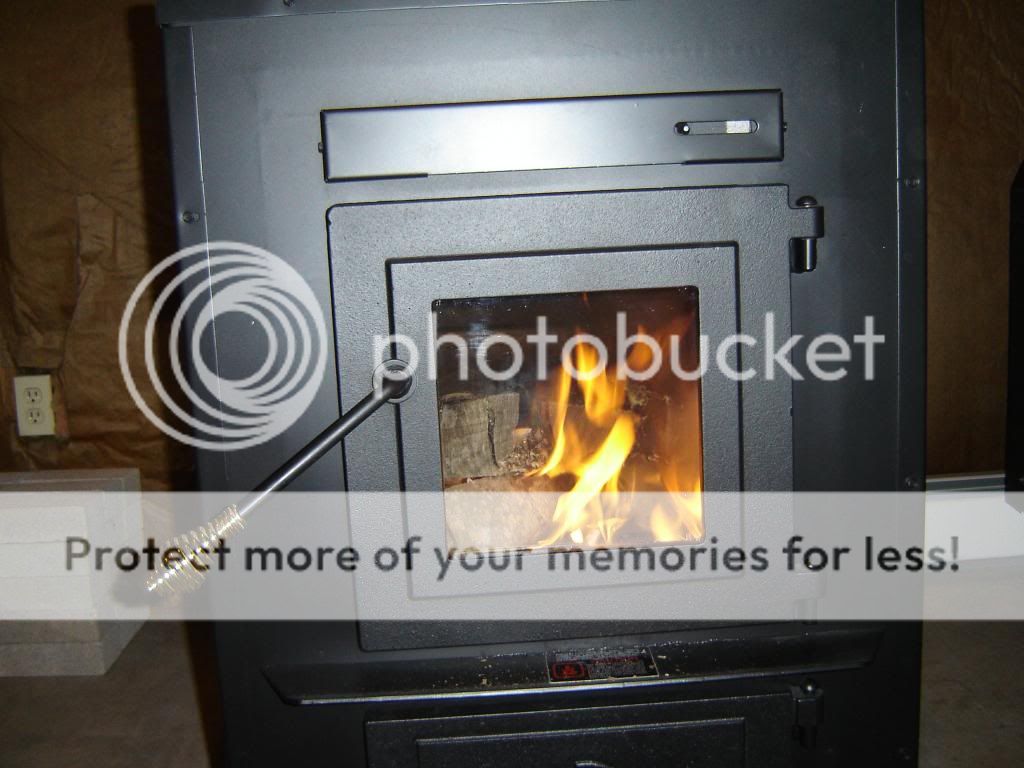
The trusty old wood stove has kept us warm for the last 12 years. Not too bad considering the 100 bux I paid for it + a few replacement bricks and gaskets over the years. Unfortunately, it's really showing it's age. It's a late '94 model I got from a navy buddy when he sold his house in '00.

DCP00698.jpg


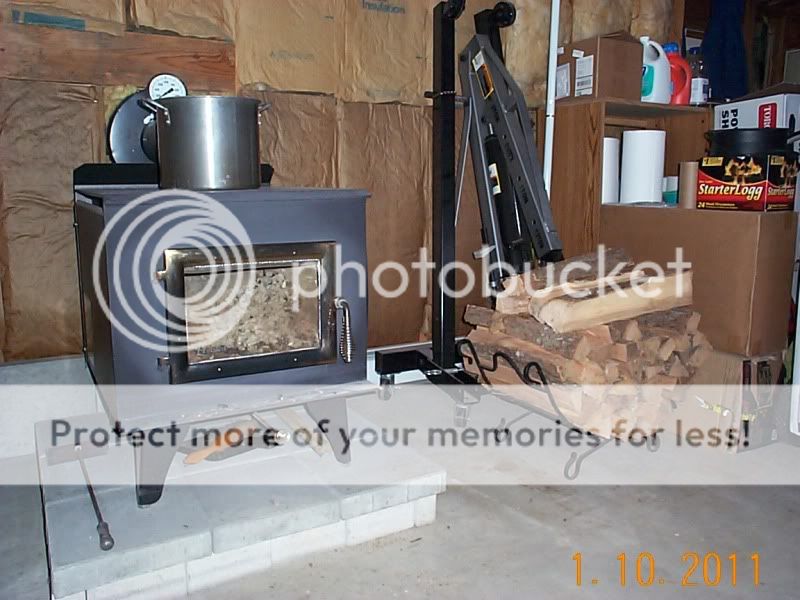
I've been contemplating it's replacement for nearly 2 years, finally pulled the trigger.
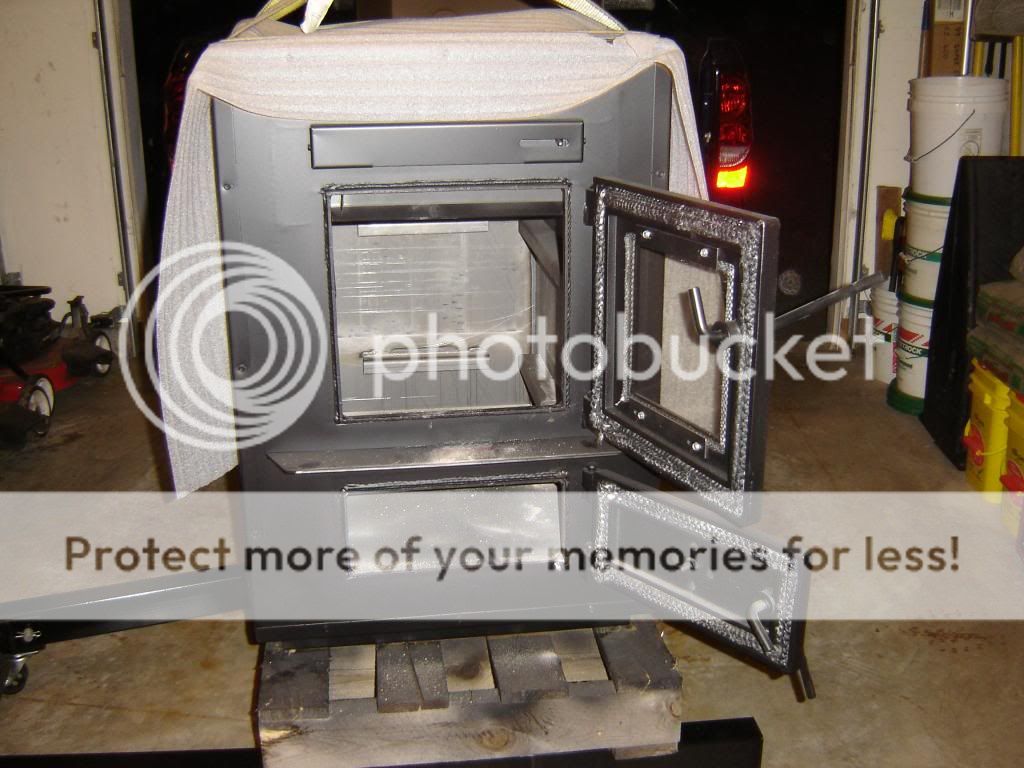
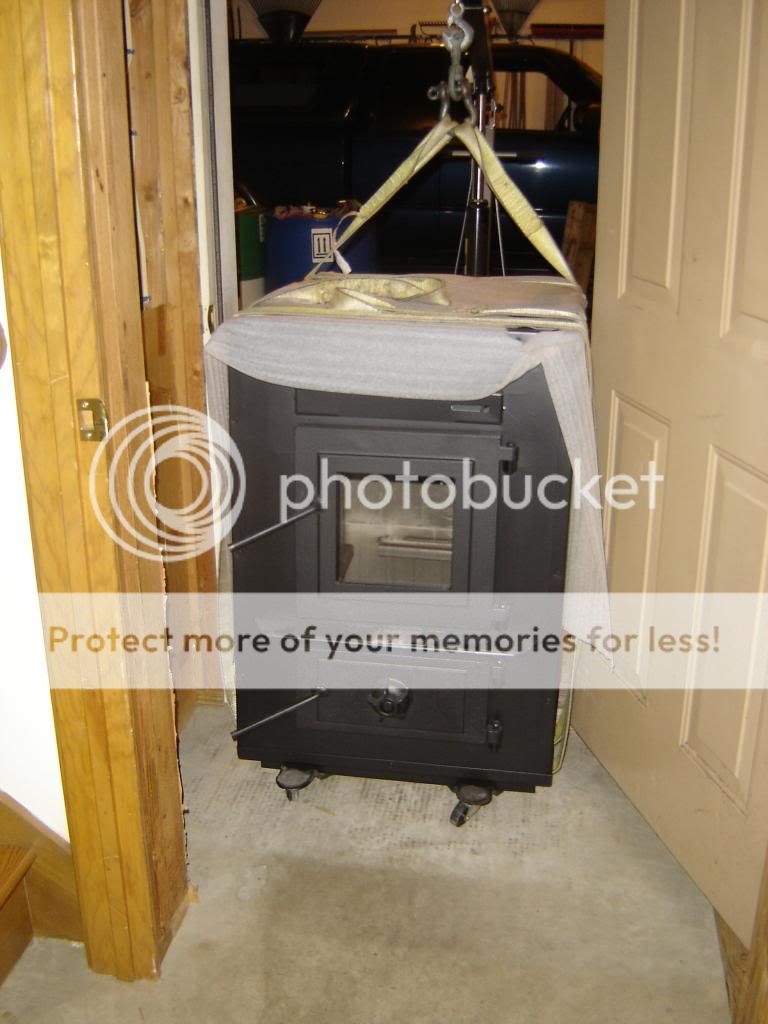
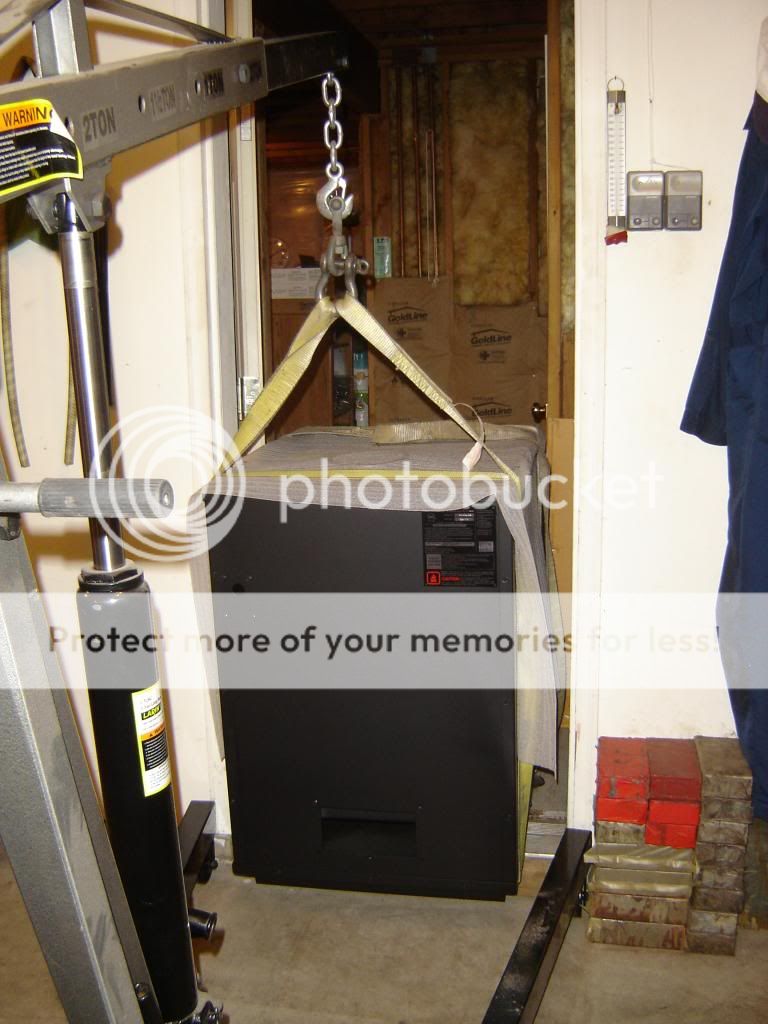
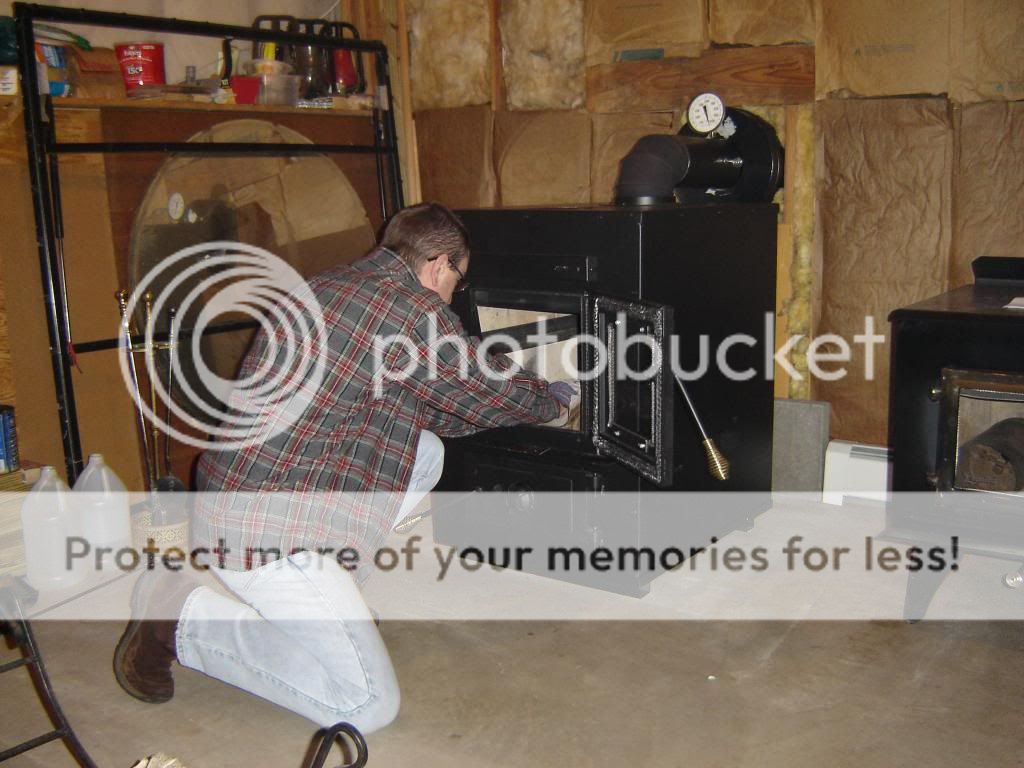
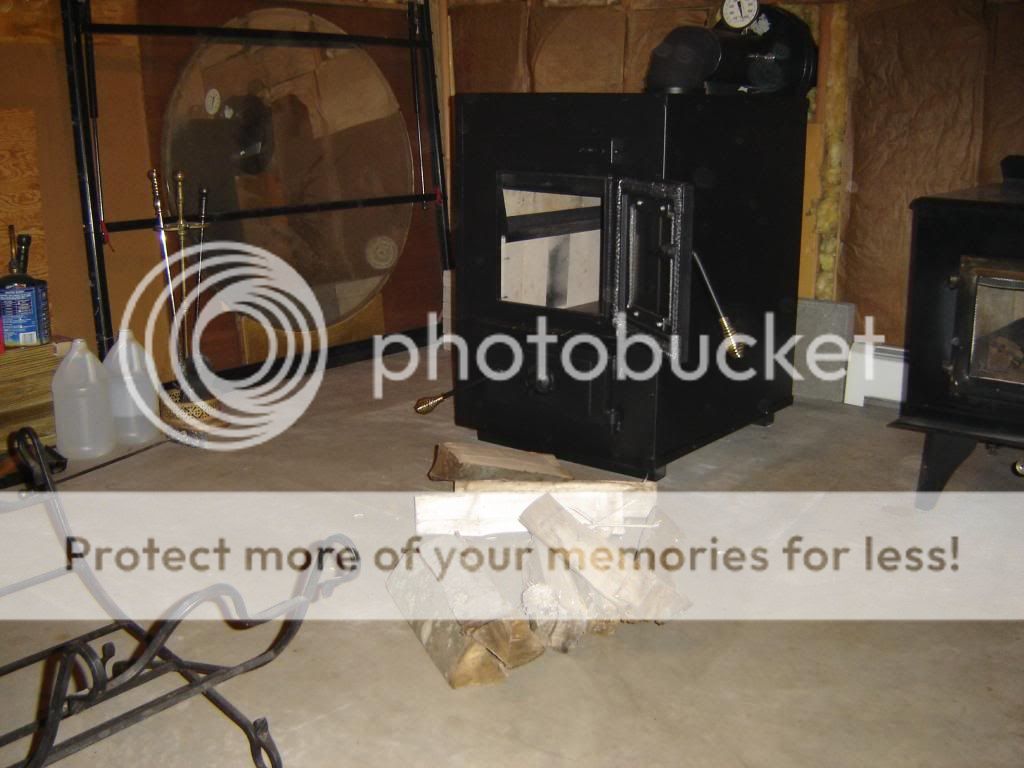
Made in good old Virginia USA. England stove works 28-3500 wood furnace from Home Depot, complete with 10% Veteran discount. :)

This thing is 570 lbs of 1/4" steel and has many great reviews, most of which I learned about here on Hearth.com.

After they set it in the bed of the D-max with the forklift, the young kid waving the orange flags asks me....."want some string to tie that down with?" Epic. :eek:


DSC00081.jpg


DSC00084.jpg


DSC00085.jpg
 
DSC00086-1.jpg


DSC00087.jpg


DSC00090.jpg
 
DSC00091.jpg


DSC00092.jpg


DSC00093.jpg
 
DSC00097.jpg


DSC00098.jpg


DSC00099.jpg
 
DSC00102.jpg


DSC00104.jpg


DSC00105.jpg
 
DSC00107.jpg


DSC00108.jpg
 
A "furnace" is essentially a stove surrounded by a tin jacket so the heat is directed into a duct. A "boiler" has a water jacket.

According to the manufacturer it is "rated to heat up to 3000 sqft when hooked into existing ductwork." They do not give it a BTU rating. Those are very arbitrary anyway since the EPA test method uses soft wood under stringent test conditions. For now we will be dumping the hot air to the rec room, similar to how the old stove worked. Hopefully before next summer I will be able to toss the window A/C's and have central A/C instead. I'm heating 1800 sqft now with the stove and oil boiler back up with hot water baseboard.

This is pretty much the lowest cost, most basic & manually controlled furnace on the market. Cheap and basic, bigger firebox than the stove and has a HUGE ash pan. I am guessing I will burn through about the same 3 - 4 cord per season that the stove used. What I won't have to deal with is the ash management issue and having to play "puzzle" 3x per day just to fill the firebox, so I should not have as many issues keeping a hot fire for 12+ hours.

I was thinking about a wood boiler, and the one I fell in love with is super awesome, but it's nearly the size of a small refrigerator, requires 400 - 800 gallons of pressurized hot water storage tanks so the complete system would have been about 20 - 22 K.

http://www.youtube.com/watch?v=KxOh6xiwwSI

The other contender was an automatically controlled stainless steel wood furnace, for about 4500.

http://www.lamppakuuma.com/kuuma-vapor-fir...on-furnace.html

So the 1199 Englander with 10% vet discount is considerably cheaper.
 
We finally have some colder weather setting in and I'm in the middle of a long 4 day weekend to mess around and monitor things so.....

The new beast is in place and cooking!

I did a few modifications to it prior to the first fire. I found these ideas scattered around a few different threads here on Hearth.com

The stock configuration is called a "firebrick grate" but the bricks were taller than the slots in the steel support. The 8 underfire air holes were 3/4 wide and would have allowed large coals to drop into the ash pan and they were wider than the ash pan.

DSC00112_zps1328647c.jpg


DSC00114_zpsf4884d3c.jpg


DSC00145_zpscdd4939d.jpg


I cut a 15.25 x 24" plate of 1/4" steel to cover the stock setup. This makes for a solid even floor so the poker will not catch on the bricks & chew them up. My mechanic friend at work cut eight 1/8" slots in the plate with the plasma torch to allow underfire air to penetrate the coal bed. I may have to enlarge them if the fine ash does not rake through them effectively. So far the air penetrates nicely.

DSC00207_zps1ed76912.jpg


I also added 3 more pieces of angle iron and 8 more bricks (the 2 front side pieces are about 6" long) on top of the sides and back of the firebox. They just sit on top of the rails that hold the factory brick. The extra refractory will hold more heat in the firebox for better overall combustion efficiency.

DSC00206_zps48c45b3f.jpg


DSC00209_zps3fd13940.jpg


DSC00210_zps17315c45.jpg


For now the heat is naturally rising through the lower rear air intake, where the factory 850 cfm blower is supposed to be, and rising out the 8" outlet on top. The 850 blower is going to be overkill since we are just dumping the heat to the rec room like the old stove did. I may add a small block off plate to the inlet with a small 3 or 4" muffin fan and hook that up to the factory temp probe and fan thermostat. I could integrate that to a wall thermostat as well.

The redneck hot water coil for (pre) heating DHW is still in planning.
 
First fuel load, very dry ash and poplar:

DSC00212_zps264de2fc.jpg


DSC00215_zps26280902.jpg


DSC00216_zps18eaedfb.jpg


DSC00217_zpsc4766644.jpg


DSC00218_zps06a28368.jpg
 
Ive been kind of interested in replacing my stove with a furnace. My house is only 1000 sq ft with an attached garage that houses the air handler for the ac and heat pump. I want some kind of central wood heat that i can control with a thermostat in this mild weather weve been having. What kind of burn times are you getting on this? Wonder if anybody on the sight has one hooked into their existing duct work?
 
Does this furnace have a cat or secondary burn or none of the above?
 
I don't have a real idea of actual long burn times yet. We fired it up Friday and I was around the house Sat, Sun & Mon so I have been playing with it, throwing another piece or 3 in now & then, etc. I work 12 hr rotating shifts and my other half works a regular 40 hr week so we will find out soon. My goal is 12 hr burns with 15 hrs of coals.

What I can say right now is that it holds a steady heat for quite a while, easily 8 hrs. That is from a full load of "not quite seasoned well enough" red oak. It was dropped last winter, delivered & cut on site in Feb. I suffered a health issue in June so the chunks did not get split and stacked untill mid Sept. It was also cut too short. My request was 20-21 but most of the load was more like 16-18. I split it into smaller sizes to fit the stove, hoping it would season a little quicker. For next season I want to cut about 23-24 and leave the splits a little larger.

I snagged this load for 850, delivered and cut on site. :cool:

DCP00752.jpg


DCP00754.jpg


My old stove was much more "peaky" because we had to let the coal bed burn down somewhat & load it for the long burn, but the heat output would fall off toward the end and require more air and some poking to liven it up again. The Englander has a taller but more narrow firebox so it tends to stoke itself as the logs burn down and turn to coals.

So far it has surpassed my expectations. Semi-seasoned red oak, main air control @ 1/4 to 1/2, lower spin draft shut, steady even heat for easily 8+ hrs, kept us >70-72 with outside temps from 18-35, cloudy days, a 12" storm and winds last night upward of 30 mph. Coming home from a family gathering last evening there were 3-4 foot drifts betwen the corn fields on my road. With properly seasoned larger splits at the correct length, I forsee 12 hr burns with 15 hrs of coals.

I'm heating 1800 sqft, built in '96, R-19 walls, R-30 attic. If I prop open the door between the rec room and garage I am heating allmost 2500 sqft.

DCP00748.jpg


It does not have a cat or secondary burn.

The one piece of info that was VERY hard for me to find was actual fire box volume. 15.375 W x 14.5 H x 25 D = 3.2 cuft. Those measurements are after installing the extra bricks and if you load it right up to the upper baffle.

Wood storage. I can easily put 2-5 cord under here before the snow flies:

DCP00731.jpg


DCP00732.jpg
 
I have the same furnace. No mods. Heating 2400 sq. ft. house in west Pa. With temps. in the mid teens I have to keep the fire moderate or we get cooked out of here. Using 3 - 6 cords per year depending on variables. You will likely burn more the first year or two till you learn the stove characteristics. Probably the best deal on the market for a wood furnace. Ducting the heat through the house is well worth the effort. Also I noticed a huge difference in heat output using well seasoned wood. Good luck and I will watch for more posts to see how your doing with it.
Kevin
 
Great post mustash29, can you tell me how you attached the angle iron ?
3 more pieces of angle iron and 8 more bricks (the 2 front side pieces are about 6" long) on top of the sides and back of the firebox. They just sit on top of the rails that hold the factory brick. The extra refractory will hold more heat in the firebox for better overall combustion efficiency.

As my firebox is looking worse for wear I was thinking of trying to redo the rails in the file box and I liked how you had added the top row of bricks

https://www.hearth.com/talk/threads/first-time-stove-burner.101685/#post-1312320
 
Good old gravity, they just sit on top of the factory supports, which had a slight tilt to them when the factory welded them in.

The rear angle is just shy of 18". The steel of the firebox is 18" wide. It had four vertical 4 x 9 factory bricks back there for a total of 16" and a 1" gap in each corner. I replaced the 2 outer rear verticals with 4.5 x 9's and used the skinny 4's for the rear horizontals. The notches were made with a 1/4" masonry drill bit.

The side angles are 24". The side bricks are standard 4.5 x 9's with the front ones being about 6-7" long and were cracked with a 4" brick chisel.

As long as the wood is loaded gently and not thrown in, they should all stay in place just fine.

DSC00210_zps17315c45.jpg
 
Well, after 10 days of firing the new furnace I have a few things to comment on.

Right from the start I determined that relying on convective air flow through the unit would work if necessary, but it was slow to pump out the heat. I wired up a heavy duty 120v alumnium frame 4" muffin fan from an old PC to a cord & plug. It just sits right at the air intake and does a wonderful job of blowing a gentile heat out the top of the furnace.

We are very happy with the heat output. It is more than plenty for our 1800 sqft in temps as low as 11 and winds upward of 30.

My ash plate works well in protecting the factory floor grates. The (epic) failure was that I made the air slots too small. I had to shovel the ash out of the furnace just like my old stove. :mad:

This is all that fell into the ash pan after firing for 10 days:

DSC00229_zpsdfd52ea3.jpg


So today I made the slots larger. I drilled the ends of the slots to 5/16" and then stacked two 1/8" cutting discs on the grinder and made a nice spark shower. The slots are now slightly > 1/4".

DSC00228_zpse6cd4a78.jpg
 
Very nice and detailed thread. Love Engalnders products. Best customer service in the industry :)
 
Ash management is much improved with the larger slots in the plate. :cool:

Some ash drops on it's own. Every poke at the coal bed drops more. Essentially no red coals fall through. I fired it for 5 days untill the heat wave set in. When I let it go out all that was left in the firebox was some ash and some black coals. After raking that around for a bit the ash dropped and left the charcoal behind.

DSC00230_zps84f5c9f4.jpg


DSC00231_zps05bb3954.jpg
 
Looks interesting, and like the mods to the unit. Your place and all, but SERIOUSLY, get the exposed combustable insulation paper covered with something, sheetrock preferred. It wouldn't take much to light the whole mess up.
 
mustash29. Very nice job. I like the way you added so many pics and details to the thread. I have to agree with Yankee on the safety thing. I cringe evertime I see that exposed insulation behind your stove. One day I was working with a guy putting up 12' sheets of sheetrock on the ceiling of a renovation. We had a light socket in the middle of one of the sheets and someone had installed a pigtail with a bulb in it to help them see better while working. We struggled a little with the sheet because we did not have a rock lift and anywho, we missed the hole in the rock and trapped the bulb in between the sheet we were putting up and a joist and bang. Broke the bulb, the filiment from the bulb was now exposed and started to spark and caught the paper on the insulation on fire! The fire swept across the cieling in just a few seconds. Unbelievable! We were able to get the fire out before the firefighters got there. This was after we had called the fire department that was just about two blocks down the street. I still to this day do not know how the fire did not travel up the walls on the outside. I thought for sure we would lose the whole house.

Leaving the insulation exposed directly behind the furnace is just asking for it. I know you are a smart man. And you have probably been burning fires in your wood stove like that for years. But why take the chance? Cover the whole wall and ceiling above it with 5/8 sheetrock and be done with any chances. If you can not do the whole room with sheetrock now, then at least cover the wall behind and ceiling above the stove for now and finish later. ?
 
I don't have a real idea of actual long burn times yet. We fired it up Friday and I was around the house Sat, Sun & Mon so I have been playing with it, throwing another piece or 3 in now & then, etc. I work 12 hr rotating shifts and my other half works a regular 40 hr week so we will find out soon. My goal is 12 hr burns with 15 hrs of coals.

What I can say right now is that it holds a steady heat for quite a while, easily 8 hrs. That is from a full load of "not quite seasoned well enough" red oak. It was dropped last winter, delivered & cut on site in Feb. I suffered a health issue in June so the chunks did not get split and stacked untill mid Sept. It was also cut too short. My request was 20-21 but most of the load was more like 16-18. I split it into smaller sizes to fit the stove, hoping it would season a little quicker. For next season I want to cut about 23-24 and leave the splits a little larger.

I snagged this load for 850, delivered and cut on site. :cool:

DCP00752.jpg


DCP00754.jpg


My old stove was much more "peaky" because we had to let the coal bed burn down somewhat & load it for the long burn, but the heat output would fall off toward the end and require more air and some poking to liven it up again. The Englander has a taller but more narrow firebox so it tends to stoke itself as the logs burn down and turn to coals.

So far it has surpassed my expectations. Semi-seasoned red oak, main air control @ 1/4 to 1/2, lower spin draft shut, steady even heat for easily 8+ hrs, kept us >70-72 with outside temps from 18-35, cloudy days, a 12" storm and winds last night upward of 30 mph. Coming home from a family gathering last evening there were 3-4 foot drifts betwen the corn fields on my road. With properly seasoned larger splits at the correct length, I forsee 12 hr burns with 15 hrs of coals.

I'm heating 1800 sqft, built in '96, R-19 walls, R-30 attic. If I prop open the door between the rec room and garage I am heating allmost 2500 sqft.

DCP00748.jpg


It does not have a cat or secondary burn.

The one piece of info that was VERY hard for me to find was actual fire box volume. 15.375 W x 14.5 H x 25 D = 3.2 cuft. Those measurements are after installing the extra bricks and if you load it right up to the upper baffle.

Wood storage. I can easily put 2-5 cord under here before the snow flies:

DCP00731.jpg


DCP00732.jpg
 
You just gotta love these beast. Have one in the cabin in Maine. Boils us out but it is better than being cold. Endless supply of wood so I just open the windows if I have to. I also have one, brand new, at home but haven't installed it yet in the basement. Will get to it sooner or later. These babies are the greatest. There are other good makes as well but I am sold with the performance of the 28-3500. Best.
 
I don't have a real idea of actual long burn times yet. We fired it up Friday and I was around the house Sat, Sun & Mon so I have been playing with it, throwing another piece or 3 in now & then, etc. I work 12 hr rotating shifts and my other half works a regular 40 hr week so we will find out soon. My goal is 12 hr burns with 15 hrs of coals.

What I can say right now is that it holds a steady heat for quite a while, easily 8 hrs. That is from a full load of "not quite seasoned well enough" red oak. It was dropped last winter, delivered & cut on site in Feb. I suffered a health issue in June so the chunks did not get split and stacked untill mid Sept. It was also cut too short. My request was 20-21 but most of the load was more like 16-18. I split it into smaller sizes to fit the stove, hoping it would season a little quicker. For next season I want to cut about 23-24 and leave the splits a little larger.

I snagged this load for 850, delivered and cut on site. :cool:


My old stove was much more "peaky" because we had to let the coal bed burn down somewhat & load it for the long burn, but the heat output would fall off toward the end and require more air and some poking to liven it up again. The Englander has a taller but more narrow firebox so it tends to stoke itself as the logs burn down and turn to coals.

So far it has surpassed my expectations. Semi-seasoned red oak, main air control @ 1/4 to 1/2, lower spin draft shut, steady even heat for easily 8+ hrs, kept us >70-72 with outside temps from 18-35, cloudy days, a 12" storm and winds last night upward of 30 mph. Coming home from a family gathering last evening there were 3-4 foot drifts betwen the corn fields on my road. With properly seasoned larger splits at the correct length, I forsee 12 hr burns with 15 hrs of coals.

I'm heating 1800 sqft, built in '96, R-19 walls, R-30 attic. If I prop open the door between the rec room and garage I am heating allmost 2500 sqft.


It does not have a cat or secondary burn.

The one piece of info that was VERY hard for me to find was actual fire box volume. 15.375 W x 14.5 H x 25 D = 3.2 cuft. Those measurements are after installing the extra bricks and if you load it right up to the upper baffle.

Wood storage. I can easily put 2-5 cord under here before the snow flies:
As for the burn time, I can't say the time lenght for a given night because installations differ as much as temperatures. But I will offer this small story. In the cabin in Maine, I loaded the stove to about 3/4 and cut back on the air. I left the cabin for two days. When I returned, I still have a hot bed of coals and the radiation was still comfortable. Of course I had to rake it down, and reload but that gives you some what of an idea in 20 degree weather. During snowmobiling in subzero temps, we are toasty. Uses a bit more wood but you can get some extremely long burns depending on how you regulate it and the temps you are looking for.
 
This thing is 570 lbs of 1/4" steel and has many great reviews, most of which I learned about here on Hearth.com.

After they set it in the bed of the D-max with the forklift, the young kid waving the orange flags asks me....."want some string to tie that down with?" Epic. :eek:

Forklift!? Engine crane!? Cheater!!! :p 
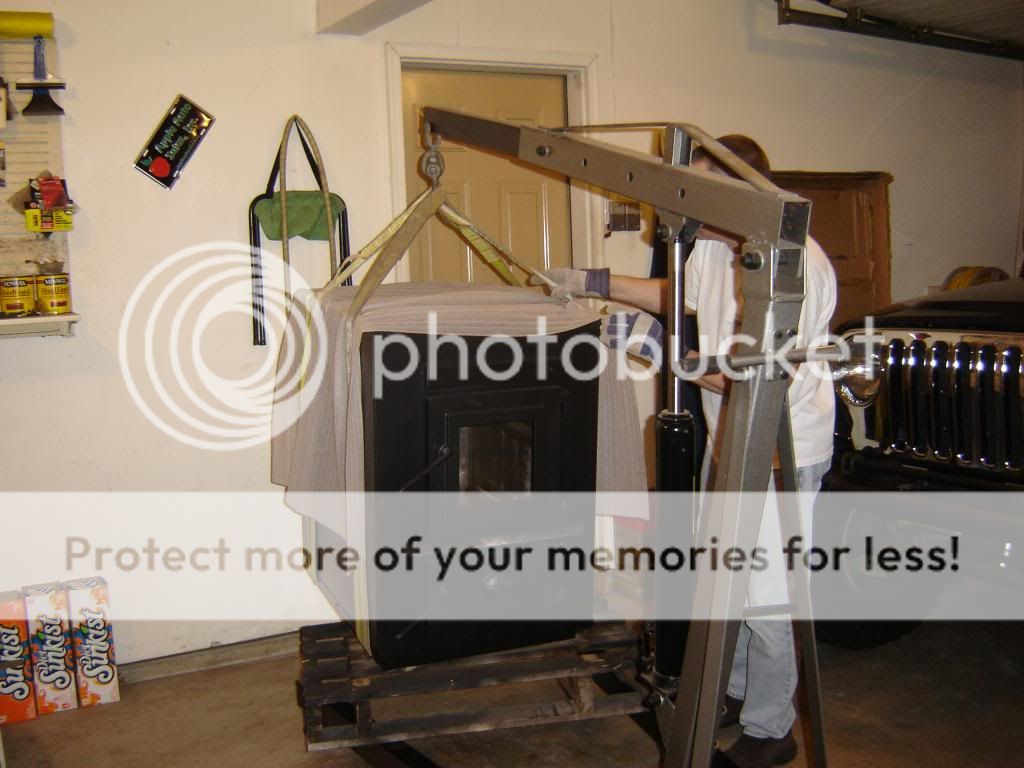
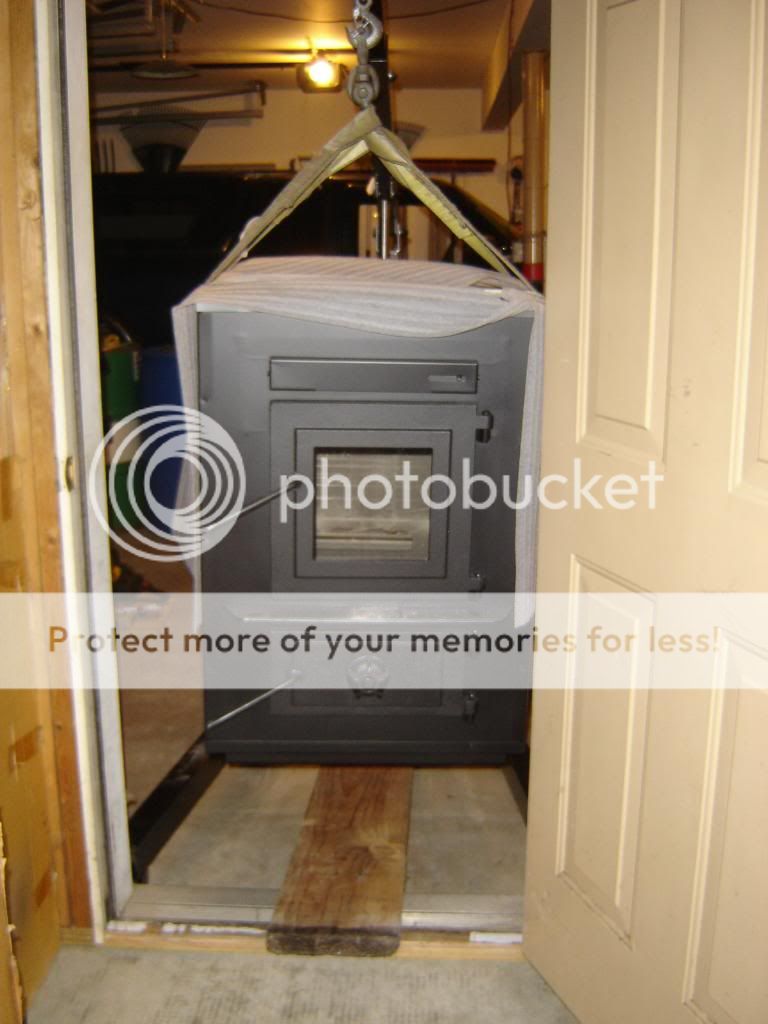
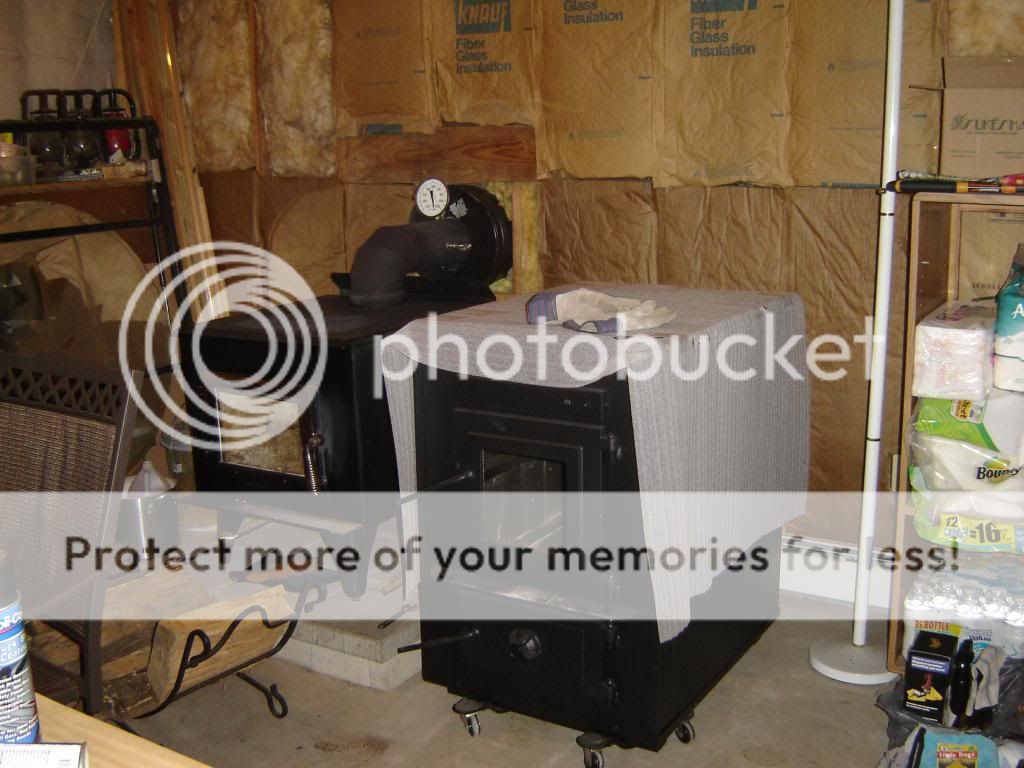
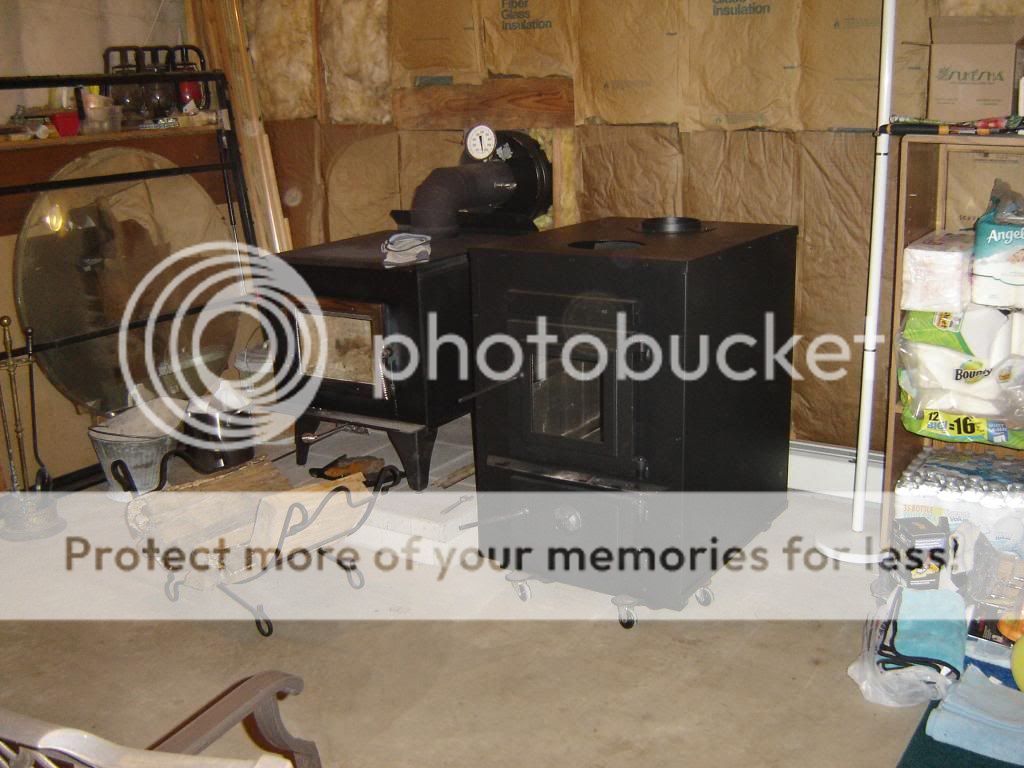
I only paid $300 for mine (used) but I had to disassemble the entire thing, lug it out of a basement up a steep staircase and out of some Bilco doors, then get it up my back steps to the kitchen, through there to the basement on a handtruck. There was a point when there was 450+ lbs of stove, a 215lb me, and a 190lb buddy all on my basement steps (which have no center stringer)-needless to say we were a little nervous, but all turned out well. Seriously, hook up some ductwork to that puppy and get heat to the entire house-it'll make a huge difference. I have mine piped directly into the plenum of my oil furnace. Got a fillup today for the first time since the end of last winter-45 gallons :)
 
Status
Not open for further replies.