Well now, summer is finally getting closer, Ahhhhh, for some of us anyway.
The little friend pellet stove has given its all for the heating season and now it's time to give it some TLC in preparation for next fall/winters heating season.
What to do ?
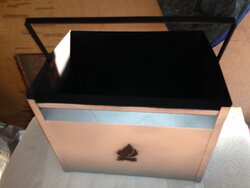
Give the little creature a complete cleaning, and this means every nook and cranny in the thing.
Remove all the baffles, plates and uncover every place that ash and crud can collect.
Once the stove is open and vacuumed out good, use the leaf blower on SUCK to get the beast as clean as you can.
Be sure to leave the door open to allow max air flow and also to be sure you dont over stress the pressure switch.
Now, BE SURE TO UNPLUG THE POWER CORD.
Open the mechanical cabinet (Stove sides, back or ??) to gain access to the inner workings.
This area collects DUST, DIRT and PELLET DEBRIS.
It's amazing how much crap collects in this area.
If you have pets (cats dogs) there will be hair that gets in there too.
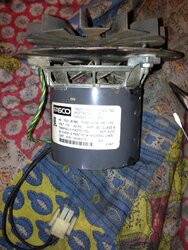
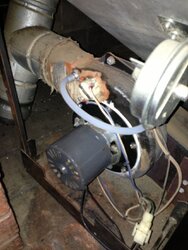
One area that really collects the crud is the air passages through the various fan motors.
The exhaust fan, room air fan motors each have a cooling blade to pull cool air through the motor, and the small slits in the end cap of the motor will collect hair, dust and all manner of crap.
The worst of the crud can be vacuumed off using the house vac with a soft brush on the hand piece.
Once this is done, carefully vacuum the entire cabinet out being careful not to suck up the various insulation thats present in the area.
Look over all the wiring that runs about to be sure that none of the wires have been rubbing on sharp metal pieces and are in danger of causing a short circuit.
A warning, EVERY stove I have ever seen are chuck full of SHARP metal edges that will slice you up quickly.
Soooooooooo, be careful and dont go flogging about, lest you need a box of bandaids.
If all is well so far, then its time to remove the exhaust blower and the room air fan assemblies.
Many exhaust blowers require oiling, and this is a wonderful time to do it.
Getting the exhaust blower off is not usually difficult, but generally will require a new gasket. (See spare parts list)
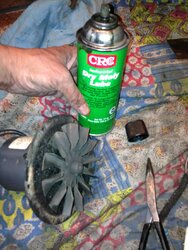
Once the exhaust blower is off, take it out doors to clean it.
The usual exhaust fan is a radial blade type and pretty sturdy, butttttttttttttt, be gentle so as not to distort the bladed.
Use a soft steel/stainless or brass brush to clean off any carbon, ash, etc.
Getting the entire fan clean is important, as left over crap on one blade will cause an imbalance and vibrations.
Once the fan is cleaned, blow out the motor with compressed air to remove the last of the crap.
Set this assembly aside and turn your attention to the exhaust housing.
A metal brush like a bottle brush can do wonders to reach into the innards and knock loose the stuck on crud, ash, carbon etc that the leaf blower SUCK JOB did not jar loose.
Take your tiime and "GITTERCLEAN" as this part of maintenance is only a yearly endevour.
Once things are good here, replace the gasket and then fasten the fan/motor assembly back on.
If the fan/motor is noisy or does not spin freely/quietly, this is the time to replace it.
Next comes the room air fan.
These are usually a squirrel cage design and unbeknownst to most folks, collect huge amounts of crap.
The airborn smoke, oils and such from cooking and ???? all tend to find their way into the air stream and act to STICK the dust particles to the fan blades.
Remove the fan/motor assembly and take it outdoors and blow out the fan, housing and motor.
DO NOT BE TEMPTED to allow the fan to reach extreme speeds while directing compressed air into the squirrel cage, as this can cause damage or personal injury if the fan were to come apart.
Thes fans generally run at 3000 rpm max and could reach many many times this speed with air directed into the wheel.
Once this unit is clean, replace it. Now if the bearings sound noisy or rough, this is a great time to replace the unit.
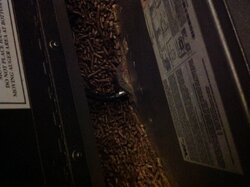
Next, clean out the auger of any pellet dust and be sure the drive motor coupling and such is secure.
The auger motor is sealed/prelubed and is pretty much trouble free and unless there is signs of large grease leakage or other issues, you can leave it alone.
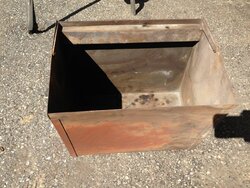
The fire back or brick firebox backer.
If this has become badly erroded to broken, now is a good time to replace it.
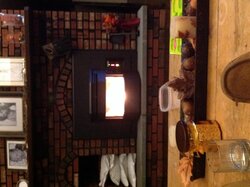
The next item is to clean the windows and make sure the airwash is clean.
The air wash allows air to be sucked in around either the top of the glass or its directed up from slits at the bottom of the glass that are fed air from a booster fan. Every model/make can be different.
Cleaning the glass is a subject of another post, BUTTTTTTTT, I use fantastic spray and with tough stains I use SOS PADS
Check the fire pot to be sure its in good order and if so, reinstall it.
Spare parts list
DONT WAIT UNTIL WINTER AN YOUR STOVE IS BROKE TO ORDER PARTS.
Exhaust fan/motor
Room air fan/motor
Any other fan such as a booster ???
Feed motor
Snap switches (high and low)
Ignitor (if you have one) maybe 2 spares
Control board, especially if your stove is an older model.
Fuses.
Any other odd items like a door switch or ??? that cant be obtained quickly
Vacuum/pressure switch
Piece of hose to connect the switch.
Door rope seal
Gaskets for all the items serviced.
Fresh tube of high temp silicone.
These items may seem like a lot, but on a cold Sunday morning and the fire is out, the house is cold and the wife/hubby and kids are crying, this stash of parts will be a lifesaver.
Once you use an item, REPLACE IT ASAP, because if you don't then next time you will be in deep do do, this is especially true of ignitors.
One can hope to never need these parts, but when you do, they are more valuable than GOLD.
Hope this helps
Snowy
The little friend pellet stove has given its all for the heating season and now it's time to give it some TLC in preparation for next fall/winters heating season.
What to do ?
Give the little creature a complete cleaning, and this means every nook and cranny in the thing.
Remove all the baffles, plates and uncover every place that ash and crud can collect.
Once the stove is open and vacuumed out good, use the leaf blower on SUCK to get the beast as clean as you can.
Be sure to leave the door open to allow max air flow and also to be sure you dont over stress the pressure switch.
Now, BE SURE TO UNPLUG THE POWER CORD.
Open the mechanical cabinet (Stove sides, back or ??) to gain access to the inner workings.
This area collects DUST, DIRT and PELLET DEBRIS.
It's amazing how much crap collects in this area.
If you have pets (cats dogs) there will be hair that gets in there too.
One area that really collects the crud is the air passages through the various fan motors.
The exhaust fan, room air fan motors each have a cooling blade to pull cool air through the motor, and the small slits in the end cap of the motor will collect hair, dust and all manner of crap.
The worst of the crud can be vacuumed off using the house vac with a soft brush on the hand piece.
Once this is done, carefully vacuum the entire cabinet out being careful not to suck up the various insulation thats present in the area.
Look over all the wiring that runs about to be sure that none of the wires have been rubbing on sharp metal pieces and are in danger of causing a short circuit.
A warning, EVERY stove I have ever seen are chuck full of SHARP metal edges that will slice you up quickly.
Soooooooooo, be careful and dont go flogging about, lest you need a box of bandaids.
If all is well so far, then its time to remove the exhaust blower and the room air fan assemblies.
Many exhaust blowers require oiling, and this is a wonderful time to do it.
Getting the exhaust blower off is not usually difficult, but generally will require a new gasket. (See spare parts list)
Once the exhaust blower is off, take it out doors to clean it.
The usual exhaust fan is a radial blade type and pretty sturdy, butttttttttttttt, be gentle so as not to distort the bladed.
Use a soft steel/stainless or brass brush to clean off any carbon, ash, etc.
Getting the entire fan clean is important, as left over crap on one blade will cause an imbalance and vibrations.
Once the fan is cleaned, blow out the motor with compressed air to remove the last of the crap.
Set this assembly aside and turn your attention to the exhaust housing.
A metal brush like a bottle brush can do wonders to reach into the innards and knock loose the stuck on crud, ash, carbon etc that the leaf blower SUCK JOB did not jar loose.
Take your tiime and "GITTERCLEAN" as this part of maintenance is only a yearly endevour.
Once things are good here, replace the gasket and then fasten the fan/motor assembly back on.
If the fan/motor is noisy or does not spin freely/quietly, this is the time to replace it.
Next comes the room air fan.
These are usually a squirrel cage design and unbeknownst to most folks, collect huge amounts of crap.
The airborn smoke, oils and such from cooking and ???? all tend to find their way into the air stream and act to STICK the dust particles to the fan blades.
Remove the fan/motor assembly and take it outdoors and blow out the fan, housing and motor.
DO NOT BE TEMPTED to allow the fan to reach extreme speeds while directing compressed air into the squirrel cage, as this can cause damage or personal injury if the fan were to come apart.
Thes fans generally run at 3000 rpm max and could reach many many times this speed with air directed into the wheel.
Once this unit is clean, replace it. Now if the bearings sound noisy or rough, this is a great time to replace the unit.
Next, clean out the auger of any pellet dust and be sure the drive motor coupling and such is secure.
The auger motor is sealed/prelubed and is pretty much trouble free and unless there is signs of large grease leakage or other issues, you can leave it alone.
The fire back or brick firebox backer.
If this has become badly erroded to broken, now is a good time to replace it.
The next item is to clean the windows and make sure the airwash is clean.
The air wash allows air to be sucked in around either the top of the glass or its directed up from slits at the bottom of the glass that are fed air from a booster fan. Every model/make can be different.
Cleaning the glass is a subject of another post, BUTTTTTTTT, I use fantastic spray and with tough stains I use SOS PADS
Check the fire pot to be sure its in good order and if so, reinstall it.
Spare parts list
DONT WAIT UNTIL WINTER AN YOUR STOVE IS BROKE TO ORDER PARTS.
Exhaust fan/motor
Room air fan/motor
Any other fan such as a booster ???
Feed motor
Snap switches (high and low)
Ignitor (if you have one) maybe 2 spares
Control board, especially if your stove is an older model.
Fuses.
Any other odd items like a door switch or ??? that cant be obtained quickly
Vacuum/pressure switch
Piece of hose to connect the switch.
Door rope seal
Gaskets for all the items serviced.
Fresh tube of high temp silicone.
These items may seem like a lot, but on a cold Sunday morning and the fire is out, the house is cold and the wife/hubby and kids are crying, this stash of parts will be a lifesaver.
Once you use an item, REPLACE IT ASAP, because if you don't then next time you will be in deep do do, this is especially true of ignitors.
One can hope to never need these parts, but when you do, they are more valuable than GOLD.
Hope this helps
Snowy


")