Chimney parts for Englander 17-VL

  • Active since 1995, Hearth.com is THE place on the internet for free information and advice about wood stoves, pellet stoves and other energy saving equipment.

    We strive to provide opinions, articles, discussions and history related to Hearth Products and in a more general sense, energy issues.

    We promote the EFFICIENT, RESPONSIBLE, CLEAN and SAFE use of all fuels, whether renewable or fossil.
Status
Not open for further replies.

cabinner

Member
Aug 2, 2013
120
NY
Well I was supposed to receive my englander today but it arrived broken and beaten and I had to send it back.... :(

They are sending another one instead.

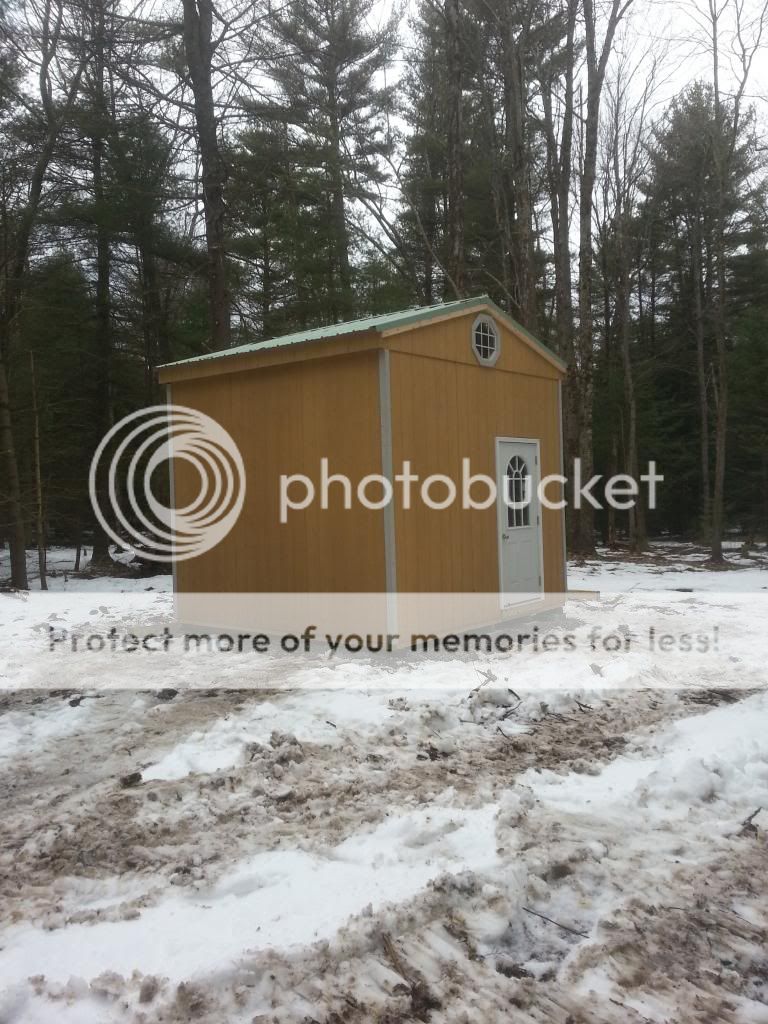
I would like to start planning the chimney parts for it. I do not want to go through the roof nor through the overhang outside. my cabin is 12ft x 12 ft with 13ft ceiling. I want the double wall chimney to reduce the distance from combustibles...

Mike, from englander, said I need to get UL103HT type chimney and I intend to do so.

Should I go straight up and then 45 degree it out or should I just 90 degree it out and then up?

If someone can recommend how to do the chimney I will be very happy..


Just out of curiosity who did you order it from? I just ordered one from Dixie products. They had the best price around with free shipping. I believe I saw it from your post.
 
I do not want to go through the roof nor through the overhang outside.

Should I go straight up and then 45 degree it out or should I just 90 degree it out and then up?
The best route is going to be through the roof, why don't you want to go through the roof?
If you want to go out the wall, you need to to go up a few feet, then double 45 or 90. At this point, the connector pipe (stovepipe) will meet the Class A chimney. Outside you will have to have a Tee with a piece running inside through the thimble, this is what connects to the connector pipe. The problem with not going through the overhang is that the Tee support isn't adjustable enough to allow for the extra distance. Most extend about 10" from the wall I think. Excel makes an extended bracket that allows you do more. It works pretty well. But again, straight up is much better!
 
Luigi - yes from dixie products. They did have the best price around. I don't think it was their fault but the delivery company. It was very badly damaged. I will call them today and see when they are sending me a new one.

webby - I don't want to go through the roof because I don't want to cut my roof.... I am doing this myself and messing my roof is definitely not something I want to do... But we'll see. maybe I just need to get over it.

Where can I find great prices on chimney parts?
 
I used Woodsmans Parts Plus for pipe. I would go out of the house as soon as possilbe. This will keep the cleanout point close to the ground as possible. Also, where ever the 45 or 90s are, you will not be able to clean with a rod/brush. You need to be above the highest roof point within a 10 foot radius. If the pipe is at the roof ridge, then you need to be a minimum distance above that point as well.
 
I went up 3 or 4 feet and then went out the wall via the pass through and then to a T and then it was a straight shot up. It worked out very well for me as there is no roof penetration other than the support struts and an added benefit is that from a standing position I can un-screw the three screws holding the T's base cap in place and then sweep the chimney from the ground year-round in any weather and it's a 10-15 minute job.

Personally, I like going up a few feet inside the house . . . I personally feel as though it helps establish a draft a bit quicker . . . but I honestly have no hard facts backing this up.
 
Several stove manufacturers recommend that there is 3' or so of pipe before the elbow. If this is ignored, it can make an already slow drawing set up even worse.
 
  • Like
Reactions: PapaDave
Ok - so a 4ft straight up, elbow (90 or 45?), another straight piece to the outside, and then a T (to allow of cleaning access under?), then a straight shot over the roof....

Sound like a plan?

Any recommendation as to what material to use? stainless vs whatever else is out there?

any other good tips or things I should read on chimeny pipe installation?
 
Super-vent from menards is pretty much straight forward. It comes with instructions. You want to use all SS class A components. The big box stores have pretty good deals, and its all tested to the same standards. I would avoid any air cooled pipe, you want chimney that is double wall with solid packed insulation between the walls.
 
  • Like
Reactions: PapaDave
I don't want to cut my roof.... I am doing this myself and messing my roof is definitely not something I want to do... But we'll see. maybe I just need to get over it.
Study up, do it yourself or get somebody with some skills to help. Do a good job sealing it up, and you'll be fine. Maybe use some high-tech sealant? Straight up would be cheaper, better draft etc. Not sure if there is a way to clean by going through the stove from the bottom (Sooteater?)
 
Make sure to use the proper wall pass-thru, and obey all CTCs.
Horizontal run should have 1/4" rise per foot of stove pipe.
http://englanderstoves.com/manuals.html Yours is right under the ER in Englander. Page 30 describes what you need.
Read the whole thing.
Come back for any clarifications.
Sucks that the stove was damaged, but this will give you more time to get the flue setup correct.
How's your wood supply?
Don't forget the pics.....:cool:
 
Don't worry - even if I had the stove I would have not rushed this. I never do anything without first making sure it will be done right.

What inexpensive kits will work for me? any good links you can share?
 
If expense is a concern, go thorough the roof instead of the wall. That way, you can use quite a bit of single wall or double wall pipe up to the support box in the ceiling and only pay for the Class A from the support box on up. If you go outside five or so feet up the wall, you will have to pay for eight more feet of class A going up the side of your house, and if you go with a brand like Duratech, that'll be around $450. Plus you get the benefits of a warmer, straighter chimney that should draw better.

Plan the location so you go through between the trusses, make sure you have your clearances right, and pay somebody (or, as I did, get a more competent friend) to make sure that your flashing and shingles are done properly.
 
Alright.. change of plan. After finishing up the wiring of the cabin I realized that putting the chimney through the wall won't be as good for us. I guess I will need to go through the roof. Any good tutorial or videos out there of how to do it? I have a steel metal roof.

I have no problem to pay a bit more for the roof flashing part if it will be easier to install and more "mistake proof" so I don't get leaks. Any recs will be appreciated.
 
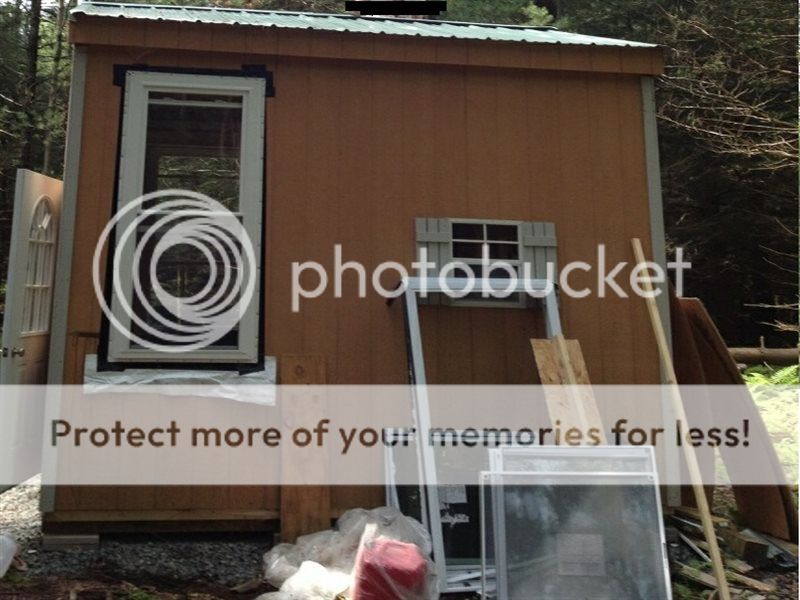
What type of steel roof is this, standing seam or corrugated? Do you have any pictures of the roof?
 
Hard to say but it looks like some form of seamed roofing. Does this cabin have any windows? With a stove in that tiny space you are going to need them open I think.
 
This is just the way I bought it... Since then I installed huge windows... 36 x 80 ( three of them) so this cabin is basically mostly glass.

Is this a better photo?

 
That is a better picture of the roof. It appears to be corrugated. You will need a soft boot (lead jack?) with a silicone flex boot I think, but defer to the experts. Hogwildz is the roofing expert here.

So what is the footprint of the cabin, 12'x12'? It is going to get hot in there for sure with a wood fire.
 
Excel makes the flashing you need. It made for metal roofs and gives you the needed stability that the rubber boot doesn't give you.
 
Thanks for the link I will look into this option as well.

I saw a video yesterday of this pro installing it and also a friend mentioned the same thing - decktite boot. This thing: http://www.dlm.co.nz/dektite.html

Will that not be as good? seems very adjustable to wherever I will come out?
 
I would not trust the rubber boot to last as long or seal as well as the flashings Webby or Begreen mentioned.
Is the class A penetration going to be near the peak or elsewhere?
Webby gave a good link to a good flashing. On that page is a link to the installation instruction PDF.
Here is the link.
http://www.icc-rsf.com/c/iccrsf/file_db/chem_produits_manuels.pdf_en/XM-EMFA-B-C1.pdf
Read up on it and this is pretty much how you want to install the flashing.
Don't forget to install a storm collar around the pipe just above the flashing, and seal the collar to the pipe with silicone.
Smear the silicone smoothly in both directions with your finger to work it in as this helps it adhere better.
A good gob od split on your finger will help keep the caulk from sticking to your finger, and give a nice smooth spread of the silicon caulk.

Where in NY are you?
You picked a great place to ask questions, so don't hesitate to ask, or send a PM if you need more help?
 
Thanks Hogwildz.

I will use this metal flashing part.

The penetration will be closer to the bottom (overhang) as the stove will sit very close to the outside wall. I am 30 min north from Port Jervis - I am 10 min from PA border ;)

BTW - my roof pitch is 4/12.. not sure if that matters for this installation.

A few questions pls:

1. In step 2 they say to leave 2" between chimney and combustible. Then this means that I need to make the hole 2" bigger because of the OSB sheathing on the roof?

2. I understand the water management concept for the slot. How far off from the cone should it be? I fill like it should be so it touches the cone for maximum protection.. right ?

3. Online video shows a guy installing it (on a shingle roof but nonetheless) where he makes a square cut... I thought I need to make a round hole? The guy online then connect that interior metal box (not right term I think) to the inside of the rectangle hole and places the flashing on top...

4. What is the best sealant out there?

5. Also they mention that anything over 5ft needs a brace. My entire cabin is 12 ft so in a 10 ft radius my ridge/peak, on a 4/12 pitch roof, should be about 2 ft higher than the lowest part (overhang) and where my chimney will be quite close to.... Then from my estimate - 3 ft minimum chimney height will be about 1 ft higher to 0.5 ft than my ridge so I need another foot - 0.5 ft which will = 4-3.5 ft of chimney. I don't mind to go above this minimum. I like to over build than under build. Then how much more than the ridge should I go? Should I do a brace any way?

And again, you guys are really helping me and I can't wait to do this and share photos.
 
Status
Not open for further replies.