Hardiebacker to brick?

  • Active since 1995, Hearth.com is THE place on the internet for free information and advice about wood stoves, pellet stoves and other energy saving equipment.

    We strive to provide opinions, articles, discussions and history related to Hearth Products and in a more general sense, energy issues.

    We promote the EFFICIENT, RESPONSIBLE, CLEAN and SAFE use of all fuels, whether renewable or fossil.
Status
Not open for further replies.

mattjm1017

Feeling the Heat
Oct 23, 2012
408
Corapeake NC
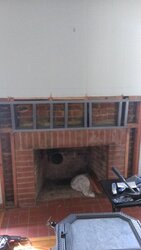
Does anybody know of a way to install hardiebacker to brick? Im giving my hearth a makeover and need to install the hardiebacker directly to the brick. I planned to just use concrete/brick anchor screws but when I talked to hardiebacker they said that they have no recommendations for installing it to brick so Im kind of at a loss now.
 
That's a unique install! What is the reason for the backer? Most all masonry products can be attached to the brick without any trouble. I used mesh behind my stone veneer, but that was only because the brick was painted with semi-gloss paint.
 
That's a unique install! What is the reason for the backer? Most all masonry products can be attached to the brick without any trouble. I used mesh behind my stone veneer, but that was only because the brick was painted with semi-gloss paint.
the reason for the backer board over the brick is because part of what will be tiled is also over studs I need the backer board on the studs for the tile and to make it all flush and even i want to put the backer board on the brick too.
 
I would think you could use thin-set to bond it to the brick. Just use some anchors randomly to hold it to until the thin-set dries.
 
  • Like
Reactions: mattjm1017
Thanks webby for the quick reply I found on another forum about shower stuff to use thinset and tapcons so Ill go ahead and try that. Thanks again.
 
Tapcons
 
  • Like
Reactions: mattjm1017
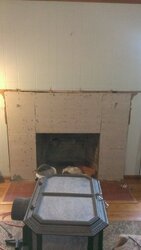
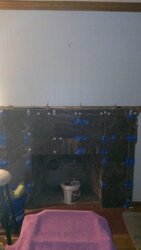
Heres an update I used the mortar and tapcons on the brick seemed to work out nicely. After that was all fiinished I started in on the tiling got that done tonight now to wait and grout it all. All I need is a new mantle and some trim on the edges of the tile. Th pictures dont quite do it justice but yall will get the idea Im sure. After its all done and put back together Ill get my wifes camera and take a real good picture of it.

IMAG0273_BURST001.jpg IMAG0278.jpg IMAG0283.jpg
 
Status
Not open for further replies.