Poured Concrete Hearth Help

  • Active since 1995, Hearth.com is THE place on the internet for free information and advice about wood stoves, pellet stoves and other energy saving equipment.

    We strive to provide opinions, articles, discussions and history related to Hearth Products and in a more general sense, energy issues.

    We promote the EFFICIENT, RESPONSIBLE, CLEAN and SAFE use of all fuels, whether renewable or fossil.
Status
Not open for further replies.

mustardman

New Member
Oct 15, 2013
27
Quebec Canada
Hi Guys,

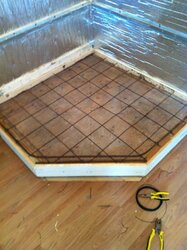
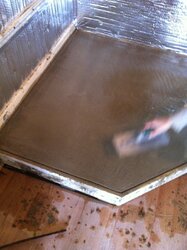
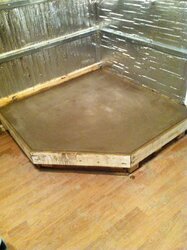
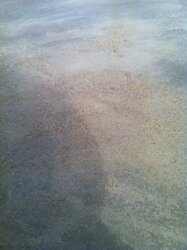
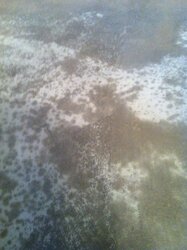
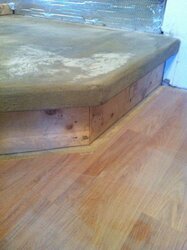
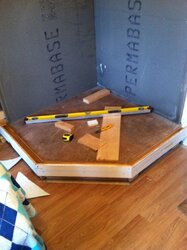
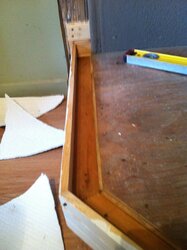
I just signed up to this forum as I am installing a new wood stove "Jotul F100" and I built my hearth 8 inches above the ground and its going to be installed in a corner. I made a form and plan on pooring cement right in approx inches thick and then I plan to acid wash it and polish it. Will normal Sand Mix cement work for this. I have seen counter top concrete but it is 50$ a bag and way too expensive. Some people have recommended mortar but i dont think thats a good idea. Looking forward to your opinions on this
 

Attachments

  • IMG_0062.JPG
    IMG_0062.JPG
    246.8 KB · Views: 442
  • IMG_0064.JPG
    IMG_0064.JPG
    231.9 KB · Views: 358
Need some more info here to be helpful, before even getting to the concrete.

What stove is going to be installed on the concrete? Does it only need ember protection under it? Or does the pad need a certain r-value?

How thick were you planning on making it (the # of inches didn't get recorded in your first post)

pen
 
Hi Pen,

Thanks for the fast Reply. I am really not sure about the heat shield, but i think it does have one. It is a Jotul F100. I plan on Making the Cement between 1.5 inches to 2 inches thick
 
Here is what i got in my guide

Floor Protection
The Jøtul F 100 USA requires one of the following forms
of hearth protection:
1. Any UL, ULC or WH listed hearth board. (No bottom
heat shield required).
2. Any noncombustible material with use of the
bottom heat shield.
All forms of protection must include a noncombustible
surface extending forward from the glass panel at least
16” for the U.S., or 18” (46cm) for Canada. Protection
must extend 8” (21 cm) from the sides and rear for both:
the U.S. and Canada.
 
You'll probably be ok but it would be best to check if the stove has a bottom heat shield attached.
 
Yep, same guide I'm looking at. You don't need a specific r-value for the pad so a couple of inches should be good to go so long as it's big enough in each direction as per the manual, and you have proper wall clearances, and that shield.

With that established, now you'll have to find someone who finished concrete (not me). If this thread doesn't generate the response you need for that in a few days, try a post about finishing concrete in the DIY room on here.
 
It will need to be at least 2" thick, otherwise it will crack. It can be thinner if you use specialized cement, like that would be used in an overlay application. Use pea gravel mix, mortar will not work for this. I poured a new concrete hearth over top of my existing limestone hearth, it's three inches thick and no crack yet. I died it black and then used an emulsion sealer on it. Gives it that polished, wet look but without all the work.
 
what do you think about using the cement without the Gravel. I am not a big fan of the lumps .. if you know what I mean. How did you polish your hearth ?
 
I think you can use concrete (with gravel) then float the top. Our steps are done this way and there are no pebbles showing.
 
I have used Quikrete Precision Grout for numerous concrete tables and it is extremely durable. It doesn't have the pea gravel and doesn't take much to get a smooth finish. Quikrete 5000 is another but does have pea gravel. I also cast upside down into a melamine form for a smooth finish before polishing. The grout is $11-$13 for a 50lb. bag.

Depending on how smooth and shiny of a finish you could wet polish. I have done light polishing with wet sandpaper and hope to step up to a pneumatic wet polisher before to long.
 
Thanks for all the replies everyone. I did poor my slab last weekend. (Pics Below) I just bought sand mix for the job. I wanted to keep it cost effective. I will be letting it dry for 7 days as it is my country home but I am really wondering how to finish this now. I have been reading up a lot and some people say to use muriatic acid on it ro remove the "paste". If I do choose to do this would i do it before or after i sand.

I also wanted to get honest opinions here. Can i use my normal orbital sander. This is all I have and I am not to go out and buy a wet polisher and diamond blades for a small hearth. I have a normal sander and bought a whole stack of 240 grit sanding disks. Will the sand just keep breaking off or do you think after the 7 days it will be able to sand down to that "glassy look" ? I tries to upload some pis so you guys get a good idea of what I am working with.

As the final step after i apply the sealer i will be polishing it with a buffer and carnuba wax
 

Attachments

  • IMG_0068.JPG
    IMG_0068.JPG
    292.3 KB · Views: 404
  • IMG_0073.JPG
    IMG_0073.JPG
    247.1 KB · Views: 577
  • IMG_0097.JPG
    IMG_0097.JPG
    321.8 KB · Views: 408
  • IMG_0104.JPG
    IMG_0104.JPG
    215.6 KB · Views: 418
  • IMG_0105.JPG
    IMG_0105.JPG
    316.4 KB · Views: 427
  • IMG_0106.JPG
    IMG_0106.JPG
    278.9 KB · Views: 349
  • IMG_0109.JPG
    IMG_0109.JPG
    274.4 KB · Views: 359
Sorry it took so long to respond. I've never used the acid to remove any paste. After letting it cure, I've gone straight to polishing. The table I'm working on now, I will wet sand working up from 100 or so, to 1000 grit, then buff. I've gone up to 400 in the past with smooth results. I think the 240 will get you smooth but I don't think glossy smooth.

I plan on making more and think it will be better (for me) to get the wet polisher and pads.
 
Status
Not open for further replies.