evaluate my plan to add wood mantel to massive old stone fireplace (pics)

  • Active since 1995, Hearth.com is THE place on the internet for free information and advice about wood stoves, pellet stoves and other energy saving equipment.

    We strive to provide opinions, articles, discussions and history related to Hearth Products and in a more general sense, energy issues.

    We promote the EFFICIENT, RESPONSIBLE, CLEAN and SAFE use of all fuels, whether renewable or fossil.
Status
Not open for further replies.

brobrandonb

Member
Apr 1, 2010
20
SE Pennsylvania
Looking for any tips/tricks/advice for this project.

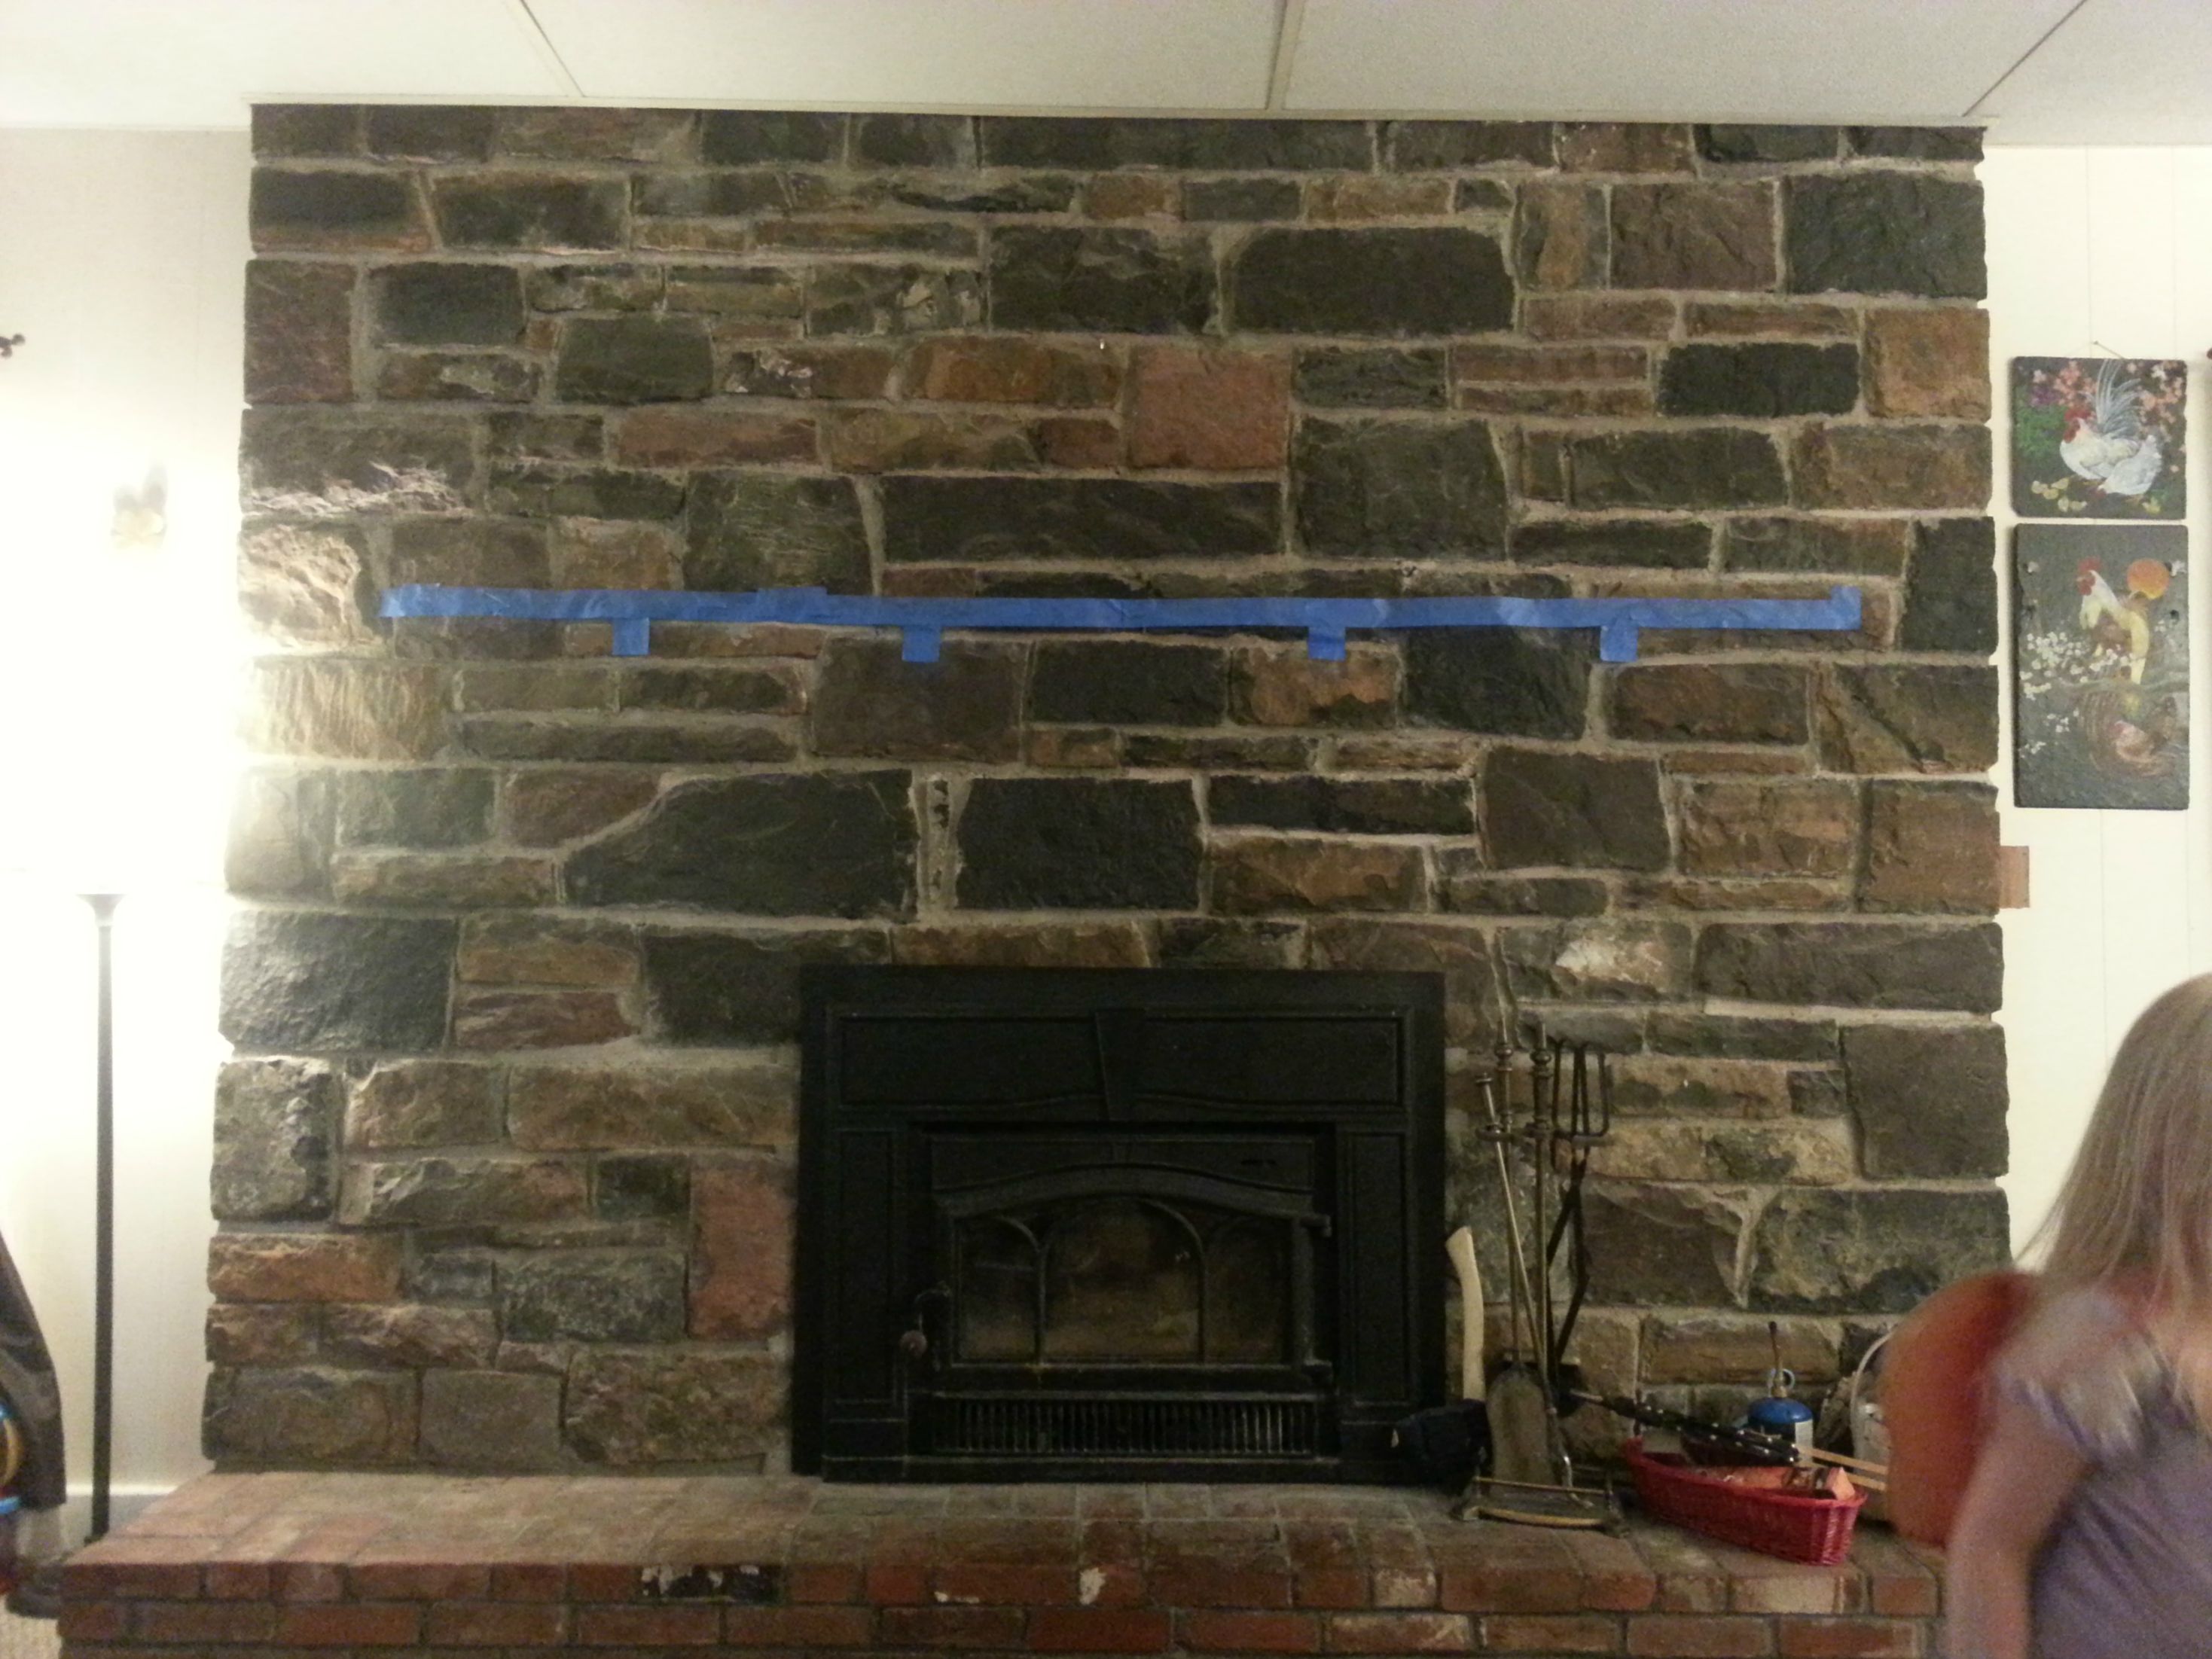
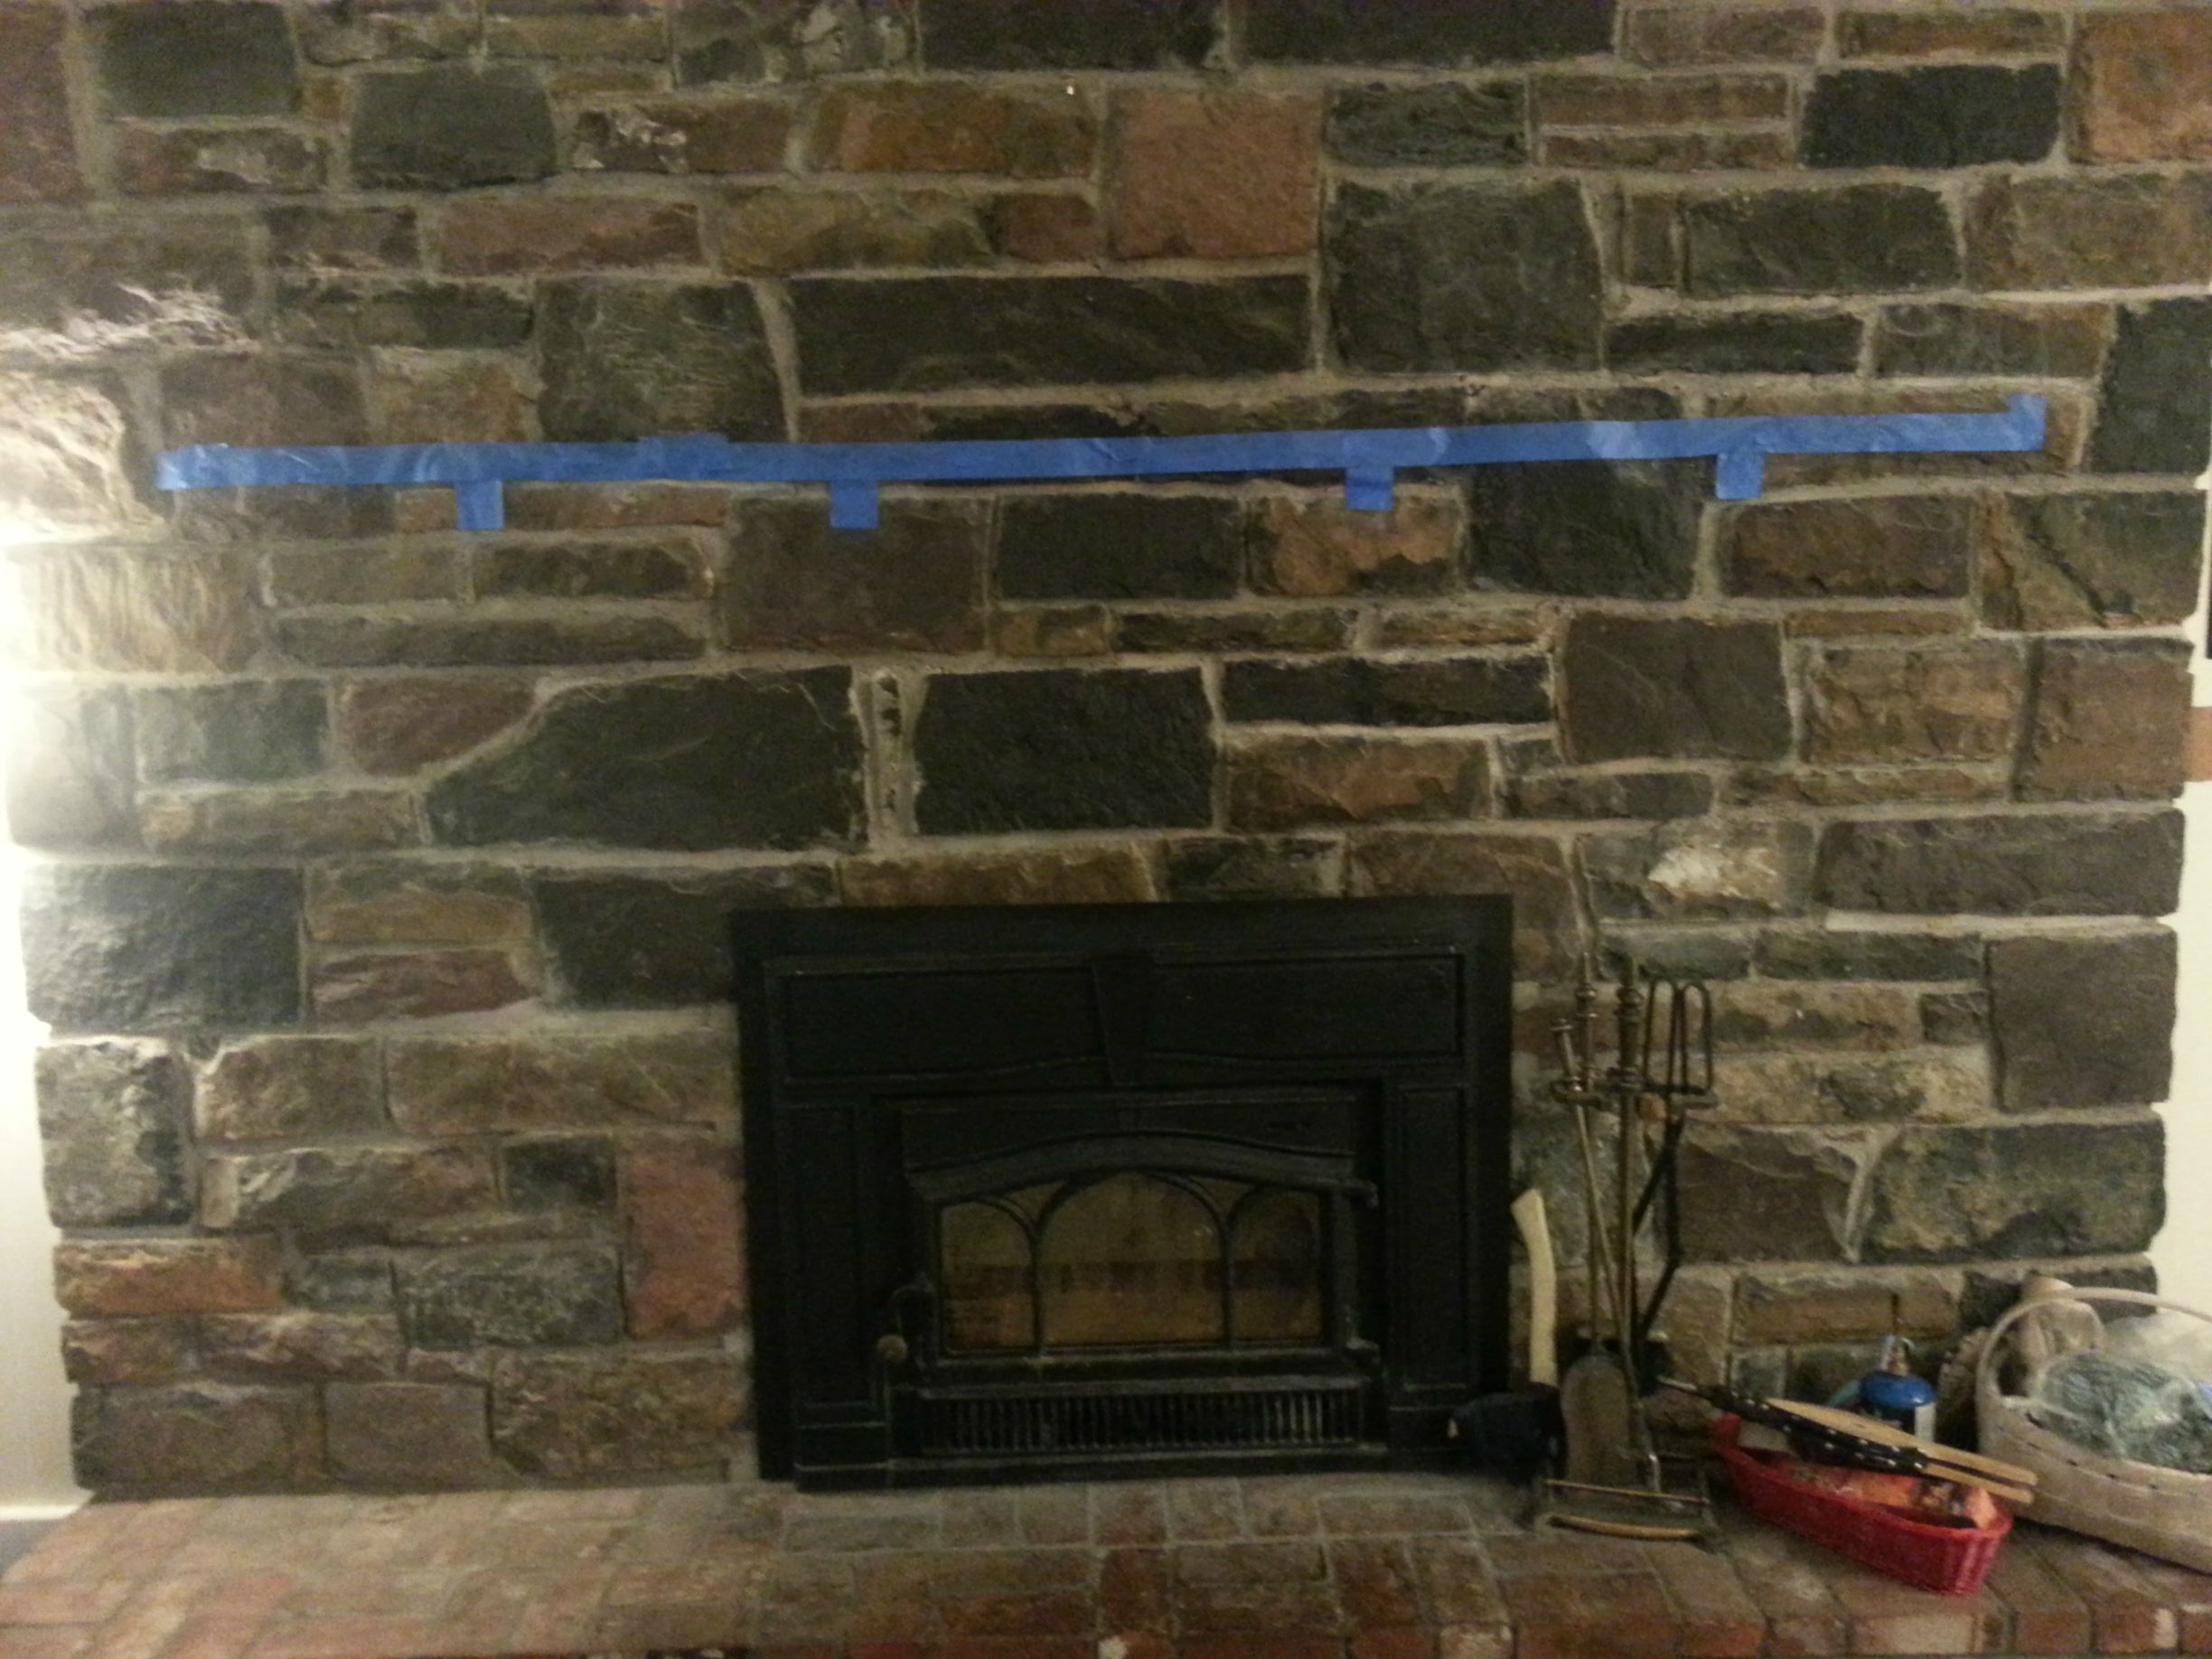
What we are working with:I'm the 3rd owner of this old house, the last one was a mason and installed a massive stone fireplace in the addition he tacked on to the house (bringing the total square footage to 1200 sq ft). One of the first things we did was add in my Jotul C550 Rockland with a liner. It's been heating us like a champ for a few years now. Sadly, in spite of the fireplace being massive and dominating the living room - it feels a bit... naked. Here is a shot from one of our Christmas's:

Laz3fI8.jpg


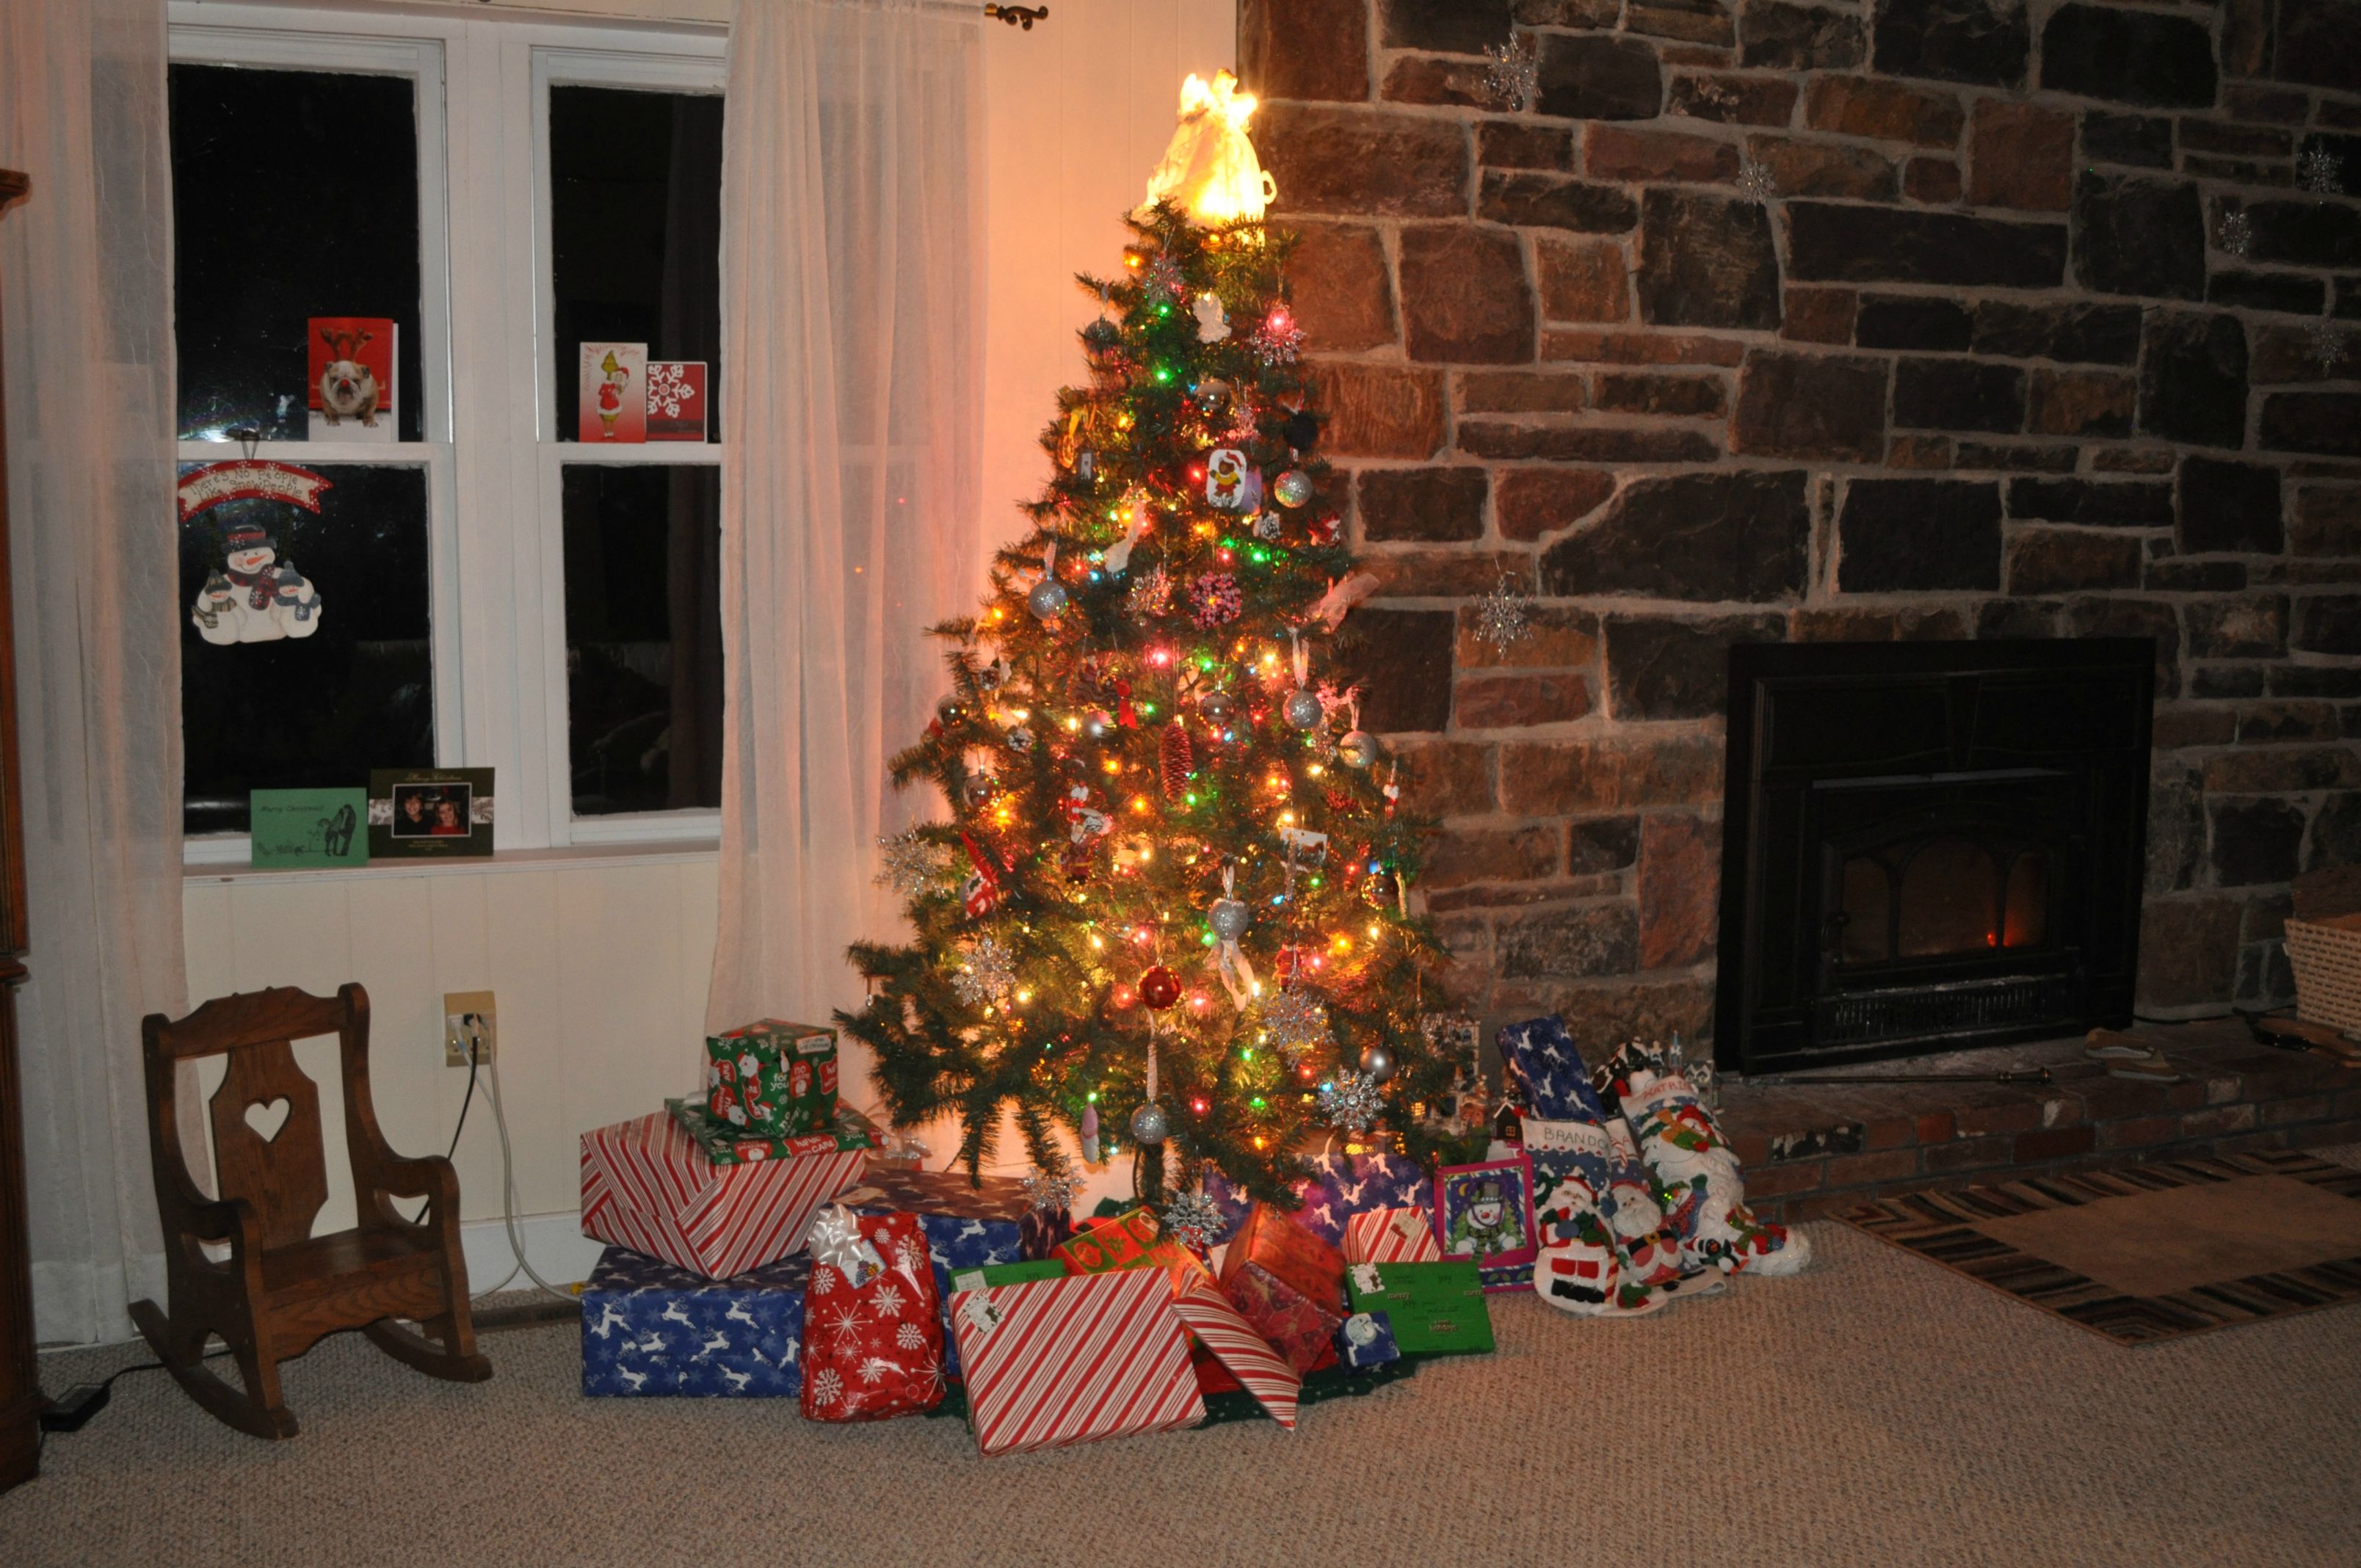
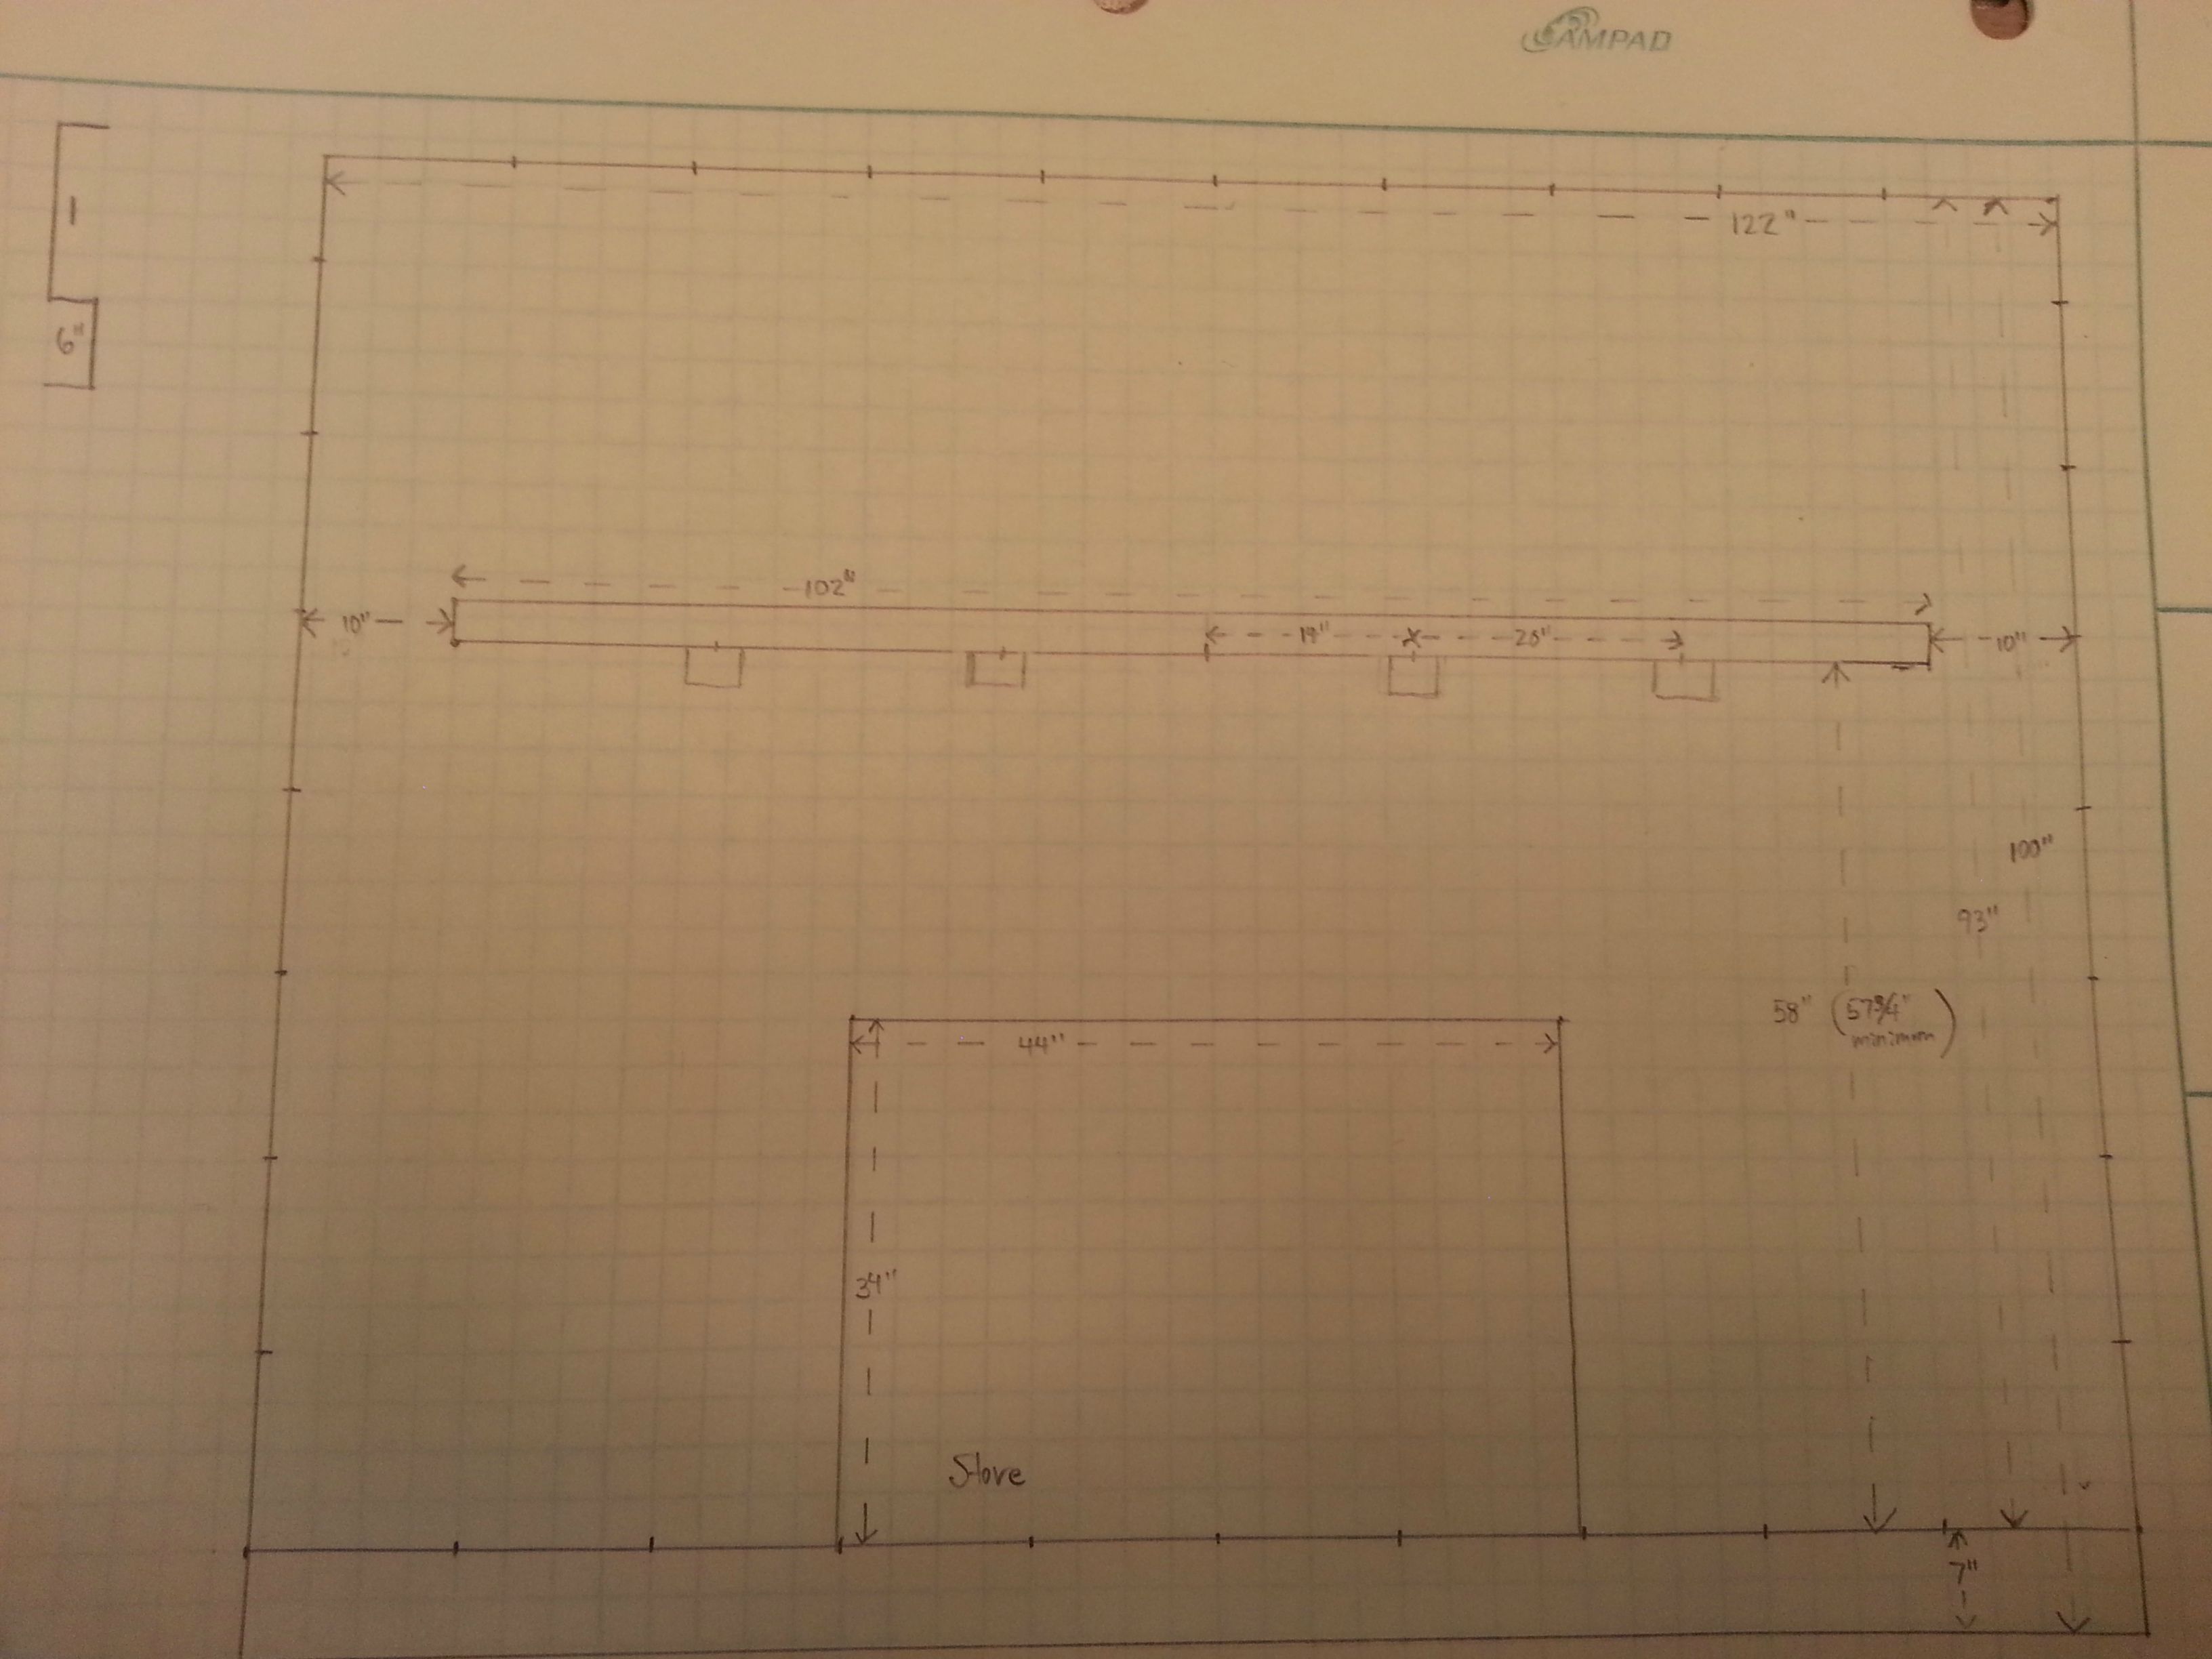
The stone work is 93" high (reaches the ceiling) and about 122" wide. We want a mantel.
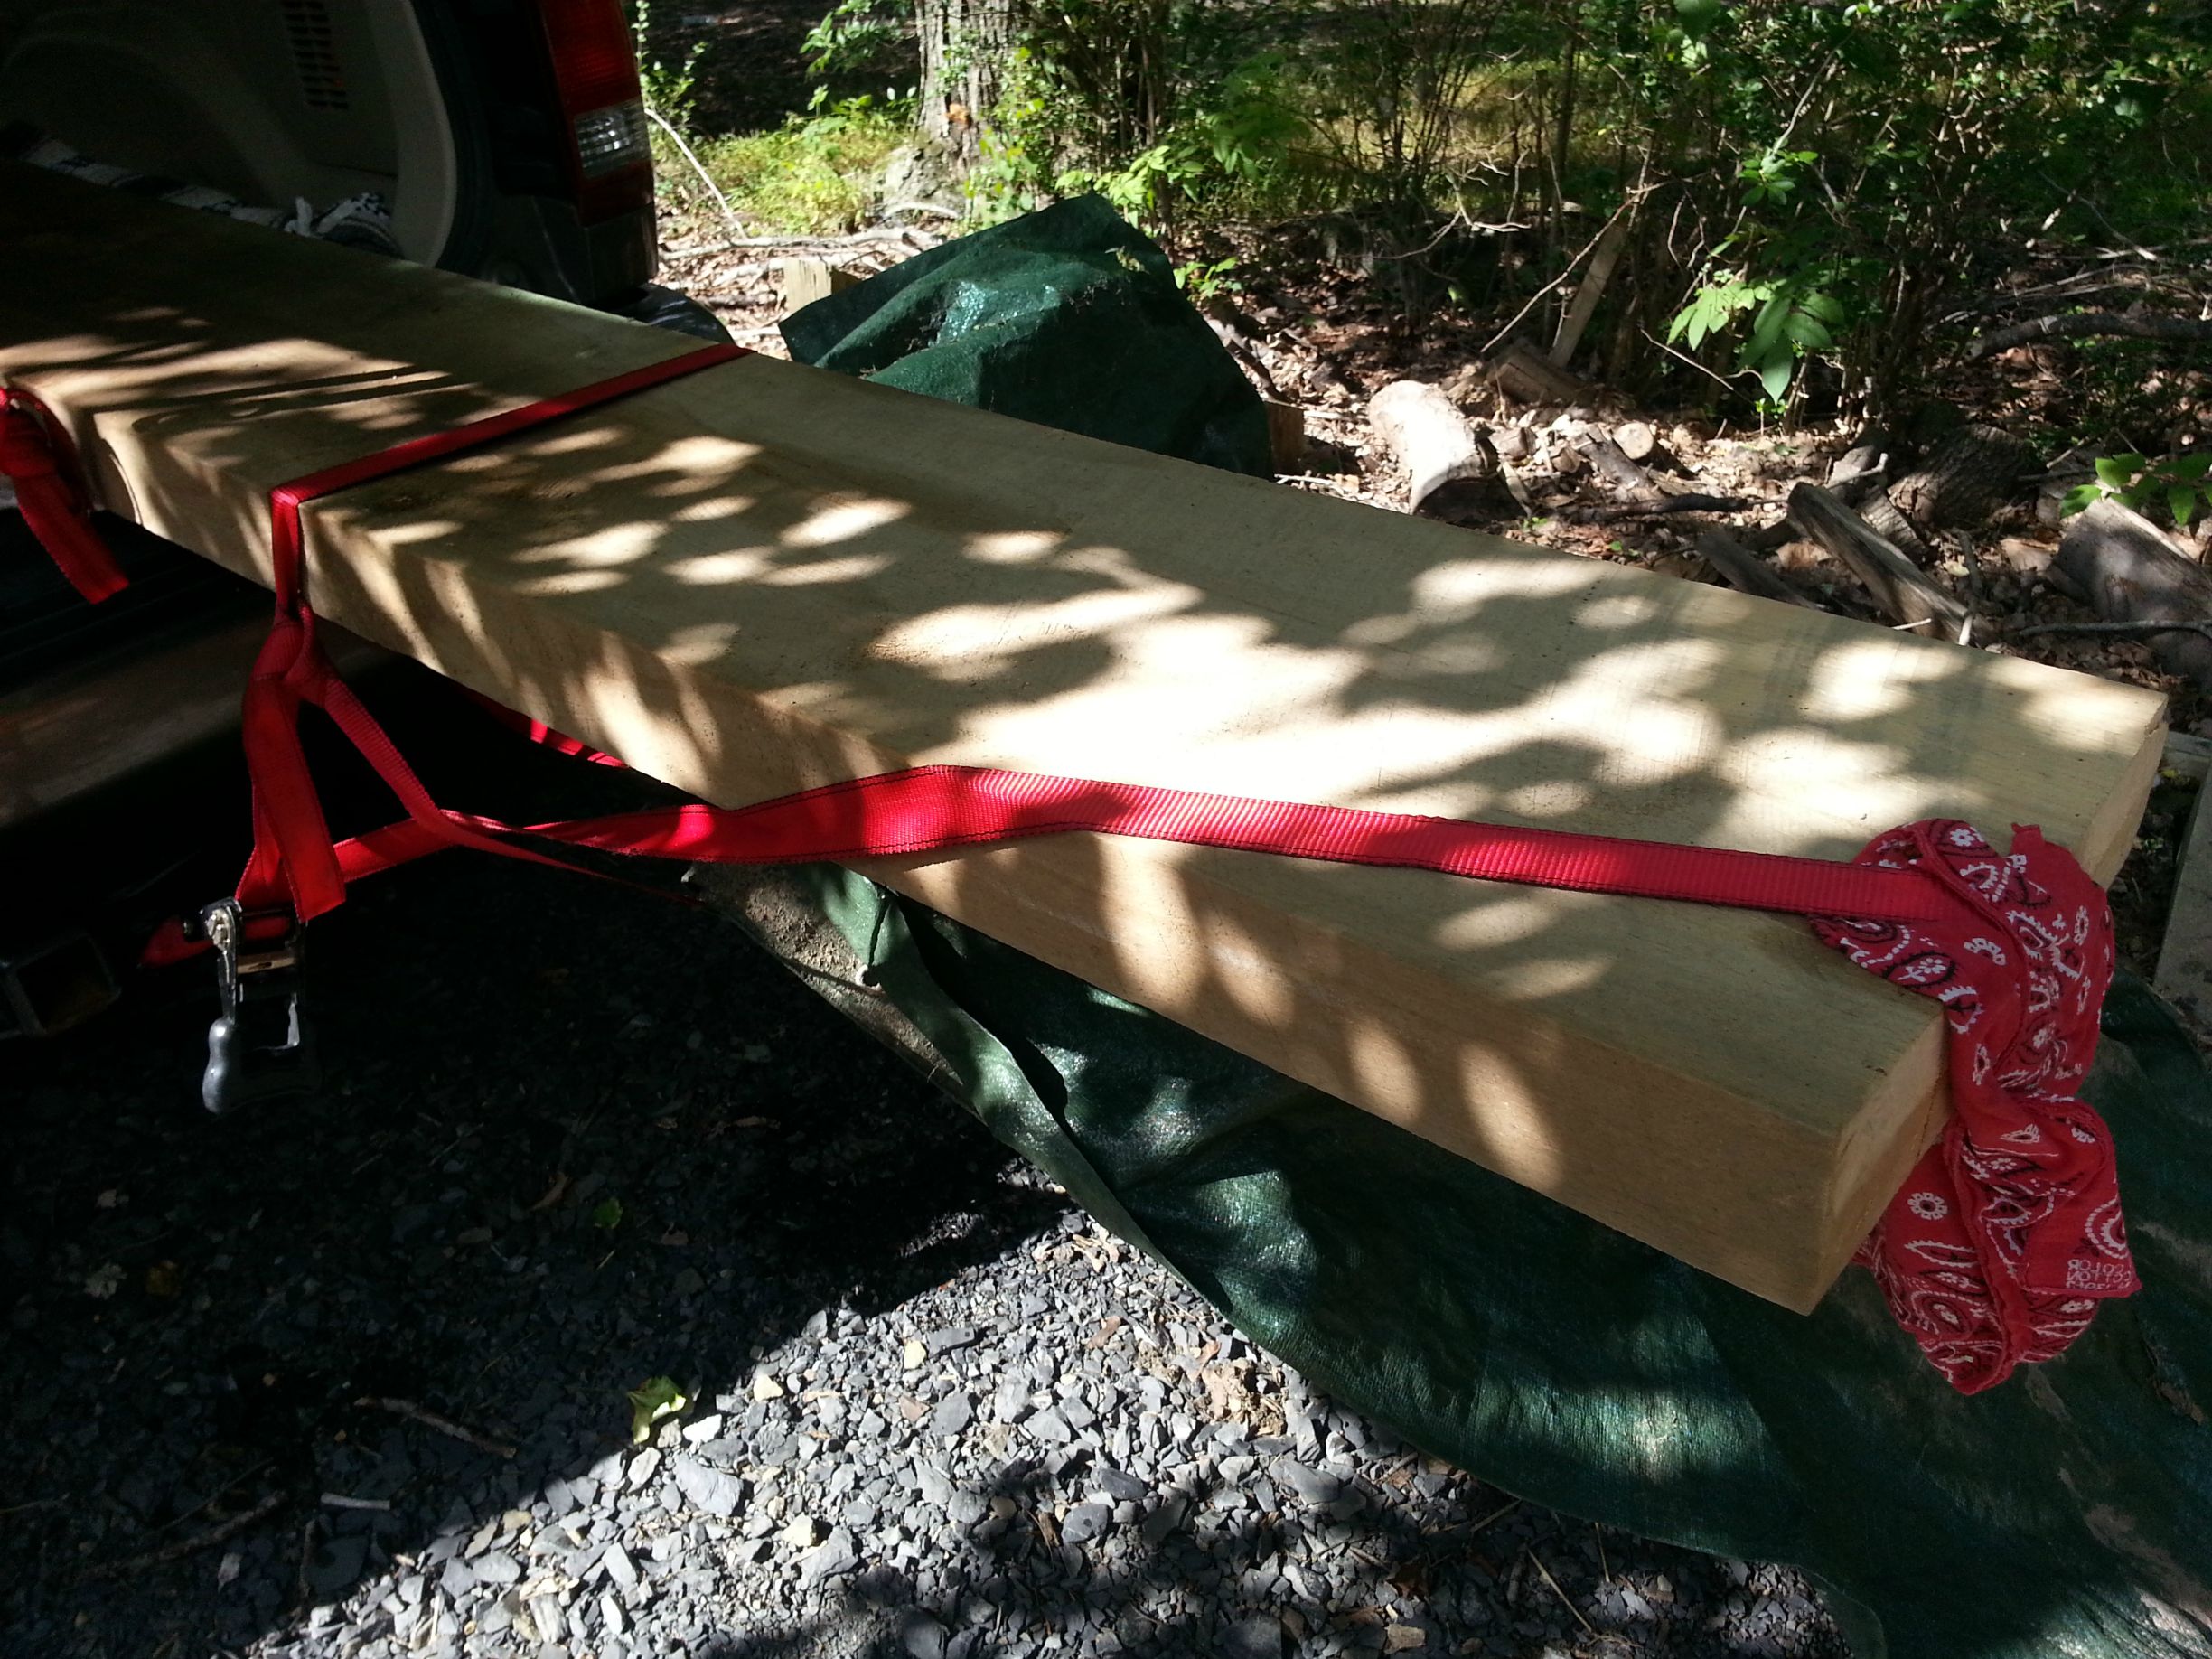
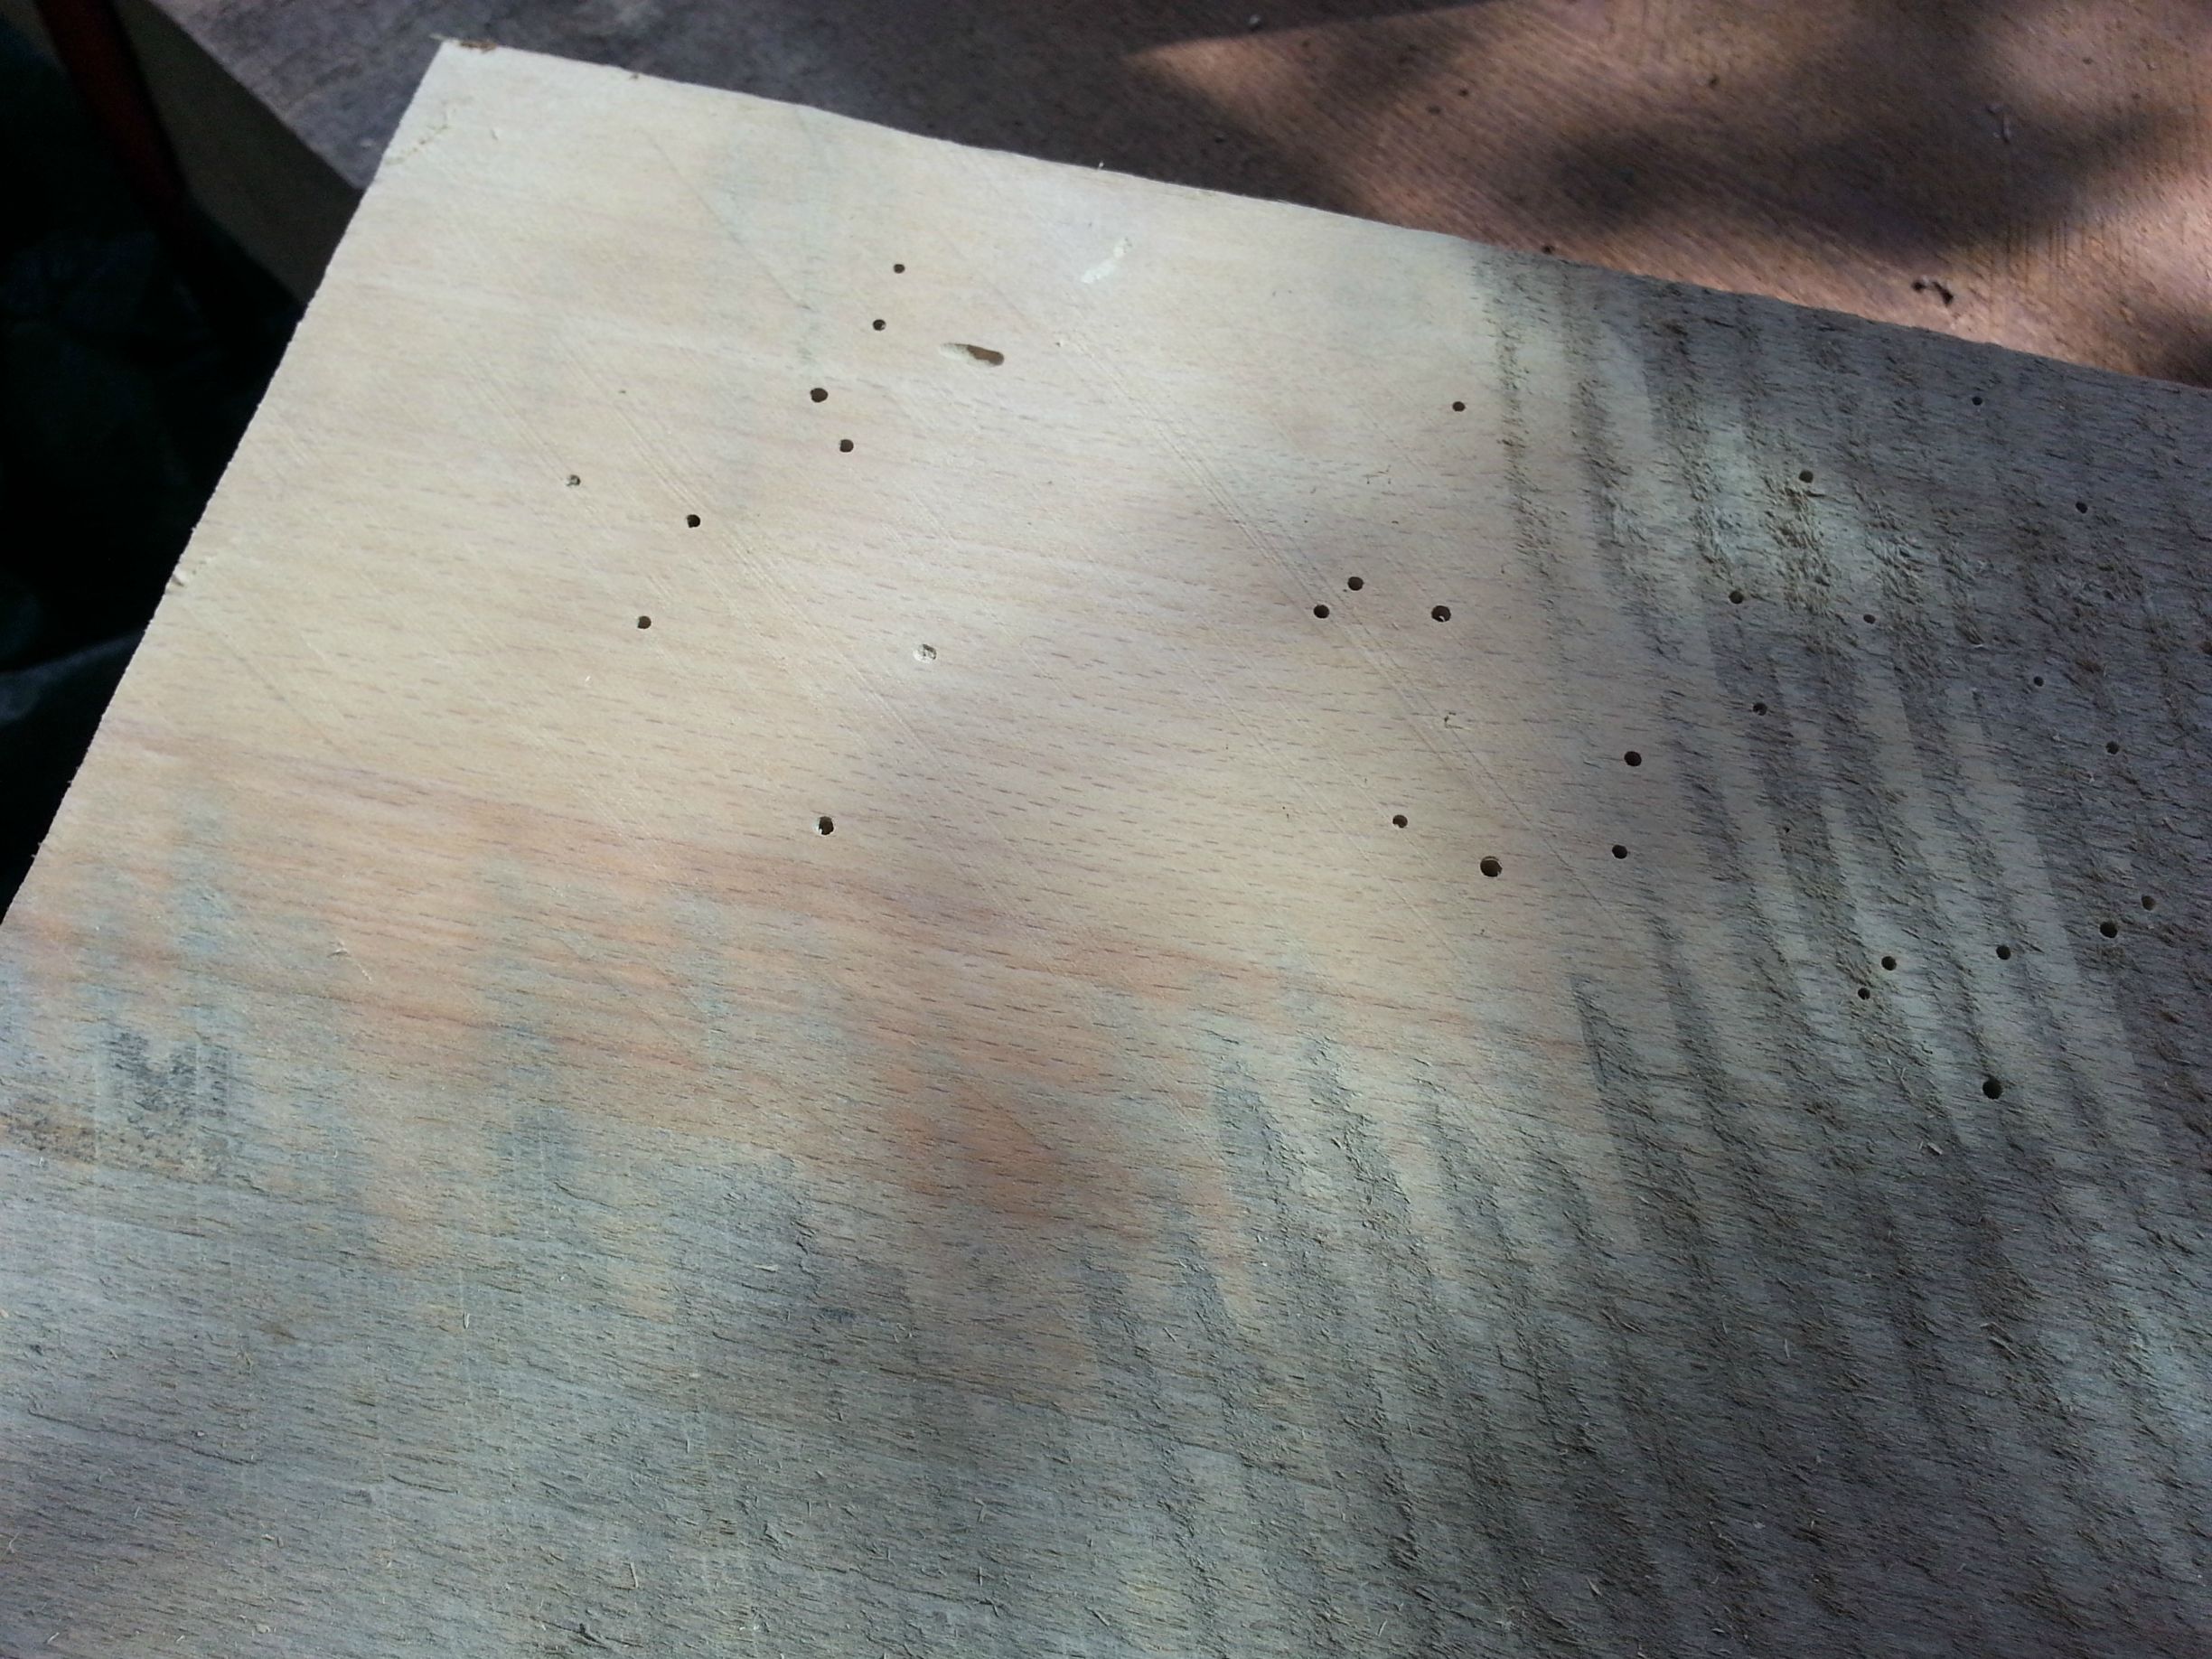
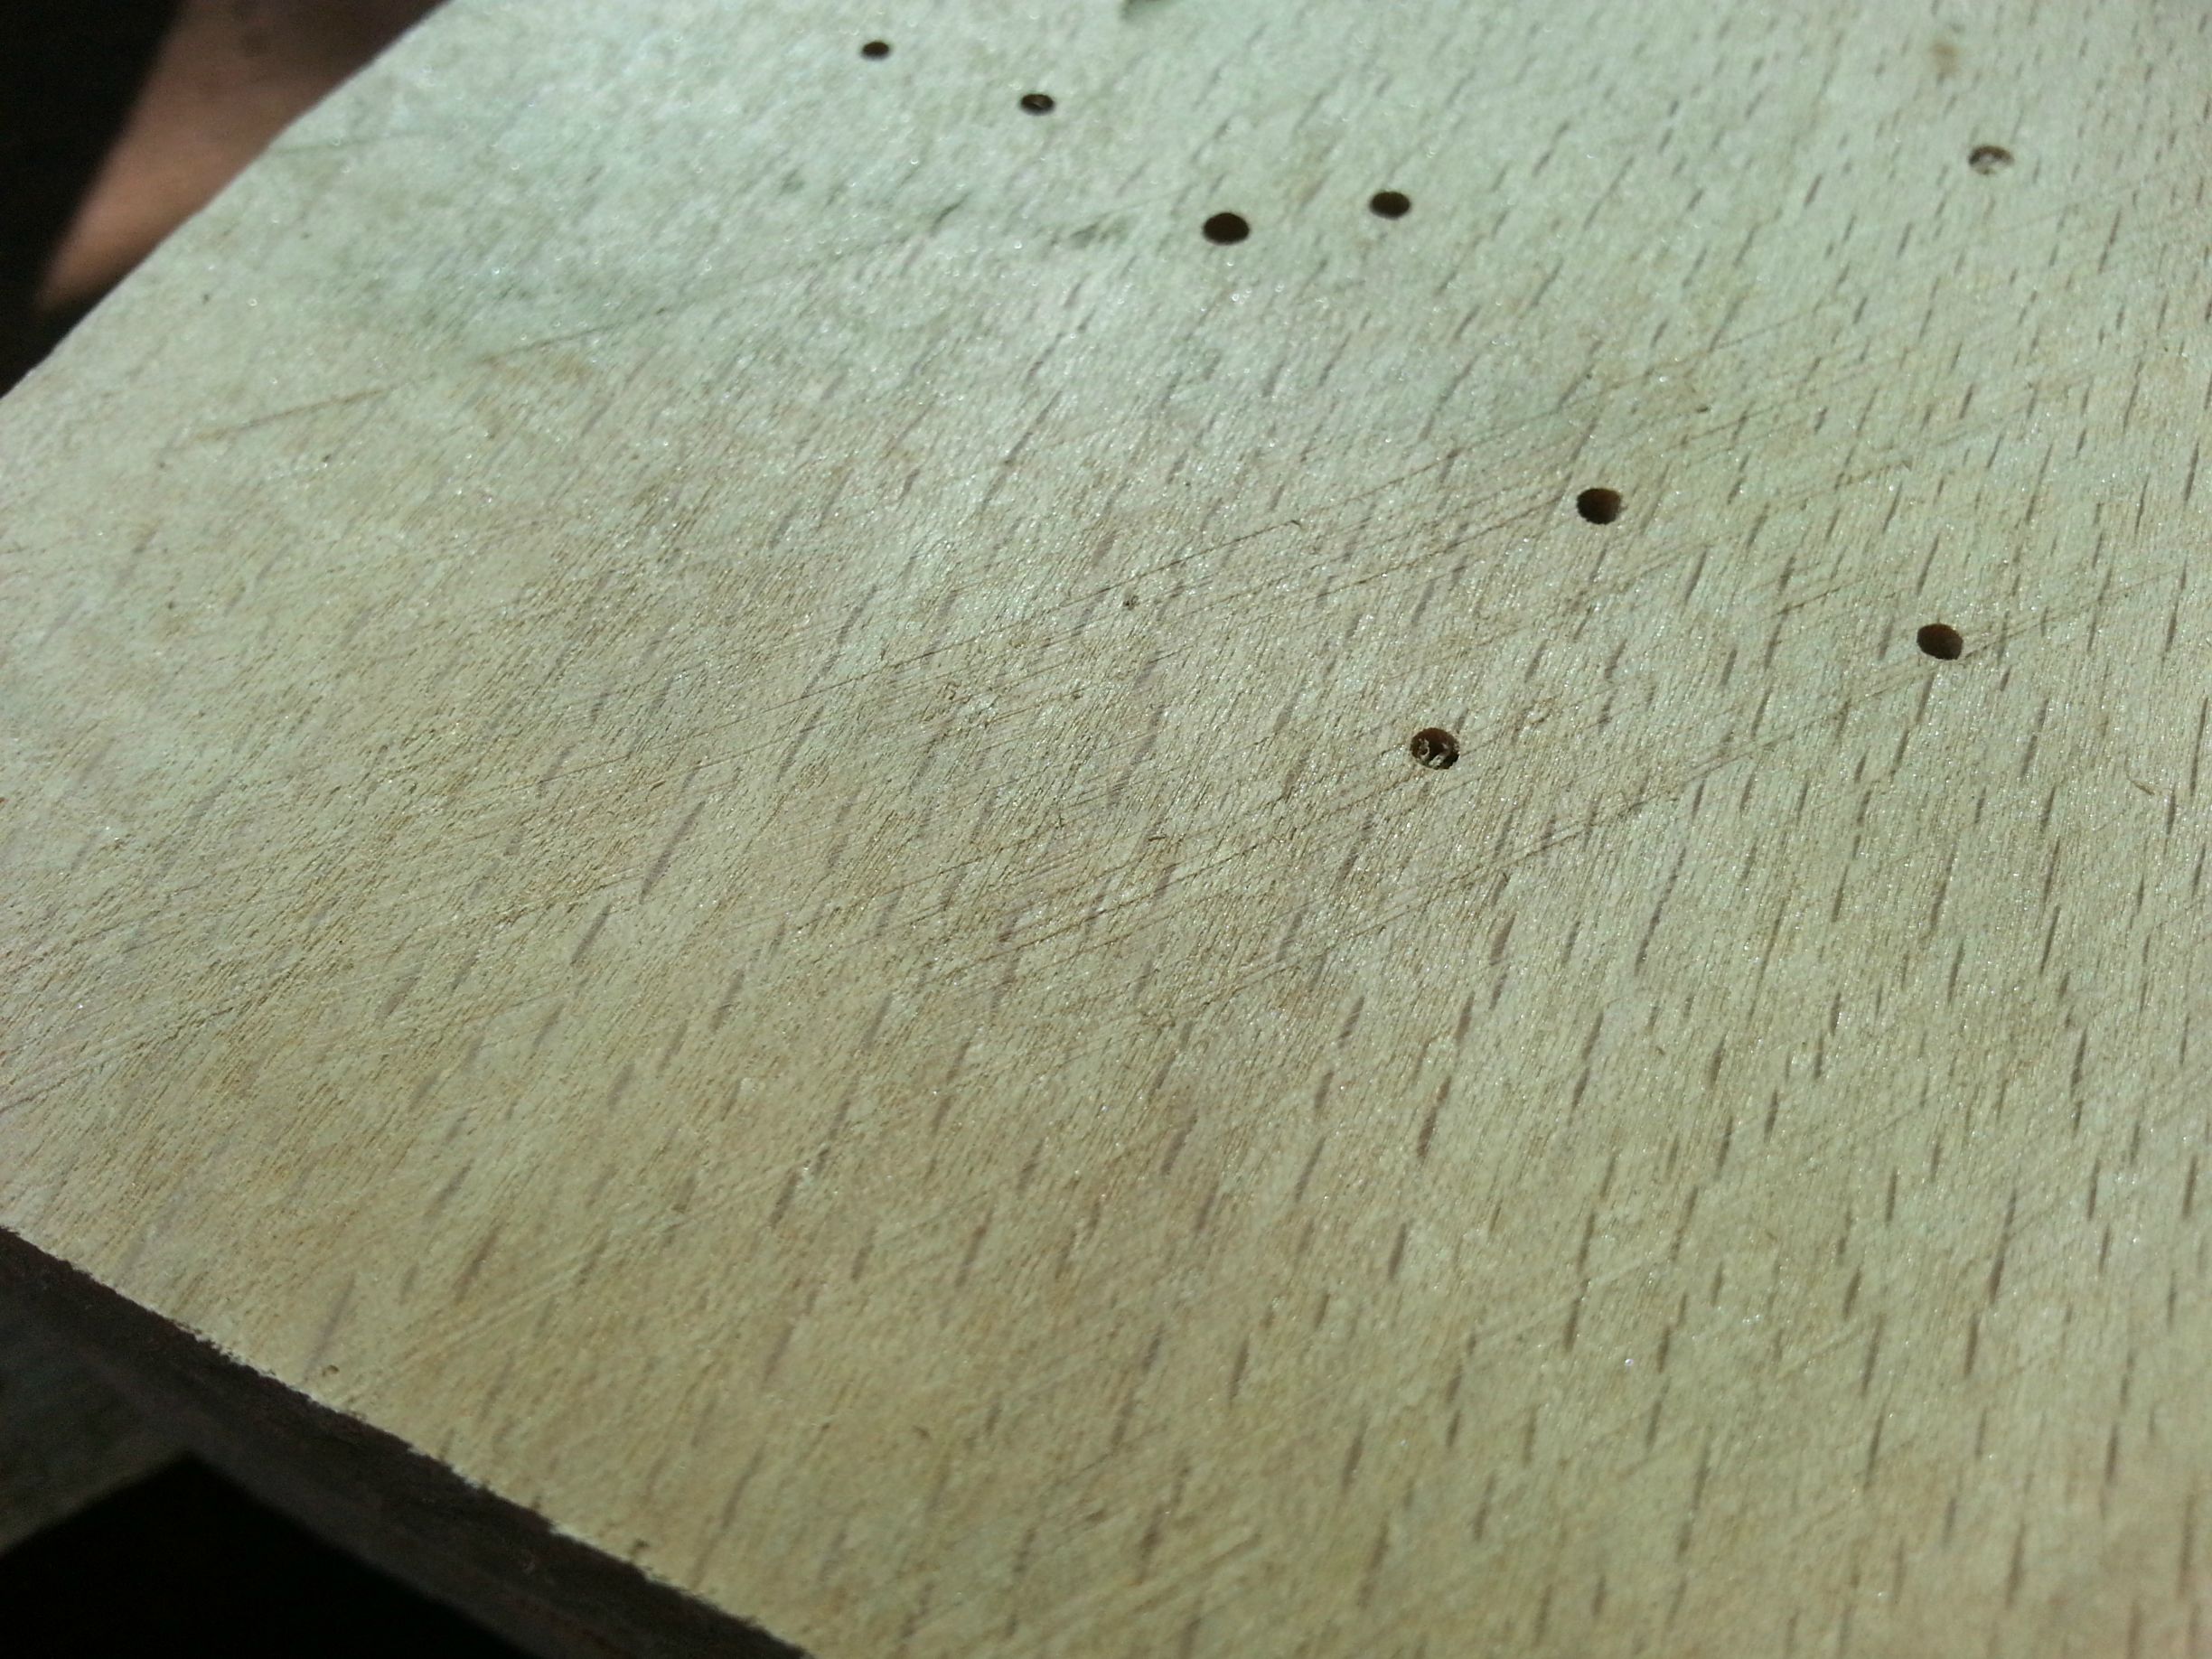
I've since procured a rough cut board that is about 3" x 12" x 14'. It had been sitting in a local barn since 1955 when it came down in a hurricane and it was a screaming deal. Not sure what it is exactly, possibly poplar or elm? There is also lots of ash around here but I don't think it's that. It's been bit up a little by powder post beetles but I can live with imperfections since I want a rustic look anyways and I like wood that has a little history.

3ETS8a2.jpg


pZ8oYlQ.jpg


VB7Yw7i.jpg


The tentative plan:
I'm going to plane down the board and chop it down to 102", to make a floating shelf style mantel with a 10" gap on either end. I'll use some of the extra to make some faux supports (4 of them) spaced across the bottom, with the end grain facing out so they look as if they are actually sunk into the masonry.
Once I have all the wood cut and put together I'm planning on "tenting" off the area (and all the door ways too) with plastic and making an exhaust to outside with some fans and using an angle grinder to grind down the stones where the mantel will attach to make it flat. I had considered trying to scribe the back of the wood - and while the grinding will be wayyyyy messier I think it'll be faster and less overall work since then I'll have two flat surfaces to attach to each-other.

LC926qX.jpg


u3KN4NS.jpg


Don't mind the little fairy walking by in my shot... she wanders around anytime I'm working on a project.

Once I have two prepared surfaces I'm going to use a hammer drill to make holes somewhere between 8-12" into the masonry and drill holes 8" into the back of the mantel to match them. I'm planning on having about 8 sets of matching holes. I'll cut lengths of iron pipe that fit into the holes and after vacuuming and and ensuring the holes are cleaned out will epoxy the pipes into the masonry.
After the epoxy sets I'll put the mantel up. I plan to tap into at least two of the holes in the mantel from the top so that I can have a small metal pin drop in to keep the mantel from falling off the wall (and I'll hide those with some plugs).

Once everything is up and looking good I'll experiment on some of the scraps to see what, if any, kind of finish I'll apply. I like darker looking wood and I might try aging or lightly distressing the wood, too.

wz0nsPT.jpg


Any ideas or critiques would be welcomed. Of course once I'm done more pics will follow but I'm determined that we'll finally have something better than nails to hang our stockings from this year!
 
Well First it looks like quarter sawn red oak to me but hard to tell. Your plan sounds good but i would not bother taping into the rods it wont go anywhere. And have fun scribing it to that stone i have done it allot and it is a pita.
 
Make sure your clearance for that insert is enough.
 
Of course check the clearances to it looks like they would be fine at that location but check to be sure
 
I'd be very cautious about taking a grinder to the stone, unless you have some type of jig set up, how are you gong to get a straight smooth face? I'd be inclined to leave those gaps and not commit to something so irreversible with the stone.

Are you meeting your vertical clearances?

TE
 
I'd be very cautious about taking a grinder to the stone, unless you have some type of jig set up, how are you gong to get a straight smooth face? I'd be inclined to leave those gaps and not commit to something so irreversible with the stone.

Are you meeting your vertical clearances?

TE
It probably would be much easier to trim the board than smoothing out the stone.
 
  • Like
Reactions: Lakeside
Well First it looks like quarter sawn red oak to me but hard to tell. Your plan sounds good but i would not bother taping into the rods it wont go anywhere. And have fun scribing it to that stone i have done it allot and it is a pita.

Yeah it's not like we're in earthquake country or anything, but kids hang on stuff and it'll make me rest easier.

Make sure your clearance for that insert is enough.

Yep. Minimum clearance for a mantel this size is 57 3/4", I'm going for an even 58"

I'd be very cautious about taking a grinder to the stone, unless you have some type of jig set up, how are you gong to get a straight smooth face? I'd be inclined to leave those gaps and not commit to something so irreversible with the stone.

You don't think that just going slow and steady I can do it? I was going to basically do the inside and then (with help) hold the board up and mark the edges that need widening a little bit at a time to get a snug fit. If I don't do something there are going to be some BIG gaps. Like as much as 1 1/4" variations.
 
This is very similar to my mantel only yours is much larger. I put mine up before I set the stone which made it a little easier. Mine's 5'X7"X1-1/2".
The one thing I did to make it a lot easier was to make an 'L' shaped wooden jig and attached it to the wall at the height that the mantel was to be mounted.
I set the mantel on the jig and was able to line everything up with little effort. The jig also made it easy when it came time to set the epoxy. When I set the rods in the wall, I placed a board across the jig which held the rods straight while the epoxy set up.
002.JPG

You're mantel is probably a lot heavier than mine and you'd probably have to go about it in a different way. I just figured I'd show how I did mine and maybe it will help in some way.
One thing's for sure, that anchoring epoxy is some incredibly strong stuff. My mantel feels like it's part of the wall and would need a sledge hammer to knock it down.
If you have enough horizontal pins I don't think you'll need any coming down from above.
 
i don't think i would bother with the smoothing out of the stone - much easier to trim the wood. will it be at a height where you can see the join between the wood and the stone?
 
Hi Brandon,

I recently installed a mantel on my brick fireplace face. I was originally planning to drill matching holes, but after some thinking decided to use a french cleat system instead. Using a router, I etched out a groove in my mantel and attached one side of the cleat. However if you don't have a router, you could chisel it out. I drilled the other end of the cleat into the brick using masonry screws (tapcons). I used two french cleats that are each rated to 200 pounds to be on the safe side, although my mantel is only about 70 pounds.

Height is totally up you, granted you meat clearances obviously. My stove only requires 20" which is where I put itThe mantel is completely flush to the brick and very solid.

In my view there are a few advantages to this approach. One is that if it isn't perfectly straight you can easily adjust the french cleat on the back of the mantel. Second, the installation is far simpler. Finally, you can very easily remove the mantel by just knocking it up from the bottom with rubber mallet.

Here are the cleats I used: http://www.homedepot.com/p/OOK-Hang...with-Wall-Dog-Mounting-Screws-55316/202341629

And I've attached a few pictures of the finished product. This is an old barn beam that I finished in danish oil.

mantel1.jpg Screen Shot 2014-08-13 at 7.18.11 PM.png
 
This is very similar to my mantel only yours is much larger. I put mine up before I set the stone which made it a little easier. Mine's 5'X7"X1-1/2".
The one thing I did to make it a lot easier was to make an 'L' shaped wooden jig and attached it to the wall at the height that the mantel was to be mounted.
I set the mantel on the jig and was able to line everything up with little effort. The jig also made it easy when it came time to set the epoxy. When I set the rods in the wall, I placed a board across the jig which held the rods straight while the epoxy set up.

That DOES look a lot easier. I sure wish that it had gotten at least some sort of mantel from the get-go because it will be a pain to do this from scratch. I like the look of that jig and wonder if I can make something bigger and use a bunch of masonry screws into the mortar to temporarily have it up there? If I made it low enough with a removable piece on top it could protect the bottom edge of the masonry while I'm grinding in addition to holding the shelf and pipe in place when epoxying and installing... I'm going to have to think on that for a bit see if I can come up with any ideas.

You're mantel is probably a lot heavier than mine and you'd probably have to go about it in a different way. I just figured I'd show how I did mine and maybe it will help in some way.
One thing's for sure, that anchoring epoxy is some incredibly strong stuff. My mantel feels like it's part of the wall and would need a sledge hammer to knock it down.
If you have enough horizontal pins I don't think you'll need any coming down from above.

I appreciate seeing your project - it's got the wheels turning for me on some possibilities. I've heard great things about the epoxy, but I'd prefer to epoxy only the one end of the pins (the side in the masonry) so that it's possible to take the whole thing off. I don't think it'll be much more work to make a couple of drop in pins so that it's all secure when I want it to be but removable also. I like flexibility and keeping options open for the future.

i don't think i would bother with the smoothing out of the stone - much easier to trim the wood. will it be at a height where you can see the join between the wood and the stone?

Yeah I think if I leave it untouched the gap will just be too much. I'm reconsidering trying to scribe the wood instead of the stone after so many comments like this tho... it will be tedious though.
 
I recently installed a mantel on my brick fireplace face. I was originally planning to drill matching holes, but after some thinking decided to use a french cleat system instead.

I considered that sort of an approach but since the main weight is going to the the shelf and it's only going to be less than 3 1/2" thick (less when I plane it down - we'll see how much I can preserve dimensionally) I don't think that I'll have a thick enough area for the cleat to be hidden behind.

And I've attached a few pictures of the finished product. This is an old barn beam that I finished in danish oil.

View attachment 136508 View attachment 136509

That looks beautiful, I really like that finished product. Very dark and rich. Nice mantel!
 
With the weight of your slab I'd build some kind of frame that sits on the mantel and fasten the frame to the wall somehow too.
 
I considered that sort of an approach but since the main weight is going to the the shelf and it's only going to be less than 3 1/2" thick (less when I plane it down - we'll see how much I can preserve dimensionally) I don't think that I'll have a thick enough area for the cleat to be hidden behind.

You're right, with only 3 and a half inches to work with it would be tight.


Please let us know how the end result looks!
 
You don't think that just going slow and steady I can do it?

I don't see how it can be done well just by eyeballing it, also ASFAIK you can't grind with the face of a masonry blade, only cut or score using the edge. With a jig, perhaps you could score some lines 1" apart wherever needed, and chisel out the rest. It's too drastic for my liking, but maybe I'm not correctly picturing what you plan to do with the stone. I do love that board, and think it will look great.

One thing's for sure, that anchoring epoxy is some incredibly strong stuff. My mantel feels like it's part of the wall and would need a sledge hammer to knock it down.

The correct epoxy should be MUCH stronger than the stone it's set in. If you take a sledge hammer to those rods, the stone should give first!

TE
 
Please let us know how the end result looks!
I surely will!
I don't see how it can be done well just by eyeballing it, also ASFAIK you can't grind with the face of a masonry blade, only cut or score using the edge. With a jig, perhaps you could score some lines 1" apart wherever needed, and chisel out the rest. It's too drastic for my liking, but maybe I'm not correctly picturing what you plan to do with the stone. I do love that board, and think it will look great.

Scoring and chiseling out is an interesting idea.... I'm going to put in a call to my masonry buddy and see if he has any ideas along that line. He mostly does concrete work but maybe he has some better ideas and possibly some better tools.

For now I was planning on masking off around the masonry where I do NOT want to touch, and then use my small angle grinder with a grinding wheel to just slowly work away at the middle section making sure I "color inside the lines". Before jumping in on it I was going to practice grinding on some rocks I have laying around on my property to get a feel for the resistance and how much the tool can and does jump around.
 
I think grinding the stone may be a little easier but i would still still scribe the wood
 
I would not grind away at that stone. Once you do its that way forever, no matter what. not to mention being able to get it flat.. You'll still have to work the wood to make it fit nice. besides its just not the right way to do it. Here is how I would go about it. I would take my lay out and drill for the rods/slash pipe whatever supports you are going to use. Epoxy them in the stone with a product called "Sika" Making sure they are perfectly level. Once they set up, take your wood, lay it on top and mark and drill where your rods will go into the wood.. Drill a little over sized to make sliding the wood on and off easier. Slide the wood on and scribe to the contour of the stone. Take your time and work at it. You would be surprised at how well you can make it fit using a jig saw and belt sander and some files. Keep at it sliding it on and off till it fits perfectly. Once done you can epoxy the rods into the finished mantle.
 
  • Like
Reactions: Chuck the Canuck
Great description lockpicker and i agree totally. I think grinding the stone would be pretty easy but i grind masonry all the time and i have also scribed many boards to meet stone. And while scribing the wood will be a pain it is the right way to do it. I will ad that if it was me i would rout out the center of the back edge of the board 1/2" to 3/4" deep so you only have the top and bottom edge to deal with it will make things much easier
 
Last edited:
It's your house, but I'd go with trimming neither the wood nor stone. If you have never ground stone with a grinder, you may be in for a bigger dust nightmare than you are already imagining. The stone, at least from what I can tell in the photo, does not appear to be all that uneven. I bet you'd never even notice the gaps in back once installed and you've lived with it a while. But it trimmed it must be, I would sure go with trimming the wood plank.
 
I did this approach with floating wood shelves that make up my AV rack, but into brick. I use 3/4 threaded steel. The shelves are hollow inside, box shape that slip over. It worked well. I have my 65 LB vintage receiver on a shelf with no issue.
I wouldn't grind on the stone either. I also think it looks better without a mantle, but that's me.

On the right side, that's brick behind the facing

.20140122_193451.jpg
 
score.. I need a board like that to finish mine
 
Great description lockpicker and i agree totally. I think grinding the stone would be pretty easy but i grind masonry all the time and i have also scribed many boards to meet stone. And while scribing the wood will be a pain it is the right way to do it. I will ad that if it was me i would rout out the center of the back edge of the board 1/2" to 3/4" deep so you only have the top and bottom edge to deal with it will make things much easier

Ok y'all are making me seriously consider scribing the board instead of the masonry now. If I do I'm going to rout out the center as bholler described above. And I think I'm going to try to find some way to build a temporary jig to hold it all up like bsruther did.

score.. I need a board like that to finish mine

Yeah it was an amazing craigslist find. .... $40 and the guy delivered it for me because I was only 10 mins down the road and it was easier to load the board into his pickup than into my father-in-laws sprinter. Guy had a whole mess of rough cut of various species and sizes but this was the nicest/biggest I could find. I would have taken more because he was cleaning out the barn but I already am tight on storage space.

The only other craigslist deal I've made that tops this is when I got 8 chickens / coop & run / food& supplies for $20 from a guy who was moving across the country and couldn't take 'em with him.
 
And I think I'm going to try to find some way to build a temporary jig to hold it all up like bsruther did.
i would just do your rods like lockpicker said that way it is always in exactly the same spot and you are going to have to do it anyway
 
Status
Not open for further replies.