Changing The Nozzle

  • Active since 1995, Hearth.com is THE place on the internet for free information and advice about wood stoves, pellet stoves and other energy saving equipment.

    We strive to provide opinions, articles, discussions and history related to Hearth Products and in a more general sense, energy issues.

    We promote the EFFICIENT, RESPONSIBLE, CLEAN and SAFE use of all fuels, whether renewable or fossil.
Status
Not open for further replies.

hobbyheater

Minister of Fire
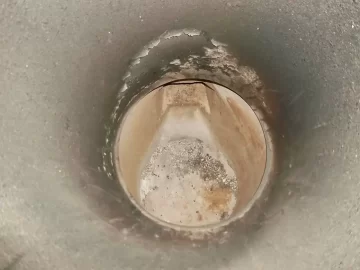
Have been reading some threads on Nozzle changes so here are a few pictures of changing the nozzle on the old Jetstream.

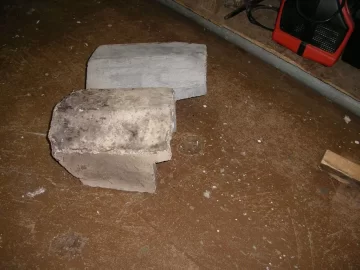
The newest nozzle is home made using about 15 lbs of refractory. The original not in the picture lasted around 70 cords. The old one pictured here has about 30 cords of wear.
IMGP4009.JPG
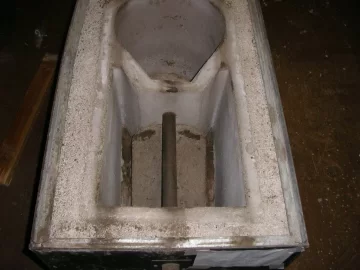
The nozzle can be seen in the ash settling chamber just below the combustion air injection pipe. The nozzle sits below the fire tubes which pass up through the heat exchanger. The elliptical section is the burn chamber that will give a combustion and loading chamber 42" tall when the heat exchanger is in place. This vertical feed gives a constant gravity supply of wood to the fire.
IMGP3378.JPG

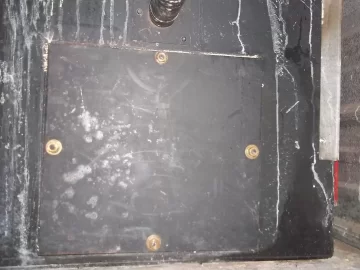
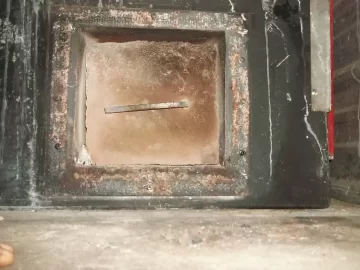
The clean out cover for the ash settling chamber has just 4 nuts to remove.
100_2271.JPG

With the cover removed, you next remove the refractory plug.
100_2273.JPG
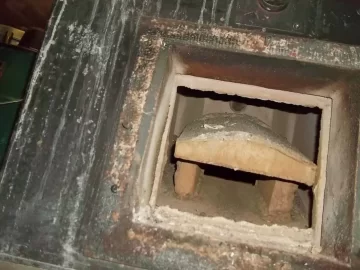
The nozzle when it has disintegrated, you can pull the broken pieces out, slide the new nozzle into place, cement it in place and process is complete.
100_2274.JPG

There is member from the Canadian Maritimes @slowzuki that at one time had 3 jetstreams. He felt the nozzles were a wear item and 5 to 6 years was good service.
 
Last edited:
Those jetstreams were certainly ahead of their time.

Makes ya wonder why they had to stop making them.

One certainly would have been on my short list if they were still around - could have been even better with 30-some years of developement & refinement by then.
 
  • Like
Reactions: hobbyheater
Makes ya wonder why they had to stop making them.
.


IMO the basic understandings of curing the refractory were not understood by the manufacture. I know of three other units locally that did not survive the first year of operation. Their refractory component totally failed.

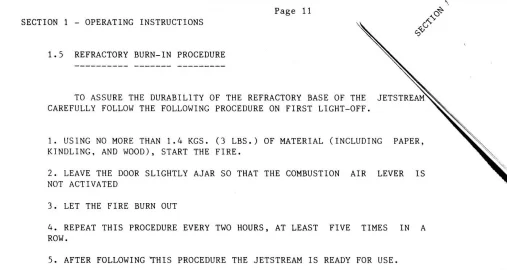
Below are the curing instruction in the manual. I followed these instructions on the first curing (1983) when the unit was new and again in (2003) when I attempted my first major repair. Both times I had major intersecting cracks.

Page 11.jpg

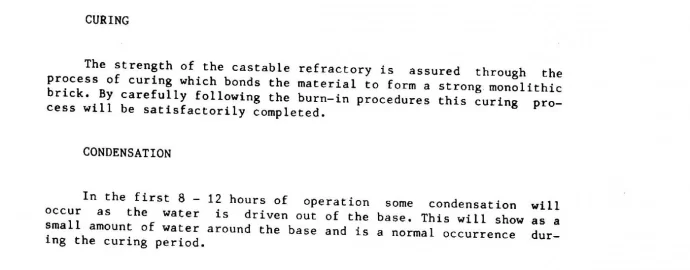
If you read the two paragraphs below, you will see where it says in the first 8 to 12 hours of operation, condensation will show as a small amount of water around the base. These times were not enough.

On the curing after the third major repair (2011), it took 48 hours for all the moisture to disappear and again when curing the new base (2014), it took 60 hours.

Page 17B.jpg


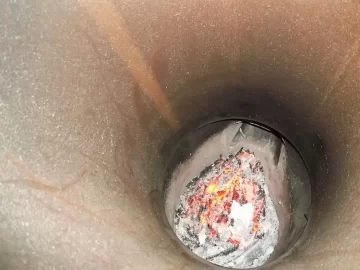
This newest Jetstream and the end of the ninth curing fire. The black ring is soot clinging to uncured refractory.


100_2171.JPG
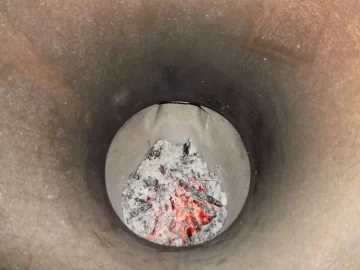
This is after 29 curing fires. The refractory is cured - no soot.

100_2191.JPG
This is the refractory today after 6 hour batch burn. One very small stress crack can be seen on the right hand side of the burn chamber.

100_2281.JPG
 
Last edited:
so Allan, who has the rights to this design, because, correct me if I am wrong.....you by far have the best handle on how to fine tune this unit and now maybe even manufacture it with a properly cured refractory.
The market is definetely favorable and the timing could be auspiciously perfect :)

Scott
 
  • Like
Reactions: hobbyheater
Do you think making a replacement refractory now and giving more time and less heat/stress over a longer period might get it to last longer? Maybe if it cures at say 150 degrees instead of 1500-2000 it may last longer. Or like regular cement, the longer it cures the better it is?
 
  • Like
Reactions: hobbyheater
.
The market is definetely favorable and the timing could be auspiciously perfect :)

Scott


I believe Kerr Controls still has the rights. To be competitive in today's market several things would have to be improved.

1 The loading tube/burn chamber is too small at under 4 cubic feet and would need to be doubled.
2 The combustion blower should be Lambda Controlled.
3 There are many better and more efficient blowers now available.
4 The blower should have the option of being remotely located so it can obtain the combustion air from directly outside.

The testing and the acquiring of CSA and UL approval would require very deep pockets.
 
But Alan, if you doubled the size in a bigger model you build, you and the misses could cook a 7 course meal in there! For a whole bunch of family! ;lol
 
  • Like
Reactions: hobbyheater
Status
Not open for further replies.