mark cline
Minister of Fire
Didn't notice but is there a door at both ends? So the wood that was put in first can be taken out first?
OK, pictures.
side view: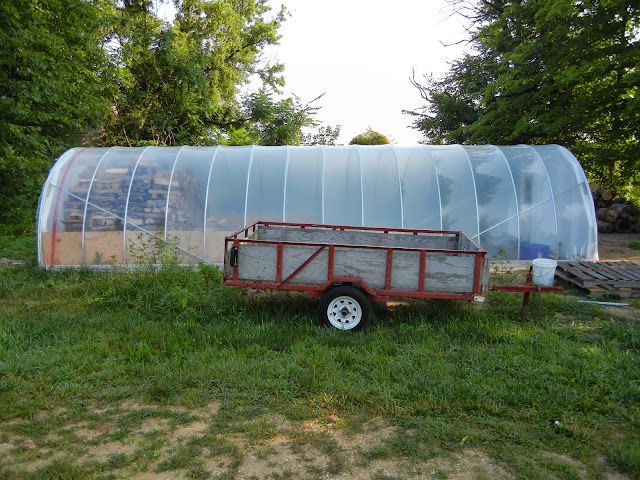
interior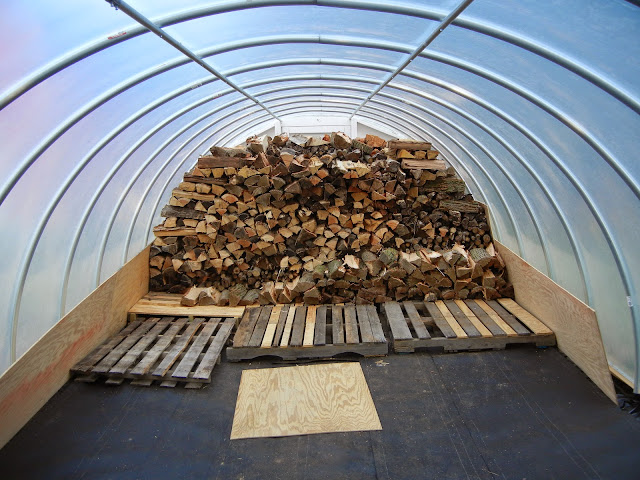
east end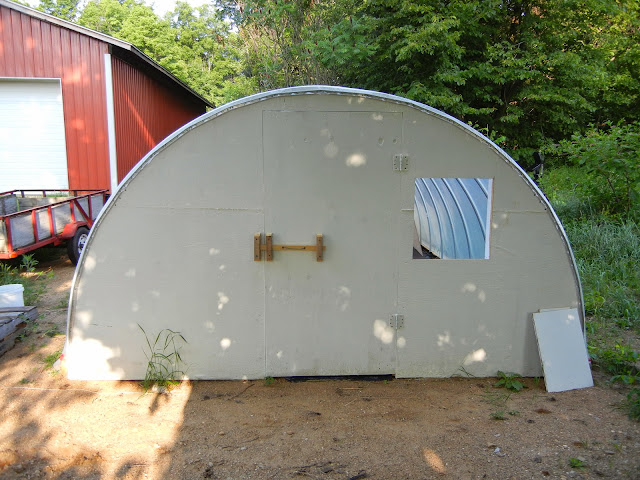
Note that both ends have a door and a window. This is the passive window that lets the humid air out when the fan at the west end is running. Both windows will end up with a plywood awning and some 1/4" screening to attempt to keep the mice out.
West end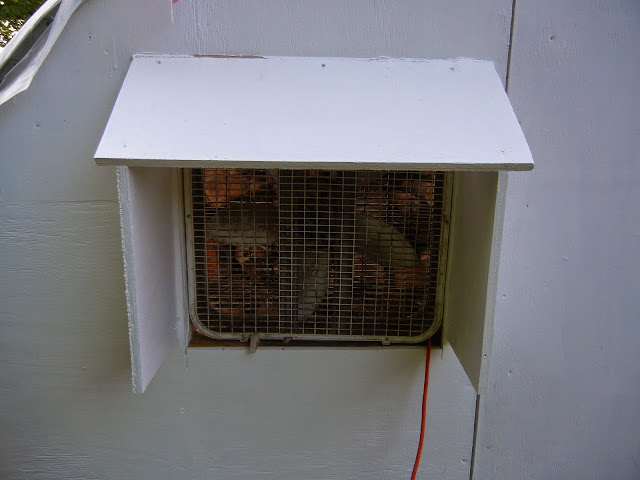
Note that a box fan -just- fits between two studs.
floor plastic sealing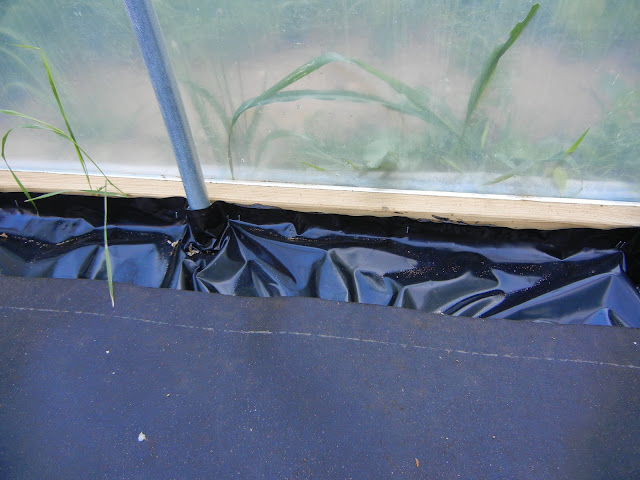
I made the dirt floor pretty smooth. Wacked and pulled all the weeds and grass. Raked it smooth and removed all the significant sharp rocks. Laid 6 mill black plastic on the dirt and used sealant made for polyethylene vapor barrier to seal it to the framing around the edges. This is called acoustic sealant and I had to special order some. Then laid tar paper over the plastic to protect it from the wheel barrow and the pallets, etc.
Each rib is comprised of two pieces of 1" emt. They cost about $6.xx each. I used a piece of 3/4" emt inside at the joint at the top. The joiner piece is just long enough it can't really slide any further and is trapped. It's straight.
Note that many plans and youtube videos tell you to put the ribs every 4'. That will work fine if you don't get much snow or too much wind. Since we get several to many feet of snow, I put the ribs every 2'. If it's worth building, it worth over building.
I used 1 1/8 emt that is pounded into the ground, then got screwed to the 2x6 base boards by angling the screw in from the top. You could also do it by drilling a big hole on the inner surface and small 1/8" hole for the screw to attach it to the 2x6.
The wood base boards are pressure treated 2x6's. I pounded a 16" length of 1 1/8" emt into the ground to receive each rib. The rib just slips inside and then gets screwed to the emt. I attached the emt with various self tapping tech screws in predilled holes. There are two purlins that run the length of the greenhouse, and every corner got a piece of 3/4" emt for diagonal bracing to resist shear/wind. I weight 200 pounds and can do pullups on the ribs. It is a sturdy structure.
Don't forget, you have to use plastic that is rated for greenhouse/outdoor use, or it will be trash in a year. This stuff is rated for 4 or 5 years, and might last 6 or 7.
troy
Our commercial solar kilns are 8mtr x 25mtr with no fans. Instead it is designed 90 degrees to the prevailing wind open at each end but the important part is the ridge is not horizontal but has a 1 mtr slope over the 25mtr length. This is important as it can give a a 10C to 15C difference in temperature from one end of the tunnel to the other creating a strong convection current taking the moisture out of the tunnel.
When we first put the wood in, there were some conditions where there was some condensation. Now that the wood has already dried down significantly, there is (so far as I have noticed) none. Even when we add a batch of newly split stuff, no noticeable condensation.
Yes, it may be possible to design an elegant greenhouse/woodshed that works well passively without the need for a fan. I leave that for the next guy/gal.
A solar driven fan was considered, but they are expensive and don't move a lot of air compared to the $18 box fan.
http://www.amazon.com/Solar-Attic-Fan-25-year-Warranty/dp/B0002YWVJM
$300 by the time you pay shipping.
troy
OK, pictures.
side view:
interior
east end
Note that both ends have a door and a window. This is the passive window that lets the humid air out when the fan at the west end is running. Both windows will end up with a plywood awning and some 1/4" screening to attempt to keep the mice out.
West end
Note that a box fan -just- fits between two studs.
floor plastic sealing
I made the dirt floor pretty smooth. Wacked and pulled all the weeds and grass. Raked it smooth and removed all the significant sharp rocks. Laid 6 mill black plastic on the dirt and used sealant made for polyethylene vapor barrier to seal it to the framing around the edges. This is called acoustic sealant and I had to special order some. Then laid tar paper over the plastic to protect it from the wheel barrow and the pallets, etc.
Each rib is comprised of two pieces of 1" emt. They cost about $6.xx each. I used a piece of 3/4" emt inside at the joint at the top. The joiner piece is just long enough it can't really slide any further and is trapped. It's straight.
Note that many plans and youtube videos tell you to put the ribs every 4'. That will work fine if you don't get much snow or too much wind. Since we get several to many feet of snow, I put the ribs every 2'. If it's worth building, it worth over building.
I used 1 1/8 emt that is pounded into the ground, then got screwed to the 2x6 base boards by angling the screw in from the top. You could also do it by drilling a big hole on the inner surface and small 1/8" hole for the screw to attach it to the 2x6.
The wood base boards are pressure treated 2x6's. I pounded a 16" length of 1 1/8" emt into the ground to receive each rib. The rib just slips inside and then gets screwed to the emt. I attached the emt with various self tapping tech screws in predilled holes. There are two purlins that run the length of the greenhouse, and every corner got a piece of 3/4" emt for diagonal bracing to resist shear/wind. I weight 200 pounds and can do pullups on the ribs. It is a sturdy structure.
Don't forget, you have to use plastic that is rated for greenhouse/outdoor use, or it will be trash in a year. This stuff is rated for 4 or 5 years, and might last 6 or 7.
troy
Very interesting aspect that others may not have caught John!
Please explain further!
Here in the 'Colonies' we're not familiar with "mtr", we still resist (have no reason why myself) to working in a simpler fashion.
It's your 'slope' ideal that fascinates me!
It just makes sense, from a naturalist point of view (hmm, simplicity as well).
Please explain further!
Pm me, if indeed I'm the only one interested..
Sorry about the mtr I am of the age that I use both mtr and yds but the younger generation are all metric so I have had to convert but still enjoy a pint at the local. we also sell timber by mtr cube rather than cords.
As for polytunnels I am from a horticulture background so used to polytunnel design. Our normal horticulture tunnels are 40 mtr long and again use a slight slope on the roof line as we suffer frosts in the winter and require heat for frost protection. Having the slope allows a sawdust burner at one end heat the whole tunnel by natural convection of heat rising.
When we came to designing the solar kiln we just applied the same technique. The only additional requirement was bog mats on the polytunnel floor to allow the 2 tonne free lift forklift to operate within the tunnel stacking the IBC container frames which each hold 1mtr cube of split logs. The bog mats also provide additional thermal mass but I have not bothered to paint them black as yet as the tunnel is hot enough without.
Ya killin' me here.. Yet Loin' it..
I do prefer my 'glass' chilled, but that as side for further conversation, it comes down to a swallow of preferred and explanation of 'MTR'?
Curvature of design comes down to degrees, again another shallow, and we continue..
M(assumed meters) 'of'(T, assumed 'to') to what (R)'?
Degrees of inclination?
Have you charted what you have seen, according to what you have done?
Have you reached a point of which X does vs, What Y dies?
Yet another shallow and hopefully the conversation continues,,,
I'm enjoyin' my chilled.
Hopefully, while enjon' your warm..
We'll get down to the bottom of this, aye?
Clink! Here's to you!
Tell me some more.
Okay I will start again. Yes mtr is indeed meter or for you in the US 1 yard and 3 inches. Our solar kilns are all measured in mtrs being 8 mtrs wide and 25 mtr long with hoops at 2.5 mtr centers. The hoops slide over a ground anchor which is just a smaller diameter tube with a bucket of concrete attached to the bottom. (We have to do this in UK to keep the structure as a "temporary" structure to avoid the strict planning laws on permanent structures). With a spirit level and string mark horizontal on first and last tube then decide which direction you want the heat to go and then move the string up 1 mtr at the hot end. Where the string crosses the tubes attach a car exhaust clamp of the right pipe diameter repeat on both sides then slide hoops onto the anchors and you have your solar kiln frame with gradual slope ready for covering with plastic. Remember to grease the exhaust clamps as you can tighten the plastic if it goes slack using the clamps.
Performance wise it takes 3 months to get split logs below 20% MC during the summer and 6 months in the winter. Our D shaped tunnel holds 80 IBC containers and the straight sided although the same size holds 120 IBC containers. Each IBC container holds 1.2 meter cube of loose fill logs.
Thank you John for your patience and explanation!
That's one heck of a lot of wood placed in there!
No other source of heat..
That much wood..
And, not insulated on the backside??
And you can turn it over in 3 months..
I'm impressed!
It's the curvature of the top that strikes me the most.
Very inventive!
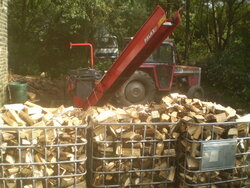
Looks like a Hearthstone Shelburne...is it?
You must remember this is a commercial operation but you can apply the same techniques on a smaller scale. Part of the reason why it works so well is the timber is not stacked but loose fill within the IBC containers allowing the air to circulate around the logs this is particularly important when drying "wet" timber such as willow and poplar to avoid it going mouldy.
Bump, any updates on how long it is taking you to season fresh split wood down to below 20%?
Who is Bump??
Interested in whom your following.. and what he has.
So... Who is Bump and what does he have?