Help me choose - Jotul F55 free stander or Pacific Energy Summit insert

  • Active since 1995, Hearth.com is THE place on the internet for free information and advice about wood stoves, pellet stoves and other energy saving equipment.

    We strive to provide opinions, articles, discussions and history related to Hearth Products and in a more general sense, energy issues.

    We promote the EFFICIENT, RESPONSIBLE, CLEAN and SAFE use of all fuels, whether renewable or fossil.
Status
Not open for further replies.

iluvjazznjava

Member
Oct 26, 2014
168
British Columbia
Hello everyone,

I have learned a ton from this forum and value the advide of its members. To that end ...

My wife and I just bought a new house a couple months back and the recent cold snap has made me realize that our heating setup really is not sufficient. To sum up, I live in south eastern British Columbia. We get four seasons - summers are warm with temps reaching the 90's, but in winter temperatures are usually below freezing. The house is three levels - basement 1,500 sq ft, main 1430 sq ft, 2nd floor 700 sq ft - so over 3,500 sq ft altogether. The house has a pretty open floor plan which makes heating easier. The entire house has electric baseboard heat - very expensive! I have a masonry style fireplace on the main floor (it has a blower, but is not super efficient as a heat source). There used to be an insert installed in a masonry fireplace in the basement, but the previous owner removed it before we bought the house (I suspect it wasn't up to code). We are getting a natural gas furnace to replace the electric heat, but that won't happen until next spring (can't get a gas line now that everything is frozen). In the mean time, I have convinced the significant other that it's a good idea to have an efficient wood burning appliance of some kind to help us out now and in the future should we need it in an emergency. In truth, I love wood heat, so even once we get a gas furnace I know I'll still be lighting fires.

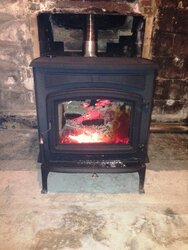
This is the place (rather unsightly right now) that our new unit would go:
Basement fireplace.jpg

I know that some of the insulation and wood studs would need to be pulled out to give proper clearances. The plan is for us to finish the basement, so that ugly brown hearth has got to go too. The basement walls are insulated (as you can see), but there is no insulation in the floor between the main level and basement. I don't have delusions here that all the heat will rise to the main level, but I'm hoping it will at least make the main floor (hardwood cherry) feel warmer under foot.

Our goals here are:
1. Spend no more than $5,000 for a complete install - looking for good value for dollar here
2. Find a fireplace that will provide a sufficient amount of heat in an emergency (given the sq feet, I think we need something fairly large)
3. Find a fireplace that will look decent in our basement (subjective I know)

I think its a good idea to have a wood stove for cooking too, but my wife doesn't think we would ever use it.

I spoke to the local fireplace store and asked him for some reasonably priced options for a basement install. He gave me a couple, both priced at approx. $5,000 including install of a full chimney liner in our existing masonry chimney and an outide air intake . He is recommending the Jotul F55 as a nice value option for a wood stove, or the Pacific Energy Summit if we want to go the insert route. The dealer said the Jotul has a rear vent option which would make the install a lot easier/cheaper in this case. A top vent stove could be done, but would likely involve coring through the concrete wall into the chimney rather than using the existing opening. I like the Jotul, but my wife prefers the PE. Both look like nice units, so I'm asking the forum members to chime in on any experience with these units and help us decide.

Anyone care to comment on their experience on the heat output of an insert vs a free standing stove of similar size?

Any install concerns that anyone wants to raise for my setup that I should make sure are considered? Thanks everyone ...
 
The insulation framing around the fireplace will definitely have to go. What were they thinking? Take it back at least 16" from the firebox opening on the sides and probably more on the top or there will be clearance issues. Then make sure the chimney is cleaned and ready for a liner.

The stove/insert will definitely heat the basement and possibly the first floor if the fireplace is in an open area that has a direct open stairway to the first floor. Don't expect it will do much for the 2nd floor. If there is enough height I would go with the freestanding stove. Be sure there is an insulated block-off plate below the damper area to keep heat in the room. The Summit is an awesome insert, but considering one of the main concerns is power outages I think the Jotul has a better chance of convecting more heat.
 
You didn't mention this poll is rigged. Get the one that she likes. ;)
 
  • Like
Reactions: 2PistolPacker
The wife likes the way the Jotul looks, but doesn't like the idea of it sitting too far out into the room. I personally don't see the stove in the room as a problem since the basement is large and its only functions at present are for laundry and storage. With the insulation and studs pulled back for proper clearance, would it be possible for the wood stove to be partially recessed into the opening I have here? Or does it need to be out and fully clear of the wall? The OM for the Jotul doesn't quite seem to answer that question for me, although it does have a section on installing in an "alcove." I have seen members post pictures of stoves perched inside on old masonry fireplace, so that makes me think its possible.
 
I think combustible over the Jotul's stove top is going to be an issue. For fireplace installs they list 35" as the clearance from stove top to mantel. The wood edge of the 2x4 stud would in this case be like a mantel. You could reduce that down to 18" with a ventilated heat shield on 1" spacers under the 2x4 or maybe just remove all wood on the firepalce front up to the ceiling and put a nice stone veneer on the face to flush out with the pulled back studs on the sides?
 
Yeah, combustibles are an issue, but can become a non-issue quite easy. I can pull off as much as the studs and insulation as necessary to get the clearances needed. The basement ceilings are nearly 8 feet, so there is plenty of vertical clearance and horizontal clearance is easy to get too. The old opening into the masonry chimney recesses nearly 2 feet into the concrete wall and is about 3 feet high and 2.5 feet wide. It is lined with fire brick. I'm thinking that's enough room to partially recess the stove into.
 
If you get the F55 and recess it, get the optional blower kit too.
 
Keep in mind that one of your criteria is emergency heat. That means power outages, right? In that case, a freestanding stove would emit heat much more effectively than an insert burning without its blower running. I have the f-50 rangeley, the slightly smaller version of the carabassett. There is a sheet metal panel at the rear of the stove that conducts air up along the the back and then defects it over the top.If you go with the f-55, it would be a good idea to keep the top of the air channel flush with or in front of the fireplace opening.
DSC05122.JPG DSC05127.JPG


sorry for the giant, crappy photos.

ps: Don't put a steamer kettle on your cookplate. Gotta clean that thing up one of these days.....

pps: Yeah, I had to get creative to shoehorn the rear vent in there. I saved the bricks just in case. ==c
 
Was that cut into the brick still below the lintel supporting metal or right thru it?
 
Was that cut into the brick still below the lintel supporting metal or right thru it?

The bricks came out intact. It was one whole brick, and two halves. I did have to cut a slot in the metal that was about 4" wide and 3 or so inches deep. It was not a separate piece of angle iron, but rather a flange integrated into the damper frame. I realize that I weakened it a tad, but there is still about a foot and a half of meaty 3/16 or 1/4 inch steel above the cut.
 
By the way, does posting full images hog bandwidth? If i post thumbs do I have to host the files?
 
Posting thumbnails is handled by the forum software as long as that option is chosen. It does save bandwidth for those with slow connections. No need to host the file, just choose the thumbnail option when posting. And thanks for asking.
Screen Shot 2014-11-21 at 5.54.35 PM.png
 
Not sure if it matters or not . . . but you're from Gorham, ME . . . and Jotul North America is based in Gorham, ME . . . can't get more hometown than that!
 
Not sure if it matters or not . . . but you're from Gorham, ME . . . and Jotul North America is based in Gorham, ME . . . can't get more hometown than that!

Yeah, the factory is about 3 miles from my house. I keep meaning to stopping in there to see if I can take a tour. The dealer I bought from is right there too. Frost & Flame. They treated me right.
 
Bk king would be my choice. If it is possible to install. You could slow it down and be able to use your basement. Or get advantage of the huge fire box when you need the heat.
 
Decision made - we put a deposit on the Jotul F55 today! Install will happen next week ... can't wait. Wife got on board with the F55 when she saw it in person in the showroom.
 
Good! I have a feeling your wife's vote carried more weight than our 6 or 7 votes, but glad they were all on the same side of the ledger.

I went with the freestanding stove because of no need for blower in power outages. The wife originally vetoed BOTH stove and insert (she liked the open fireplace), but is now very happy we got the stove... no oil bills AND I do a lot of cooking on it AND she is always warm AND she loves the way it looks.

Four on the upside and zero on the downside is pretty good when convincing the wife to go against her first instinct. Never happened before, doubt it will again!
 
New F55 is in and working like a champ! I did my first overnight burn last night and it worked great. Still had a decent bed of coals going in the morning when I woke up - enought to get the next load of wood going no prob. That was with burning some Douglas fir that was as much bark as anything else (but at least it was good and dry). Temp was 21C in the house when we went to bed and only fell to 18C by morning on a night that was roughly around freezing temp outside. With our backup electric heat set at 15C, that means that the stove kept the electric heat from coming on during the night. Not bad in our 3,000 sq foot house :)
 
Good deal, sounds like it's working well. Now we need to see it!
 
Not a lot to see in my concrete basement, but here you are. A few notes about the install: You can see the outside cold air intake pipe running along the wall on the right side of the pic. The pipe goes up the wall, along our basement ceiling and outside on the opposite end of the room as the stove. In all, I figured its about 35 feet of pipe to do this. Had to be done that way as the side of the basement where the stove sits is entirely below grade. Outside air intake is also code here, so it was not optional. I was worried that the pipe run was a bit long, but it seems to work great. The intake connects directly to the bottom of the stove.

You will also notice the old hearth that was in my first photo is now gone. That wasn't fun - four hours on a saturday busting it up and hauling it out of the basement in 5 gallon pails. I also had to open up the wood framing somewhat to get proper clearances. Local building inspector was happy that we had done our homework and got it right the first time so she didn't have to make a second visit.

Chimney is on the exterior of the house, but with the new liner it drafts great. Doubt that will be an issue for us.

Next summer we will start finishing the basement, so I'm starting to think about what I want the new hearth and mantel to look like. For now, we are just happy to have a nice warm house.
 

Attachments

  • Jotul F55.jpg
    Jotul F55.jpg
    55.7 KB · Views: 710
Another quick install note - the pic makes it tought to tell, but its a rear vent setup. The pipe goes out horizontally for 2 or 3 feet and then vertically up the chimney.
 
Did the installer put in a block-off plate with insulation? My installer refused to do this so I decided to make it a DIY project and do it right. They just wanted to get in and out and on to the next job.
 
Not a lot to see in my concrete basement, but here you are. A few notes about the install: You can see the outside cold air intake pipe running along the wall on the right side of the pic. The pipe goes up the wall, along our basement ceiling and outside on the opposite end of the room as the stove. In all, I figured its about 35 feet of pipe to do this. Had to be done that way as the side of the basement where the stove sits is entirely below grade. Outside air intake is also code here, so it was not optional. I was worried that the pipe run was a bit long, but it seems to work great. The intake connects directly to the bottom of the stove.

You will also notice the old hearth that was in my first photo is now gone. That wasn't fun - four hours on a saturday busting it up and hauling it out of the basement in 5 gallon pails. I also had to open up the wood framing somewhat to get proper clearances. Local building inspector was happy that we had done our homework and got it right the first time so she didn't have to make a second visit.

Chimney is on the exterior of the house, but with the new liner it drafts great. Doubt that will be an issue for us.

Next summer we will start finishing the basement, so I'm starting to think about what I want the new hearth and mantel to look like. For now, we are just happy to have a nice warm house.


Oh and beautiful stove! Stay warm.
 
Did the installer put in a block-off plate with insulation? My installer refused to do this so I decided to make it a DIY project and do it right. They just wanted to get in and out and on to the next job.

No block off plate, although we did discuss it. He would do it (extra charge of course), but he thought in my case the effort would yield little to no difference because of the way the old masonry chimney was designed. From the bottom, it tapers gradually for maybe five feet and then the masonry clay liner is barely bigger than the insert they put down it. The installer said it was a smaller than average chimney inside which I guess is a good thing when it comes to a setup like this. They stuffed a whole bunch of insulation in the top and capped and sealed around the new liner of course. He said to keep an eye on it and see if I feel any drafts coming from the base of the chimney (I don't). I figure its a reasonably easy DIY if I want it, but at this point I'm inclined to feel it won't be necessary. The plan is also to come up with some way to seal up the wall and opening around the horizontal stove pipe coming out the back of the stove too. I just need to come up with a way to do it that will look good and be removable for maintenance purposes.
 
Status
Not open for further replies.