My wife and I purchased this house in 2002, and we rented it out for 5 years until we moved in in 2007. At time of purchase, the house had no insulation in the walls or basement ceiling, and only 6" of fiberglass in the attic, and there were no installed storm windows. I estimate the house would have burned 1000 gallons of oil for heat (1977 vintage boiler) that first year (had we been in the house full time, with heat on). Frighteningly, it burned about 600 gallons with the thermostat set to 50 degrees.
I insulated the attic with another 12" of fiberglass insulation, and 6" of insulation in the basement ceiling. That brought oil usage down to 700 gallons (occupied and heated).
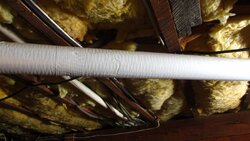
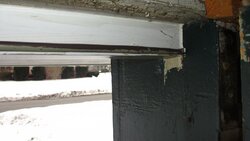
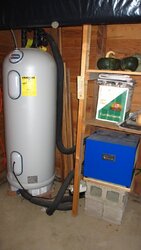
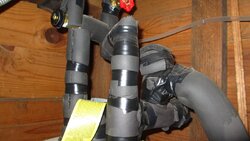
In 2008, we insulated the walls with blown-in fiberglass and insulated the foundation above-grade basement walls with spray foam, bringing the spray foam down just over the block walls (see IMG_1428.jpg). The basement casement windows were sealed with EPDM stick-on weatherstripping (it works so well I can no longer open them, they seem sealed shut...) (see IMG_1432.jpg) and the seams between the wall plates were sealed with silicone (see IMG_1433.jpg). I also insulated the boiler to radiator supply pipes with fiberglass pipe insulation (see IMG_1425.jpg).
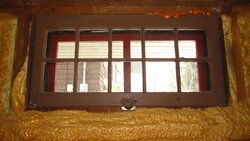
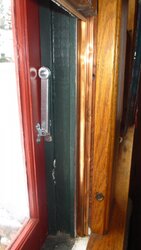
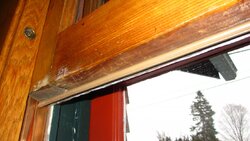
Next, I tackled the windows. We have double-hung windows (they are the original ones, and are in good condition. I purchased some v-strip spring bronze weatherstripping (see IMG_1413.jpg) from Kilian Hardware (http://www.kilianhardware.com/vshapsprinbr3.html) and installed it on the window jambs. From Kilian's I also purchased Stanley Storm Window Adjusters. These can also be seen in IMG_1413. They permit the storm window to be tilted open in the summer or winter, and better yet, when you swing them to the "up" position, they tighten the storm window to the jam. Not shown on the outside are the storm window hangers that makes this possible (something like this http://kilian.stores.yahoo.net/woodscreenan.html). Now, I mostly don't bother changing the screens over to storms and vice-a-versa twice/year - we just tilt open the storm windows and put a small adjustable screen in the window.
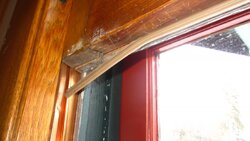
I then purchased some silicone tubeseal from Resource Conservation Technology (see http://www.conservationtechnology.com/building_weatherseals.html) along with a WS90 slot cutter blade for my router. The WS90 cuts a slot in the bottom of the window that the tubeseal fits into - it's a very nice system, and a big improvement over the stick on EPDM weatherseals that I originally installed (and that were constantly falling off). See IMG_1415 for it installed on the bottom of the window, and IMG_1416 for it pulled out of the slot a bit (for viewing of how the tubeseal fits into the slot).
After this, I had a blower door test performed - 1850 CFM at 50 pascals. That is about 10.3 ACH50. The blower door contractor told me that this was "pretty good", but there was still a lot of low hanging fruit for me to tackle, specifically the attic entrance and a basement walkout doors.
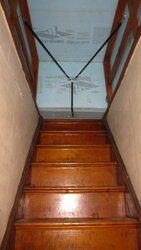
So I insulated the attic entrance. It had a nice railing around the attic opening, so I screwed 1" of foamboard around it, and gluing 1" thick pieces to that using PL300. I sealed the bottom with foam, and built a hatch of foamboard using the silicone tubeseals to create a good seal. The top is held down with gravity (a piece of 1/2" plywood on top) and sealed to the top rail with tubeseals. Bungie cords hold everything tightly together. See IMG_1424.jpg.
I insulated the attic with another 12" of fiberglass insulation, and 6" of insulation in the basement ceiling. That brought oil usage down to 700 gallons (occupied and heated).
In 2008, we insulated the walls with blown-in fiberglass and insulated the foundation above-grade basement walls with spray foam, bringing the spray foam down just over the block walls (see IMG_1428.jpg). The basement casement windows were sealed with EPDM stick-on weatherstripping (it works so well I can no longer open them, they seem sealed shut...) (see IMG_1432.jpg) and the seams between the wall plates were sealed with silicone (see IMG_1433.jpg). I also insulated the boiler to radiator supply pipes with fiberglass pipe insulation (see IMG_1425.jpg).
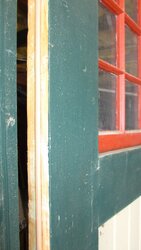
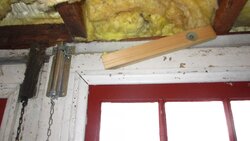
Next, I tackled the windows. We have double-hung windows (they are the original ones, and are in good condition. I purchased some v-strip spring bronze weatherstripping (see IMG_1413.jpg) from Kilian Hardware (http://www.kilianhardware.com/vshapsprinbr3.html) and installed it on the window jambs. From Kilian's I also purchased Stanley Storm Window Adjusters. These can also be seen in IMG_1413. They permit the storm window to be tilted open in the summer or winter, and better yet, when you swing them to the "up" position, they tighten the storm window to the jam. Not shown on the outside are the storm window hangers that makes this possible (something like this http://kilian.stores.yahoo.net/woodscreenan.html). Now, I mostly don't bother changing the screens over to storms and vice-a-versa twice/year - we just tilt open the storm windows and put a small adjustable screen in the window.
I then purchased some silicone tubeseal from Resource Conservation Technology (see http://www.conservationtechnology.com/building_weatherseals.html) along with a WS90 slot cutter blade for my router. The WS90 cuts a slot in the bottom of the window that the tubeseal fits into - it's a very nice system, and a big improvement over the stick on EPDM weatherseals that I originally installed (and that were constantly falling off). See IMG_1415 for it installed on the bottom of the window, and IMG_1416 for it pulled out of the slot a bit (for viewing of how the tubeseal fits into the slot).
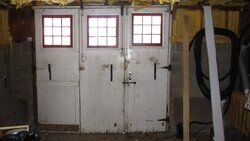
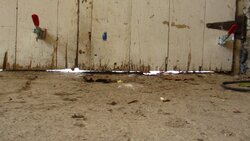
After this, I had a blower door test performed - 1850 CFM at 50 pascals. That is about 10.3 ACH50. The blower door contractor told me that this was "pretty good", but there was still a lot of low hanging fruit for me to tackle, specifically the attic entrance and a basement walkout doors.
So I insulated the attic entrance. It had a nice railing around the attic opening, so I screwed 1" of foamboard around it, and gluing 1" thick pieces to that using PL300. I sealed the bottom with foam, and built a hatch of foamboard using the silicone tubeseals to create a good seal. The top is held down with gravity (a piece of 1/2" plywood on top) and sealed to the top rail with tubeseals. Bungie cords hold everything tightly together. See IMG_1424.jpg.