Is there a repair manual for Jotul F500 ?

  • Active since 1995, Hearth.com is THE place on the internet for free information and advice about wood stoves, pellet stoves and other energy saving equipment.

    We strive to provide opinions, articles, discussions and history related to Hearth Products and in a more general sense, energy issues.

    We promote the EFFICIENT, RESPONSIBLE, CLEAN and SAFE use of all fuels, whether renewable or fossil.
Status
Not open for further replies.
Put it back together correctly. Safety first.
Since your final assembly of the stove is all from the inside, my choice would be not to remove the top. If you remove the top, you have to reattach it anyway. My procedure would be as follows:

Assuming the heat resistant board, blanket, the 3 tubes and all 4 manifold parts are removed from the stove. It is all best done clean and empty.

1. Attach and seat both LEFT and RIGHT side upper manifold halfs. Tighten upper bolts fully and seat it carefully.
2. Place and position the board and blanket above the upper manifold halfs. Together they control draft to the flue.
3. Attach RIGHT side lower manifold half with the 2 bolts. Leave bolts loose by about one turn.
4. Insert the 3 tubes in the RIGHT side manifold. Note: The "small" air hole tube goes in the rear. Place all tubes with the special "point" locating hole on LEFT side. Examine each tube carefully before you place it.
5. Slowly insert and lift the left side, lower manifold half, first with the rear tube, then the middle tube, and finally the front tube. It is tricky, but makes sense. Start by the rear, middle and then front tube as you hold up the lower manifold half. Tighten two LEFT side bolts to hold the manifold together. Then finally tighten all four (4) of the the lower manifold bolts.
6. Perfect time to empty all ashes and clean your glass.

It all goes together quite simply. Since this is your first time, I'll estimate that 1 to 2 hours would be required. Take your time and be thorough with each step.


Valhalla, thanks for the detailed description of removing the secondary burn tubes in the Oslo. I've been wanting to clean them since my stove was new in 2000. I don't know if anything in the design has changed since then, but I thought mine had two hex head bolts on the bottom half, which I thought held them together and screwed into the top. My fear was they would be frozen and snap off if I tried removing them. I don't recall alan screws, but they may be there. How free were yours?

My Oslo has the cast iron burn plates. They haven't warped as others here have had happen. I don't need to run it hard and I have maintained the insulation blanket. The blankets get torn up every few years. The first one I got was from Jotul for $45. I found the exact material and bought a roll that I cut a new one every couple of years. The blanket is to keep the fire box hotter, but I believe it keeps the burn plate evenly heated.
 
  • Like
Reactions: Valhalla
OK. Thanks for the instruction. I'll get on this in the morning! (Do you think those manifold bolts with the allen heads are going to come out easily? )

The four (4) vertical bolts could be very tight or possibly seized. Maybe not. About how old is the stove?
Do everything NOT to break or damage them. Try to very carefully "tighten" each one (clockwise) by a quick, small fraction of a turn, also by just a light tap, before beginning to loosen them (counter clockwise). Some fasteners that are subject to repeated high heat cycles, causing extreme expansion and contraction, may actually self loosen. Bolts can be always replaced, but bolts broken in cast iron will have to be drilled out.

You can do this. So, good luck and work very carefully.
 
No, I'm not a pro and appreciate your perspective and helpful suggestions Valhalla. I had the top off on our F3CB and F400 without drama. There's no more seal there than there is on the front door.
 
  • Like
Reactions: Valhalla
The four (4) vertical bolts could be very tight or possibly seized. Maybe not. About how old is the stove?
Do everything NOT to break or damage them. Try to very carefully "tighten" each one (clockwise) by a quick, small fraction of a turn, also by just a light tap, before beginning to loosen them (counter clockwise). Some fasteners that are subject to repeated high heat cycles, causing extreme expansion and contraction, may actually self loosen. Bolts can be always replaced, but bolts broken in cast iron will have to be drilled out.

You can do this. So, good luck and work very carefully.

I'll take a look at it after this burn season. The stove is 15 seasons old. I've seen burn tubes in other stoves removed by sliding them left or right. But my Oslo wasn't moving. I looked in the manual, but it doesn't say anything about taking them out for cleaning.
 
Valhalla, thanks for the detailed description of removing the secondary burn tubes in the Oslo. I've been wanting to clean them since my stove was new in 2000. I don't know if anything in the design has changed since then, but I thought mine had two hex head bolts on the bottom half, which I thought held them together and screwed into the top. My fear was they would be frozen and snap off if I tried removing them. I don't recall alan screws, but they may be there. How free were yours?

My Oslo has the cast iron burn plates. They haven't warped as others here have had happen. I don't need to run it hard and I have maintained the insulation blanket. The blankets get torn up every few years. The first one I got was from Jotul for $45. I found the exact material and bought a roll that I cut a new one every couple of years. The blanket is to keep the fire box hotter, but I believe it keeps the burn plate evenly heated.

xman, The threads of the vertical bolts could be seized, possibly also not. Reach in and carefully test one or two. After 16 heating seasons, anything is possible. Even order some bolts in advance. My 2010 stove, with the machined surface griddle, has also not warped. I never go over 550 degrees on the stovetop. Yes, the board and blanket also reduces the thermal load on the above surface. It is an excellent design. Let me know of your blanket source on "a roll," as I also need to replace the same in a year or so. Thanks!
 
No, I'm not a pro and appreciate your perspective and helpful suggestions Valhalla. I had the top off on our F3CB and F400 without drama. There's no more seal there than there is on the front door.

You are the Hearth.com pro... thanks!
 
This is the insulation blanket in my Jotul Oslo. It is on top of the 2 piece cast iron burn plates. I replaced if about 6 years ago and it a was about $40 Jotul stealer. For the same price I bought a roll, 2' x 10' roll of Kaowool™ RT - 2,300°F / 1,260°C. It is the same insulation material. The piece I needed is 11.5" X 27" X 1/2". I will be able to get 8 pieces out of the roll.

http://www.anvilfire.com/sales/pages/kaowool_index.htm

Tom
Attached Files:
 
  • Like
Reactions: Valhalla
I'll take a look at it after this burn season. The stove is 15 seasons old. I've seen burn tubes in other stoves removed by sliding them left or right. But my Oslo wasn't moving. I looked in the manual, but it doesn't say anything about taking them out for cleaning.

They will not move if correctly assembled. The secondary air tubes are each located by three (3) "points" cast in the left side, upper manifold half. On assembly, the three "points" protrude into the tubes to secure each one in place. Tricky to assemble the first time; easy after some experience... and a few choice words!
 
  • Like
Reactions: wdb
This is the insulation blanket in my Jotul Oslo. It is on top of the 2 piece cast iron burn plates. I replaced if about 6 years ago and it a was about $40 Jotul stealer. For the same price I bought a roll, 2' x 10' roll of Kaowool™ RT - 2,300°F / 1,260°C. It is the same insulation material. The piece I needed is 11.5" X 27" X 1/2". I will be able to get 8 pieces out of the roll.

http://www.anvilfire.com/sales/pages/kaowool_index.htm

Tom
Attached Files:

Tom, thanks for the great info! Your Oslo has two cast burn plates, my 2010 model has a heat resistant board and a blanket above it. I'll post some photos. Thanks again!
 
UPDATE 2/8

After I put in my estimated 2 hours trying to put the tubes back into the stove, I gave in an removed the top of the stove. With the stove top removed, it took about 15 minutes to get the manifold firmly installed in the stove. Of course, I had all the 'concept' practice leading up to pulling the top.

The allen head bolts that hold the ends together came out effortlessly, all 4 of them. The biggest problem I had working with the lid on was that I simply couldn't get the allen head bolts to start. When I finally gave up and decided to put the manifold together outside the stove, it was actually very difficult to get those bolts started. Doing it 'overhead' while trying to keep the manifold halves together was just not a skill I seem to have.

In taking the stove top off, the two forward bolts broke (heads wrenched off) the rear bolt readily screwed out. I couldn't figure out how to get penetrating fluid to go where is need to go with those overhead bolts. I'm not bolting the top down, to I didn't try to remove the 'studs' and didn't put a bolt in the open rear threaded hole.

I haven't started a fire as such yet but I've burned a few balls of paper. The stove appears to draw MUCH better than it did before I re-installed the manifold. (Chimeny sweep coming on tuesday, which wouldn't be happening if I knew about the brush that comes in from the bottom (I really should cancel and buy one!) I have an insulated stove pipe in my chimney, it should be easy to clean.

No offense, Xman, but I wanted to ask the group if the source for insulated blanket you recommended is the way to go. My blanket is pretty ragged at this point. (I hate paying 8x the price to anyone but, on the ohter hand, how many years would a new 'Jotel Brand' insulation rug last? It's not likely I'd need more than another ONE, is it?

I really appreciate all the help and attention I've been given with this 'problem.'

Here's a question from the wife: what do you folks recommend for cleaning the stove door glass? the manual says to use a chemical cleaner but doesn't give a brand..

Thanks again

-Allan
 
  • Like
Reactions: Valhalla
Very glad that you made significant progress. Congratulations!

The door glass is easiest and best cleaned with... an old newspaper, slightly wet and very lightly dipped in ashes. The moisture cuts the smoke stain and ash provides excellent light abrasive for stubborn buildup.

You can do a final wipe with Windex and paper towel, if you want a really clear view! Do the outside of the door glass also with Windex! Heat transfer is really improved with clean glass.

Well done!
 
Last edited:
From a person who has repaired a few of the secondary systems on the F500/F600 stoves, taking the top off will give better access to re-attach the manifolds. With the top off (one 10MM bolt on back center- reach inside of flue outlet, 2 other 10MM bolts in front portion of top), you will find that the manifold forks in back are probably loose, usually from someone prying up on the secondary system getting that last piece of wood in there. Put a large washer under each manifold fork on reassembling along with sealing around manifold rear connection with furnace cement after the tubes have been reset into the two cast manifolds. Its not impossible to do without taking top off, but its easier to see that everything is properly in place. The top plate bolts don't have to be put back in, but I would. The top plate gasket (3/8) will probably not need to be redone. The top plate is heavy though, be careful. From that first pix, one tube looks like it is sagging but may be the angle... prob good time to replace the baffle and blanket too, if the top is off (cost around 100.00 for ceramic baffle and blanket). If the stove has the cast baffles- (1999-2003 Oslos did), they are still available, but cost about twice as much as the ceramic. It is not a good idea to use the stove with it compromised, if you crack the top plate, that'll be costly. A new complete secondary burn system is available from Jotul for around 180.00. Good luck with her, she can be fixed but will need a bit of correct work done on her.
 
Good to hear that you are making headway, Allan.

Rutland stove glass cleaner is good stuff. A bottle will last you years. It contains a silicone that is supposed to retard build up too.

Stovelark, thanks for dropping in. I was hoping to hear from you! You da Jotul man!
 
UPDATE 2/8


No offense, Xman, but I wanted to ask the group if the source for insulated blanket you recommended is the way to go. My blanket is pretty ragged at this point. (I hate paying 8x the price to anyone but, on the ohter hand, how many years would a new 'Jotel Brand' insulation rug last? It's not likely I'd need more than another ONE, is it?

I really appreciate all the help and attention I've been given with this 'problem.'

Here's a question from the wife: what do you folks recommend for cleaning the stove door glass? the manual says to use a chemical cleaner.

Thanks again

-Allan


Allan, yes best to get everyones opinion on issues, completely understand. I posted that info on the insulation blanket a number of years ago. I think a few guys were going to give it a try. I'm guessing it's exactly the same material as Jotul insulation. Its a high temp insulation used in most of the stoves. There have been some that don't replace it when it's torn up. But I wouldn't. I have a roll and when it looks bad after 2 seasons, I put in a new one.

I use spray nine , fireview to clean the glass. For years it was amazing stuff. Sprayed it on and wipe off anything. Just this year I got a few new bottles, and see they changed the label. I asked them and they said it was the same. It's not as good, but still works well. You can find it online.
 
Spray Nine is at many True Value hardware stores, and some Home Depot. Painters use it for prep. Great stuff!

I'm still using wet newspaper, lightly dipped in ashes to clean my Oslo door glass. Windex then quickly afterward, inside and out! I pitch the paper in the stove and light it. Done!
 
  • Like
Reactions: wdb
FWIW, I've had the top off my Jotul F3 about 10 times in the last three months ('why' is another story posted elsewhere) . There's nothing to it, I do it without thinking now and would certainly make that my 'route in' of choice if I had options. It's also how I clean my flue. As long as you check you put it back on evenly, as BeGreen always says. The top isn't sealed in any way other than by gaskets and gravity and neither of those can be in any compromised by lifting off the top, any more than the gasket in the door can be compromised by opening and closing it - probably less, actually.
 
Thanks once again to all the help people in this forum have given me. I got the chimney cleaned and started the stove up again. A lot of aspects of the burn are so much better than they were, but before I go into the downside, I better ask some questions that recent posts have brought up for me

1. Why would I have to replace the non-iron top baffle if it appears to be in one non-worn piece?

2. I did not use stove cement on the headers as stovelark suggested. Is this something I should open the stove back up and do?

3. My stove is clearly not air tight. When I throw the front lever all the way to the left, the flame reduces somewhat but I can't kill the fire. Also, I can't get a fire to 'burn' through the night, even if I have the lever all the way to the left. I've run around the stove with a incense stick, with the exception of an about 2 inch stretch at the bottom of the front door, the incense runs over up over or around the stove into the fireplace. Other than on the door, none of the incense smoke seems to be entering the stove through a gasket.

But, I have to ask: my stove has been used for 10 years, easily. Should I just replace all the gaskets at this point? If I do, are farm store gasket materials as good as buying from jotul?

Now, the big issue:

Like another poster I read a few weeks ago but whose posts I simply can't locate currently, my stove will not heat over 300 degrees on the corners (tested with magnetic stover thermometer and an infra red thermometer) I probably do have snow moisture in much of my wood at this point. Is that enough to keep my temps that low? If not, what do I need to do?

Everyone once in a while, I have to open the side load door to get a good flame going. Possibly related to paragraph above (?)

Thanks again to everyone who shared their experience and knowledge with me
 
It's probably pointless to point this out but it's COLD here. If I didn't have the stove running, it would easily be 20 degrees in my living room. Not that I think that cold is knocking 300 degrees off my stove output, but worth mentioning...maybe ;-)
 
I just now re-ran the top of the stove with the infra-red thermometer. I got readings near 200 on the lest side and near 300 on the right side and about 600 in the center of the top
 
Hi Aball, Glad you got the Oslo back up and going- yes it has been a real testing winter for us on the east coast! I myself am having to burn wood and pellets to keep the wife nice and warm, normally my wood stove is sufficient, but not at subzero temps..
The Jotul blanket for the Oslo is about 40-45 dollars, it should last many seasons, most of them get ruined by chimney cleanings.. The secondary burn system will work its best when sealed properly, but if you are not burning good dry wood, you won't see a lot of sec burn until the moisture is driven out first. If you are only seeing 200-300 deg stove top temps, sounds like wet wood. Having to open the side door to let more air in to "get it going" (unless the stove is stone cold, then opening the side door isn't such a bad thing to do to get up to initial temp) is also indicative of wet wood. Try to avoid opening ash pan door, its a no no. The Oslo is a real winner of a stove.
 
Thanks, Stovelark, that makes sense to me. I guess I still don't know whether or not I should replace all the door gaskets, though. Of course, I also don't understand 'sec burn,' either ;-)

Thanks!!
 
Hi Aball, secondary burn. If in doubt replace the gaskets, check especially the ash door gasket. Don't forget the flue connector too, make sure it hasn't slipped and is letting air in. The stove will pull in air anyway she can, especially when you close down the primary air control. That's when more secondary air will be pulled into the stove and through the air tubes in the top, making the secondary burn happen. If the stove is sucking air in from another easier source, then less secondary air is drawn in and through the air tubes meaning less secondary combustion and less heat output from the stove because air is being let to exit the stove quicker, so more heat goes up the chimney with it. That's why air control through the stove is so important. Good dry wood + controlling the amount and speed of air going into and through the stove = happy owner and warm house.
 
Seems like you got it. One thing I had trouble wrapping my head around when I first started "working" on my stoves was that the gaskets aren't the same as the gaskets I've always worked with.

Anyone who's worked on motors or mechanical equipment is used to the mentality of any disturbed gasket needs to be thoroughly removed, area cleaned, new gasket installed prior to re assembly. This is not the case with wood stove rope gaskets.

Glad you figured out how easy it is with the top off the stove. Too bad you snapped the bolts, but not the end of the world. When I took the top off our stove I found the bolts to be bent, probably from being lifted and moved by the top. Who knows, wife got the stove for free, used, before we got together.

20150226_094656.jpg

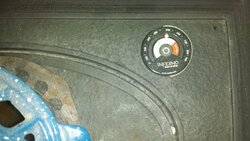
Stove should be cruising 450+ . This pic is 1 hour after a reload with the air shut 85% and questionable wood. Other than the cook plate in the center, with the ir gun on my stove, the back right corner seems to be the hot spot.

It's a great stove, took me a while to figure this one out compared to my other one (hearthstone). Now if I can just get the wife to stock up on wood and get a full year ahead, we'll be in good shape.
 
Status
Not open for further replies.