Wow - this has been a journey...
Ok for some background - me and my family moved into our house in 2010, at the time I was hugely looking forward to having our own house so we could setup a wood stove. After looking around we really liked the look of the Lopi Declaration, and sprung for this, the whole deal including installation.
I got it up and running, but I had some questionable wood that first year (~6 month), so really didn't get much out of it. The second year, I knew I had good dry wood, tested below 20%, but still I had issues getting good hot fires, and found I had to do frequent reloading and a ton of babysitting. What ensued was a multiple year project trying to get some good performance form the stove - this included all sorts of craziness, block-off plates, modified air controls, modified burn tubes, if you can find it mentioned anywhere on these forums then I tried it - but absolutely nothing seemed to work very well. I finally accepted the fact, this stove would simply never get an overnight burn or be able to effectively heat during cold weather. Again, not to bash the manufacturer, but these particular stoves (their flush inserts) are simply ill-suited for the task of maintaining fires and heating.
So finally, fall of 2014, I pulled the trigger and ordered an Ideal Steel after reading all the reviews. I had some concerns, mainly that I'm in the Pacific Northwest, so we have milder winters, and I also have a 15 foot exterior lined chimney, and going with rear-venting.. on to that later...
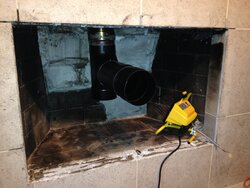
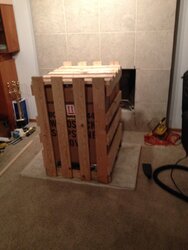
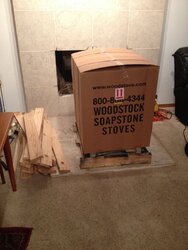
After a few anxious months of waiting due to backlog, the stove finally arrived at the shipping warehouse just last Friday. I went out that night and got it loaded in my truck. Saturday was the big day, fortunately I had help, from various people throughout the day for each part of the process. Had a friend help remove my insert and get it into the garage - that was dead easy. Then I spent a few hours hooking up the piping for the rear vent. Next had a few great neighbors help get the IS off the truck and onto the hearth. We had 4 people - anything less and the task would've ranged from dangerous to impossible. We were good though, it was tough but 15 minutes later the crate was landed on the hearth.
Next I unpacked everything for a while, and a bit later had a good friend come over and helped move, position everything in place, then cracked into the beers and made the first fire.
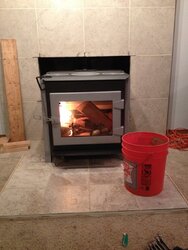
I was NOT dissapointed. With the rear vent, then a 2 foot horizontal run into a T up a 15 foot single wall chimney... there was zero draft issues and this was on a rainy 55 degree evening. The wood fired instantly, and I had the door shut within 5 minutes, and started building heat and had to turn down so it didn't race past 400. That was a 3/4 load of softwood (mixed Douglas Fir, Alder and Cottonwood), and I have gotten 12 hours with easy relights since then (just put in my 4th load Monday morning here). I don't know what else to say - it's amazing, burns long and the stack is transparent. Here's a vid:
The only downside right now is the paint cure is a bit obnoxious - any idea how long this will last ? I'm on the 4th load, and have peaked at 550 - tough getting it past that, the stove really likes to slow burn, and I like it too. It's still gassing a little now but not as bad as it did on the first startup, where it literally had visible smoke rising off of it.
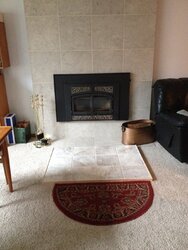
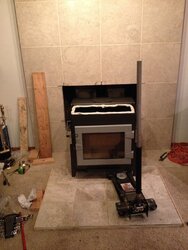
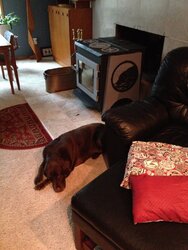
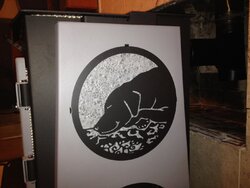
Here's some pics right from the Declaration (beautiful stove!), to the IS - please I understand the hearth is not the greatest - however it functions fine and mostly meets code. I need to cleanup the surround area as it was previously covered, and sadly when they installed the insert they jack hammered out 3/4ths of the back firebrick to make it fit, so I'm investigating options to clean up that area also, any suggestions ? My only regret is that I didn't do this sooner!!



Last edited by a moderator:


