First off thanks to EJL923 for the tips. Was going to put this in the 550 thread but maybe others will find something useful.
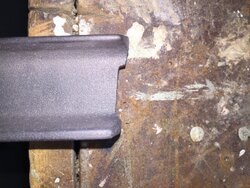
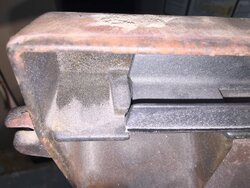
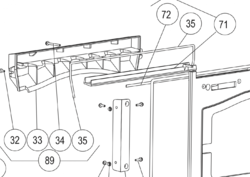
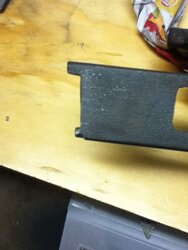
The primary air slider on my stove did not travel to the end of the slot that retains the slider knob. I removed the slide and on inspection the slide hits a stop preventing maximum closure of the air.
Users of this stove know it allows alot of air into the box. When I have been running and draft is rolling it feels like you want to limit the air coming in more than you can. Burn times are decent 5-6 hrs but probably could be better so I looked into ways of gaining more control of the air.
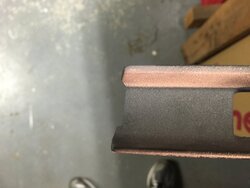
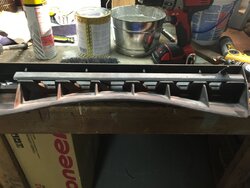
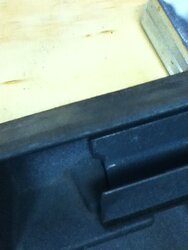
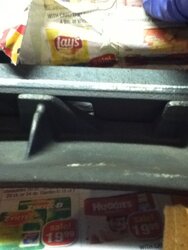
The center opening is designed (angled) so that it cannot be fully closed but by removing material on the slider it could travel farther making the center slot smaller when fully closed. *I also noticed that the other square slots that are meant to fully close were not shut completely.
I removed close to a 1/4" of material. This shut the square slots fully and caused the center slot to be much smaller. Once back together I am getting full travel in the slider retaining slot.
Testing begins tomorrow.
*Edit; I should say the it was only 1 or 2 of the 6 square slots that were not fully closing. They were on the same side of the manifold (unequally distributed) and it did not appear to be an intentional part of the design but more of a casting issue.
The primary air slider on my stove did not travel to the end of the slot that retains the slider knob. I removed the slide and on inspection the slide hits a stop preventing maximum closure of the air.
Users of this stove know it allows alot of air into the box. When I have been running and draft is rolling it feels like you want to limit the air coming in more than you can. Burn times are decent 5-6 hrs but probably could be better so I looked into ways of gaining more control of the air.
The center opening is designed (angled) so that it cannot be fully closed but by removing material on the slider it could travel farther making the center slot smaller when fully closed. *I also noticed that the other square slots that are meant to fully close were not shut completely.
I removed close to a 1/4" of material. This shut the square slots fully and caused the center slot to be much smaller. Once back together I am getting full travel in the slider retaining slot.
Testing begins tomorrow.
*Edit; I should say the it was only 1 or 2 of the 6 square slots that were not fully closing. They were on the same side of the manifold (unequally distributed) and it did not appear to be an intentional part of the design but more of a casting issue.
Attachments
-
 center slot pre-mod.JPG94.3 KB · Views: 792
 -
 center slot pre-mod2.JPG50 KB · Views: 766
 -
 slider post mod2.JPG84.7 KB · Views: 747
 -
 slider post-mod1.JPG80.2 KB · Views: 738
 -
 slider and stop.JPG68.3 KB · Views: 706
 -
 center slot post-mod2.JPG79.7 KB · Views: 760
 -
 center slot pre mod3.JPG50.9 KB · Views: 641
Last edited: