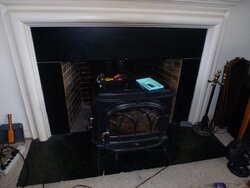
We bought an Oslo last summer, and had the stove shop install it, with single layer, insulated flue. The Oslo was placed on the stone hearth, in front of the fireplace, for more heat and cooking capability. I wish the installers had pointed out that this installation did not meet clearances in several ways. We gradually became aware that the mantle was getting too hot. It measured up to 110F, and sometimes higher. As a stopgap, we wrapped bricks in aluminum foil and used them to prop up temporary heat shields (cookie sheets set at an angle) to deflect the heat, until we could get a definitive fix.
In the spirit of other helpful posts, I took pictures of our project as it went along. The shield is galvanized steel, I had it fashioned from a duct shop. We opted for "thick" (other option was "thin") and the edges are folded and crimped. $60 covered this, and another mantle shield (that is a work in progress). The goal was not to make any obvious marks in the mantle, and have it completely removable for the off-season.
Before:
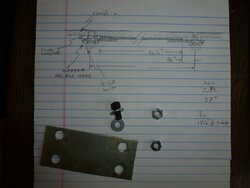
Diagram, and some parts. The steel plates were scraps lying around here, only 2 holes were needed, but they were otherwise perfect for size (salvaged from an old electronics project):
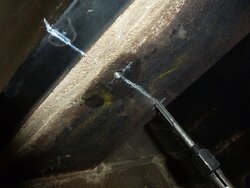
Lintel, marked with grease pencil (so the shield is centered): left side is marble slab (front of mantle), right side is the iron lintel. The front hole is already tapped, the rear is in process in this photo. Wanted to put as many threads into the 1/4" think lintel, so used 1/4-28 tap:
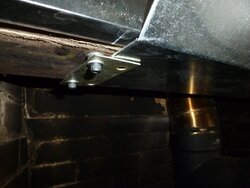
Left bracket, with shield in place:
Right bracket:
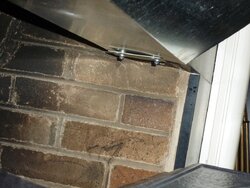
Final look, although it isn't painted yet. Even unpainted, the reflected surface makes it blend in:
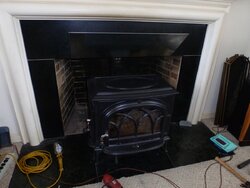
Side view- it come out almost an inch beyond the mantle. This shows, unfortunately, how dark and discolored the mantle became. Needs repainting.
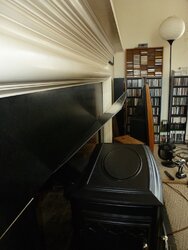
Measurement of mantle is now 77F. The shield angle can also be bent up or down, if we want to later.
In the spirit of other helpful posts, I took pictures of our project as it went along. The shield is galvanized steel, I had it fashioned from a duct shop. We opted for "thick" (other option was "thin") and the edges are folded and crimped. $60 covered this, and another mantle shield (that is a work in progress). The goal was not to make any obvious marks in the mantle, and have it completely removable for the off-season.
Before:

Diagram, and some parts. The steel plates were scraps lying around here, only 2 holes were needed, but they were otherwise perfect for size (salvaged from an old electronics project):

Lintel, marked with grease pencil (so the shield is centered): left side is marble slab (front of mantle), right side is the iron lintel. The front hole is already tapped, the rear is in process in this photo. Wanted to put as many threads into the 1/4" think lintel, so used 1/4-28 tap:

Left bracket, with shield in place:

Right bracket:

Final look, although it isn't painted yet. Even unpainted, the reflected surface makes it blend in:

Side view- it come out almost an inch beyond the mantle. This shows, unfortunately, how dark and discolored the mantle became. Needs repainting.

Measurement of mantle is now 77F. The shield angle can also be bent up or down, if we want to later.
Last edited:

