
Hello
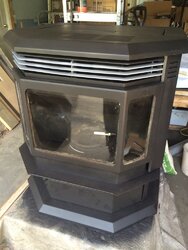
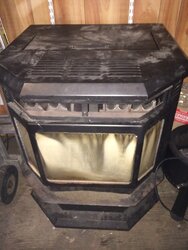
This Quadrafire CB1200 has see alot of use in a basement that may have had some dampness. Dampness is the Pellet stove's # 1 adversary!
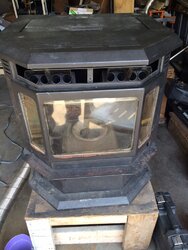
Even though it works fine, looks like time for a little touch up?
I brought out the Big Gun by using a 40 lb Abrasion blaster connected to a 210 PSI DeWalt compressor using Black Diamond - ultra fine (Coal Slag) but that is not all that is needed to perk this boy up?
Getting and setting up a good blaster is not easy, here was my struggle.
https://www.hearth.com/talk/threads...coal-slag-in-the-red-bag.144027/#post-1943223
Ultra fine Black diamond is a little messy but works good at $8 per bag.
Anyone else do blasting with Aluminum Oxide? That is rich stuff @ $50 per bag!
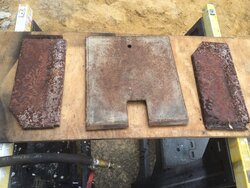
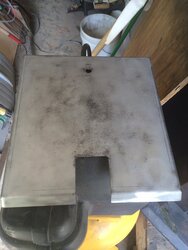
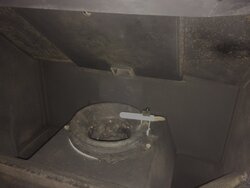
Pic 1 - Rusty Top Panels
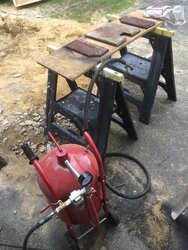
Pic 2 - Abrasion Blaster using Black Diamond
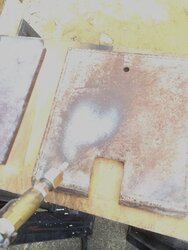
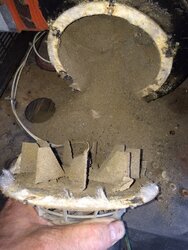
Pic 3 - Baffle Blasting - "Gets the Rust Out"
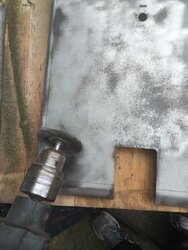
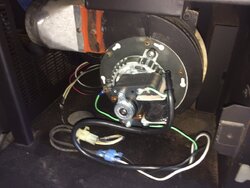
Pic 4 - Removing the white calcium residue from the Black Diamond coal slag
Pic 5 - Almost Done blasting!
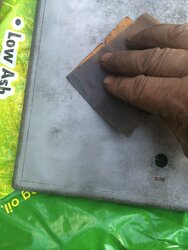
Pic 6 - Smooth with Emory Cloth
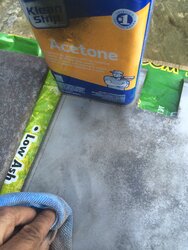
Pic 7 - Acetone wipe - 3 times over to get the oil and dirt off!
Pic 8 - Paint with Flame Proof Ultra High Temp Flat black paint
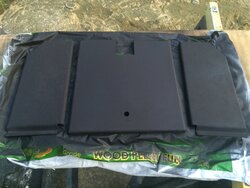
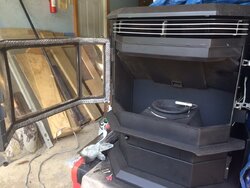
Pic 9 - Fire Box Finished!
Click Pics to Enlarge:
This Quadrafire CB1200 has see alot of use in a basement that may have had some dampness. Dampness is the Pellet stove's # 1 adversary!
Even though it works fine, looks like time for a little touch up?
I brought out the Big Gun by using a 40 lb Abrasion blaster connected to a 210 PSI DeWalt compressor using Black Diamond - ultra fine (Coal Slag) but that is not all that is needed to perk this boy up?
Getting and setting up a good blaster is not easy, here was my struggle.
https://www.hearth.com/talk/threads...coal-slag-in-the-red-bag.144027/#post-1943223
Ultra fine Black diamond is a little messy but works good at $8 per bag.
Anyone else do blasting with Aluminum Oxide? That is rich stuff @ $50 per bag!
Pic 1 - Rusty Top Panels
Pic 2 - Abrasion Blaster using Black Diamond
Pic 3 - Baffle Blasting - "Gets the Rust Out"
Pic 4 - Removing the white calcium residue from the Black Diamond coal slag
Pic 5 - Almost Done blasting!
Pic 6 - Smooth with Emory Cloth
Pic 7 - Acetone wipe - 3 times over to get the oil and dirt off!
Pic 8 - Paint with Flame Proof Ultra High Temp Flat black paint
Pic 9 - Fire Box Finished!
Click Pics to Enlarge:
Attachments
-
 1-RustyFireBoxPanels1.JPG675.1 KB · Views: 416
 -
 2-BlastingSetup.JPG818.2 KB · Views: 352
 -
 3-BaffleBlasting.jpg384.7 KB · Views: 411
 -
 4-WireWheelCalcium.JPG646.2 KB · Views: 341
 -
 5-AlmostDone.JPG399 KB · Views: 414
 -
 6-EmoryCloth.JPG441.8 KB · Views: 321
 -
 7-AcetoneWash.JPG487.1 KB · Views: 394
 -
 8-UltaHighTempBlackPaint.JPG426.7 KB · Views: 416
 -
 9-FireBox.jpg266.5 KB · Views: 380
Last edited:


")