Finally getting down to business and getting the stove together. Bought it used on CL last March, knowing I'd have to replace the rear burn plate & secondary baffle assembly. Decided last week to just do all 3 burn plates. The ash pan door gasket was basically non-functional, so that needed replacing, and while I was at it I redid the door gasket, which looked like it had the original rope in it!
Still waiting for my wife to be paid for her contract work in July confused
 , upon which I'll get the dang chimney liner, but otherwise I'm in good shape. Have a block off plate made and 1.5 cords of dry wood to play with this year.
Here's the workstation:
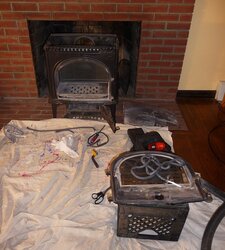
Had to gasket off the rear of the secondary assembly too - yeah, it was a little sloppy, but the baffle gets bolted into place, so it's okay
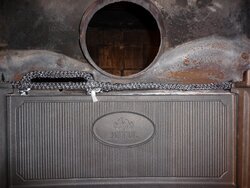
All shiny!
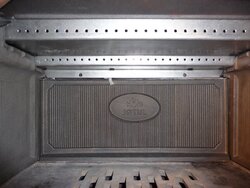
Fresh gaskets, aaaaahhhh
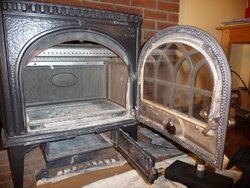
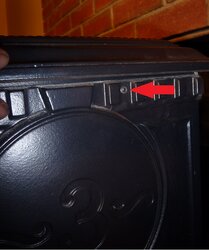
And finally a little tidbit I learned the hard way - when I got the stove, I wanted to remove the top so I did it the hard way, the really hard way, by removing the bolts from the inside-upper surface by reaching in through the vent collar! Well, fancy this, I noticed today that the brackets I removed the hard way are actually held in place with these little screws that can be backed in and out right on the side of the stove with a metric allen wrench
  ! I don't have any metric allen wrenches, but one of my hex/star bits fit well enough to get the job done.
Still waiting for my wife to be paid for her contract work in July
 confused
 , upon which I'll get the dang chimney liner, but otherwise I'm in good shape. Have a block off plate made and 1.5 cords of dry wood to play with this year.
Here's the workstation:

Had to gasket off the rear of the secondary assembly too - yeah, it was a little sloppy, but the baffle gets bolted into place, so it's okay


All shiny!


Fresh gaskets, aaaaahhhh

And finally a little tidbit I learned the hard way - when I got the stove, I wanted to remove the top so I did it the hard way, the really hard way, by removing the bolts from the inside-upper surface by reaching in through the vent collar!
 Well, fancy this, I noticed today that the brackets I removed the hard way are actually held in place with these little screws that can be backed in and out right on the side of the stove with a metric allen wrench
  ! I don't have any metric allen wrenches, but one of my hex/star bits fit well enough to get the job done.

