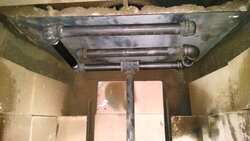
Silent Flame Retrofit - Secondary Air, Firebrick, etc..

  • Active since 1995, Hearth.com is THE place on the internet for free information and advice about wood stoves, pellet stoves and other energy saving equipment.

    We strive to provide opinions, articles, discussions and history related to Hearth Products and in a more general sense, energy issues.

    We promote the EFFICIENT, RESPONSIBLE, CLEAN and SAFE use of all fuels, whether renewable or fossil.
Status
Not open for further replies.
Well... I ordered a Condar probe style flue thermometer, a wood moisture meter, and an IR temp gun which will all be here this week.

So back to the modifications.. I loaded some of the split wood and so far the stove seems to like it a lot more so I'm feeling a lot better about the baffle. Heat output is high... possibly higher then before but smoke output is almost 0 when the stove is up to temp.

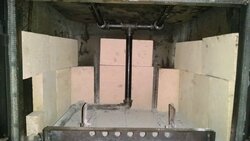
Now, I was walking around my local TSC yesterday and they had firebrick for $1.99 each. I believe I'm going to measure the firebox tomorrow morning and pick up enough to line the bottom and the sides up to the bottom of the baffle.

With the baffle.. the firebox retains a lot more heat then it did originally. Is there risk of damage to the box itself due to the added heat retention? Will firebrick help/hurt this?

Also.. My wood stove has an air chamber between the firebox and the outer casing of the stove.. along with a blower built into the bottom. Will adding firebrick reduce the heat output from the blower?
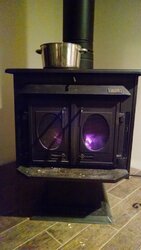
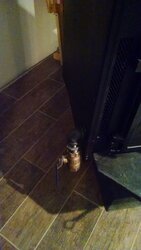
IMG_20151026_242958173_zpsglyvnjsu.jpg

Thanks guys.
 
Last edited:
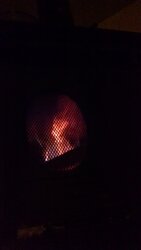
Quick question... does outside air temperature effect secondary burn (due to less draft)?

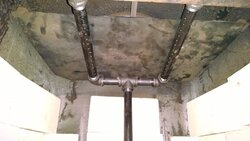
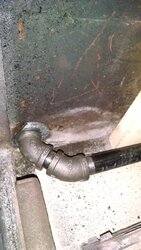
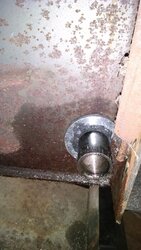
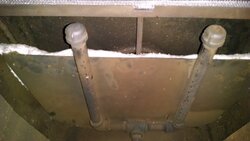
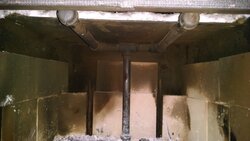
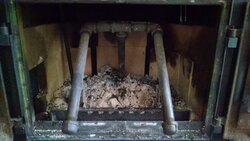
Anyways... I finished up secondary manifold and most of the fire brick...

IMG_20151027_141336230_zpsza9ujyjb.jpg

IMG_20151027_141341759_zpsyxevglb4.jpg

IMG_20151027_125042372_zpspkq1qbff.jpg

IMG_20151027_125029621_zpslk5ogg12.jpg

IMG_20151027_152953206_zps3gr2zkvn.jpg

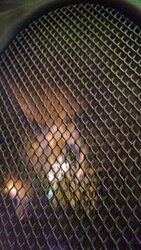
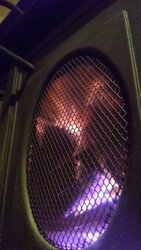
I piled on some kindling and got it rolling... let it roll for 15-20 minutes to get things hot... shut the primary air down and the secondary tubes lit instantly... but the jets slowly died and went into lighting the entire underside of the baffle with a deep blue flame 3-4" above the wood... which again slowly died out after a few minutes and the fire went back to a primary burn... I do get a good secondary burn while the primaries are open, however it doesn't seem to "jet" from the holes in the secondary tubes except the first few minutes...

IMG_20151027_151022464_zpsokmzk1si.jpg

No smoke out of the chimney after warm up at all... so it certainly is burning clean.

With all that being said... why cant I maintain the "jets" out of the burn tubes? Can outside air temp effect secondary burn? Its 55-60 out and raining and I don't hear any draw coming from the secondary valve with the primaries shut... I can feel a slight air movement there but nothing significant. I'm wondering if its just too warm out yet...

Do I need to add some type of lining to the top of the baffle perhaps? I could see the vertical pipe that was low in the firebox had a slight cherry glow but the upper tubes didn't. Perhaps I need to bring the brick all the way up to the baffle?

I'm open to ideas or should I wait to see what a cooler night will do?

I'm happy with the mods so far as just a kindling fire (no splits) has brought the room temp up 5 degrees and the fire has been out for 15-20 minutes but the stove is still putting out good heat and the automatic blower is still running.

Thanks guys
-Chris

-EDIT-
After some reading, I think its going to take a more significant fire to get good/continuous secondary combustion... but still open to ideas...
 
Last edited:
Question...

In normal secondary operation, should the flames be jetting out of the holes in the burn tubes or should there just be flame above/independent of the wood in the stove?

I only get the blue jets of flame when I really have the stove cranked up and shut the primary air down completely... but with the primary open a bit, I can get a normal wood flame... and a burn above the wood but not coming directly out of the pipes.

So... what is "proper operation"? What exactly am I looking for in these tests?

I did some playing around tonight during a HOT burn... shut the primary down and used a hair dryer to push air through the secondary intake valve... made no difference.

I'm leaning heavily towards heat being the problem. I am getting secondary burn but its not consistent. I think I need to insulate the steal baffle plate and get a tighter fit to the sides and back of the stove. I also think I need to bring the fire brick all the way up to the baffle plate which will be a PITA as its only 3" of space.

Suggestions on material to use?

Am I on the right track?

Thanks guys
-Chris
 
Last edited:
Because I have $120 in the mods to this stove... the stove looks great... has a huge firebox which gets me 12-14hr burns without the mods... and I love to tinker/fabricate.

I bought this stove last year for $100... cant really go wrong...

That and I don't have $2k+ to blow on a new stove of similar size just to decrease emissions (which oddly enough, this stove does fairly well at that too when up to temp and not closed down... figure if I can improve on it without breaking the bank... why not?)
 
  • Like
Reactions: zig
^^
I'm getting just that during kindling fires and sporadic during regular burn which leads me to believe its a heat issue more then anything.

-EDIT- I also get secondaries during WOT burn with larger splits... hard to see but it is taking place but as soon as the primary starts to cool down, the secondaries die out. Insulation is going to be a must

I may need to change the orientation of the tubes but some research is showing that most if not all stoves that use a steal baffle plate like my setup is using some form of ceramic insulation blanket above the baffle. When asked, most people claim that the blanket is more important then the baffle itself as secondary combustion wont take place without it.

Any ideas on what would work for baffle insulation? Anything I could get local?
 
Last edited:
One possibility on the secondaries is there is too much air resistance in the pipe. It could be that the intake path is too long and has too many 90* turns for the pipe size. More air would be delivered by a larger pipe feeding the 2 secondary tubes and exiting out of the bottom or back side. That said if there is no visible smoke and the wood consumption is down notably, there's reason to celebrate that success.
 
Its getting there... slowly but surely.

I went in to town to the local stove shop and they had the 1" ceramic baffle insulation 2' wide... $15 per foot. I picked up 2' and started bsing with the owner a bit and was telling her what I was tinkering with. She claimed that they were the first in the area to offer Silent Flame stoves.... she asked me what model number it was and started describing the stove from memory along with its needed clearances.. said that they were top of the line stoves for their time and performed very well.. over built in a lot of areas... etc.. etc..

Why didn't I think to call them when I was trying to find info on this stove?? lol

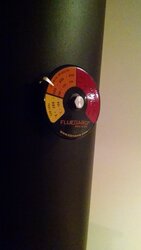
Anyways... My toys arrived today as well.. I installed the stove pipe probe thermometer.. the fire was already down to coals and registered 250-300 on the Condar fluegard probe placed 20" above the stovetop.

I took the moisture meter out and split one of the large oak pieces I had on the deck.. 33% Ouch. Some of the small stuff was down in the teens so I'll be mixing it up. Hopefully I have enough on hand to be 2-3yrs ahead.. we'll see how the winter goes.

I also got an IR temp gun and was playing with it a bit.. My tubes under the baffles at this stage in the fire were 600F... coal bed pegged the gun which maxes at 1250... Fire brick was in the 500-600 range.

Waiting for things to cool down so I can get the insulation cut and installed then go from there. While I was at the shop, we had a look around at their EPA stoves.. Was checking out a smaller Buck stove that used secondary air and other then my tube orientation, I think I'm on the right track. That little stove basically had a piece of sheet metal on top of the burn tubes with a layer of the 1" insulation. It also used much thinner wall stainless tubing which would heat up faster... something to think about as I have access to plenty of scrap stainless material.

I'll find out tonight if that does the trick... if not, I'll go back to the drawing board on the tube layout. As you said, it may be restrictive.

More to come.
 
Last edited:
I always think its pretty cool when people do this. Wet wood won't help your secondaries that's for sure. Keep tinkering but it's not like my secondaries always fire like a gas barbecue. Often it's more subtle than that. Draft does have an effect so you may want to wait for some cold weather before you decide where you're at.
 
  • Like
Reactions: Mr4btTahoe
I think we have a winner!

Cut and installed the blanket..
IMG_20151030_171617981_zps9xokrlah.jpg

IMG_20151030_171624833_zpsnnllpgsk.jpg

Had an extra fire brick so I split it and sat a piece on top of the insulation on both sides of the flue outlet...

Got a good kindling fire going and let it roll for 20-30 minutes and noticed right off the bat that the flame front was being pulled around the front of the plate instead of around the sides... the draft was also greatly improved (keep in mind its still 55 outside..)

I went out and picked a few dryer pieces from my pile. Chucked a few pieces on and let it roll again for 10-15 minutes to help drive out any moisture... before I even started shutting the primaries at all, the underside of the baffle was rolling...
IMG_20151030_181120147_zpsngf6lc0p.jpg

Right now, its cruising along at 500F...
IMG_20151030_181706403_zpsanmhxpcg.jpg

Primary air shutdown...
IMG_20151030_183156684_zpscjpyhs3k.jpg

And its been rolling steady for 20-30 minutes as of yet...

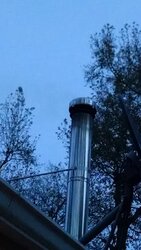
And the stack...
IMG_20151030_181305263_zpsok3bnncf.jpg

Nothing but heat waves.

The heat output is insane... 1 hour in and the room is already rather toasty... which used to take a several hours atleast.

I call this a success so far. I'm keeping a close eye on overall stove temps with the IR gun... Can anyone guess as to a safe limit for a stove that has an air pocket around it? Stove top is running 270 right now and is still climbing (and that's not in direct contact with the fire box).

If someone can give me an idea on what temps should run or the best places to check on a stove like this that uses a blower and an outer casing around the box, I would be grateful.

Thanks for all the input guys!
 
Secondaries were kicking for about an hour solid and then they died out... and primary fire took over however the 3 pieces I had in the box were still log shaped... but nothing but charcoal rolling a nice blue flame off of them... And that's how it sits at the moment. Nice small blue flame off of the "log shaped" pieces...

Checked the stack and its still clear as can be.

Flue temp has progressively dropped after secondaries shut down... Holding steady at 350 19" off of the stove top (which is 22-23" above the fire box)

I'll give it a little while longer and then I'll toss on a few of the dryer oak splits I have and I'll see if I can get any significant burn time now.

After all this... I'm considering changing how primary air is supplied by sealing off the slots in the front of the doors and piping in air above the glass directed down towards the firebox (poorman's airwash system). We'll see though... might not be needed as the glass is clear as can be still.

-Chris
 
Well done. You're having too much fun!
 
  • Like
Reactions: Mr4btTahoe
Cool project!
What size pipe did you use for the secondaries? I did something similar, main feed is 1" and then after the bends it goes down to 3/4" for the two air diffusor tubes. Not sure if that is really better or not...
Not on topic, but do you have a 4bt Tahoe? That would be a cool project too
 
Last edited:
Cool project!
What size pipe did you use for the secondaries? I did something similar, main feed is 1" and then after the bends it goes down to 3/4" for the two air diffusor tubes. Not sure if that is really better or not...
Not on topic, but do you have a 4bt Tahoe? That would be a cool project too

As for pipe size, I had a 1" valve so I reduced right after the valve to all 3/4". I would venture to say that a bit more air certainly wouldn't hurt.
I let the fire burn down to a hot coal bed and threw on some of the oak splits... Ran it HOT and still couldn't get the secondaries to cooperate. I have a feeling moisture content is to blame... however with the primary air shut down, it looks as if secondary combustion is taking place between the logs... hot blue flame. Cant see the stack at the moment to check for smoke so not sure if its burning clean... Temps are running right at 350-375.

As for the Tahoe... yeah that's been a long term project of mine. Its been on the road for a couple years now but its not "done"... as if they ever are. I have a full build thread here:
http://www.4btswaps.com/forum/showt...bta-Swap-(Looong-term-project..-well..-sorta)

I'm contemplating changing up the plumbing a bit and running the tubes east/west as I think it would hold more heat in the pipes and keep them burning longer. The stoves I've seen with factory secondary air are all east/west... perhaps that's the reason. I'm curious what the factory hole size is on the burn tubes... I went with 1/8".. perhaps a bit more flow would help matters too. Input?

Either way, stove heat output is through the roof and emissions are all but gone. I'm very happy with it so far.
 
There are a couple of points to consider with secondary air.

First, you want the secondary air to be as hot as possible when it is injected. Putting cold air on top of the fire can quench that area and kill off the burn pretty quick. Ideally, you would have a lot of cubic inches of pipe / space leading up to the air tubes. This means the air moves really slow in that area, heats up and is injected as hot as possible. Insulation on top of the baffle and around the firebox also helps hold heat in the combustion area.

Second, ideally, the tubes are thin wall stainless steel. The thin wall helps the air inside heat even more and the stainless won't 'burn out' the way a thin carbon steel tube would.

Third, east-west tubes work much better as the general flow of the flue gas is from back to front. The tubes act as 'ripples' in a stream to help break up the flue gas flow and absorb a bit more heat. Also, the back-most tube can point at the one in front to help heat it, that second tube points at the third, third at the fourth and so on. They cascade the fire to help heat each other up.

Then, once all this is in place, you need to start looking at the stove like the carburetor of a car. There is a mixture of air which is 'just right' and gives best performance. If you let too much secondary air in, you cool the secondary combustion and possibly extinguish it entirely. Too much primary air flushes through the firebox and cools it off. Too little of either air obviously leads to smoky / cool combustion just like a rich carburetor.

Generally, the way I go about it is to have the air open to get the fire going. As you start closing the air down, you will find the stove gets hotter. Surprisingly, the more you close the air down, the hotter things get. Then at some point, it levels off and you are 'in control' of the fire. At that point, you can reduce air further for the temperature you need. Though at some point, you go too low and it may start smoking.
 
Last edited:
  • Like
Reactions: Mr4btTahoe
As far as surface area goes for preheating the secondary air, the inlet is on the lower front left of the stove... goes along the bottom of the firebox to the rear.. right to the center of the box then vertical and out. Other then running back and forth under the baffle, I'm not sure how I could increase surface area. As far as temp goes, when the secondaries lit with the dry wood, the tubes were running 1100+F. As it stands, the baffle and tubes are hovering around 800F...

I am leaning heavily towards changing to an east/west plumbing configuration which may kill 2 birds with 1 stone. North/South was just easier to work with... however east/west would not only allow for even heating of the tubes, but more overall surface area in a high heat location. Currently with the north/south, the ends of the tubes are out from under the baffle and in the smoke stream... If I ran east/west, I could keep the tubes completely under the baffle which would most likely keep them much warmer.

I've got a few weeks I'd say before temps turn to the point of needing the stove for primary heat... so I've got time to tweak the design a bit... but then again, I'm still curious if cooler outside temps (stronger draft) and dryer wood would solve the problem without changing the design... I'm 100% positive that the oak I through in the box was wet 28%+ but that's what I've got to work with this season which sucks.. next year will be better.

Gives me a good bit to think about.
 
Last edited:
Made a couple of changes this morning to the burn tube orientation...

At least the design made it simple to alter..
IMG_20151031_113453804_zpsghki3ib9.jpg

To this...
IMG_20151031_125331869_zpsxuaeyqmy.jpg

Much more surface area and east/west runs for the burn tubes. Now the only issue I can see with this is the tubes being different overall lengths... the longer tube may or may not draw air properly... wont know until a test fire.

Hopefully this evening, temps will get down low enough to warrant burning as its rather warm out right now.

Anyways.. more to come. Once this gets dialed in, I'm leaning towards an airwash system.

-Chris
 
Well.. they seem to work well... how well will have to wait until a colder night.

I'm done tinkering until cooler weather hits... and then I'll update with how things really work.

Thanks for all the insight guys
-Chris
 
Well... First cold night after the mods and I must say they work and work well... Maybe too well.

Primary air is shut down... Stack temp is running 500...

Stove top (which isnt the top of the box... There is an air path between the firebox and the top) is running 320...

The doors near the top are pushing 650..

I kicked the blower on high to get the temps down but I still don't know what is considered safe with this stove.

Am I overdoing it?
 
Glad to hear its working. Follow the golden rule. no glowing.
 
Status
Not open for further replies.