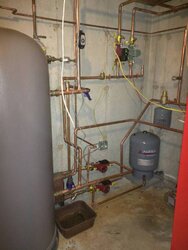
BioWIN 210 Install
- Thread starter Galroc
- Start date
-
Active since 1995, Hearth.com is THE place on the internet for free information and advice about wood stoves, pellet stoves and other energy saving equipment.
We strive to provide opinions, articles, discussions and history related to Hearth Products and in a more general sense, energy issues.
We promote the EFFICIENT, RESPONSIBLE, CLEAN and SAFE use of all fuels, whether renewable or fossil.
You are using an out of date browser. It may not display this or other websites correctly.
You should upgrade or use an alternative browser.
You should upgrade or use an alternative browser.
- Status
- Not open for further replies.
velvetfoot
Minister of Fire
Good luck. Are you getting the Mass. rebate? Not sure if it's still in effect. Marc is great, he helped me out anytime I needed it.
Yep. Getting the Mass rebate plus the 0% loan.
bdud
Burning Hunk
Nice, they are a great piece of machinery..
Hopefully you will be getting the bulk storage to get the maximum rebate.
I know Sparky978 mentioned in his thread that he was interested in doing a "combination" pellet delivery.
Early this year GuitarManDave and I with a few others had arranged with Sandri for a bulk delivery on the same day and it really did save some money. I could either start a new thread to see who else in MA would be interested in this or we could just have a private conversation about this this. Let me know your thoughts..
Hopefully you will be getting the bulk storage to get the maximum rebate.

I know Sparky978 mentioned in his thread that he was interested in doing a "combination" pellet delivery.
Early this year GuitarManDave and I with a few others had arranged with Sandri for a bulk delivery on the same day and it really did save some money. I could either start a new thread to see who else in MA would be interested in this or we could just have a private conversation about this this. Let me know your thoughts..
I was going to have a pellet room for 5 tons of storage built (5 tons is the limit according to the program) but then engineering plans called for ripping up my basement floor to install footers. I declined.
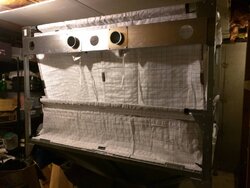
I will be using a fabric bin designed to hold 4.7 tons. I use about 5-6 tons/winter for my Mt. Vernon AE now. The BioWIN 210 is more efficient than the Mt. Vernon AE, but then it will be heating more of the house.
I don't mind joining in on a group buy for next season. This season, I have yet to order the bulk pellets and I just cancelled the order for bagged pellets for the Mt. Vernon AE due to the install of the BioWIN 210.
Day 1
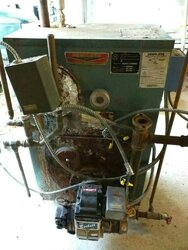
Today, the old oil boiler was removed. It doesn't look a day over 27...
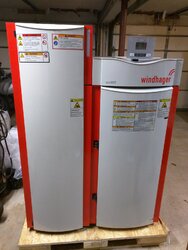
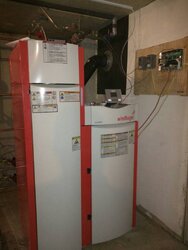
We positioned the new Biowin 210 boiler and the thermal storage tank. I spent hours trying to clean the basement floor but 27 years of stains would not come up.
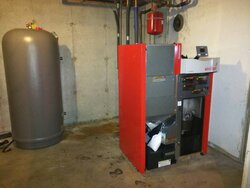
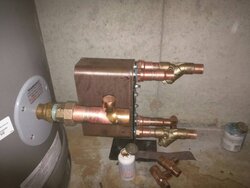
I chose a different thermal storage tank than most. This one is by Rheem and has a lifetime warranty. It is relatively inexpensive compared to other options.
Today, the old oil boiler was removed. It doesn't look a day over 27...

We positioned the new Biowin 210 boiler and the thermal storage tank. I spent hours trying to clean the basement floor but 27 years of stains would not come up.

I chose a different thermal storage tank than most. This one is by Rheem and has a lifetime warranty. It is relatively inexpensive compared to other options.
maple1
Minister of Fire
I spent hours trying to clean the basement floor but 27 years of stains would not come up.
That's what paint is for.
That's what paint is for.

Last edited:
The first electrician bailed on us. Not sure what the issues were with him, but I think the job was too complex for him. I personally don't think it is very complex but the boiler requires two additional circulator pumps and a temperature sensor for the thermal storage.
The second electrician appeared to be more professional, but was a bit overwhelmed at first. I had to talk him through it. He also made a mistake when he wired the hot wire to ground on one circulator, which blew the 20amp breaker immediately when that zone called for heat. The fuse for that zone on the Taco Controller SR504-EXP-4 also blew. Also, the relay for that zone for that circulator appears to be bad, causing the circulator to be always on. I don't think that relay is user-replaceable either. The circulator is on, but it isn't pumping any water since Marc installs a Zone Sentry Valve to stop thermal siphoning when no zone is calling for heat.
BTW, the Taco Zone Sentry Valve requires 24V AC to activate, which the Taco Controller SR504-EXP-4 does not supply*. My old boiler had a 120V AC-> 24AC transformer, which we wired to the Taco SR504-EXP-4 primary pump zone. Works perfectly.
Taco SR504-EXP-4 Primary Circulator Zone -> 24V AC Transformer -> Taco Zone Sentry.
I helped Marc come up with a source for inexpensive 4" pipe. You can thank your local diesel truck shops. It was a bit harder to come up with very shallow bends in stock but I eventually located 15° bends and had them shipped. As you can see in the picture below, I am still working on that. I am welding most of the sections together, but with a few strategically placed band clamps for disassembly.
The 2x4 in the pipe is me trying to get approximate measurements for the next section..
*It doesn't supply a 24V AC that switches on when a zone calls for heat, but it does provide 24V AC that is always on.
Last edited:
bdud
Burning Hunk
I used Taco Zone Sentry Valves for each of my zones and used the Taco ZVC 406-4 which does have the 4 wires for the valves if needed.
The Taco SR 504-4 was used for boiler and pump control.
I presume the 4" pipes are used blowing in the pellets, nice.
Make sure it is all completely airtight as the pressure used to blow in the pellets creates a lot of fine dust.
Can you wire another zone on the SR504-EXP-4 to control the circulator?
Hi bdud,
I do have extra zones to use on the Taco SR504-4 controller, but since it is brand new, it should be replaced. Marc is handling that for me.
Yep, the 4" pipe is for blowing in wood pellets. I am doing the welding and the welds aren't pretty, but I did put a multi LED flashlight inside the pipe and checked to see if I could see any light through the welds. I did of course, and I rewelded those areas. I might lay a few extra welds down to make sure the joints are really strong.
Today, the old oil tank was hauled away.

I do have extra zones to use on the Taco SR504-4 controller, but since it is brand new, it should be replaced. Marc is handling that for me.
Yep, the 4" pipe is for blowing in wood pellets. I am doing the welding and the welds aren't pretty, but I did put a multi LED flashlight inside the pipe and checked to see if I could see any light through the welds. I did of course, and I rewelded those areas.
 I might lay a few extra welds down to make sure the joints are really strong.
Today, the old oil tank was hauled away.
bdud
Burning Hunk
Nice..
You mean you do not have a special motorized rig to rotate the pipe while you weld it with your tig welder?
Its a nice feeling to get rid the old oil tank isn't it. Mine had a lot of sludge in the bottom.
You mean you do not have a special motorized rig to rotate the pipe while you weld it with your tig welder?
Its a nice feeling to get rid the old oil tank isn't it. Mine had a lot of sludge in the bottom.
I am using a MIG welder and doing it on a bench, rotating as I go. It is just exhaust pipe.
When they removed the oil tank, one of the legs was solid full of mouse poop.
When they removed the oil tank, one of the legs was solid full of mouse poop.

Nearly finished the piping this weekend.
4" exhaust pipe, with two 15° bends each. There are two band clamps per pipe. One is to connect the steel pipe to the outside aluminum pipe. The other is in the middle so I can assemble/disassemble the pipe. Both band clamps are on the straight sections of pipe for maximum strength.
Still got to ground everything, and strap down the pipe but it is extremity solid right now.
Last edited:
Nice job.Nearly finished the piping this weekend.
4" exhaust pipe, with two 15° bends each. There are two band clamps per pipe. One is to connect the steel pipe to the outside aluminum pipe. The other is in the middle so I can assemble/disassemble the pipe. Both band clamps are on the straight sections of pipe for maximum strength.
Still got to ground everything, and strap down the pipe but it is extremity solid right now.
View attachment 168766
Are those band clamps air tight? The pneumatic delivery truck has a tremendous amount of pressure that any little opening will let dust into your basement. I thought I was all set with the gasket I put on my pellet store door but the dust filled up my basement. Next time I am going to duct tape around the door before the delivery.
The band clamps that Marc provides are very nice and are meant for piping for pellet bins. They are 6" long with 3 massive bolts and with an internal rubber gasket.
The fabric bin I have isn't air tight, I bet I will have plenty of dust from that, much less any air leaks in the piping. I don't see myself staying with the fabric bin for the long term.
The fabric bin I have isn't air tight, I bet I will have plenty of dust from that, much less any air leaks in the piping. I don't see myself staying with the fabric bin for the long term.
bdud
Burning Hunk
First time I got my delivery the dust was bad, the sock that is on top of the silo got completely block with dust. I now use a leaf blower on suction connected to a hose on the outside vent pipe. Most of the dust now gets collected in the leaf blower/sucker bag and the basement is pretty much dust free.
velvetfoot
Minister of Fire
Why is there a sock on top of the silo if you have supply and return lines?the sock that is on top of the silo
This bag also has two pipes.
I thought the framed fabric bags acted as a filter so you really only need one pipe.
I'd think you'd have to be careful about not getting a vacuum on the fabric or even more so, metal bin, like with that leaf blower. How much would it take to collapse it?
I guess here the leaf blower would be overcoming back pressure in the exhaust pipe?
bdud
Burning Hunk
I have metal silo that is sealed up pretty tight. The sock provides some ventilation to the pellets, maybe also allowing for space as the pellets go down. The outside fill and vent connections are kept closed and only used when bulk filling. Not sure but most likely the bag type storage due to its construction, allows air in and out.
This is a picture of the plywood reinforcement around the pipe exiting the house. I want this to take all the forces from the connection on the outside, rather than the pipe clamp. The pipe clamp is very strong, but over time it could loosen. Plus, the plywood seals the hole and it is a very tight fit.
The one on the left doesn't have the plywood, and while the right one does. The screws have been replaced with large wood screws.

The one on the left doesn't have the plywood, and while the right one does. The screws have been replaced with large wood screws.
A close up of a band clamp. The wire is there to provide ground continuity between the different pipe sections. The wire is stripped and inserted inside the band clamp, which is then tightened down.

This is what the outside looks like. I still need to trim it.

velvetfoot
Minister of Fire
- Status
- Not open for further replies.
Similar threads
- Replies
- 5
- Views
- 600
- Replies
- 4
- Views
- 934
- Replies
- 0
- Views
- 297
- Replies
- 3
- Views
- 545


