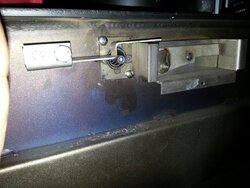
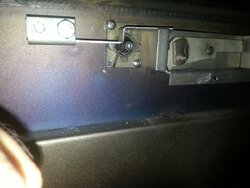
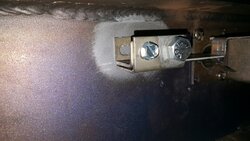
Air lever on Englander Madison - 50-TRSSW01

  • Active since 1995, Hearth.com is THE place on the internet for free information and advice about wood stoves, pellet stoves and other energy saving equipment.

    We strive to provide opinions, articles, discussions and history related to Hearth Products and in a more general sense, energy issues.

    We promote the EFFICIENT, RESPONSIBLE, CLEAN and SAFE use of all fuels, whether renewable or fossil.
Status
Not open for further replies.
Or just give them a good "tap" with a hammer before you back them out.

BB - Old helicopter mechanic
 
Or just give them a good "tap" with a hammer before you back them out.

BB - Old helicopter mechanic
Tried the hammer trick too. Haven't tried the small sledge (kids are asleep, something to try later).
 
  • Like
Reactions: BrotherBart
Whatever you smack needs to be in direct contact with the bolt/screw. Those look like sheet metal screws and a smack or two on the end of the screw driver makes them give up the fight.
 
As I posted earlier, one of my bolts holding the actuator broke off as well. After removing the burn tubes and insulation on top, I squeezed a pair of vice grips to the sucker and just rocked back and forth gently. It did not turn out, i thought I broke the other side in the stove too when the screw bent down inside the stove.

I almost used a not nice word, as my 3 yr old daughter was "helping me" by banging a ratchet against the stove at the same time.

I would spray the broken bold with WD inside the stove. Wait a bit and then try vice grips and wiggling it out. Just wipe up the WD when you are all finished :)
 
  • Like
Reactions: spirilis
Alright well that was an unreasonable pain in the ass, but it's fixed.

Took a combination of hammer, vice grips, pliers, dremel w/ cutting wheel, drill with carbide bit, then regular drill bit and about an hour or so to get that stupid screw out. Had to use a drill bit just slightly larger than would fit through the (surviving) hole to chase out the "swarf" remaining in the threads but a new pair of stainless #10-3/4" machine screws go in & out pretty well now.

On that note, @Michael Cardillo I recommend putting in big !!WARNING!! notation a message on your previous post regarding how you fixed it that with "PLEASE REMOVE FRONT BURN TUBE, REMOVE BAFFLES AND SPRAY LUBRICANT ON SCREW THREADS INSIDE STOVE BEFORE YOU TRY TO REMOVE THEM" so newbies locating this thread know ahead of time ;)

Anyway, it's fixed now, and I tried Michael's trick with the lighter to get the AAS to delatch. Looks good for now, will have to see later on when it gets cold out whether the spring is "calibrated" properly...

20151023_181027_resized.jpg
 
Definitely not calibrated properly. AAS delatches at 144F stovetop temp. Mike did say something about "7 o'clock" position, mine is more like the 9 o'clock position. I'm assuming adjusting the spring is as easy as taking an allen wrench to the bolt in the middle of the spring? There is also a nut inside the stove at the back of the thermostatic actuator assembly, maybe that tightens the tension on said bolt.

edit:
Well the allen bolt isn't metric fwiw, and it won't budge with pliers - probably do need to loosen the nut in the back of the thermostatic actuator in order to adjust it. A job for a few days from now when it's warm out & the stove is cold...
 
Last edited:
Per Mike's suggestion, I tuned the AAS spring to roughly the "7 o'clock" position. Tuning the spring requires loosening the nut on the backside and turning the bolt relative to the nut..... this last piece is the tricky part, and I found it easier to do by removing the Thermostatic Actuator assembly from the stove. That was easy since I have anti-seize compound on my philips head 3/4" stainless screws...

Can't recall the socket size but you loosen the nut on the inside portion of the thermostatic actuator, which tends to rotate the whole bolt with it... I think the allen head is 3/16" according to Mike but I didn't have any SAE allen wrenches so I used vice grips. Had to squeeze it down tight too. The bolt & nut don't like to rotate relative to one another, so it requires some pressure and patience to tune it, then you tighten the nut (bolt rotates with it). Likewise you have to pay attention to make sure the spring ends up in the right position once you're done tightening the nut since the bolt does rotate with it. Obviously do this on a stone-cold stove so the spring is at its full resting position.

New pic:
20151028_191407_resized.jpg

No idea how well it works yet, might start a fire tomorrow night...
 
Hi folks,
Just joined today in order to rant about my Madison. So I don't seem like such a jerk, I will first say thanks to those who have posted this great information! The hours I've spent lurking here have helped a great deal with my liner install, selecting a wood stove, and gathering firewood.

I picked up my Madison from Lowes just a few weeks ago. It was $750 minus %10 because I had a coupon. No complaints there! My build date is 8/15 and serial is 003023. Because of this thread I checked my AAS before firing my new stove and it was indeed backwards. I made the repair but haven't tried the AAS yet because I'm still doing break in fires.

I get that it's a cheap stove, but I always get angry when I have to fix something that is BRAND NEW! I have other small complaints with the stove but a defect that could cause an overfire (if you weren't paying attention) is a little too much. And now we need to fix our new stoves instead of cutting firewood. Ain't nobody got time for that!

Oh well, I still think the stove is a good buy and I am excited about running it this winter. Rant over. Maybe ESW could send me a cord of dry oak...

IMAG0808.jpg
rsz_imag0810.jpg
 
Hi folks,
Just joined today in order to rant about my Madison. So I don't seem like such a jerk, I will first say thanks to those who have posted this great information! The hours I've spent lurking here have helped a great deal with my liner install, selecting a wood stove, and gathering firewood.

I picked up my Madison from Lowes just a few weeks ago. It was $750 minus %10 because I had a coupon. No complaints there! My build date is 8/15 and serial is 003023. Because of this thread I checked my AAS before firing my new stove and it was indeed backwards. I made the repair but haven't tried the AAS yet because I'm still doing break in fires.

I get that it's a cheap stove, but I always get angry when I have to fix something that is BRAND NEW! I have other small complaints with the stove but a defect that could cause an overfire (if you weren't paying attention) is a little too much. And now we need to fix our new stoves instead of cutting firewood. Ain't nobody got time for that!

Oh well, I still think the stove is a good buy and I am excited about running it this winter. Rant over. Maybe ESW could send me a cord of dry oak...

View attachment 165546 View attachment 165547


have you fired this unit yet? the 7 oclock ish position is approximate, its only when the tab on the spring is pointed above like 2 to 3 oclock that its inverted, but looking at yours it looks like if it was reversed it would literally be too high and wold trip way too early, the spring can e adjusted somewhat by rotating the allen head screw to move the tab closer to 7 oclock if it doesn't trip quickly enough
 
I made the spring look like Michael's "correct" picture in post #43. I've done a few small break in fires but I haven't tried the AAS yet. I tested the spring with a lighter after the adjustment and it tripped after a while. I wanted to do the fix as early as possible to avoid breaking the screws.

Come to think of it, the stove was warm when I took the picture, I guess that's why the spring is where it is.

I can't wait for it to get cold so I can really test this thing. Looking forward to watching the lazy flames.:cool:
Makes sense, if yours originally looked like that when warm it probably looked a lot like mine did when cold.

I generally think even on a cold start, you should leave the air wide open with no AAS for 20min or so because that's when you truly have maximum primary air (the AAS doesn't *quite* match fully open airflow especially when the rod is far out). I bet it's good to go just dampering down and turning the rod right after a reload though.
 
Not sure but hold off worrying about this too much. Mine was "backwards" but as I've discovered, turning it around doesn't calibrate it right either. Have to wait for more cold weather to test again.
 
Alright, after a few fires I think I can say that *this* is what it should look like:

20151101_104022_resized.jpg


The original setting was more like 2-3 o'clock, so the worst I could say is ESW tuned it a bit too high (making it unreasonable to rely upon). But it wasn't totally "backwards". I tried the 7 o'clock position as mentioned earlier and it tripped before 250F, this is around 4 o'clock and seems to be about right. Trips somewhere around 500-550F, meaning that the hottest spot on the stovetop is around 500-550F whereas other parts of the stovetop might be 450-500F. Sometimes it won't make it there (and thus will never trip), but if I put a super-dry form of kindling or firewood mixed in such as a wood briquette (biobrick, liberty brick, etc) or pallet wood in the middle or lower half of the fuel load, when it eventually ignites (top-down fire) that usually provides the right stuff to "surge" the stove into the 500+F range so it kicks off a clean burn and settles down after the AAS trips with the air control all the way out.

I have yet to test this on a reload though, so I'm not sure how it'll perform there. The vast majority of my burns are cold-starts anyhow. If it trips too early on a reload then maybe the original setting was correct--but only for reloads. In that case I'd probably re-tune the spring slightly counter-clockwise to between 3 o'clock and 4 o'clock.

Overall though, tuning the spring is still a minor pain in the butt that works best if you can remove the Thermostatic Actuator assembly, so the whole ordeal of getting that out was still worth the trouble, if only to install new screws greased with anti-seize compound.
 
Last I tried using the AAS was November, and it wasn't working - it would trigger when it was cold. Finally took it apart to see.

The "S-shaped bracket" that releases the AAS was sticking in the "up" position, probably due to all my fiddling. I used graphite lube on its mating surface between the bracket and stove and bolt but I guess that didn't do the trick. This time I applied some anti-seize compound, hoping this'll be the ticket:

20160103_220419_resized.jpg
The S-bracket does not stick anymore (before applying anti-seize I could get the bracket to stick easily by fiddling with it, now I can't get it to stick). Don't crank down that bolt too much, just lightly tighten enough that the bracket doesn't have "too much" side-to-side play. We'll see tomorrow night when I fire it up...
 
hi guys,

seems I have some work to do here.

first off the "recall" is not a recall in any way shape or form. the mistake was made by one of my junior techs who was completely incorrect in his statement. there is no recall at all.

looking above at the picture that Sprillis provided in post #65 the tab is correctly positioned for a cold stove working with this setup ive gone back and done some testing down here in the lab and confirmed this position is correct. it is possible that a few of these stoves may have been shipped with the tab in the wrong position though if there were any I doubt there were many and they are adjustable so there would not normally be a need to replace them.

if you have any questions feel free to contact me.

Mike Holton
Senior Techincian
England's Stove Works Inc.
800-245-6489
 
Last I tried using the AAS was November, and it wasn't working - it would trigger when it was cold. Finally took it apart to see.

The "S-shaped bracket" that releases the AAS was sticking in the "up" position, probably due to all my fiddling. I used graphite lube on its mating surface between the bracket and stove and bolt but I guess that didn't do the trick. This time I applied some anti-seize compound, hoping this'll be the ticket:

View attachment 170933
The S-bracket does not stick anymore (before applying anti-seize I could get the bracket to stick easily by fiddling with it, now I can't get it to stick). Don't crank down that bolt too much, just lightly tighten enough that the bracket doesn't have "too much" side-to-side play. We'll see tomorrow night when I fire it up...
How did it work? It is sticking any more? My AAS is triggering at approximately 150 degrees as well. I haven't used it at all since my initial posts. I am going to wait until after the burning season to mess around back there. BTW. How did you get the spring to move. I was just bending the spring by turning the spring in the housing. Probably the wrong approach I'm sure. Any help would be good. Thanks so much.

Mike Cardillo
Working pretty well now. I did see it "lingering" around 500F a while before finally delatching but it was close... me touching the lever a bit dropped it but I tried re-latching, and it de-latched again after some fiddling, so I think it was just "on the cusp". Both my wife and I have let it run with our full faith in the AAS and haven't been let down.

Getting the spring to move involves removing the actuator assembly from the stove, loosening the nut in the back (which is exposed to the stove), then CAREFULLY turning the spring's hex-head while holding the nut in the back steady (loosening the nut in the back typically rotates the whole spring+hex bolt inside the housing since the nut doesn't spin relative to the hex bolt without some force involved, as if there was loctite in the threads).

Hard to describe beyond that... will make sense when you fiddle with it. Pay attention as you loosen that nut in the back, the spring will rotate a bit with it. Then you have to adjust the spring relative to the nut (again, by torquing on the hex bolt, not bending the spring itself), and tighten the nut again. Once you tighten the nut the spring+hex bolt will rotate with it into its final position, which may or may not be correct (so you might have to loosen that nut and go fiddling with the hex bolt a few times to get it perfect). As @stoveguy2esw indicated above, the 4 o'clock position I posted above seems to be correct.
 
Last edited:
As a side note, I have found the stove cruises ideally by pulling the draft lever all the way out and then pushing it back in a smidge... maybe 1/2 centimeter worth max. Keep that in mind when setting up the draft control for the AAS. Just a tiny feed of primary air keeps the coalbed lively enough that the secondaries stay rollin' for hours and I still get nice burns (loaded ~26lb of wood at 10:30PM, big chunks of coals in the back of the firebox at 6AM).
 
Got a project together, with a 2" probe thermocouple in the flue pipe ~12" above the stove... here's a graph of a burn so far, using the AAS (I think it de-latched around sample #300):
woodstove.png


Samples are every 5 seconds FYI. I don't have stovetop info yet, need to buy a suitable thermocouple for that (the PCB I rolled can take up to 4 thermocouples)
 
  • Like
Reactions: begreen
I just purchased a Madison stove and was wondering how I can tell if my damper is working properly. Seems I have to crack the door slightly before I get a good burn. Is this a result of poor draft or the damper not working? Also is there a way to make sure none of the stove pipe is leaking , especially around the joins? I have about 18 feet of chimney (prefab)

Cheers
Do you hear a metal-sliding/screeching sound as you move the damper in & out? If so, it's working fine. Can't say whether the AAS feature works or not (passively, without taking the rear heat shields off to inspect) until you've established your draft/etc works right and have experience using the stove manually (so you have a baseline for how fast the stove should heat up with your firewood in its current condition, etc).

Stove pipe leaks can be identified with a grill lighter, touch the flame near joints and see if the flame really gets sucked into them.

I hear the rod sliding and when I pull it out and turn in CCW I hear the spring. I just can't seem to get the proper draft. I have old wood that's been sitting outside for 4 or 5 years so I wonder if it could be the wood? I also have a piece of stove pipe coming off the flue, then turns into a 90 deg going into a cleanout tee, then straight up. Just wondering if I should just go straight up and avoid the clean-out tee? Getting really frustrated!!
 
Just a quick question. I have the wood stove in my garage. The garage is not finished, just shelled in. (No siding, insulation on walls and the attic is left open, not closed in.) Could this be a cause of my draft problems?
 
Status
Not open for further replies.