Picked up a Fisher Stove

  • Active since 1995, Hearth.com is THE place on the internet for free information and advice about wood stoves, pellet stoves and other energy saving equipment.

    We strive to provide opinions, articles, discussions and history related to Hearth Products and in a more general sense, energy issues.

    We promote the EFFICIENT, RESPONSIBLE, CLEAN and SAFE use of all fuels, whether renewable or fossil.
Status
Not open for further replies.

JeepJeepster

Member
Mar 19, 2016
9
Kentucky
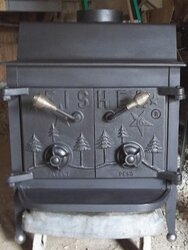
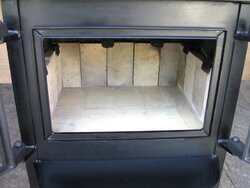
Ive always wanted a wood burning stove. After researching a little (and reading the fisher story!) I knew I wanted a fisher stove. I sort've wanted a papa bear stove (and still do) but locally people were asking $700+, which is typical around here. People think everything is worth more for whatever reason. A grandpa was priced at $1000 just down the road from me.

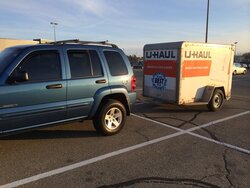
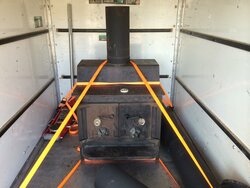
Anyway, searched on craigslist and a lady had one price at $500 and said she just moved in and wanted it gone. Offered her $250 and she agreed, but it was 3hrs away. No worries, I needed something to look forward to. Rented a uhaul and went after it!
F22C05A2-D05A-401A-A1BC-65F22086AE5A_zpsetmts1rr.jpg

6F857C10-83C9-4AEE-A045-1B870306CDD7_zpsrlpn5pzk.jpg

786044C3-2969-4B6A-AE7A-4426137D1B3C_zps373qopjp.jpg

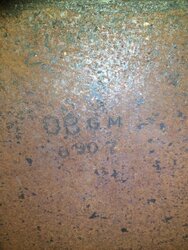
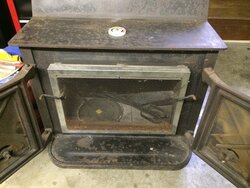
Its obviously not a 76, how can I tell anymore about the stove? It came with the screen for the front! Pretty happy about that, and a set of pokers and such.
F8E83265-D75E-4527-BB94-289E4F61AA5D_zpszigppz00.jpg
 
Last edited:
  • Like
Reactions: Jan Pijpelink
Looks like you have some clean-up to do!! Keep us posted on progress... Welcome to the forum
 
Yes I do. Ive read derusto was the original paint and was brushed on. Is that still available? Quick google search didn't turn up much. I would like to keep it original as possible.

Ive found out its a grandma. I had it in my mind it was a grandpa :/. I knew it didnt seem like it was 450lbs when we were moving it. Guess it'll do, but it probably wont heat the garage Im wanting to build.
 
Welcome to the Forum,
Yes it's a Grandma and built '78 or '79. The trees on a Grandpa are much farther apart at the center door seam. Before '78 it would have straight handles, old style stainless springs and 4 fin draft caps. The flat doors were dropped for 1980.
I wouldn't be concerned with heat output difference between Grandma and Grandpa. You can reduce (and should) to a 6 inch chimney if codes are not an issue in garage and add a baffle raising the output above a stock Grandpa with 8 inch chimney. Log length and burn time are a bit shorter with Grandma since it holds a little less.It very well could have had Forrest paint which is now Stove Bright. You want Satin Black for original finish. The brushed on finish was much earlier stoves before the double doors existed.
I fold rear seats ahead (they flip out of the way and since then, I've removed rear seats since more stoves ride in it than passengers) and lay them on their back in my Land Rover Discovery. Two 2 X 6 planks strapped to bumper prevents them from moving while I "walk" them up.
 
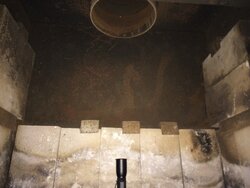
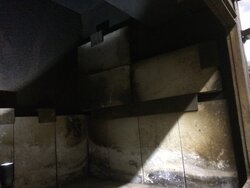
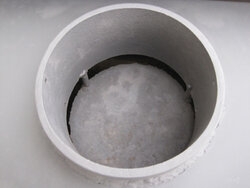
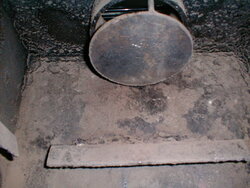
What size baffle plate do you recommend for the grandma? Ive not had time to read through your entire post about baffle plates yet. Ive seen some photos of grandmas and Ive yet to see the fire bricks go up the side like mine. Does it just sit on those? I didnt measure, but thats seems like it would be very close to the outlet. Does that seem right?

991B38CA-42C2-4675-9CF0-41A850AD8218_zpsggpsyum6.jpg

D36A388A-1598-4D3A-843A-525E396A4E8A_zpsdb7btyjz.jpg

I had thought about getting it in my Jeep but it was fairly dirty. That soot goes a long way when it comes to getting you dirty! They gave me the pipes with it also, all sooty. They offered to give me some firewood but in my ignorance I declined... Stupid... I wouldve loved to have fired it up today and sat around it on my deck.

It was very easy getting it in the uhaul and it was only $25. I used a motor cycle jack. Lifted the stove, wheeled it out, lifted it as high as it would go, then slid it off the jack into the uhaul. All of 5 minutes probably. No lifting with the back either.
 
Last edited:
In 1977 the addition of an upper set of bricks was optional and not all stoves had them. Many single door stoves did, but it's not common to find the second course on a double door. They didn't warp sides without them, or discolor paint on the sides, so they were not necessary to prevent damage. I'm sure raising the firebox temperature was the main reason for them. With the single course around bottom, the baffle is very easy by setting bricks on their edges on the brick retainers. If you want to keep your second course, it would need legs to support the front. I would consider removing upper course for baffle.
The baffle plate size is sized for chimney, not the stove. Connecting to a very large flue would not allow a baffle at all. A 6 inch insulated flue needs the least amount of heat and can be baffled to the maximum size which gives the same amount of smoke space square inch area as flue diameter. (exhaust flow area)
Make a cardboard template to set in place and adjust smoke space to your chimney requirement. We need to know chimney specifics to give you that.
 
The reason I never give exact baffle plate dimensions across the stove is due to different fabricators making them a bit different.
I notice you have the wider type that he bricks fit across back INSIDE the side bricks. Normally the stove width allows the 5 bricks to fit tight across the stove back when placed in the stove first. The side bricks cover the rear to hold them tight. Notice the exposed steel face plate on the front of yours between doors and angle iron corners. A regular size Grandma made to prints has the doors almost touch the angle iron shown below. I don't have a name for these "wide body" or "Dunn" stoves, but I know the Dunn Brothers (Virginia and W. Virginia) made them this way, and when the door hinge plates were welded to the angle iron as they should be, they made longer bent hinge plates to reach the door.

I can't give baffle plate depth (front to back) since that changes due to plate angle and is adjusted for smoke space needed for chimney size.

Normal width Grandma face and brick fitment; (This Grandma would have 25 1/2 wide top plate made to drawing specs.)
76 GM Indiana.jpg eBay sold 1100 3.jpg Doors are the same size, notice how much wider your stove body is.
 
The chimney doesn't exist yet, so I cant tell you what it is. Actually the building doesn't even exist yet so I can make it whatever it needs to be. It'll be a garage, so probably just go out the back wall and up how ever high it needs to go. If you think its best Ill probably just go with a 6" duraTech insulated pipe. My gosh that stuff is $$!

Edit, that explains why the top is bigger. I hadn't gotten there yet, but when I was measuring it I noticed it was 27 1/2" across the top.

I would hate to remove that top row of bricks if its somewhat of a rarity. Ill get some cardboard and see how close it is to the outlet and post some pics to get your opinion.
 
Last edited:
Then figure a 6 inch not 8 and if it's insulated metal it can have the minimum 28.26 square inch area. If you build masonry without insulated flue allow a larger smoke space for more heat to be lost up chimney. Adjusting the baffle is like tuning the stove to the chimney like tuning fuel on carb or fuel injection to the engine. Setting is completely different from a 6 cyl. to an 8 cyl. much like the smaller or larger chimney. The chimney is the engine that drives the stove and has different fuel (heat) requirements. It is much more important than the stove itself.
 
Did a little measuring last night. Its 18" to the top of the fire brick bracket and ~21" to the bottom of the welded in flue pipe. If I lift the plate up in the rear, it will be even closer. I guess If I tilted it up ~1" it would still have about 2" between the flue and the plate. Ive got a welder, so I could weld a piece of angle back there to hold the plate up.

Do you think its ok for the plate to be that close to the flue?
 
Square inch area of 8 inch outlet is 50.24 square inches. (radius squared X pi OR 4 X 4 = 16 x 3.14 = 50.24)
The circumference of 8 inch round is 25.13 so 2 inches high is double that or 50.26 square inch opening, which is more than the internal square inch area of outlet, so it is acceptable.
If you go with insulated 6 inch, the minimum square inch area is down to 3 X 3 = 9 X 3.14 = 28.26 square inch opening. That is just over 1 inch opening under the 8 inch outlet minimum.
It won't be angled as much as it should be, so angle it as much as you can.
 
This is a baffle plate in a 6 inch Honey Bear. The opening area is calculated the same way making sure square inch opening is not smaller than outlet square inch opening.

Honey Bear 9.jpg Honey Bear baffle inside.JPG

This type baffle was used on smaller stoves to prevent taking up loading space. It does not roll the smoke back down into flames or direct heat to front as much as the smoke shelf type that is preferable. But you can see how the opening is measured in square inches as not to impede flow.
 
Youre saying for any 1" section of length the area is 28.26 in a 6" flue. At which point it would be cubic inches. So if the opening is 8" in the flue technically I could get closer than 1" since Ill be using a 6" flue but the outlet is 8".... Right?
 
Last edited:
28.26 is the square inch opening of 6 inch round. (6 inch square would be 6 X 6 =36 square inches) Multiply by height and yes, it would give you cubic inches inside flue. Cubic inch is used for volume, that's not what we're calculating. We're only calculating the square inch opening of space the smoke travels through.
Using a 6 inch flue, you can't make the opening any smaller than 28.26 square inches in any shape. (which is the square inches in a 6 inch circle)
The round 8 inch outlet inside has a circumference of 25.13 inches (the distance around) So a 1 inch high space all around the 8 inch pipe has 25.13 square inches of open space. (not quite as much open space as the inside of 6 inch pipe) Another 1/4 inch larger opening gives you the required 28.26 square inch opening. I didn't do the exact math but 1 1/4 inch gives you over 30 square inches for the exhaust to travel through all around the 8 inch pipe.
 
Ive got ya now, I just had the distance from the plate to the flue stuck in my head. You just want to make sure the plate doesn't restrict the air path more than the chimney. Basically need at least 28.26sqin of space around the place.

Where do you buy the Stove Bright satin black paint? It doesnt seem to be a very popular paint. How many cans do you believe it will take to do the grandma? Do you paint the inside?
 
Now you've got it.
2 light coats, 2 cans.
No paint inside.
Most Hearth shops have it or google "buy satin black stove bright paint" This is one of the results; Good price with shipping.
http://www.amazon.com/Forrest-Paint-1990-Stove-Bright/dp/B000VYGUTU

Paint it outside with mask and fire outside for final cure. It is the nastiest smelling paint, but good stuff.
 
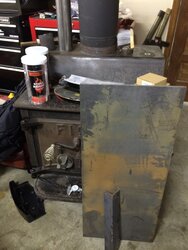
Seems lately Ive been taking on too much and haven't had time to give the stove any attention. Finally got a plate bought, some angle, and a couple cans of paint. Of course the price went up to $20 a can when I bought them then dropped back down to $13.99 a week later... Excellent.

The dude at the machine shop said it would be cheaper if I cut the plate, and Im regretting not paying them to cut it. They had a plasma and it wouldve taken a matter of seconds, it'll take me hours and several cutting wheels I imagine.

879C881E-7EE3-46CF-A97B-46EC9DBD1562_zpsdlyppedd.jpg
 
Sawzall with lots of oil , run slow to keep blade cool and it shouldn't take long.
 
t'll take me hours and several cutting wheels I imagine.

If you have a cutting wheel on a 4in angle grinder you will be surprised how fast it goes. Walk it over your cut line nice and slow several times. I would expect you could have it done in 10-15 mins or less.

If you try and make your cut clean through on the first pass you will get frustrated quick, not to mention the saftey factor those wheels can snap easy at those RPM's so slow and steady and it will be fine.
 
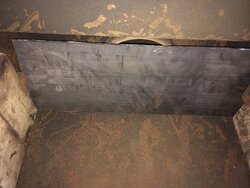
Got the plate cut and finagled up in the stove. 8.75"x24" fits perfect, gives about 1/2" on each side and plenty of room in front.

What does everyone think is the best way to orient the plate? Rear lifted up or front lifted up? I feel like the rear lifted up would swirl the smoke back downward, but Im no genius.

Think Ill weld the angle to the plate so I can take it out if needed. Thought about welding it to the stove but I dont want to mess with the originality of the stove.

195ACA3B-909B-419D-BB62-366643EB6067_zpsj6wde1a6.jpg
 
Status
Not open for further replies.