Ugly drum smoker!
- Thread starter jb6l6gc
- Start date
-
Active since 1995, Hearth.com is THE place on the internet for free information and advice about wood stoves, pellet stoves and other energy saving equipment.
We strive to provide opinions, articles, discussions and history related to Hearth Products and in a more general sense, energy issues.
We promote the EFFICIENT, RESPONSIBLE, CLEAN and SAFE use of all fuels, whether renewable or fossil.
You are using an out of date browser. It may not display this or other websites correctly.
You should upgrade or use an alternative browser.
You should upgrade or use an alternative browser.
Rustyreel
New Member
Last edited by a moderator:
WoodyIsGoody
Minister of Fire
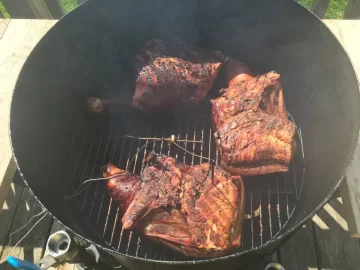
Here's my Medium Big Green Egg helping to turn a beef brisket into pastrami. M-m-m-m-m.
The big chunk charcoal burns low and slow. This load is good for 36 hours non-stop at 225F without any adjustments at all. It'll go as low as a steady 160 without worry of going out but I get my best results around 215-225F. This brisket only took 6 1/2 hours but you can just keep throwing more food on there and leave it while you sleep overnight. There is a ceramic diffuser plate that covers the charcoal so no need to worry about drippings causing a flare-up. I often put a pan there to save the drippings. The drippings won't burn when I'm cooking low and slow.
People say these are expensive but they last forever and the amount you save in charcoal is amazing. One load lasts seemingly forever at low temps. Or, I can crank it up to 650F and cook big thick cut steaks med-rare in 5 minutes total. Totally seared dark on both sides, juicy in the middle. When I don't have any more food to throw on I close it up tight and all the charcoal is still there waiting for another feast. Just throw a fire starter under a chunk in the middle and, by the time the fire starter has consumed itself it's ready to reduce the air and start cooking again. The ash that falls through to the bottom is a very fine powder and I only need to empty it every 15-20 cookouts.
I've had amazing results with pork shoulders, ribs of all kinds, prime ribs, chickens, turkey breasts, pork loin (made amazing Canadian bacon), smoked thick cut bacon (ends and pieces are excellent too), smoked salmon (so tender and juicy with exquisite flavor), lamb chops, veggies of all kinds (eggplant roasted with romano and hot pepper dry roasted are my favs), shrimp, etc. Always comes out excellent. Never burned anything and never run out of coals before it was done to perfection. The only thing it can't do is cold smoke under 110F! However, I'm thinking of getting a small green egg and putting it right below with a custom made stovepipe that feeds the smoke from the little unit into the air intake above (no fire in the big egg). I'm pretty sure I can cold smoke at 90-100F this way.
Any other Green Egg users here?


This pastrami was just laid out. Only 6 1/2 more hours to go!
The big chunk charcoal burns low and slow. This load is good for 36 hours non-stop at 225F without any adjustments at all. It'll go as low as a steady 160 without worry of going out but I get my best results around 215-225F. This brisket only took 6 1/2 hours but you can just keep throwing more food on there and leave it while you sleep overnight. There is a ceramic diffuser plate that covers the charcoal so no need to worry about drippings causing a flare-up. I often put a pan there to save the drippings. The drippings won't burn when I'm cooking low and slow.
People say these are expensive but they last forever and the amount you save in charcoal is amazing. One load lasts seemingly forever at low temps. Or, I can crank it up to 650F and cook big thick cut steaks med-rare in 5 minutes total. Totally seared dark on both sides, juicy in the middle. When I don't have any more food to throw on I close it up tight and all the charcoal is still there waiting for another feast. Just throw a fire starter under a chunk in the middle and, by the time the fire starter has consumed itself it's ready to reduce the air and start cooking again. The ash that falls through to the bottom is a very fine powder and I only need to empty it every 15-20 cookouts.
I've had amazing results with pork shoulders, ribs of all kinds, prime ribs, chickens, turkey breasts, pork loin (made amazing Canadian bacon), smoked thick cut bacon (ends and pieces are excellent too), smoked salmon (so tender and juicy with exquisite flavor), lamb chops, veggies of all kinds (eggplant roasted with romano and hot pepper dry roasted are my favs), shrimp, etc. Always comes out excellent. Never burned anything and never run out of coals before it was done to perfection. The only thing it can't do is cold smoke under 110F! However, I'm thinking of getting a small green egg and putting it right below with a custom made stovepipe that feeds the smoke from the little unit into the air intake above (no fire in the big egg). I'm pretty sure I can cold smoke at 90-100F this way.
Any other Green Egg users here?
This pastrami was just laid out. Only 6 1/2 more hours to go!
Poindexter
Minister of Fire
@lamywaby
Ugly drums are easy. I have built probably half a dozen of them. Your biggest problem is very few of us in the states have gone shopping for hardware in the UK. I have never even been to the UK, but when I go I will make a point to give it a go on my way to the pub while my wife is having tea somewhere.
The Texans I learned from typically use 3/4" holes, three of them, about 2 inches up from the bottom of the barrel, and each 120 degrees apart around the circumference. In Alaska I build with one inch air inlets. Even at -20F (about -28C) I run one intake of one inch diameter wide open, have a second one inch air intake tightly capped, and a tightly wadded rag stuffed into the third of the one inch openings.
You are doing BBQ, so you are looking for whatever is cheap, and you are looking around 2 cm/ 1.5cm nominal diameter. You are going to need both plumbing and electrical parts, at least by American reckoning. The caution here is American and UK threads are not the same.
What the Texans and I can both do, in the US, is go to the electrical aisle and get three counduit nipples. These are short pieces of pipe, maybe 1.5 to 2 inches long, with male threads on each end. You are going to need 6 conduit nuts to fit your conduit nipples. And you are going to need a hole saw, a special drill bit, that can drill a hole about the same diameter as about halfway up your pipe nipples.
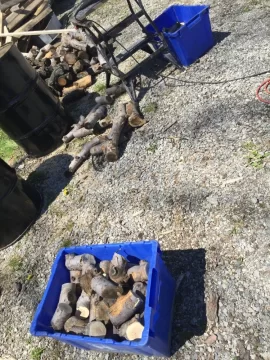
Rabbit hole, with my drums I first scrape out whatever grease I can with some kind of a scraper, wash with soapy water, rinse, drill _All_ the holes into the drum, then burn out the drum liner with some cordwood, then paint, then assemble.
Once you get to there, run a nut onto each of your three nipples, then drive the nipples into the drilled holes. Get some bacon grease on the exterior of the drum as you are getting close, then put a second nut on the nipple from the inside of the drum, again with the bacon grease as the nut is going home. I like to put my drum on a pair of sawhorses for assembly so I don't have to limbo quite so low getting the job done.
When you are done with this step you should have three pipe nipples, or three conduit nipples sticking through the wall of your drum, about 2-3 inches up from the bottom of the drum, and greased up good for the test cook.
In the US we can put black iron (plumbing) caps on two of the conduit (electric) nipples because the threads are the same. Then a ball valve on the third nipple and we have total intake air control. In the US 3/4" ball valves are in the plumbing aisle for water control, one inch ball valves are on the welding aisle for gas control.
With both caps on and the ball valve shut, you got zero intake air flow. If you walk the ball valve all the way to wide open and need more intake air, take off one of the pipe caps, shut the ball valve down to about a third, see where you are, blah blah.
Because I am old and lazy and have money I use a elbow and an extension to get my ball valve up in the air where I can reach it without bending over. But you got to be careful the intake port on the ball valve is lower than your chimney top, or you could setup reverse flow, where intake air comes down through your chimney and you end up with smoke coming out your ball valve. That will mess up your picnic/ drinking event/ block party/ basketball game in a hurry.
For bolts to hold up your racks and so on, 7mm SS will be plenty. I was going to use 3/8 inch, 9.5mm, bolts, the Texans assured me quarter inch (6.3mm) would be plenty, and they were right. Quarter inch (6.3mm) is plenty. 7mm bolts and nuts are probably much cheaper than 6.3 mm, so use the 7mm and have a relaxing pint with your savings.
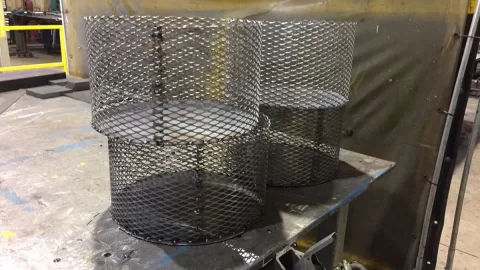
Do not scrimp on your charcoal basket. You are going to put a fair bit of weight into it of charcoal, and you will have to lift it in and out and in and out.
A thermometer probe port is on the lighting aisle in the US. Lamp hardware. Those silly hollow bolts to let the lamp wire through, with matching nuts in some odd ball (possibly Whitworth?) thread size. They used to be made out of sleazy Italian scrap tin, who knows what the Chinese are using these days. I can fit three temperature probes easy through the lamp hardware we use for 110 volt lamps in the US. You want to put lots and lots of bacon grease on this fool thing for the test cook so whatever cadmium or low grade uranium was used in the manufacture doesn't end up in your food.
Handles are a bugger for sure. I like a hook to hang the lid from too. For me a complete build has two handles (180 degrees apart) on the drum so I can move the fool thing around, a handle on the lid, and for a flat top a hanging hook for the lid on the inside, so I can hang the lid on one of the handles while the cooker is open.
The easy way out for handles is to just bend them up out of wrought iron, use more 7mm hardware to attach them, and plan to wear leather gloves. I use red oak dowels sliced in half and cut to length with countersunk holes for the nuts and the bolt heads, and immerse them in a 50-50 mix of mineral spirits and linseed oil until they sink and file down the ends of the bolts to make the handles smooth - and end up needing leather gloves anyway, so skip all that nonsense and get cooking my friend.
In the states I can buy a 2 inch diameter pipe nipple (about 8 inches long) for about 6 dollars. It will screw right into the larger port on the lid of the grease drums I can buy and makes a fine chimney.
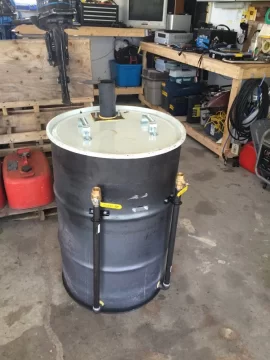
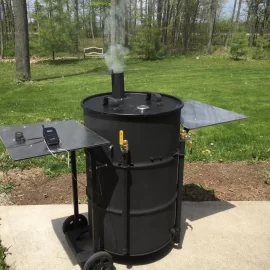
Pic is my current ugly drum with two cooking racks because of the funnel shaped top. The top is from the DIY bio-diesel people, the Turner family I think, and do not ask me how much shipping I had to pay on that one piece, my wife might overhear. The lid has a bog standard 2" diameter pipe nipple for a chimney, with a homemade Thompkin made of pine, plus a lifting handle and a hanging hook. You can easily see the intake of the ball valve is well below the chimney outlet. One drum handle visible on the left. I got a couple shelf brackets attached to the drum, with a scrap piece of construction lumber under the thermometer probe port, I can line 3 thermometers up on the shelf no problem.
The number one advantage of a flat top ugly drum is the excellent air sealing. All you got to do is adjust the ball valve/air intakes to the temperature you want and the weather you have, and wait for good food to come out. The down side is UDS provides direct heat, directly under the meat you are cooking.
The only way I know of to get better BBQ is to build an offset smoker, indirect heat; and spend your day (and learning curve) on fire management. Or you can spend big money on a system with excellent air sealing and bluetooth you can manage from the hot tub with your smart phone.
![20230709_004338[1].jpg 20230709_004338[1].jpg](https://www.hearth.com/talk/data/attachments/313/313742-984f0ab3557b03584f34cda08152899e.jpg)
you are doing great.i appreciate itView attachment 176965 View attachment 176966
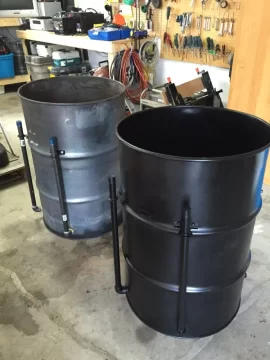
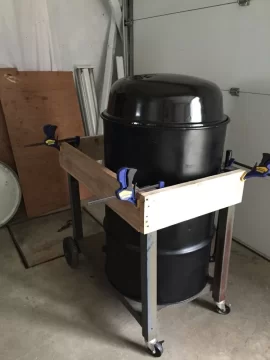
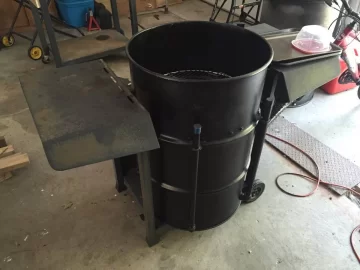
Don't know if anyone's even watching this thread but anywho. Here's today's progress. Got all the vents welded in
Similar threads
- Replies
- 3
- Views
- 1K
- Replies
- 78
- Views
- 11K
- Replies
- 24
- Views
- 6K
- Replies
- 10
- Views
- 6K


