wtb1
Member
Another somewhat stupid question. On the Hampton HI300 where does it take in air for combustion?
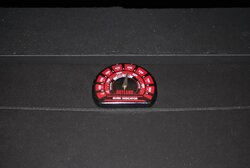
Edthedawg said:SherryAnn said:Okay, he's just left, this is what happened. He took that top piece off and stuffed some insulation up inside around the liner ( which IS a 6" ss flex) I questioned this, pointing out that on the phone we had discussed a bloke plate, he said he didn't think we needed that. He said he usually puts some insulation in and his helper must have forgotten. I told him about the washers in the latch, he took one out of the top and bottom, then he couldn't close the door, so he put one back in the bottom, so it's just one less on the top. After he left, I did the dollar test, and guess what? That sucker still slide right out. WHAT THE H***! I'm not confident that we are going to have any better luck. He is ordering a new contact piece, the one that tells the fan to come on and off automatically, since it runs all night if we put it on in the evening.
Sherry,
I think it might be time to cut ties w/ your installer. Contact Hampton and find a qualified installer. If this gent IS their "qualified installer" then you need to calmly detail the abundant shortcomings in his approach thus far.
Insulation around the liner, filling the top of the fireplace opening around the liner isn't a bad start. But if that's all he did....... i'm gonna wonder what changes you see.
Did you see any place you could maybe run a control rod to turn a damper back there?
Did you confirm your chimney/liner height better than "about 30' i think"?
He didn't put any insulation around the liner, inside the chimney, from the sound of things... Exterior chimneys should be insulated due to the cold temps making creosote condensation so easy.
I wonder where that "contact piece" sits - sounds like a thermal switch of some sort. if it's close to the flue exit, then I'm not surprised it "thinks it's hot" all the time and stays running - I think that's right where all that "singe-your-eyebrows-off" heat is going!
I'm still worried about you, girl!
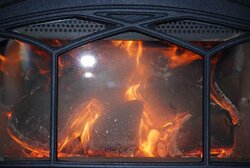
CZARCAR said:i dont get it! isnt steel bar on top of firebox the secondaries & arent they sposed to flame?
SherryAnn said:He took that top piece off and stuffed some insulation up inside around the liner ( which IS a 6" ss flex)
CZARCAR said:i dont get it! isnt steel bar on top of firebox the secondaries & arent they sposed to flame?
Edthedawg said:hey great news and good job!
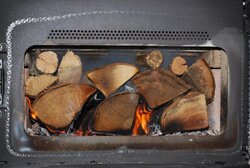
what happens if you actually put some wood into that thing??")
stejus said:SherryAnn said:He took that top piece off and stuffed some insulation up inside around the liner ( which IS a 6" ss flex)
SherryAnn, where did he stuff insulation? Is it right above the stove near the damper area where your pipe enters the chimney?
granpajohn said:I don't know why I started to follow this strangely lengthy thread, but....
1. Stuffing insulation at the usual location of the block off plate. Seems it should accomplish the same thing; only a question of durability in my mind. I mean if it's really stuffed good, thus no air moving through.
2. That said...speaking from experience....I think an exterior chimney in RI would like to be insulated.
3. On the blower output. Have you tried measuring the temp of the air coming out the blower? There's a thread around here someplace about that. In rough numbers, it should almost burn your hand. (I melted a popcorn jar I was trying to dry in front of it once. Dang.)
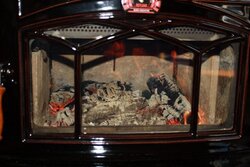
4. After looking at the photos, I wanna offer my opinion that it's a beautiful insert in a nice stone FP. Even if it didn't burn well, the house resale value has to have been improved just on looks alone.
ss="spellchecked_word">SherryAnn</SPAN> said:ss="spellchecked_word">stejus</SPAN> said:ss="spellchecked_word">SherryAnn</SPAN> said:He took that top piece off and stuffed some insulation up inside around the liner ( which IS a 6" ss flex)
ss="spellchecked_word">SherryAnn</SPAN>, where did he stuff insulation? Is it right above the stove near the damper area where your pipe enters the chimney?
Yes, he took the top piece off and stuffed it right up at the start of the chimney where the damper used to be. He put about a 5 gallon pail full in there.
wtb1 said:I am glad you have had success. I am still working through mine and it sounds like I need to do the same thing. I do not think my installer will be available since he is about 3 hours away. Is this somethings I can do myself? I know I will have to take the surround off and get access to the damper area. If I use insulation as a softblock what is the best to use?
pulldownclaw said:Sorry for the hijack, I just thought I'd ask since we've got a lot of the Hampton crew already assembled. ;-)
 !
!SherryAnn said:By the way.....you know that smell you get when the paint is curing? I'm getting it now, six weeks later. That's how NOT HOT my stove was......