Again; I have gotten answers all over the map on this issue.
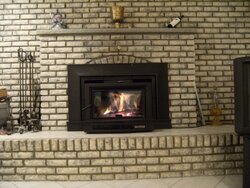
I am told by the resident woodstove insert guy that these particular inserts are designed to "reflect heat back into the room" and that air circulating around the insert is warmed and blown back into the room. He states that he generally does no see a point in insulating around the insert then, even in an exterior chimney.
Others on this forum swear by the dogma..."insulate your liner AND around your stove".
I have insisted on the insulated rigid liner....(they bitched and moaned about that...)
What's the deal with the insulation around the insert? Not so important with an insulated liner?
Info from Lopi declaration/FPX 33 or Lopi Freedom would be especially helpful.
Thanks.
 I am told by the resident woodstove insert guy that these particular inserts are designed to "reflect heat back into the room" and that air circulating around the insert is warmed and blown back into the room. He states that he generally does no see a point in insulating around the insert then, even in an exterior chimney.