I can't answer the question about voiding the warranty, I guess that's a question for Lopi (Travis Industries), but what I was thinking was was this. There is currently a hole in the outer shell of the unit on both sides for the cord to pass through. There should be no issue in my opinion with drilling a third hole in the bottom next to one of the blowers. I have no special qualifications to make this statement, just my opinion. If you don't feel comfortable doing this, I would not recommend it.
Thanks for the compliment on my install. To answer your other questions:
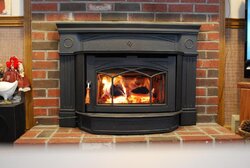
Heat output on an insert is mainly from the blowers, my opinion is that by recessing the unit by what amounts to 2-1/4" further back than a standard install, that there is no heat output reduction.
The front of my stove is only recessed about 1 inch so no interference re: limited door opening. Don't think you'd want to recess it any futher than that.
If your opening is rather small, it might be a significant challenge to do this kind of install, mine was a significant amount of extra work as it was. The think to look for is how much room you'll have left on the top after you raise the stove (you'll need at least 3" I would say in order to be able to do the liner connection. I installed cobble stone on the bottom and angle iron on the three other sides to create the recessed opening, this amounted to a couple EXTRA weekend of work for me. Even with my rather large firebox, I still ended up with tight working conditions due to the recess and raise. The bigest problen I encountered was that by recessing the unit, the liner was just bearly able to make the bend to pass through the old damper opening and up the chimney. So to answer you question on the, yes, it was something of a big deal, but I made it work and like the results.