Home Made Boiler Up and Running

  • Active since 1995, Hearth.com is THE place on the internet for free information and advice about wood stoves, pellet stoves and other energy saving equipment.

    We strive to provide opinions, articles, discussions and history related to Hearth Products and in a more general sense, energy issues.

    We promote the EFFICIENT, RESPONSIBLE, CLEAN and SAFE use of all fuels, whether renewable or fossil.
Status
Not open for further replies.
EUP of MI said:
fabguy01 said:
EUP, how did you make the insulation in the secondary?,castable refactory? Also what is the big framework around the loading door? thanks nate

Fabguy

I ordered my insert from Insulation Specialties out of Indiana if I remember correctly. I sent them my drawing and they made it up for me. They could only make pieces 12-inches long so I have three pcs. If I remember correctly, I paid about $250 or so for the insert. It is not a castible ceramic, more like a ceramic insulation with a hardener in it. It is not very heavy. The steel framework is the path for air to enter the combustion chamber. Basically, there is a 6-inch pipe that runs through the boiler that preheats the air, it then circles around the door and enter the fire box at 12 and 6 o'clock.
I wonder if Garn would sell thier secondary chamber to a non-owner
 
I greatly admire your ingenuity and boldness to attack such a project.
American Spirit! (North American, if I may say, because I'm in Canada.) :)
Great job. Hope it satisfies you for decades.
Happy burning.
 
That friggin thing is gynormous! 3000 gallons? How big is your house?
 
heaterman said:
Somebody has to say it Alan ;) .............

Imitation is the sincerest form of flattery.

Nice work. Still want to get up there for that tour of the locks someday. I was within sight of the bridge last week but running a tight schedule this time of year. I'll give you a jingle someday. I'd love to see your craftsmanship firsthand.

Heaterman

If your going to make something, you might as well base it off of something that is the best IMHO. Or at least the simplist. There are many good designs out there, but none this simple as far as I can tell. I really like some of the European boiler designs, but I could not build one of those very easily.

You are welcome anytime, all though, I'm working away a lot right now. I appreciate all your input on different post. I checked out your website, looks like its still in the building stage, but looks good just the same. Good luck!.
 
Jim K in PA said:
EUP - congratulations on getting this project to "light off" :lol: . I know we traded a few PMs about the fan. What did you wind up using? Your flue/HX piping is larger than the WHS200, so you can move more air, but do you need to? Did you fab your own impellor, or find something off the shelf?

Your flue and water temps look great. 510k-765k Btus is your average input during a burn per your last post. Over what period of time are you getting the temp rise?

Again, kudos to you for starting, and COMPLETING, a project of this size. If I had the tools and skills I would attempt something like this too, but I am a woodworker, not a metal worker. ;-)

Jim

I followed your progress with mush interest. I used a Garn wheel based on the 1500 model. If I had to do it over, I might be temped to use the wheel for the 2000 model as it is slightly larger.

I usually burn for no more then 4 hours a day from starting the fan to shutting it off. I get most of my heat rise during the first 2.5 to 3 hours, after that I'm just burning down the coals. I think that I get about 10 degrees per hour rise on my guage. When my boiler guage reads in the low 190's, I have readings on my supply blk iron pipe of over 200 degrees. I have not run my boiler temp guage past 195 becasue I had 207 degree water in my supply pipe. I'm not sure that I want to "boil the beast" just yet.
 
maplewood said:
I greatly admire your ingenuity and boldness to attack such a project.
American Spirit! (North American, if I may say, because I'm in Canada.) :)
Great job. Hope it satisfies you for decades.
Happy burning.
Maplewood

I too was born and lived in Canada my first 24 years. I enjoy challenges but once I got into this project and with the help of a great my folks on this site, it was not really that big of a deal. The hardest part is not knowing if my changes to the design would pan out. I wanted a longer secondary burn chamber and a shorter fire box. I'm glad I made the secondary chamber longer As I see flames a good way down when the fire is really going.
 
EUP of MI said:
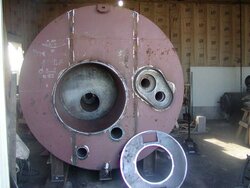
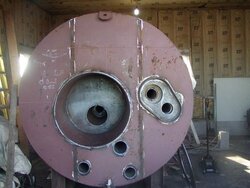
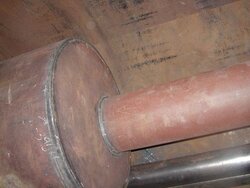
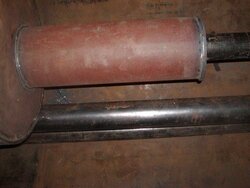
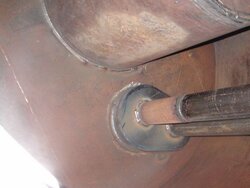
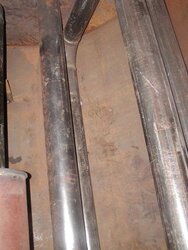
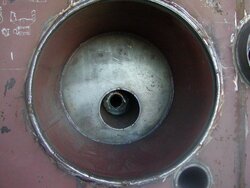
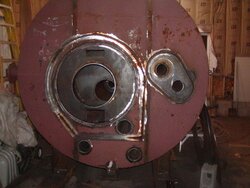
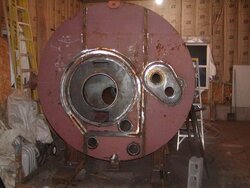
I just wanted to let everyone here know that I now have my "Garn" like boiler up and runnng. It works better then my expectations. I want to thank all my friends on this site for the wealth of information I have and still am gleaning from this site. I made my boiler (really hydronic heater), from a 3000 gallon tank that I bought off Ebay. I have been running it for the last week, I realize that the temperatures are not really cold yet, but I do live in the U.P. of MI so the temps are going down to the low 20's overnight. Right now I fire once a day (I should say my wife fires once a day). The temperature on the boiler usually read a starting temp of around 160 degrees and an ending temp of between 185-195 degrees. Friday night I was home and the temperature was 195 near the end of the burn (about 6 pm) the next afternoon about 4:30 pm it was still 173, but it was a nice day with outside temps around 50 degrees. Right now I put 3 pcs of paper, 4 pcs of kindling wood, 3-4 pcs of regular wood, turn on fan, light fire with match, shut door, wait 3-4 minutes, fire is roaring by then, load 4-6 pcs of wood in the fire, wait 45 min, reload 6-8 pcs of wood turn timer to 3 hours and forget about the fire. Come back and the temperature has climbed from about 160 to 185-195 depending on how much wood was put in the second load. My wife finds it very easy to operate (she did not grow up on wood). You can't tell the boiler is running except you hear the fan, other wise there is no visible smoke coming out the chimney. I will post some pictures later of the completed project.


10:05 on November 15 in the U.P. and you are on the computer???? Did you forget it is opening day of deer season in MI.......LOL you did not miss much

Rob
 
Here is some photos of building the "Beast" Enjoy:).
 

Attachments

  • November 2007 001.jpg
    November 2007 001.jpg
    49.4 KB · Views: 1,233
  • November 2007 002.jpg
    November 2007 002.jpg
    48.8 KB · Views: 1,162
  • November 2007 003.jpg
    November 2007 003.jpg
    44.6 KB · Views: 1,190
  • November 2007 004.jpg
    November 2007 004.jpg
    40.3 KB · Views: 1,111
More Photos :)
 

Attachments

  • November 2007 005.jpg
    November 2007 005.jpg
    31.2 KB · Views: 1,225
  • November 2007 006.jpg
    November 2007 006.jpg
    50.6 KB · Views: 1,259
  • November 2007 007.jpg
    November 2007 007.jpg
    45.7 KB · Views: 1,233
  • November 2007 008.jpg
    November 2007 008.jpg
    45.1 KB · Views: 1,315
  • November 2007 009.jpg
    November 2007 009.jpg
    51.9 KB · Views: 1,191
Nice work EUP. I was thinking to myself why did he cut the firebox hole so big and not use the existing steel sheet for the air nozzle cutout but I then remembered that you didn't cut the entire end of the tank off, Duhhhh! How else would he get the firebox inside the tank!

I made "nozzles" to fit in the top and bottom air inlet holes to more or less ,experiment with the right combo. Some of the early garns had a turn knob I think to regulate the upper inlet or the inlet right in the door. I found that with wetter wood, close off the top inlet and dry wood open up the top inlet.
Did you weld in any couplings to install anode rods? And, I do believe supply from the top and return in the bottom is working out better. Again, nice job!
 
Very nice setup. I think if one is going to build a gassifier from scratch, that the garn design would actually be easier than the downdraft style..... And much simpler.... Heck, with one of those, I wouldn't even need my NFCS....

One advantage though with a downdraft setup and external storage is if you pull a "dumb" moment and let your storage run waayyy down, you can get heat in the house fairly quickly by firing up the downdraft... VS the garn setup where you have to heat the storage to a usable level before you can heat your house...

Maybe not a big deal though.
 
Status
Not open for further replies.