- Aug 20, 2007
- 644
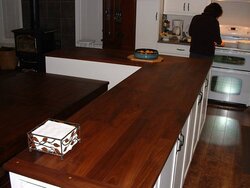
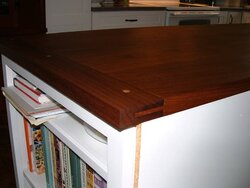
So I FINALLY finished countertops for an island in the kitchen in a remodel that is well into its 2nd year. My wife wanted a dark wood and a sort of "table top" appearance - not butcher block. I chose Black Walnut, purchased a bunch of rough cut lumber, planed/jointed it, used finger joints to edge-join short pieces to make long boards, edge-glued long boards together, installed breadboard ends with oak pins, and colored with mineral oil. I orignally intended on using a wax-based, "food-safe" finish. After several coats of wax and buffing it looked great, but the wax seemed to disappear after two days and then someone spilled a mug of hot tea on the countertop. I will now need to re-sand and re-color a portion of the counter and want to re-finish it with something offering significantly more protection.
I'm thinking of using a Cabot product I found at Lowes - a "spar varnish". Anybody have experience with this? Supposed to be very durable. I've also thought of maybe a hardwood floor finish that's water based (less smell). There are also pre-finish products to put on before any of these protective layers? So many choices I'm not sure what to do.
Key requirements are (1) clear finish that doesn't change the look of the wood and (2) protection/durability.
Thanks for any input. A couple of pics attached.