hearthtools said:
Im just chuckling at all this post.
Time is money to me. all this time to Mod something is going to cost the same as
just getting the Original Replacement and your done.
and yes the Profile 20 amd 30 Tubes are welded.
the older advantage tubes were just pressed in with a Roll pin to hold them aligned because ignitors were options and us dealers had to install them
Wow, thanks for your help but didn't help much so chuckle away "at all this post". I'm happy that your time is worth more money than the part but I didn't need your comment to fix my problem so it is useless in this thread.
I guess that taking care of my three rentals, my 12 acres upstate NY, my business, my residential property, my land to be built on, and my oil changes on my 7 registered vehicles on the road don't keep me busy enough, so I look to save a few bucks here and there to keep busy. BTW, yes I do and always did my own oil/filter changes because "time is money". It's fun actually to sit around and do fixes like this one, you should try it one day.
I have plenty of time. Comments like this don't help anyone, but you did confirm that I wasn't blind and the tube is welded. So thanks for confirming.
Two homemade igniters $37, time spent on this website getting help that mattered: priceless
The chuckles in the end from a dealer looking to make a buck, well you would have lost my business on anything else I would ever need that I couldn't weld up myself or put together with duct tape.
In the end, YES I was offended by your post in case you can't tell.

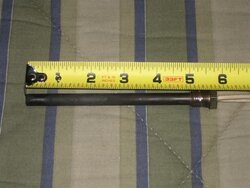
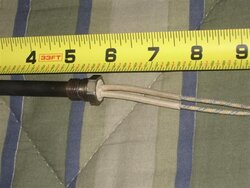
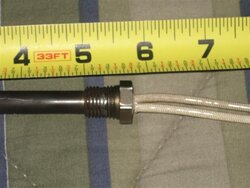

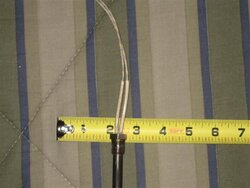
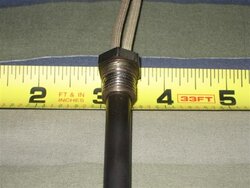
 ) You want to drill three holes and tap them for allen keyed flush mount set screws. This will hold your new igniter from Grainer in place. Slide the chassis back in. You need to sink the set screws to get it to pass through. Once it is in, loosen the set screws, slide in the new igniter, set the screws to hold it in place. Seal the end with astro foil tape. Done. :snake: