
So after taping every inch of my venting I still have some smoke smell.. not to mention the smell of the tape is almost as bad. I am almost positive the problem is with the adapter that connects to the stove to the venting. I cant seem to get it all the way on the stove so I taped it. The adapter is ridiculous anyway it just slips on the stove with noting to keep it there except your silicone or tape. ANy new suggestions? I am thinking of tearing it all apart again and trying to get that adapter farther on the stove. I spoke to a dealer awhile ago who sold venting that had an internal silicone gasket. Has anyone ever heard of that?
At My Wits End
- Thread starter dhungy
- Start date
-
Active since 1995, Hearth.com is THE place on the internet for free information and advice about wood stoves, pellet stoves and other energy saving equipment.
We strive to provide opinions, articles, discussions and history related to Hearth Products and in a more general sense, energy issues.
We promote the EFFICIENT, RESPONSIBLE, CLEAN and SAFE use of all fuels, whether renewable or fossil.
You are using an out of date browser. It may not display this or other websites correctly.
You should upgrade or use an alternative browser.
You should upgrade or use an alternative browser.
- Status
- Not open for further replies.
Shortstuff
Feeling the Heat
Wow, sorry to hear you are having so much trouble. All I can relate to was my install of my Quadrafire Castile. The heavy metal pipe that sticks out of my Castile just wasn't quite long enough for what I wanted to do as far as pipe connections were concerned. I wanted to attach a "T" with a cleanout (the cleanout faces the floor) and then my pipes extend 14' straight up and through the roof to the cap. I did this exact install but with a little modification to the "T" pipe.
I had to cut away just about an inch of the outer shell of the "T" pipe so that it would go about 1/2" further onto the heavy metal stove pipe. Even then it was NOT a tight fit and was a little "loose" on the stove's pipe. So after I got everything together, I used high-temperature silicone to seal not only the outside of every connection, but this is also what I did:
I had the cap off of the "T" connection and was able to put globs (lots) of the high-temp silicone (I believe it was red in color) on my fingertips. I laid on my back and slowly reached up inside and into the horizontal section of the "T" leading into the stove where I could feel where the two pipes ("T" and stove pipe) overlapped. I carefully rubbed on a heavy layer of the silicone at the junction of the two pipes as best I could, trying to force some silicone up into the joint (between the two pipes). All this was done carefully on the inside until I thought I had put more than enough to ensure a good seal. I then made sure that I also put more than enough all around the outside of the same joint using whatever I could to ensure the best seal.
Well the stove has been running perfectly for two full seasons (starting my third season already) and I have had no problems at all with any leakage at that joint. About a month ago I had removed the "T" cap and brushed out my pipes and reached up inside to check the silicone at the junction and it was still there and was still just as pliable as day one.
This is what has worked for me, hope this helps.
Steve
Shortstuff
Feeling the Heat
smwilliamson
The Stove Guy
1/4 bead around the inside of the adapter 1/4 inch from the end. Then fill the cavity of the double wall pipe before fitting together. You should be using aluminum foil tape that doesn't melt or burn. Also, try cleaning out the venting if you haven't already done so.
Panhandler
Minister of Fire
cncpro
New Member
The adapter is ridiculous anyway it just slips on the stove with noting to keep it there except your silicone or tape.
I locked mine onto the stove outlet with 3 screws. Pretty sure you're required to use the screws...
Panhandler said:Don't forget to check for a good seal around the combustion blower.
please explain!
Clarksfan1
Member
I finally found that I had forgot about a connection inside of my wall thimble. Once I took care of that I was good to go.
Snowy Rivers
Minister of Fire
Glad you got it fixed.
I always work to make sure that the section of pipe that goes through the thimble does NOT have any connections in there.
A simple little way to find smoke leaks is as follows.
Tools needed
A lazer pointer of little LED light with a lazer
Darken the room way down DARK
turn on the red lazer unit and start aiming it around all the joints and other areas that can leak.
Any smoke leakage will show up reeeeeeeeeeealy good in that red lazer light.
I had a similar issue on my Advantage II
The Previous owner or ???? had removed a screw on the back side of the exhaust fan housing and never replaced it.
This was not a big hole but enough that you could smell it real well after a while with the fire going.
With the sheet metal off the stove a quick run through with the lazer and it was not hard to find.
Screwed a asheet metal screw in the little hole with some slicone on it and all was well.
Enjoy the stove
Snowy
Dr_Drum
Feeling the Heat
Shortstuff said:I laid on my back and slowly reached up inside . . . .
Just curious, on my Leyden the heavy pipe stub that connects to the stove has a flange, gasket and 4 nuts that attach it to the stove. I removed the entire thing from the stove while attaching my adapter to it so I could make sure of a good seal, and allow the RTV to cure in a vertical direction, rather than horizontal. Is your exhaust stub removable?
Mike -
Dr_Drum said:Shortstuff said:I laid on my back and slowly reached up inside . . . .
Just curious, on my Leyden the heavy pipe stub that connects to the stove has a flange, gasket and 4 nuts that attach it to the stove. I removed the entire thing from the stove while attaching my adapter to it so I could make sure of a good seal, and allow the RTV to cure in a vertical direction, rather than horizontal. Is your exhaust stub removable?
Mike -
Mike thanks for this info I'll do that when I replace my venting. I picked up a new exhaust plate gasket (sq. 4.25 x 4.25) so I'm taking that stove collar off anyway for that.
Vinelife
Minister of Fire
When mine fires up when the pellets start to burn I can smell alittle pellet smell but it does away once the burn pot ignites...no biggie here..
cantman
Member
Panhandler
Minister of Fire
dhungy said:Panhandler said:Don't forget to check for a good seal around the combustion blower.
please explain!
It is possible there is a break in the gasket for the combustion blower. Gases could be escaping there.
slls
Minister of Fire
Clarksfan1 said:I finally found that I had forgot about a connection inside of my wall thimble. Once I took care of that I was good to go.
Hate to tell you this, there is not suppose to be a connection in the wall thimble, just straight pipe.
slls said:Clarksfan1 said:I finally found that I had forgot about a connection inside of my wall thimble. Once I took care of that I was good to go.
Hate to tell you this, there is not suppose to be a connection in the wall thimble, just straight pipe.
I'm glad you said it. I was gonna, but I didn't want to look like the party pooper :cheese:
I have no connection in the thimble. My issue was where the adapter connects to the stove. I wrapped it with tape all the way on tot he blower and that seems to be where the tape is getting the hottest and smelling. I still am not sure where the smoke smell is coming from. And because of the tape fumes I can tell if it is only at start up.
I have no connection in the thimble. My issue was where the adapter connects to the stove. I wrapped it with tape all the way on tot he blower and that seems to be where the tape is getting the hottest and smelling. I still am not sure where the smoke smell is coming from. And because of the tape fumes I can't tell if it is only at start up.
if u can get someone to plug the end of the chimni while watching from inside, it'll pressurize the pipe so to better see the leak. crumpled piece of burning paper may help make it smokierdhungy said:I have no connection in the thimble. My issue was where the adapter connects to the stove. I wrapped it with tape all the way on tot he blower and that seems to be where the tape is getting the hottest and smelling. I still am not sure where the smoke smell is coming from. And because of the tape fumes I can't tell if it is only at start up.
So i just spent sometime scraping the metal tape from the exhaust blower end (where it meets the exhaust pipe. I guess I got more onto then I wanted. Obviously the tape I used (sure tape from lowe's) is not adequate. I know it was rated to 200 degrees. After scraping some of the gunk off i started it to find that there is quite a bit that is pliable and discolored indicating to me that it has failed and causing the fumes. however i got just a limited amount of smoke when i smelled behind. I'm afraid if I remove the portion of the tape that seems to be the problem. I will loose my seal. Is there tape out there that can handle the higher temperature.
cantman
Member
Why don't you remove the appliance adapter, clean the adapter and the male portion of the exhaust
outlet, high temp silicone both male & female portions, reassemble it, and install three screws
into the female end of the appliance adapter.... Be done with it!
outlet, high temp silicone both male & female portions, reassemble it, and install three screws
into the female end of the appliance adapter.... Be done with it!
Hello
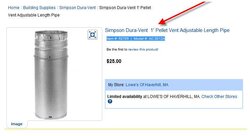
When I purchased my Avalon Astoria, the Stove Shoppe sold me the 4" Simpson Dura-Vent 1' Pellet Vent Adjustable Length Pipe for the stove adapter. It works great for me. I paid $47.13 I saw a similar one at Lowes for only $25 however it may only be 3" it did not say.
Link to Lowes Item #: 62705 | Model #: AC-3012A ----------------- my part # Sim 3112A
http://www.lowes.com/pd_62705-76845-AC-3012A_4294934297+4294809884_40_?productId=3134813&Ns=p_product_prd_lis_ord_nbr|0||p_product_quantity_sold|1&pl=1¤tURL;=/pl_Simpson+DuraVent_4294934297+4294809884_40_?Ns=p_product_prd_lis_ord_nbr|0||p_product_quantity_sold|1
What is the make and part # of your stove adapter??
Attachments
I am afraid a new section of longer pipe will not work in my scenario. I am going to take it all apart and try to silicone it again but i don't have much confidence in it since it was a complete failure before
- Status
- Not open for further replies.
Similar threads
- Replies
- 11
- Views
- 928
- Replies
- 9
- Views
- 2K
- Replies
- 0
- Views
- 315
- Replies
- 4
- Views
- 2K