ss liner installation (one-piece) - need advice.

  • Active since 1995, Hearth.com is THE place on the internet for free information and advice about wood stoves, pellet stoves and other energy saving equipment.

    We strive to provide opinions, articles, discussions and history related to Hearth Products and in a more general sense, energy issues.

    We promote the EFFICIENT, RESPONSIBLE, CLEAN and SAFE use of all fuels, whether renewable or fossil.
Status
Not open for further replies.

bostock

Member
Oct 27, 2010
136
Sharpsburg Maryland
i'm new to this site (posting, but been reading a lot), sorry if this is in the wrong place.

I'm buying Jotul F3, need liner in chim. House is 1850, chimney is original brick. Getting prices from liner installers of about $2000-$2500 (insulated ss). Approx 32', from hearth on 1st floor to top of stack outside. This price is blowing me away so i am considering doing this myself (ordering liner online). Anyone know any links i could look at, any advice? i have plenty of experience in home improvements (not afraid of heights either!) and i think with the right instruction/advice/links i would be fine. If anyone can point me in the right direction i would appreciate it. Thanks guys/girls - i am so glad to have found this forum!
 
I got mine from these guys: http://www.chimneylinerdepot.com/
I got the original kit off of their ebay store. I had to call a month or so ago and get a new top plate and rain cap (I broke them when I had to replace my crown) and they seem to be really nice people. Very friendly and they shipped my stuff out immediately.

There is also a guy on this board that I believe sells for MagnaFlex. Hopefully another member will chime in and give you his name. I'm sure he could give you a pretty good quote also.
 
thanks ikessky...i will check those sites. Hopefully someone can share some trips/traps with the installation process. I'm not so concerned about the low end at the stove, but up top i want to make sure i only go up once. btw - currently no top plate up there, it's wide open. Thanks folks..
 
Have you checked out the original chimney to see if its safe and sound for a re-line? Insulating the liner would be great and no doubt cut down on creasote, even if its an interior chimney. That sounds about 2x as long as my liner, and my materials ended up being about $700, so 2 grand isn't that far out of line for such a long reline, especially in such an old chimney.
 
BTUser - chimney is safe for relining, had two chimney guys check it out and both said no problem. top stack (above roofline) was rebuilt about 4 years ago, solid brick. I don't doubt $2k or so (for a certified chimney guy) is probably normal for 30'+ of SS liner (including top plate)...but from reading on this forum it seems like the liner itself can be bought online for maybe $750. Add another $200 for top and bottom hardware etc, i'm just having a hard time spending $1,000 on labor to have someone fasten to the top, fasten to the bottom, then hit the road. I have years of carpentry and home improvement skills - just never did this before...
 
I was in your shoes a few years ago, price of a proffessional install blew me away. I ended up getting the liner kit though my chimney sweep for a fairly good price (under $500 for 23 lineal ft. w/ insulation)
Long story short, I did the install myself, to include a ss top plate. Went onto the roof one time, dropped the liner down, secured the top plate and cap and did the rest with the first floor under my feet.
good luck...
 
glad to hear it. any rules on bends or cants? two slight bends inside the chimney (two fireboxes inside the house that run straight up, seperate flus, then come together about 10' from the top)....to be more precise - the two flus remain seperate all the way - but they "share" a stack for the last (highest) 10 or 12 feet..thanks guys, this is EXTREMELY helpful to me..
 
I bought my 35' 304Ti SS liner myself (~$500 for everything) and installed it in an afternoon. I have a really steep and nasty roof, so I rented a lift for the day to do the install... best money I ever spent! Like yourself, I have an older chimney. After repointing it, I still did not feel comfortable with the parts I couldn't see and what it might have been in contact with behind the walls. The SS liner gave me some piece of mind, but I didn't have the room to wrap it with insulation. What I did is create a cement and perlite mix and created a block-off at the bottom that I feel is very secure. From the top (with the help of my handy rental lift) I filled the void between the chimney flue and the SS flex liner with perlite I purchased from ebay. Knowing I had the insulation and SS liner in there gave me a LOT more piece of mind. The total for the 35' liner, perlite, and lift rental for the day was around $1000 or less. I'm sure I would have paid way more if I had it done, plus I wouldn't know it was done the way I wanted.
 
bostock - You can make/buy a pulling cone that will attach to the bottom of your liner. Then drop a rope down the stack and have a helper pull the liner down while you push from the top.

As far as a top plate goes, you will get one with your kit, but just make sure it will be the correct size before you order it. I only use silicone to attach it to the crown, but I see that some other people silicone and tapcon it down. With a good bead or two of silicone all the way around, it makes for a nice, tight seal.
 
Here's a couple decent videos

http://www.youtube.com/watch?v=RRauuzjI-H4

http://www.youtube.com/watch?v=xEt-3HE_ikA

http://www.youtube.com/watch?v=qoqXy0ChX2w

http://video.bobvila.com/m/21320348/installing-the-chimney-liner.htm

The bottom, Bob Villa one is the more complicated one because they had to take out a section of the wall, they have a cable dropped down and attached to the liner and they are pulling it up the chimney with a pulley type setup. Most of the other chimney installs are shown top down.

On youtube you'll see there are a bunch more too.
I didn't have the confidence or tools to do it myself but hired a handyman buddy who installed according to my research and his own as well as the liner instructions and some of these videos. I only have a one-story home, but he did exactly the install I wanted/needed for $150 and I was a much happier camper than the $$$$$ install for an UNinsulated liner the local places were quoting me.
I got the whole insulated liner kit from Magnaflex for like $500 or so. The liner and install were both applicable for the tax refund as well as the stove, too.
 
I did the following:

bimmerFAITH said:
Got everything vital installed this weekend. Any suggestions from the experienced wood burners?

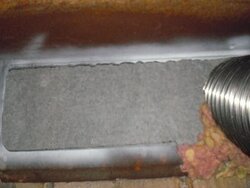
I installed the Flex King Pro liner kit attached to a Lopi Freedom insert. Went fairly easy . . . but still took a couple of hours. First, to construct a block plate I laid a piece of card board over the existing damper opening (with obstructions already cut away), and spray painted the border so that it could be traced onto a scrap piece of concrete tile backer board. Then I cut out the backer board to fit the opening and removed enough material to allow the pipe to fit snuggly through the block plate. With the block plate in place it was insulation time. There were two small gaps between the block plate and back of the pipe, so I stuffed maybe 3 handfuls of fiberglass insulation to keep the rest of the insulation from falling out of the chimney before it had a chance to cure. I went with a 3 part Perlite, 3 part Vermiculite & 1 part Portland Cement mixture, wet it enough to be damp but still loose and poured it down the chimney around the liner. I used the cement mixture until I had used the complete 47 lb. bag of cement, which covered the entire block plate, about 1' of liner pipe & filled most of the smoke chamber. For the rest of the chimney I poured a 50/50 mix of loose Perlite and Vermiculite while holding the liner as centered as I could. Once full, all that was left was some silicone sealer and a few self tapping screws. It took me about 6 cubic feet of both Perlite and Vermiculite and one 47# bag of Portland Cement. I used about $65 worth of materials and had about $20 worth of Perlite and Vermiculite left over . . . so a total cost of $85 to insulate.

I wish the Flex King Pro was a little more flexible, but was otherwise very satisfied with the quality of the product. Not to mention the fact that I ordered it Wednesday and it arrived Friday . . . plus their customer service was superb at chimneylinerdepot.com.

Now time to work on next year's wood pile.

Total cost of 15' Flex King Pro liner kit and insulation materials was $495. Too bad its still 80 degrees in Atlanta on 10/27!! Ready for the cold weather so I can trial burn my new stove. Good luck with your install . . . Mine was a very easy afternoon.

Ditto on ChimneyLinerDepot.com and their staff. My liner came from their eBay store, too.
 

Attachments

  • Block Plate.jpg
    Block Plate.jpg
    15.5 KB · Views: 423
you guys rock, thanks for all the advice and i am growing more confident already. two questions come to mind, and i fear it may be an opinion thing but please, opine away:

** insulation - i'm fairly sure i do NOT want to pour; what wrap is recommended (and, can i consider NOT insulating at all?)
** how critical is it to get the "bends" perfect - is there a danger if liner is too close (or touching) a brick corner?

and what a great idea, getting all the materials here and paying another carpenter/etc $200 or so to let me "help" him....
 
I did not see the cross section dimensions listed for your chimney. I put a 6" diameter SS flex liner, 25', in a 9"x9" clay lined chimney. I put the 1/2" blanket insulation on so that it was 7" diameter in a 9" by 9" square opening chimney. It was an easy install. The one thing I had to do was take out the chimney damper and break out the chimney damper frame and make a block off plate. None of this was too difficult, but you just need to do a little research on what you have, what you need to do for the install. I found that the easiest way to remove the damper frame plate was to fracture it with a 2 lb mini sleg hammer. It is made out of cast iron, so it breaks fairly easily when hit in the right places. Making the block off plate was not to bad either. You just need to do a little research on the forum into the threads about how to make a block off plate. You definitely want to have a rope on the cone to help pull the liner around the curves.

But the job is doable with two people as long as you plan properly and check the sizes so you don't have a liner that is too big for the opening.
 
bimmerFAITH said:
I did the following:

bimmerFAITH said:
Got everything vital installed this weekend. Any suggestions from the experienced wood burners?

I installed the Flex King Pro liner kit attached to a Lopi Freedom insert. Went fairly easy . . . but still took a couple of hours. First, to construct a block plate I laid a piece of card board over the existing damper opening (with obstructions already cut away), and spray painted the border so that it could be traced onto a scrap piece of concrete tile backer board. Then I cut out the backer board to fit the opening and removed enough material to allow the pipe to fit snuggly through the block plate. With the block plate in place it was insulation time. There were two small gaps between the block plate and back of the pipe, so I stuffed maybe 3 handfuls of fiberglass insulation to keep the rest of the insulation from falling out of the chimney before it had a chance to cure. I went with a 3 part Perlite, 3 part Vermiculite & 1 part Portland Cement mixture, wet it enough to be damp but still loose and poured it down the chimney around the liner. I used the cement mixture until I had used the complete 47 lb. bag of cement, which covered the entire block plate, about 1' of liner pipe & filled most of the smoke chamber. For the rest of the chimney I poured a 50/50 mix of loose Perlite and Vermiculite while holding the liner as centered as I could. Once full, all that was left was some silicone sealer and a few self tapping screws. It took me about 6 cubic feet of both Perlite and Vermiculite and one 47# bag of Portland Cement. I used about $65 worth of materials and had about $20 worth of Perlite and Vermiculite left over . . . so a total cost of $85 to insulate.

I wish the Flex King Pro was a little more flexible, but was otherwise very satisfied with the quality of the product. Not to mention the fact that I ordered it Wednesday and it arrived Friday . . . plus their customer service was superb at chimneylinerdepot.com.

Now time to work on next year's wood pile.

Total cost of 15' Flex King Pro liner kit and insulation materials was $495. Too bad its still 80 degrees in Atlanta on 10/27!! Ready for the cold weather so I can trial burn my new stove. Good luck with your install . . . Mine was a very easy afternoon.

Ditto on ChimneyLinerDepot.com and their staff. My liner came from their eBay store, too.

Is that spray can insulation around that flex pipe?
 
My friend did have to cut a pc of the back ledge of the damper out, but it was no biggie and if I want to use the FP again I can put a top sealing damper.

There's one more option, maybe, if you want to go insulated. I used Insulflex pre-insulated liner which is a stainless steel liner with 1/2" of insulation only instead of installing it as a blanket there's a second flexible liner outside the insulation. If you do a search on here you will see it's a bit controversial because this liner setup has apparently not been tested to know whether for instance it will meet the clearances that "zero clearance" insulated liners should meet. However I was like you and didn't have a specific requirement for insulation, but I wanted it for the better draft and other reasons. And in my big chimney it was a really easy install. Just know if you go that route that it's not a fully vetted product. There is nothing UNsafe about it though if you are using it in the same type of application that you would normally use an uninsulated liner, that's what I figured. It was a really excellent price, not much more than what I would have paid for uninsulated liner elsewhere, too.
 
Status
Not open for further replies.