Hello Everybody,
I'm new to the forum (have been lurking here for a while), and now wanted to see if anyone can help us with the specific dilemma we face with our wood-insert installation.
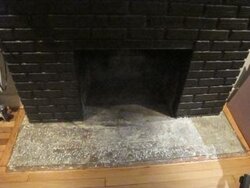
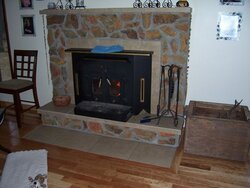
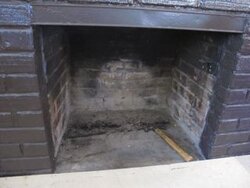
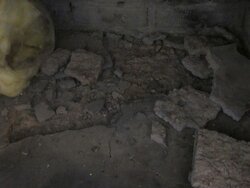
We bought a Drolet Escape I-1400 months ago, and are only now getting around to tackling the installation (this is part of a larger DIY renovation). We actually recently decided to let the installation of the insert itself be done by a professional, but we first have to deal with the hearth and hearth extension. I am attaching some pictures so you can see what we are up against.
The current hearth our 1925 house is a concrete slab that extends about 14.5" in front of the fireplace opening (there used to be a travertine slab over it that we ripped out). The Drolet insert specifies a hearth with an R-value of >1 to extend 16" in front of the blower. That means we will need to extend the current hearth by about 11". To reach the required R-value beyond the concrete slab, we are planning to cut out the hardwood and insulate the combustible subfloor with 1/2" Fiberfrax Duraboard LD.
Our main issue is how to finish the surface. We would like to keep things as close to floor level as possible (although we are flexible on that if necessary, we might able to raise the insert a few inches), and tile both the hearth and the fireplace surround (we already ordered the tile, so I can't really change that plan). I have been told that tiling over two different substrates, even when covered with a continuous sheet of backerboard is a problem because of movement issues.
As I imagine that people who retrofit wood inserts into old houses deal with this issue quite often, I wanted to see if anyone here has any ideas on how to handle this situation, or what they did.
Also, I am wondering if I need to use special heat resistant materials to set the tile.
Thanks in advance for any advice you might give!
I'm new to the forum (have been lurking here for a while), and now wanted to see if anyone can help us with the specific dilemma we face with our wood-insert installation.
We bought a Drolet Escape I-1400 months ago, and are only now getting around to tackling the installation (this is part of a larger DIY renovation). We actually recently decided to let the installation of the insert itself be done by a professional, but we first have to deal with the hearth and hearth extension. I am attaching some pictures so you can see what we are up against.
The current hearth our 1925 house is a concrete slab that extends about 14.5" in front of the fireplace opening (there used to be a travertine slab over it that we ripped out). The Drolet insert specifies a hearth with an R-value of >1 to extend 16" in front of the blower. That means we will need to extend the current hearth by about 11". To reach the required R-value beyond the concrete slab, we are planning to cut out the hardwood and insulate the combustible subfloor with 1/2" Fiberfrax Duraboard LD.
Our main issue is how to finish the surface. We would like to keep things as close to floor level as possible (although we are flexible on that if necessary, we might able to raise the insert a few inches), and tile both the hearth and the fireplace surround (we already ordered the tile, so I can't really change that plan). I have been told that tiling over two different substrates, even when covered with a continuous sheet of backerboard is a problem because of movement issues.
As I imagine that people who retrofit wood inserts into old houses deal with this issue quite often, I wanted to see if anyone here has any ideas on how to handle this situation, or what they did.
Also, I am wondering if I need to use special heat resistant materials to set the tile.
Thanks in advance for any advice you might give!