Creative Flooring . . .

  • Active since 1995, Hearth.com is THE place on the internet for free information and advice about wood stoves, pellet stoves and other energy saving equipment.

    We strive to provide opinions, articles, discussions and history related to Hearth Products and in a more general sense, energy issues.

    We promote the EFFICIENT, RESPONSIBLE, CLEAN and SAFE use of all fuels, whether renewable or fossil.
Status
Not open for further replies.

FixedGearFlyer

Burning Hunk
Oct 8, 2010
212
Michigan's Upper Peninsula
My wife and I bought an old one room schoolhouse last Feb., and moved in in April. Long story short, we've done a ton of remodeling and renovating and have moved upstairs into three bedrooms and a bathroom that used to be nothing but an uninsulated, 1000 sq foot, windowless attic. And we made it upstairs before winter . . . hurray!

The big, glaring, unfinished item is the floors. At the moment, the first and second floors are raw OSB and look like crud. I'd love to get something else down, but we don't want to use carpet and aren't in a position to buy the wide board pine that will eventually be going in just yet.

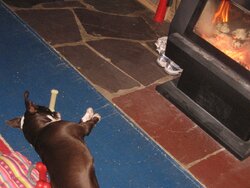
Does anyone have any creative flooring suggestions that I could use to cover the OSB for a year or so? I've thought about canvas stretched tight, and we already have a bunch of rugs down, but the unfinished nature of it is killing me!
 
Paint it? Friends of mine did that when they got tired of looking at the plywood.
Lived with it painted in a brown enamel for three years - til they could afford the wall-to-wall...
 
If its only for a year, toss some stain on it. Maybe a nice dark color will really make it look nice, and a gallone of stain is pretty cheap! it also doesnt add work when you want to add a real floor!
 
Stain or paint.
 
Check local craigslist ads...I saw tons of ads this year for barn material and old farmhouse material teardowns...lots of things like 100 year old barnboards, old wide plank flooring, etc. You might find a gem of a deal and be able to actually finish it the way you like with recycled materials.
 
Long time since I've been here. Nothing like a painted floor to use up your spare time and keep you out of trouble. This is OSB and is the floor of my workroom.

1.) Fill cracks/nailholes/major divits with phenoseal to get a uniform surface. Be prepared to fill several times over because it shrinks as it cures. I had to fill the cracks 3 times I think to get a uniform surface and give each fill a solid 24 hrs. to set up properly. Phenoseal is nice because it remains flexible and as the floor moves (and it will) the paint will not crack in those areas as quickly. Prep. is key, in this department and it basically sucks. Sorry. I chose brown because it released my inner 12 yr. old and indulged my scatalogical sense of humor.
354049449.gif

354049445.gif

354049447.gif


2.) Prime as much as you feel necessary to achieve a good ground. I primed twice, then layed down 2 coats of the paler color before adding the detail work. Make sure you use deck/floor paint. It's formulated to withstand as much wear as can be expected from paint. I used Ace paint and worked from the "custom" palette. Make sure each coat has plenty of time to dry and cure properly. Painting floors is a lot of work, no getting around it. Knowing that going into the project allows you time to do it properly. I figure about 24 hrs. for each step and I deal with the inconvenience by planning for it.
355651457.gif

357517014.gif

3.) I always seal the finished floor. I use polyurethane. I am a die hard and prefer oil based paints, but new VOC laws make them increasingly difficult to obtain. The floor above was rendered in latex deck paint, topcoated with a water-based product (satin finish, 3 coats) formulated for floors (be sure to check that the formulation is for floors! it matters!). Oil based polyurethane will "yellow" the palette with every coat applied. Regardless of what the label says, water based products will too. Time and patience are your allies. Remember that.

The design in the floor above is a copy of a very ancient tile pattern, dating to pre-Roman times. I saw it in a photograph of the Chapel Royal at Hampton Court in Great Britain and loved it. Traditionally it is rendered in black and white, but I opted for the softer palette of buff and taupe. Frankly, I wish I'd stuck with "traditional"... live and learn.
 
Wow. That's incredible, Bobbin! Knowing that we'll be dropping real floors over it in a year or two, I'm not sure I could bring myself to put that much time into it - yours is beautiful!

At the moment, I'm thinking of a light sanding, a few coats of poly, outlining the outside 6 inches of each room and laying out a 1-inch wide, 16x16 grid in dark brown paint, then another coat or two of poly. I'm going to do a few tests over the next few weeks and we'll see what we like the best. Heck, maybe we'll end up doing something like Bobbin's floor and skip the future floor plans!

Thanks for the suggestions, all!
 
I purchased a forclosure, had to redo all the carpet. got three of the beedrooms done, and started on the remodel of the master. then found out that my 1 year old needed hip surgery.so all the remodel money went to that. so I went to local carpet store, and got a deal on some hotel runner carpet. its ugly, royal blue,red,gold/yellow, but 400 sq feet was less than 120 bucks. no padding put down, just laid the carpet, used cold seam tape and some staples along the edges. room is 15x24, and took me about 3 hours by myself to do. I know you dont wanna use carpet, but it can be done cheap and temporary.
 
Glad to see you're still alive and kicking Bobbin' -- noticed you haven't been around here for a bit.

And I'm flabbergasted that this is plain ol' OSB . . . amazing floors . . . truly amazing . . . and beautiful.
 
We used floor paint to buy some time after we gutted the house. The dog beats it up pretty good but it has served its purpose and we got to try out a color we would never have considered on the floor. (Yes, I know, need more protection in front of the stove)

I found that the heavy foam rollers made for decks work good on plywood. Only had to touch it with a brush in a few places and did zero prep other than vacuum.
 

Attachments

  • our reject.jpg
    our reject.jpg
    259.2 KB · Views: 571
Bobbin said:
Long time since I've been here. Nothing like a painted floor to use up your spare time and keep you out of trouble. This is OSB and is the floor of my workroom.

1.) Fill cracks/nailholes/major divits with phenoseal to get a uniform surface. Be prepared to fill several times over because it shrinks as it cures. I had to fill the cracks 3 times I think to get a uniform surface and give each fill a solid 24 hrs. to set up properly. Phenoseal is nice because it remains flexible and as the floor moves (and it will) the paint will not crack in those areas as quickly. Prep. is key, in this department and it basically sucks. Sorry. I chose brown because it released my inner 12 yr. old and indulged my scatalogical sense of humor.
354049449.gif

354049445.gif

354049447.gif


2.) Prime as much as you feel necessary to achieve a good ground. I primed twice, then layed down 2 coats of the paler color before adding the detail work. Make sure you use deck/floor paint. It's formulated to withstand as much wear as can be expected from paint. I used Ace paint and worked from the "custom" palette. Make sure each coat has plenty of time to dry and cure properly. Painting floors is a lot of work, no getting around it. Knowing that going into the project allows you time to do it properly. I figure about 24 hrs. for each step and I deal with the inconvenience by planning for it.
355651457.gif

357517014.gif

3.) I always seal the finished floor. I use polyurethane. I am a die hard and prefer oil based paints, but new VOC laws make them increasingly difficult to obtain. The floor above was rendered in latex deck paint, topcoated with a water-based product (satin finish, 3 coats) formulated for floors (be sure to check that the formulation is for floors! it matters!). Oil based polyurethane will "yellow" the palette with every coat applied. Regardless of what the label says, water based products will too. Time and patience are your allies. Remember that.

The design in the floor above is a copy of a very ancient tile pattern, dating to pre-Roman times. I saw it in a photograph of the Chapel Royal at Hampton Court in Great Britain and loved it. Traditionally it is rendered in black and white, but I opted for the softer palette of buff and taupe. Frankly, I wish I'd stuck with "traditional"... live and learn.

end result looks great! only thing is i think you should have put "fool dog" out a little sooner, according to the first pic...
 
We finally decided on and have begun installing a floor material. What is it? Brown paper grocery bags . . .

You can Google "Paper Bag Floors" to get an idea, but I'll also post photos once we have a few rooms done. The gist is that you tear grocery sacks (or any other similar material) into random shapes, coat the back with a 50/50 Elmers glue and water mix, stick it to the floor, and coat the top with waterbased polyurethane. After you've covered the floor in a room, you put on 3 or 4 more coats of poly.

There's very little floor prep aside from filling any big cracks between subfloor sheets and a good sweeping.

The end result looks REALLY nice, is very durable, and only sets you back the price of a few gallons of glue and Poly. We figure that we'll end up doing the entire house (~1800 sq ft) for about $300. Most of that cost is the poly.

Win!
 
FixedGearFlyer said:
We finally decided on and have begun installing a floor material. What is it? Brown paper grocery bags . . .

You can Google "Paper Bag Floors" to get an idea, but I'll also post photos once we have a few rooms done. The gist is that you tear grocery sacks (or any other similar material) into random shapes, coat the back with a 50/50 Elmers glue and water mix, stick it to the floor, and coat the top with waterbased polyurethane. After you've covered the floor in a room, you put on 3 or 4 more coats of poly.

There's very little floor prep aside from filling any big cracks between subfloor sheets and a good sweeping.

The end result looks REALLY nice, is very durable, and only sets you back the price of a few gallons of glue and Poly. We figure that we'll end up doing the entire house (~1800 sq ft) for about $300. Most of that cost is the poly.

Win!

Well you learn something new every day... looks nice.
 
Will be waiting for the finished pics. Might be cool.

I am goofy too living on a steel troweled concrete slab painted with a thick glossy sealer.
 
FixedGearFlyer said:
We finally decided on and have begun installing a floor material. What is it? Brown paper grocery bags . . .

You can Google "Paper Bag Floors" to get an idea, but I'll also post photos once we have a few rooms done. The gist is that you tear grocery sacks (or any other similar material) into random shapes, coat the back with a 50/50 Elmers glue and water mix, stick it to the floor, and coat the top with waterbased polyurethane. After you've covered the floor in a room, you put on 3 or 4 more coats of poly.

There's very little floor prep aside from filling any big cracks between subfloor sheets and a good sweeping.

The end result looks REALLY nice, is very durable, and only sets you back the price of a few gallons of glue and Poly. We figure that we'll end up doing the entire house (~1800 sq ft) for about $300. Most of that cost is the poly.

Win!

Some of the pics look pretty neat . . . will look forward to seeing the end result.
 
Status
Not open for further replies.