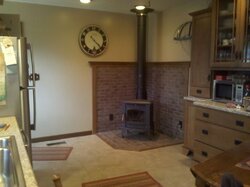
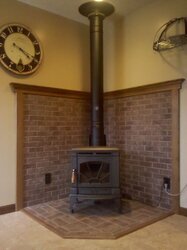
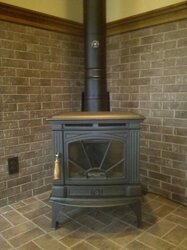
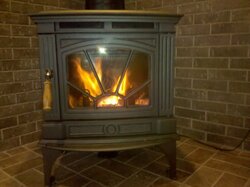
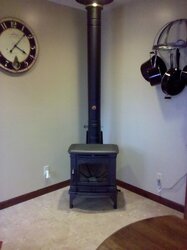
I am excited! I posted some time ago asking for help on a new stove in the kitchen. I got lots of good info and now am installing my new Hampton. Here goes. First the stove came home to the garage. Next, set it in the corner of the kitchen and installed the chimney. Thats where I am now. The brick for the hearth should come tomorrow and hopefully this next weekend I can get started on the hearth. YES, I am going to have to dismantle the stove pipe and move the stove, but I couldn't wait :cheese: (had a fire in it too!) The stove pipe is double wall with a telescoping section, so that shouldn't be to difficult. I will post pictures of the finish when I get it done. ;-P
Attachments
-
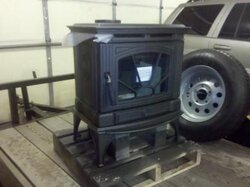 stove_home_edit.jpg16.2 KB · Views: 810
 -
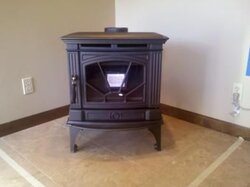 stove_kit_1_edit.jpg11.8 KB · Views: 885
 -
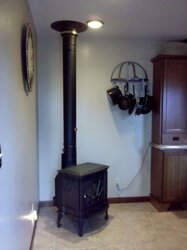 stove corner view.jpg79.2 KB · Views: 867
 -
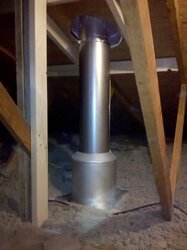
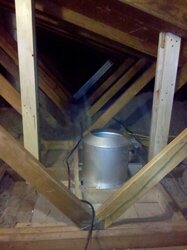 attic framing.jpg93.3 KB · Views: 832
 -
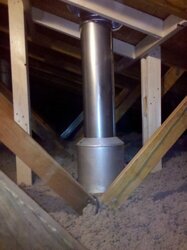
 attic chimney 1.jpg91.8 KB · Views: 997
 -
 attic 2.jpg91.3 KB · Views: 827
 -
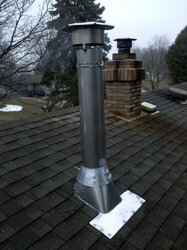 Chimney.jpg149.1 KB · Views: 853
 -
 stove corner view 2.jpg79 KB · Views: 894
") I will certainly post pics as I get the hearth done. As for the other pics of the roof and attic....well, I guess it is just a reflection of my job as Fire Chief and inspector.....I tend to think those areas are as important and interesting to look at, as all the rest of it. Most call me a nerd but that's who I am and it doesn't really bother me. On a side note, my grand kids call me Papa too! Aren't they great?
I will certainly post pics as I get the hearth done. As for the other pics of the roof and attic....well, I guess it is just a reflection of my job as Fire Chief and inspector.....I tend to think those areas are as important and interesting to look at, as all the rest of it. Most call me a nerd but that's who I am and it doesn't really bother me. On a side note, my grand kids call me Papa too! Aren't they great?