questions about my installation

  • Active since 1995, Hearth.com is THE place on the internet for free information and advice about wood stoves, pellet stoves and other energy saving equipment.

    We strive to provide opinions, articles, discussions and history related to Hearth Products and in a more general sense, energy issues.

    We promote the EFFICIENT, RESPONSIBLE, CLEAN and SAFE use of all fuels, whether renewable or fossil.
Status
Not open for further replies.
Oct 14, 2011
43
South Puget Sound
My excitement about my new insert was tempered somewhat by the way it was installed. 12 days later than estimated, for one, but when he did come, he rushed through it. The installer didn't bother to introduce himself or his helper, or protect my floor. He charged $95 for cleaning the chimney for about 5 minutes. He took a brick out of my firebox, but I don't know where it went. The top plate is held on with duct tape, which I'll have to remove tomorrow when the silicone has cured. He did the bare minimum clean up, and I had to vacuum the hearth, the interior of the insert, and the path to the front door, after he left. The insert itself is not even level. It's very close to level left to right, but the top tips towards me.

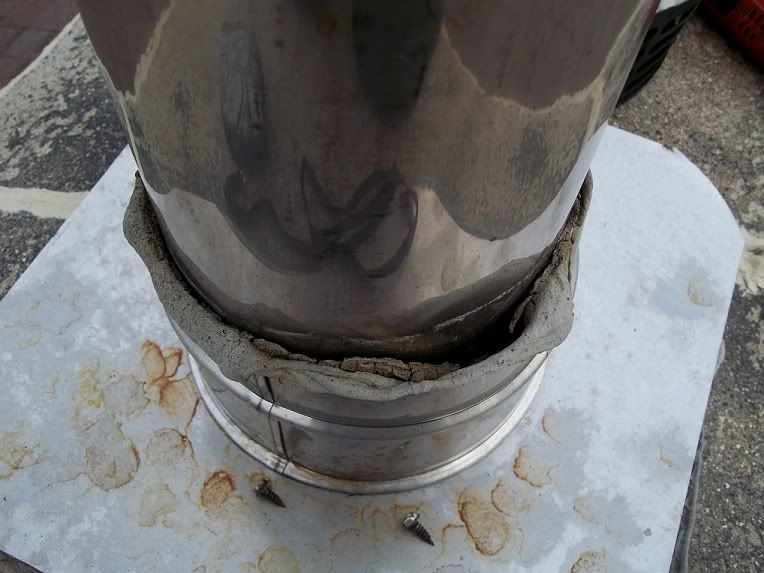
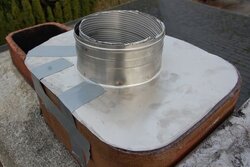
And finally, there were parts included with the stove, and he didn't explain them to me, he just left them on the floor. All I have to go on is the list that came with the instruction manual. The one that most concerns me most is the "Rope for sealing around the flue exit." Perhaps he had to use duct tape because he didn't use the rope? There was supposed to be a "Warning Card," but I didn't get one. There are screws that he didn't use.

It took him about an hour and 20 minutes, and the overwhelming impression he left was hurry, hurry, hurry. Not professionalism or quality. So to anyone considering installing it yourself, I say go for it.

Now to my questions:
1. Is this a typical professional installation?
2. Is being out of level, tilting forward, a problem?
3. I'm thinking I'll call him and ask him to come back and make it level. Is that silly of me?
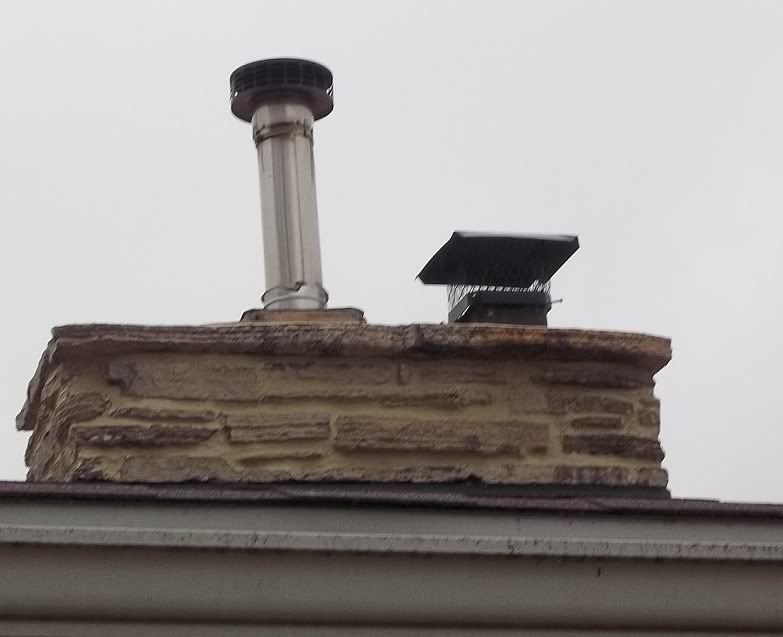
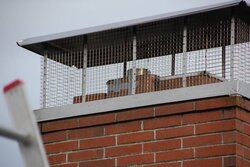
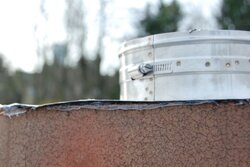
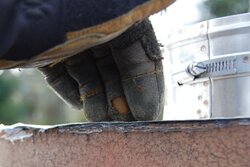
Some pictures:
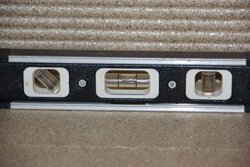
The level front to back shows the bubble is completely over the line.
 

Attachments

  • DSC_0011.jpg
    DSC_0011.jpg
    43.8 KB · Views: 349
  • DSC_0017.jpg
    DSC_0017.jpg
    35.6 KB · Views: 336
  • DSC_0018.jpg
    DSC_0018.jpg
    37.1 KB · Views: 337
  • DSC_0048.jpg
    DSC_0048.jpg
    50.3 KB · Views: 336
  • DSC_0060.jpg
    DSC_0060.jpg
    42.4 KB · Views: 359
He should have wrapped the edges of the top cap down onto the sides of the clay tile, rather than cutting it flush. May be fine, but looks like he didn't put a heck of alot of silicone under it.
Should be level, but prolly won't be an issue.
He will prolly tell you to pound sand at this point.
Not the worst install ever, you do have a cap for the top?
 
I can't speak to your interior install but your chimney area looks like mine did after my initial install.

I have a very similar chimney, 2 clay tiles - one is furnace the other is woodstove. After burning for awhile I began to question if my woodstove exit shouldn't be 2' taller than my furnace exit as I was concerned about the woodstove backdrafting down the furnace flue. I posed that question here on hearth.com and the consensus was yes. raise the liner 2' - so - I had my installers come back and extend the woodstove liner up another 2'. The store owner agreed with me but his installers were not happy with me. :)

Now, that left me with this after 1 year of weathering:

connection.jpg


Upon recommendations of hearth.com members, I have now purchased a storm collar to go around where the 'caulk' has failed. My concern is that not having the gap weatherproofed where the caulk failed that water could seep down around the liner and compromise my insulation surrounding my liner. I will be posting a thread of my before/after repairs hopefully later today. When I do, I'll put a link in this thread so you can compare.

So - I would suggest you have a 2' extension added, have a storm collar installed, caulk the storm collar and around where the stainless meets your chimney and that should it for the roof area.

Hope this helps - anyone else want to chime in on my suggestions - feel free to do so.
 
PS I'd also suggest you get another chimney cap for your other, non-woodstove, clay tile flue. Like this:

connection2.jpg
 
Like hogs said, he should have wrapped the edges of the top plate down the side of the clay liner a half inch or more. My top plate moved a little with heat and the silicone gave out, which in your case would allow water in. I gave a second helping of silicone this year and it seems to be fine. The wrapped edges would keep the water out in the event of failed sealant. Didn't that liner come with a cap?

I reread the posts and noticed you have a cap that covers the whole chimney. That will certainly take care of the wrapped edges, but still sloppy in my opinion. Did he leave you the cap from the liner in case you want to use it in the future?

At this point i would level it myself, get a buddy or two to help.

You didn't mention a block off plate at the bottom?
 
The installer said I wouldn't need a block off plate at the bottom. The chimney's in the center of the house, and the NW climate is pretty mild.

He did not leave me the cap to the liner.

Does anyone use the rope for sealing around the flue exit?

Here's a picture of my chimney cap. There are three flues, the one going to the downstairs fireplace is blocked off, and the one to the gas furnace is open. There isn't room under the cap to add 2' of liner. Should I add 1'?

Thanks for the advice.
 

Attachments

  • DSC_0041.jpg
    DSC_0041.jpg
    49.8 KB · Views: 233
As far as installers go I've only had experience with 2 companies. One wasn't certified and one was, the first one was absolutely useless. I literally could have lit the money I paid him on fire and been just as well off after he'd left. The 2nd place did a great job, put down blankets inside, took their time and did a good job, and when they left you couldn't tell they'd ever been inside. Personally, I think if you call yourself a "professional" then people should expect a quality job, that's basically why people pay you money instead of doing it themselves. If the work isn't quality I don't see any reason not to ask for it to be fixed.
 
Thanks EJL, I'll give it a shot and hopefully I'll have no backdraft issues, too.

Thanks Kingston for the support. I emailed the installer. They said the trim would hold the stove in place. We're going to go with a custom trim, since the standard is too big. We wanted to get the stove in first, then decide exactly how to trim it. I am so glad we made that choice. I emailed the installer back after hours, and said trim should not hold a stove in place. I'm no expert, but that's just not right.

I had been hoping to do the first break-in fire tonight. Just to make sure I don't wreck anything, I read the instructions. They said to leave the door ajar one inch for a few minutes to let the fire get lots of air. My door wouldn't stay ajar, because the unit was so out of level. When the door was open, it swung itself all the way open. This made me angry, so instead of waiting, I decided to try fixing it. Here's where I'm glad we didn't have any trim, because I could see what I needed to see.

I found the levelers, which are not mentioned in the installation instructions, thanks Morso : (, and by sliding the stove forward and extending the front levelers, I was able to get it right where I wanted it. Took a while, working alone, checking the level, etc. but it's good now.

And I got to do my break in fire. Pics coming soon. It's really, really beautiful. I am very happy to report that it's not soundproof. I can hear some crackling of the fire, at the beginning anyway, when my kindling was crackling. The stove kicks out a lot of heat if you're near it. I can't tell yet if it's heating the room, because I've got several windows open, due to the break-in smell. But I can see it well from my couch, and I can see it well from my kitchen sink. The big window fills with flame and makes this whole ordeal worth it.

I still want to know what he did with my brick, though.
 
Status
Not open for further replies.