Highbeam said:
Dakotas Dad said:
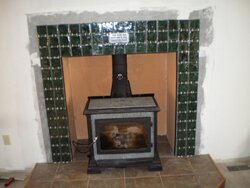
For my install, I needed a min. r value of 6.6, so I needed a lot of insulation, the manual does allow "air gap" but only in 1/8th inch increaments, and they cannot be "stacked" so to build up my r value I would have had to figure out how to get multiple 1/8th air gaps.. seperated by "something". I decided I didn't want to even try to figure that out. I wanted rock wool because it is listed in the manual, and has an r value of 3.1 something per inch.. so 3.5 inches gives me tons of non-combustible insulation. After talking with the county inspector, he told me regular unfaced fiberglass bat was fine.. I don't need an inspection, he is a buddy.
I actually researched this and found that you CAN stack the air gaps just like you can stack inches of fiberglass. I got this from the actual Hearthstone tech because I "stacked" my air gap to 3.5 inches. In the end either method will work but to anyone reading this in preparation to build their own, you can stack air gaps per Hearthstone.
Highbeam has a different stove then myself, and I don't really feeling like doing a ton of research on a stove I don't own, so I am just going to add this note: My guess is, in case of a fire or loss, my insurance company IS going to read the manual if the stove is suspect, so I did my very best to follow that document and exceed every minimum, but on the air stacking...
in case someone reads this in the interest of hearth construction, for the
Hearthstone Homestead, this is taken directly from the
manual for that stove:
Page 10:
Note: You cannot “stack” horizontal still air to accumulate R-values; you must separate each layer of horizontal still air with another noncombustible material.
To fabricate a floor protector for a wood floor with an R-value of at least 2.5, consider the following examples:
½” ceramic board 1.10
8” horizontal still air 0.92
1 According to Intertek Testing Services, Inc.
2 According to ASHRAE Handbook of Fundamentals 1977
10