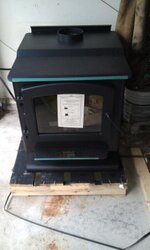
First pic, first question. The Englander 30 has landed in my garage. I found I can move it by using a 2 x 4 under the pallet, lifting up and sliding it. I'm thinking about doing the break in fire in the driveway. I did a search for break in on pallet, break in fire, and couldn't find the answer. I'm assuming the break in fire (paint smellage fire) isn't hot enough to burn the pallet, but want to make sure before I make a neighborhood spectacle and ruin a new stove; can I leave it on the pallet in the driveway for the break in fire?
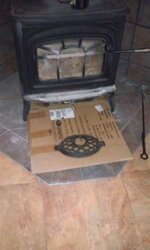
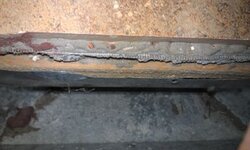
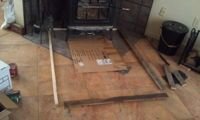
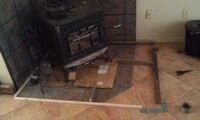
Second, I put cardboard on top of the 30 to get the measurements, then laid the cardboard down so the corners were 15 inches from the pre-fab walls to see where it would sit. Unfortunately it's right on the edge of the prefab hearth. The floor is ceramic tile which is not combustable, under it is cement board which is not combustable, but under that is plywood which is (third pic from the heat duct); so . . . would that be safe or would I have to extend the hearth?
Second, I put cardboard on top of the 30 to get the measurements, then laid the cardboard down so the corners were 15 inches from the pre-fab walls to see where it would sit. Unfortunately it's right on the edge of the prefab hearth. The floor is ceramic tile which is not combustable, under it is cement board which is not combustable, but under that is plywood which is (third pic from the heat duct); so . . . would that be safe or would I have to extend the hearth?