I have begun the "INSTALL"  Now for all the experienced folks on here this is no big deal. But for those who are tackling thier first ever install (and since I am a home repair novice) it is intimadating.
*Before I start sharing the details, I would like to say on behalf of evey FNG that tries this stuff out on his/her own, THANKS to everyone here for making this such an invaluable resourse. You folks are helpful from begining to end (not condensending or snorky), big job or just a question, and in my opinion this is what Al Gore had in mind when he invented the internet. :>)
I've been reading a bunch of postings on here, and decided that I could do it myself, and so I put the installation contractor on standby. I am buying the liner from the contractor (Homesaver 316Ti) and his 1/2in liner insulation at a real good price. I also just ordered (from Wood at Obidiahs) the Osburn connector Part # AC02006. Its a mechcanical connector that bolts the liner to the insert from the inside, and , I also ordered a hinged top plate so that I can run a brush to cleanout the liner myself.
I plan on fabricating my own block-off plate, and as discussed on multiple threads I special ordered the Rolox insulation from Lowes. No - the guy in the isle had never heard of Stone fiber "Rolox" material, BUT, because you all had prepared me, I brought along a printed page from the Lowes website. I just went to customer service and ordered it. 4 big sheet/bats for less than $36 (military discount = Thanks Lowes!) which are rated at R30 insulation value.
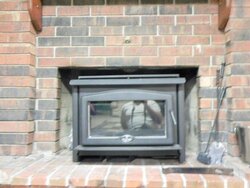
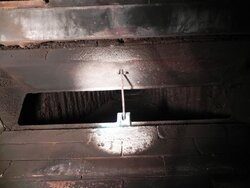
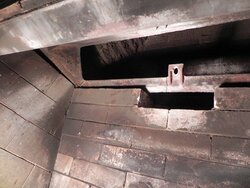
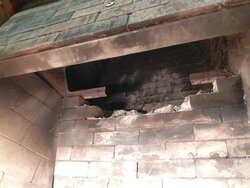
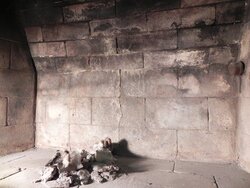
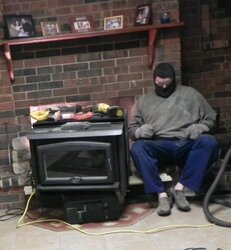
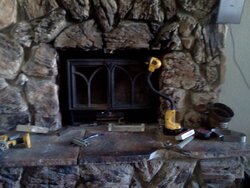
I started out last night by pulling the new insert out of the way, so that I could take some measurments and draw up a plan to fit the new liner thru the damper/smoke shelf area. My previous insert (the Shannandoah Smoke Dragon 2000HD) was a "slam job" so I did have the benefit of having the damper plate already removed, however the rest of the damper frame assembly was still intact and some of that would have to go. Also, after some initial measuring, I came to the realization that some of the bricks/mortar of the front edge of my smoke shelf would have to go too. I am going to add a post with pictures and text to chronicle my progess below. All the "experienced guys/gals" feel free to chime in and help keep me from getting too far off the path, and also feel feel to add all the "what to watch out for next" comments.
Thanks again and wish me luck posting pictures.
img][/img]
Now for all the experienced folks on here this is no big deal. But for those who are tackling thier first ever install (and since I am a home repair novice) it is intimadating. *Before I start sharing the details, I would like to say on behalf of evey FNG that tries this stuff out on his/her own, THANKS to everyone here for making this such an invaluable resourse. You folks are helpful from begining to end (not condensending or snorky), big job or just a question, and in my opinion this is what Al Gore had in mind when he invented the internet. :>)
I've been reading a bunch of postings on here, and decided that I could do it myself, and so I put the installation contractor on standby. I am buying the liner from the contractor (Homesaver 316Ti) and his 1/2in liner insulation at a real good price. I also just ordered (from Wood at Obidiahs) the Osburn connector Part # AC02006. Its a mechcanical connector that bolts the liner to the insert from the inside, and , I also ordered a hinged top plate so that I can run a brush to cleanout the liner myself.
I plan on fabricating my own block-off plate, and as discussed on multiple threads I special ordered the Rolox insulation from Lowes. No - the guy in the isle had never heard of Stone fiber "Rolox" material, BUT, because you all had prepared me, I brought along a printed page from the Lowes website. I just went to customer service and ordered it. 4 big sheet/bats for less than $36 (military discount = Thanks Lowes!) which are rated at R30 insulation value.
I started out last night by pulling the new insert out of the way, so that I could take some measurments and draw up a plan to fit the new liner thru the damper/smoke shelf area. My previous insert (the Shannandoah Smoke Dragon 2000HD) was a "slam job" so I did have the benefit of having the damper plate already removed, however the rest of the damper frame assembly was still intact and some of that would have to go. Also, after some initial measuring, I came to the realization that some of the bricks/mortar of the front edge of my smoke shelf would have to go too. I am going to add a post with pictures and text to chronicle my progess below. All the "experienced guys/gals" feel free to chime in and help keep me from getting too far off the path, and also feel feel to add all the "what to watch out for next" comments.
Thanks again and wish me luck posting pictures.
img][/img]