Cast Iron Radiators

  • Active since 1995, Hearth.com is THE place on the internet for free information and advice about wood stoves, pellet stoves and other energy saving equipment.

    We strive to provide opinions, articles, discussions and history related to Hearth Products and in a more general sense, energy issues.

    We promote the EFFICIENT, RESPONSIBLE, CLEAN and SAFE use of all fuels, whether renewable or fossil.
Status
Not open for further replies.
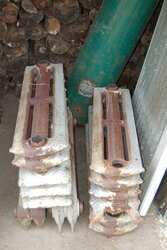
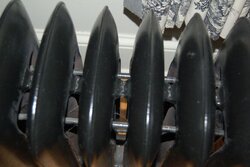
Has anyone had any experience modifying these radiators,I just bought several of the same style and would like to add sections to some while making others smaller but I'm not sure how the sections are attached,best I can figure is that they are pressed together,if this the case not sure how delicate they would be to pry apart.Perhaps they are threaded with short pieces of pipe.Any suggestions would be helpful.
 
Very, very old cast iron radiators are held together with threaded nipples. The vast majority of the radiators you'll find, however, are pressed together as you suspected. They're held together with "push nipples" which appear to be thin sections of pipe tapered down on both ends. In theory, you can make most ci rads bigger or smaller by adding and subtracting sections or columns. When they're originally built, the mfg puts in as many columns as desired, with special end-sections at each end.

I think you can still buy push nipples for some radiators. I suggest going to heatinghelp.com and either posting on or searching The Wall, which is the message board over there. They have some really good threads describing all of this, including the best ways to take apart and re-assemble ci rads. It's not for the faint of heart, but it can be done.

Here's a couple of photos. You can see the push nipples in the disassembled rad. The black radiator is an old steam rad with no top pipe that I nonetheless figured out how to use in my hot water system. Works like a dream. No air in any of the columns.
 

Attachments

  • oldradsections.jpg
    oldradsections.jpg
    67 KB · Views: 455
  • kitchenrad.jpg
    kitchenrad.jpg
    40.3 KB · Views: 488
Eric,thanks for the quik responce I will check out the other web site,it does appear that you would need some decent equipment to pull apart and press back together these radiators,worst case senario is to use them as they are ,just may not be the most ideal but perhaps close enough.
 
I think you can pull them apart with wooden wedges. Not sure about reassembly, but it could probably be done with careful hammering or with a hydraulic jack. Come to think of it, you could probably pull everything together with a come-along or a tie-down.
 
Does anyone have an opinion on whether or not you can pipe these radiators in the bottom and out the top ?As much as I clean them there is always a chance of a chunk breaking loose and plugging a line if piped bottom to bottom or top to bottom.My theory is that the chunk would settle towards the bottom and therefor would be less likely to interrupt flow.Most of my radiators are 13" high with a few 18" ones so its not like there would be a huge difference in temp between top and bottom.
 
Eric-- can't help but be curious-- what was your technique to get air out of the upper parts of the radiator that was originally designed for steam?
 
Jeff S said:
Does anyone have an opinion on whether or not you can pipe these radiators in the bottom and out the top ?As much as I clean them there is always a chance of a chunk breaking loose and plugging a line if piped bottom to bottom or top to bottom.My theory is that the chunk would settle towards the bottom and therefor would be less likely to interrupt flow.Most of my radiators are 13" high with a few 18" ones so its not like there would be a huge difference in temp between top and bottom.

I would probably stick with the doing things the way previously reccomended, as I seriously doubt that you would actually get a chunk breaking loose that was big enough to be a problem, especially if you maintain proper water chemistry and all that...

If feeling paranoid what I would probably do is put in a dirt separator, or at least a wye strainer downstream from the rads, and try to avoid having dirt sensitive plumbing like valves and circs or other stuff with tight passages between the rads and the dirt catcher.

If I was doing things the way that seems recomended these days and using a manifold / home run to each rad setup, I'd do something like; hot manifold > TRV > rad > return manifold > dirt separator > rest of system

Gooserider
 
Gooserider,you are most likely right on all accounts,just curious if you think if the radiators would not preform efficiently the way I suggested ?
 
There is not a problem plumbing in the bottom and out the top.
There might be an issue if you have to open up old plugs. They do not always come out easily.

If these were water radiators originally, I agree with Gooserider, there is not much likelihood that an obstruction
will occur.

Flush them out with water and install them. Put some corrosion inhibitor in the system along with a dirt separator
if it is really nasty.
 
pybyr said:
Eric-- can't help but be curious-- what was your technique to get air out of the upper parts of the radiator that was originally designed for steam?

OK, Trev. You asked for it.

Basically, I turned the radiator over, filled it with water, shut off the isolation valves that I plumbed in specially for that occasion, then turned the radiator back over, vented the zone up to the isolation valves, then opened the valves. This radiator is piped in series behind one other CI rad (which can be vented). Any air migrating up from the boiler gets trapped in the first radiator and can be vented out. The radiator is still going strong after two heating seasons. I thought originally that if I had to re-fill it once a year, no big deal. But that hasn't been necessary.

I have a picture around here somewhere of the vents and isolation valves (also unions for quick connect and disconnect). When I find it, I'll post it.
 
Jeff S said:
Gooserider,you are most likely right on all accounts,just curious if you think if the radiators would not preform efficiently the way I suggested ?

Probably wouldn't be a huge difference in performance, but in theory if you go in the top and out the bottom, or as I believe is more common, in the bottom on one end and out the bottom on the other, then convection currents will occur that will help ensure that the heat gets distributed evenly across the entire surface.

Seems to me like there MIGHT be a tendency for the hot water entering the bottom to convect up to the top as it goes past the first few risers, and then stay more at the top of the rad as it travels to the top exit on the other end, leaving a sort of triangular "dead zone" on the exit end bottom that wouldn't see as much circulation / heat exchange as the rest of the rad... It might not be a noticeable factor, I'm really not sure. I just figure the dead guys did it the traditional way for a reason...

Gooserider
 
That seems to be a matter of personal/professional preference. I've always lived in houses where the rads were all piped bottom-to-bottom, and that's how I install them, too. Especially if they're piped in parallel, you want the coolest water possible emerging from that radiator. You won't get that if it exits from the top.
 
Status
Not open for further replies.