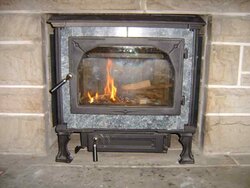
Chimney cricket!... I've done it.

  • Active since 1995, Hearth.com is THE place on the internet for free information and advice about wood stoves, pellet stoves and other energy saving equipment.

    We strive to provide opinions, articles, discussions and history related to Hearth Products and in a more general sense, energy issues.

    We promote the EFFICIENT, RESPONSIBLE, CLEAN and SAFE use of all fuels, whether renewable or fossil.
Status
Not open for further replies.

Marty

Feeling the Heat
Jul 11, 2006
284
Pittsburgh
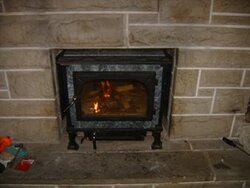
Finished my mansfield install today and had the break in fire.

Many thanks to all the good people here who showed me the way.

I'll post the rest of the install pics when I get a chance.
 

Attachments

  • firstfire.jpg
    firstfire.jpg
    14.2 KB · Views: 915
Marty said:
Finished my mansfield install today and had the break in fire.

Many thanks to all the good people here who showed me the way.

I'll post the rest of the install pics when I get a chance.

Damn that looks nice! A long road with a great ending. You are ready for the cold.

What is the heat like from the other side of the firelace?
 
Marty thanks for sharing your choice and install with us. looks good real good
 
Looks Great,, Looks similar to that install in Ireland..

Once that baby gets everything up to temp that area is going to be warm for a while..ENJOY
 
Thanks.
Don't know how well it will work yet but I'm betting it will be slow. Too warm to really test it out.

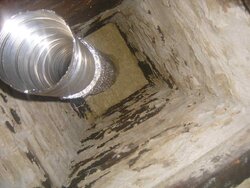
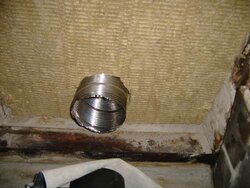
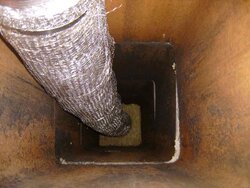
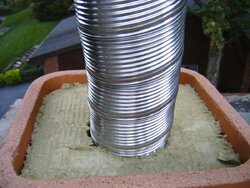
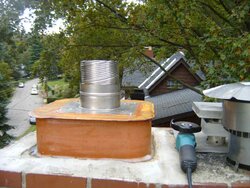
Here are some chimney install shots.
It is 316 Ti ended up useing 18' 5" of the liner.
Wrapped in ceramic and mesh and spaced in two sections by double layer 3" mineral wool board, cut to size and packed up and down around the liner.
There is another double layer unter the top plate and a single layer above the block off.
 

Attachments

  • lowerchim1.jpg
    lowerchim1.jpg
    48 KB · Views: 744
  • lowerchim2.jpg
    lowerchim2.jpg
    46.1 KB · Views: 747
  • upperchim1.jpg
    upperchim1.jpg
    61.9 KB · Views: 813
  • upperchim2.jpg
    upperchim2.jpg
    63 KB · Views: 717
My God that chimney is huge! You could have used storm drain pipe for a liner.

You nailed that job. Got it right from the top to the bottom.
 
Couldn't have done it without you guys.
Being able to stand up in the firebox diddn't hurt either.

Here are some more shots...
Top plate siliconed on the new 6" clay flue tile.
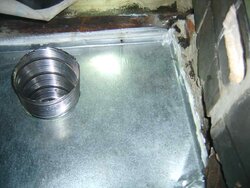
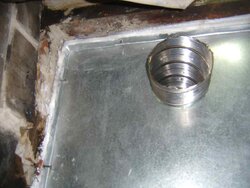
Block off plate siliconed and masonry nailed...
...and some sheet metal plates for the side walls of the firebox to reflect out some heat.
 

Attachments

  • topchim.jpg
    topchim.jpg
    66.1 KB · Views: 824
  • bp1.jpg
    bp1.jpg
    55.5 KB · Views: 731
  • bp2.jpg
    bp2.jpg
    39.7 KB · Views: 689
  • sideplate.jpg
    sideplate.jpg
    32.4 KB · Views: 683
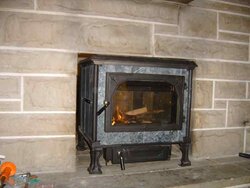
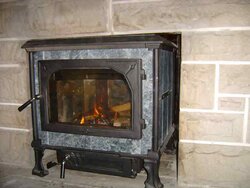
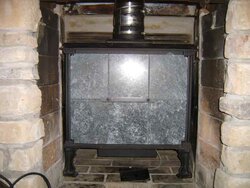
Well I know thats what you guys live for... so here are about the rest of them.
It's going to be several days of cleaning before I am allowed to show a room shot. ;)
 

Attachments

  • leftstove.jpg
    leftstove.jpg
    20.9 KB · Views: 681
  • rightstove.jpg
    rightstove.jpg
    23 KB · Views: 700
  • backstove.jpg
    backstove.jpg
    26.4 KB · Views: 699
  • stovefront.jpg
    stovefront.jpg
    25 KB · Views: 723
With that soapstone stove, all of the masonary around it and the short distance out the back you have one heat making SOB setup there my friend.
 
Wow! looks great! tight fit. did you have to take off the flue collar like you thought you would? Man thats a heavy beast to get into that hole.
 
Awesome Marty. Thanks for sharing the shots. It looks like a great install. That's a snug fit for the stove. Looks beautiful. Will it stay open in the back for heat circulation? Keep us posted once the temps drop and you have a chance to load that baby up.
 
It will be a scramble for wood this year. Most of what I have is anly a few months old. I plan on raiding my dad's pile and buying some for the short term but once thats done I am ready for the cold.

I did have to take off the flue collar. But it was a sinch to re-attach I was able to look down and see the ceramic blanket I had so much room. Everything is easier when you can work from the back... I just raised it a hair with a hydraulic jack and it slid right in.

It will be left open in the back.
A project I have begun to think through for the future is a cold air return from the most distant parts of the first floor up through the old ash cleanout that sits on the floor directly behind the stove.

I will definatly report on the setup's preformance this winter... have gotten to like this place quite a bit and plan on sticking around.
 
Great job marty. That stove looks great.
 
My one concern is that just above the block off plate I believe there are a few inches of unwraped liner in contact with the mineral wool board. It will get pretty hot there but should not get close to the 1300° F rating of the mineral wool. Anyone think this is worth addressing?
 
Status
Not open for further replies.